JNTZN

Tag: CI/CD

  • Git Branching Strategies, Explained

    Git Branching Strategies, Explained

    Git branching can either keep a project moving smoothly or turn everyday work into a merge-heavy mess. The difference usually is not Git itself, it is the branching strategy behind it.

    If you have ever wondered why one team ships confidently while another gets stuck in release chaos, the answer often comes down to process. A good branching model gives developers room to work independently, helps teams review code cleanly, and reduces the risk of breaking production at the worst possible time.

    This guide explains Git branching strategies in plain English. You will learn what a branching strategy is, why it matters, which common models teams use, and how to choose an approach that fits your workflow instead of fighting it.

    What Git branching strategies really mean

    A Git branching strategy is simply a set of rules for how your team creates, names, uses, and merges branches in a repository. Git makes branching easy from a technical perspective, but it does not tell you when to create a branch, how long it should live, or where it should merge back. That is where strategy comes in.

    Think of branches like parallel workspaces. One developer might be fixing a bug, another might be building a new feature, and someone else might be preparing a release. Without a shared system, these streams of work quickly collide. With a clear strategy, each branch has a purpose, and every merge follows a predictable path.

    When people search for Git branching strategies explained, they are usually trying to solve a practical problem, not just learn vocabulary. They want fewer conflicts, safer releases, and a workflow that scales from solo projects to busy teams. That is why the best strategy is not always the most complex one, it is the one your team can follow consistently.

    Why branching strategy matters more than many teams realize

    Version control is not only about storing code history, it is also about coordinating human work. A branching strategy shapes how developers collaborate, how code reviews happen, and how quickly changes move from idea to production.

    A poor setup often creates familiar pain points. Long-lived branches drift too far from the main codebase. Merges become stressful. Hotfixes are rushed. Release timing becomes unpredictable. None of this happens because Git is flawed, it happens because the workflow around Git is unclear or too heavy for the team.

    A strong strategy creates clarity and safety. Developers know where to branch from, what to merge into, and when to delete old branches. Reviewers know what kind of change they are looking at. Project leads can see how work is progressing. Releases become easier to track because the branch structure reflects the delivery process.

    The core idea behind every branching model

    Most branching models try to balance three competing goals. The first is speed, because teams want to ship quickly. The second is stability, because production code must remain reliable. The third is collaboration, because multiple people need to work at the same time without stepping on each other.

    Different strategies prioritize those goals differently. Some favor strict control and formal release branches, others favor continuous integration and very short-lived branches. Neither approach is universally right. The right choice depends on team size, release frequency, testing maturity, and how risky changes tend to be.
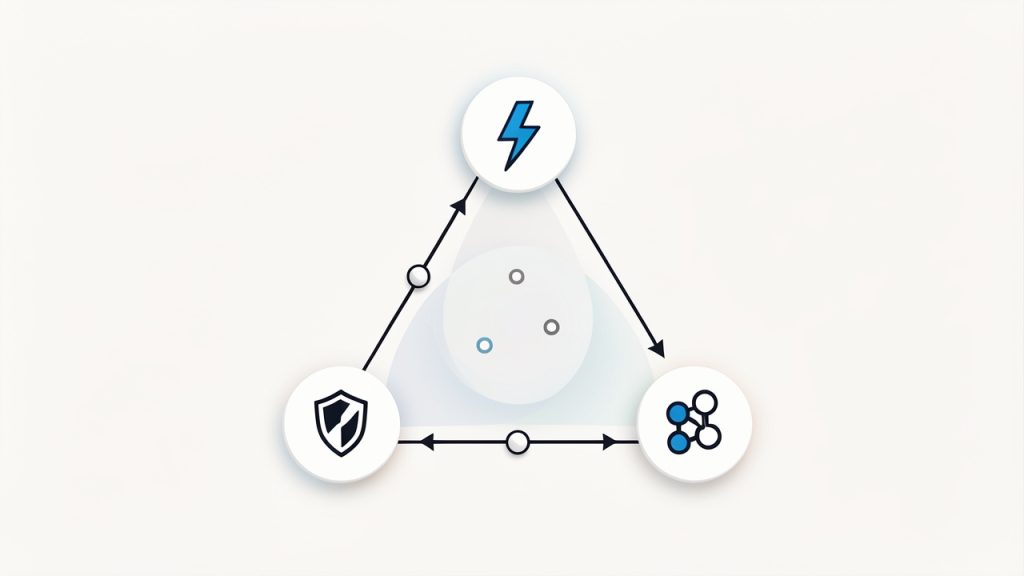
    A simple triangle showing the competing goals: Speed, Stability, Collaboration

    Key aspects of Git branching strategies

    To understand Git branching strategies properly, it helps to look at the most common models teams use in real projects. Each one solves a slightly different problem.
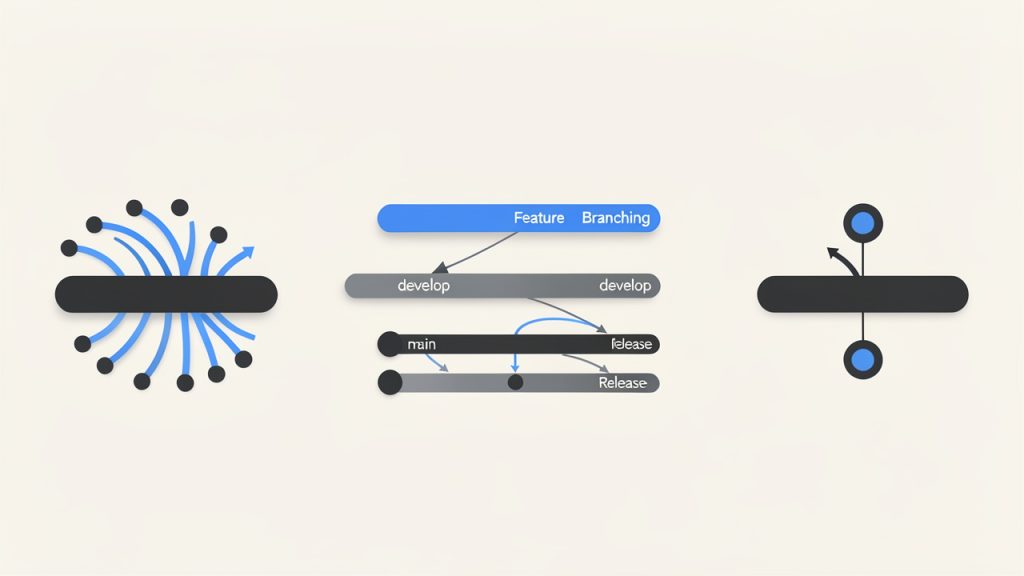
    Five compact topology sketches comparing Feature Branching, Git Flow, Trunk-Based, Release Branching, Hotfix

    Feature branching

    Feature branching is one of the most widely used approaches. In this model, each new piece of work happens on its own branch, often created from the main development branch. A developer works in isolation, pushes commits to that branch, and opens a pull request when the work is ready.

    This approach works well because it keeps unfinished work away from stable code. It also makes code review easier. Instead of reviewing a mixed set of unrelated changes, teammates can look at one focused branch with a clear purpose.

    Feature branching is especially useful for small teams, freelancers working with clients, and growing product teams. It provides structure without too much overhead. The main risk appears when feature branches live too long. If a branch stays open for weeks, merging it back can become difficult because the main codebase has moved on.

    Git Flow

    Git Flow is a more structured branching model. It typically uses a long-lived main branch for production, a develop branch for ongoing integration, plus supporting branches for features, releases, and hotfixes.

    This model became popular because it provides clear separation between active development and production-ready code. Release branches allow teams to stabilize a version before launch, while hotfix branches let them patch production issues without disrupting ongoing work.

    The trade-off is complexity. Git Flow can be powerful for projects with scheduled releases, multiple environments, or strict quality processes. But for fast-moving web apps or startups deploying several times a day, it can feel heavy. Too many branch types can slow decision-making and create unnecessary ceremony.

    Trunk-based development

    Trunk-based development centers on one main branch, often called main or trunk, where developers integrate changes frequently. Branches, if used at all, are short-lived. The goal is to avoid long-running divergence and keep everyone close to the current state of the codebase.

    This strategy supports continuous integration very well. Because changes are merged quickly, conflicts tend to be smaller and easier to resolve. Teams that deploy often, rely on strong automated testing, and use feature flags usually benefit from this model.

    The challenge is discipline. Trunk-based development works best when developers commit small, incremental changes and the team has confidence in its test pipeline. Without those safeguards, a shared main branch can become fragile.

    Release branching

    Some teams create release branches when they are preparing a version for staging, QA, or production. This is common when software has formal release cycles or when one version needs stabilization while new work continues elsewhere.

    A release branch acts like a snapshot of what is planned for a specific launch. Bug fixes for that release go into the branch, while ongoing features continue on separate branches or in a development branch. This prevents unfinished work from delaying the release.

    The benefit is control. The downside is overhead. Every additional branch that lives for a while must eventually be maintained and merged. If teams create release branches too often without discipline, they can end up managing branch logistics instead of shipping software.

    Hotfix branching

    A hotfix branch is used when something urgent breaks in production and needs an immediate correction. Instead of waiting for the normal development flow, the team branches from the production branch, applies the fix, tests it, and merges it back into production and any active development branches.

    This approach is valuable because it isolates emergency changes. It also keeps the team from mixing a critical production fix with unrelated in-progress work.

    The key here is follow-through. A hotfix that gets merged into production but not back into development creates future confusion. Good branching strategy is not just about making branches, it is about closing the loop cleanly.

    Comparing common Git branching models

    The best way to evaluate a branching strategy is to compare how each model behaves in real team conditions.

    Strategy Best For Strengths Trade-offs
    Feature Branching Small to mid-sized teams, freelance work, standard product development Simple, review-friendly, isolates work well Long-lived branches can create merge conflicts
    Git Flow Teams with scheduled releases and formal QA stages Strong release structure, clear branch roles More complex, slower for frequent deployments
    Trunk-Based Development High-velocity teams with strong CI/CD Fast integration, fewer large merges, supports continuous delivery Requires discipline, tests, and small frequent changes
    Release Branching Products with versioned releases or support cycles Good control during stabilization Adds branch maintenance overhead
    Hotfix Branching Any team supporting production systems Enables urgent production fixes safely Must be merged back carefully to avoid drift

    The real trade-off, flexibility versus control

    Most teams are really deciding how much flexibility they want versus how much control they need. Lightweight approaches like feature branches or trunk-based development reduce process friction. Structured approaches like Git Flow increase predictability for releases, but they ask more from the team in return.

    Neither side is inherently better. A solo developer maintaining a client website does not need the same branch structure as an enterprise team shipping regulated software. Problems start when teams adopt a trendy model without considering their actual workflow.

    Naming conventions matter more than they seem

    Branch naming might sound minor, but it has an outsized effect on clarity. Branches named fix-stuff or new-update are vague and hard to track. Names like feature/user-dashboard, bugfix/login-timeout, or hotfix/payment-error instantly tell the team what a branch is for.

    Clear naming improves pull requests, issue tracking, and team communication. It also helps when cleaning up old branches. A good strategy is not only about where code goes, it is also about making work visible and understandable.

    How to choose the right strategy for your team

    The right branching model depends less on theory and more on the way your team actually works.

    Start with release frequency

    If you deploy many times a day, trunk-based development or short-lived feature branches are often the best fit. These approaches reduce friction and support rapid integration. If your releases happen on a weekly, monthly, or versioned schedule, a more structured model with release branches may make more sense.

    Release timing affects everything. Teams shipping often need simplicity and automation. Teams shipping less often may benefit from extra stabilization steps.

    Consider team size and coordination needs

    A solo developer or a two-person team can often keep things simple. One main branch plus short-lived feature branches is usually enough. As teams grow, coordination becomes harder, and branch conventions start to matter more.

    Larger teams sometimes adopt more structure because they need clear handoffs between development, testing, and release management. Even then, complexity should be earned. If a simple model works, there is no prize for making it more complicated.

    Look honestly at your testing and deployment maturity

    This is where many branching decisions go wrong. Trunk-based development sounds efficient, but it depends on reliable automated tests, fast feedback, and confidence in the deployment pipeline. If those pieces are weak, merging constantly into main can feel risky.

    On the other hand, heavy branching can become a substitute for weak engineering practices. Teams sometimes create more branches because they do not trust their test coverage or release process. That may reduce short-term anxiety, but it rarely solves the underlying problem.

    Match strategy to product risk

    Not all software carries the same consequences when something goes wrong. An internal tool can tolerate a simpler model and quicker iteration. A payment platform, healthcare application, or client-facing service with strict uptime needs may require stronger release controls.

    The point is not to over-engineer. It is to align the workflow with the cost of failure. Branching strategy should reflect business reality, not just developer preference.

    How to get started with a practical Git branching workflow

    If you are setting up a branching strategy for the first time, resist the urge to design a perfect system. Start with a workflow your team can remember and follow.

    For many teams, the most practical beginning looks like this: keep a stable main branch, create short-lived feature branches from it, open pull requests for review, merge frequently, and delete branches when they are done. This creates immediate order without much overhead.

    If you later discover a need for release branches or hotfix-specific rules, you can add them. Good workflows evolve. They do not have to appear fully formed on day one.

    A simple starting process

    1. Create a stable main branch and protect it from direct, unreviewed commits.
    2. Branch for each task using clear names tied to a feature, fix, or issue.
    3. Merge often so branches do not drift too far from the main codebase.
    4. Use pull requests for review, discussion, and automated checks.
    5. Delete merged branches to keep the repository clean.

    This process works because it reduces ambiguity. Everyone knows where work starts, how it gets reviewed, and when it is considered complete.

    Helpful Git commands for everyday branching

    If you are new to Git workflows, a few commands cover most day-to-day branch management:

    git checkout -b feature/login-form
    git status
    git add .
    git commit -m "Add login form validation"
    git push -u origin feature/login-form
    git checkout main
    git pull origin main
    git branch -d feature/login-form
    

    These commands create a branch, commit work, push it to the remote repository, return to the main branch, update it, and remove the local branch after merging.

    The commands themselves are not the strategy. They simply support it. What matters is the rule set around when and why you use them.

    Common mistakes to avoid early on

    One common mistake is letting branches sit too long before merging. The longer a branch lives, the more likely it is to conflict with new work. Small, frequent merges are usually easier and safer than big, dramatic ones.

    Another mistake is treating the main branch casually. If main is supposed to reflect deployable code, protect it. Require reviews if possible. Run tests before merge. The exact rules depend on your team, but the branch should have meaning.

    A third mistake is copying a large-company workflow into a small project. What works for a 200-person engineering organization may slow a freelance developer or a small product team to a crawl. Simpler is often better, especially at the start.

    Practical examples of when each strategy fits

    A freelance developer maintaining several client websites usually benefits from simple feature branching. Each requested change gets its own branch, the work is reviewed or tested, then merged into main. There is little need for heavy release structure unless those sites have strict deployment requirements.

    A startup building a SaaS product with frequent releases might do better with trunk-based development plus short-lived branches and feature flags. Speed matters. Keeping changes small and integrating quickly helps the team ship continuously without wrestling with massive merges.

    A software company releasing versioned desktop applications every month may prefer Git Flow or a variation with release branches. In that environment, release stabilization, QA windows, and hotfix handling justify the extra branch structure.

    These examples show a simple truth. The best branching strategy is contextual. It should support how your team delivers value, not force your team into unnecessary process.

    Conclusion

    Understanding Git branching strategies is really about understanding collaboration. Branches are technical tools, but the strategy behind them shapes release quality, team speed, and day-to-day developer experience. Feature branching, Git Flow, trunk-based development, release branches, and hotfix branches all have a place when used for the right reasons.

    If you are getting started, choose the simplest workflow that protects your main branch and keeps work easy to review. Then refine it based on real friction points, not assumptions. A clear, lightweight branching model used consistently will almost always outperform a complicated one that the team barely follows.

    Your next step is straightforward: review how your team currently creates and merges branches, pick one model that matches your release style, and document it clearly. Once everyone follows the same rules, Git becomes far less confusing and much more powerful.

  • GitHub Actions: A Step-by-Step Tutorial for Beginners

    GitHub Actions: A Step-by-Step Tutorial for Beginners

    GitHub Actions can save you hours the very first week you use it. If you are still running tests by hand, copying build files manually, or deploying with a mix of guesswork and sticky notes, automation is not a luxury anymore. It is one of the easiest ways to make your development process faster, safer, and far more predictable.

    This beginner-friendly guide walks you through the basics without assuming you already know CI/CD. You will learn what GitHub Actions is, how workflows are structured, how to create your first automation, and how to build toward a practical CI/CD pipeline with testing, artifacts, caching, and secure deployment. If you know the basics of Git and GitHub, you are ready to follow along.

    Introduction to GitHub Actions

    What GitHub Actions is and why it matters

    GitHub Actions is GitHub’s built-in automation platform. It lets you define workflows that run when something happens in your repository, such as pushing code, opening a pull request, creating a release, or triggering a manual run.

    Think of it like a programmable assistant attached to your repository. Every time a defined event happens, that assistant follows your instructions. Those instructions live in YAML files inside your repo, which means your automation becomes version-controlled right alongside your code.

    This matters because repetitive tasks are where teams lose time and introduce mistakes. Running tests, linting code, packaging builds, publishing releases, updating dependencies, and deploying applications are all routine jobs that GitHub Actions can handle consistently. For freelancers, small teams, and solo developers, that consistency is a real advantage.

    Common use cases

    Most beginners first encounter GitHub Actions through continuous integration. That usually means running tests automatically every time code is pushed or a pull request is opened. Instead of finding out later that something broke, you get immediate feedback.

    From there, GitHub Actions often expands into continuous delivery and deployment. You can build your application, package it, upload artifacts, and deploy to environments such as GitHub Pages, cloud platforms, or internal servers.

    It is also useful for automation beyond app delivery. You can schedule tasks, generate reports, label issues, sync dependencies, create releases, or post notifications to Slack and email tools. Because it integrates directly with GitHub, it feels less like bolting on another service and more like extending the repository itself.

    Who this tutorial is for and what you’ll learn

    This guide is for developers, technical freelancers, and productivity-minded users who want a practical introduction to GitHub Actions. You do not need deep DevOps knowledge. You just need a GitHub repository and a basic understanding of commits, branches, and pull requests.

    You will learn how workflows, jobs, and steps fit together. You will create a simple workflow, understand key triggers, use Marketplace actions safely, manage secrets properly, debug failed runs, and build a complete beginner-friendly CI/CD pipeline.

    Key Concepts and Terminology

    Workflows, jobs, and steps

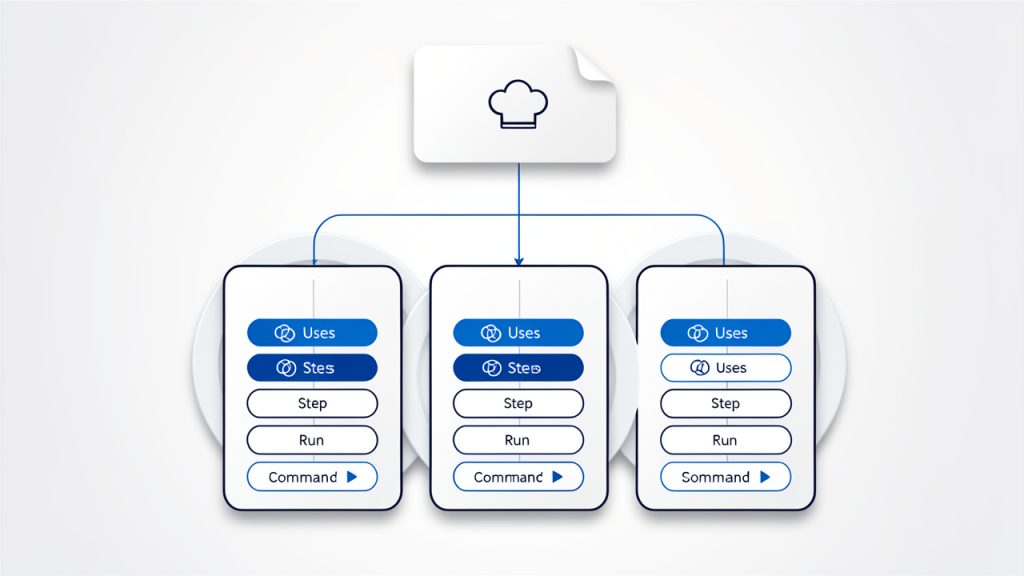
    A clean hierarchical diagram showing how a GitHub Actions workflow file maps to jobs and steps: top-level 'workflow' (YAML file in .github/workflows/) with triggers -> one or more 'jobs' (each labeled with runner, e.g., ubuntu-latest) -> each job containing ordered 'steps' (some steps using actions via 'uses', others running shell commands via 'run'). Include the recipe analogy (workflow = recipe, jobs = courses, steps = instructions) visually.

    A workflow is the top-level automation file. It defines when something should run and what it should do. Workflows live in .github/workflows/.

    Inside a workflow, you define one or more jobs. A job is a group of related tasks that run on a runner. Jobs can run in parallel or in sequence, depending on your setup.

    Inside each job, you define steps. A step is a single action, such as checking out code, installing dependencies, or running a test command. If workflows are recipes, jobs are courses, and steps are the individual instructions.

    Events and triggers

    A workflow starts because of an event. Common triggers include push, pull_request, schedule, and workflow_dispatch.

    A push trigger runs when commits are pushed to a branch. A pull_request trigger is useful for validating incoming code before it is merged. A schedule trigger works like cron, which is helpful for nightly builds or cleanup tasks. A workflow_dispatch trigger adds a manual Run workflow button in GitHub.

    These triggers are simple, but powerful. A beginner workflow often starts with push, then grows to include pull_request and manual execution as the project matures.

    Runners and environments

    A runner is the machine that executes your job. GitHub provides hosted runners such as ubuntu-latest, windows-latest, and macos-latest. These are the easiest option for beginners because GitHub manages the infrastructure.

    A self-hosted runner is a machine you manage yourself. That might be useful if you need private network access, custom hardware, or tighter control over software dependencies. For most beginners, GitHub-hosted runners are the right place to start.

    Environments are a separate concept. They are a way to group deployment-related controls, secrets, and approval rules. For example, you might have staging and production environments with different permissions and review requirements.

    Actions, composite actions, and reusable workflows

    An action is a reusable unit of automation. You can use official actions, third-party actions from the GitHub Marketplace, or actions you create yourself.

    A composite action bundles several workflow steps into a reusable component. It is useful when you keep repeating the same setup logic across workflows.

    A reusable workflow is larger in scope. Instead of reusing a few steps, you reuse a whole workflow file across repositories or teams. This is ideal when you want multiple projects to follow the same CI process.

    Secrets, variables, and secure configuration

    Secrets store sensitive values such as API tokens, cloud credentials, and deployment keys. These should never be hardcoded in your workflow files.

    Variables store non-sensitive values like region names, app settings, or feature flags. They make workflows easier to maintain because you avoid repeating values in multiple places.

    A good beginner habit is simple, keep credentials in secrets, keep normal configuration in variables, and scope both as narrowly as possible. That reduces risk and makes workflows easier to understand later.

    Setting Up Your First Workflow

    Creating the .github/workflows directory and YAML file

    To create your first workflow, add a folder called .github/workflows in the root of your repository. Inside it, create a file such as ci.yml.

    GitHub watches that folder automatically. Once the file is committed to the repository, GitHub reads it and starts applying the rules defined inside.

    A minimal example that runs on push

    Here is a very simple workflow that runs when you push code and prints a message.

    name: My First Workflow
    
    ## on:
    ### push:
        branches:
          - main
    
    ### jobs:
      hello:
        runs-on: ubuntu-latest
    ### steps:
          - name: Check out repository
            uses: actions/checkout@v4
    
          - name: Print a message
            run: echo "GitHub Actions is working"
    

    This file is intentionally small. The name gives the workflow a label in the GitHub interface. The on section defines the trigger. The jobs section contains one job called hello, which runs on an Ubuntu runner. Inside the job, the first step checks out the repository code, and the second step runs a shell command.

    How to read workflow YAML

    YAML can look intimidating at first because indentation matters. The good news is that GitHub Actions files follow a fairly predictable structure.

    The top level usually includes a workflow name, event triggers, and jobs. Under each job, you define the runner and steps. Under each step, you either use an existing action with uses or execute commands with run.

    A useful mental model is this: the workflow answers when, the job answers where, and the steps answer how.

    Committing and observing the Actions tab

    Commit and push your workflow file to the branch you selected. Then open your repository on GitHub and click the Actions tab. You should see the workflow appear almost immediately.

    Click into the workflow run to see each job and step. A green check means success. A red X means failure. Clicking a failed step opens logs that show exactly what command ran and where it broke. This interface becomes your main dashboard for automation.

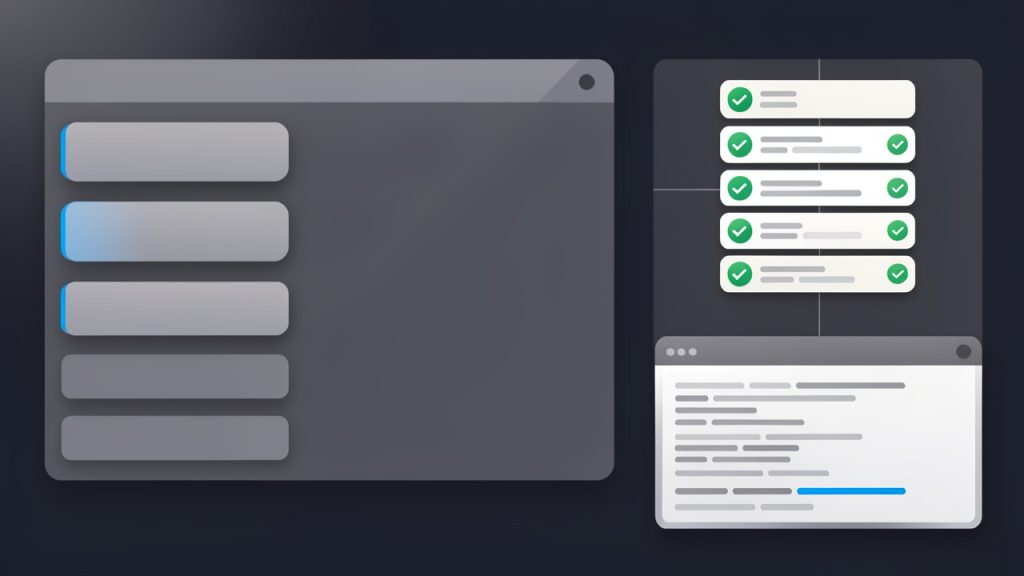
    A screenshot-style illustration of the GitHub Actions tab showing a beginner workflow run: list of workflow runs on the left, selected run details on the right with a job tree, green checkmarks for successful jobs and steps, and an expandable log pane displaying command output. Make it look like the real GitHub UI but simplified and focused on the success/failure indicators and clickable steps/logs.

    Common Workflow Patterns for Beginners

    Running unit tests and linters

    One of the most useful beginner setups is a workflow that runs tests and lint checks automatically. This catches obvious issues before they reach production or even before a pull request gets merged.

    For a Node.js project, the pattern usually includes checking out the repository, installing Node, installing dependencies, then running test and lint commands.

    name: Node CI
    
    ## on:
    ### push:
    ### pull_request:
    
    ### jobs:
    ### test:
        runs-on: ubuntu-latest
    ### steps:
          - uses: actions/checkout@v4
          - uses: actions/setup-node@v4
    ### with:
              node-version: 20
          - run: npm ci
          - run: npm test
          - run: npm run lint
    

    For Python, the idea is the same, just with different tooling.

    name: Python CI
    
    ## on:
    ### push:
    ### pull_request:
    
    ### jobs:
    ### test:
        runs-on: ubuntu-latest
    ### steps:
          - uses: actions/checkout@v4
          - uses: actions/setup-python@v5
    ### with:
              python-version: "3.11"
          - run: pip install -r requirements.txt
          - run: pytest
    

    The pattern matters more than the language. GitHub Actions is often just a clean wrapper around commands you already run locally.

    Building and packaging

    Once tests pass, many projects need a build step. Front-end apps may create a dist folder. Java apps may generate JAR files. Python packages may build wheels.

    A build workflow packages your code into something predictable and portable. That artifact can then be deployed or shared.

    name: Build App
    
    ## on:
    ### push:
        branches:
          - main
    
    ### jobs:
    ### build:
        runs-on: ubuntu-latest
    ### steps:
          - uses: actions/checkout@v4
          - uses: actions/setup-node@v4
    ### with:
              node-version: 20
          - run: npm ci
          - run: npm run build
    

    Running matrix builds

    A matrix build runs the same job across multiple versions or environments. This is especially useful when your package supports multiple Node or Python versions.

    Instead of copying the same job three times, you define a matrix and let GitHub generate the variants automatically.

    name: Matrix Test
    
    ## on:
    ### push:
    ### pull_request:
    
    ### jobs:
    ### test:
        runs-on: ubuntu-latest
        strategy:
    ### matrix:
            node-version: [18, 20, 22]
    ### steps:
          - uses: actions/checkout@v4
          - uses: actions/setup-node@v4
    ### with:
              node-version: ${{ matrix.node-version }}
          - run: npm ci
          - run: npm test
    

    This pattern helps you catch version-specific issues early. For libraries and shared packages, it is often essential.

    Using cache for dependencies

    Caching speeds up workflows by reusing downloaded dependencies between runs. This can noticeably reduce build times, especially for projects with large dependency trees.

    For Node projects, actions/setup-node can handle package manager caching directly.

    - uses: actions/setup-node@v4
    ### with:
        node-version: 20
        cache: npm
    - run: npm ci
    

    Caching is helpful, but it is not magic. If the lockfile changes, the cache may be invalidated, which is usually the correct behavior. For beginners, the key takeaway is simple, cache dependencies, not build outputs, unless you know exactly why.

    Uploading and downloading artifacts

    Artifacts let you preserve files from one job or one workflow run. Common examples include build bundles, test reports, logs, and packaged releases.

    - name: Upload build output
      uses: actions/upload-artifact@v4
    ### with:
        name: app-build
        path: dist/
    

    Later, another job can download that artifact for deployment or inspection.

    - name: Download build output
      uses: actions/download-artifact@v4
    ### with:
        name: app-build
    

    Artifacts are especially useful when one job builds and another job deploys. They create a clean handoff between stages.

    Using Marketplace Actions and Writing Your Own

    Finding and evaluating Marketplace actions

    The GitHub Marketplace contains thousands of prebuilt actions. These save time because you can reuse common integrations instead of writing every step from scratch.

    Still, convenience should not replace caution. Before using a third-party action, check who maintains it, how often it is updated, whether the repository is active, and whether others rely on it. Read the source if the action will touch credentials, deployments, or production systems.

    A strong beginner habit is to pin actions to a specific version, or better, to a full commit SHA in sensitive workflows. That protects you from unexpected upstream changes.

    How to use a third-party action

    Using an action usually means adding a uses step and providing any needed inputs through with.

    - name: Set up Node
      uses: actions/setup-node@v4
    ### with:
        node-version: 20
    

    This example uses an official GitHub-maintained action. The same pattern applies to most Marketplace actions, although inputs and documentation vary.

    When to write a custom action, composite action, or reusable workflow

    If you only need to repeat a few setup steps, a composite action is often enough. If several repositories need the same multi-job pipeline, a reusable workflow is usually better.

    A custom JavaScript or Docker action makes sense when you need logic that cannot be expressed cleanly with shell commands or composite steps. For beginners, that is rarely the first move. Start simple. Reuse before you build.

    Quick example of a composite action

    A composite action lives in its own folder and bundles repeated steps.

    name: "Install and Test"
    description: "Install dependencies and run tests"
    
    ### runs:
      using: "composite"
    ### steps:
        - run: npm ci
          shell: bash
        - run: npm test
          shell: bash
    

    You can then call it from a workflow with a local path.

    - uses: ./.github/actions/install-and-test
    

    This keeps workflow files shorter and easier to maintain.

    Secrets, Environment Protection, and Best Security Practices

    Storing and using secrets in workflows

    GitHub lets you store secrets at the repository, organization, or environment level. To use one in a workflow, reference it through the secrets context.

    - name: Deploy
      run: echo "Deploying with secret"
    ### env:
        API_TOKEN: ${{ secrets.API_TOKEN }}
    

    A secret should never be committed to the repository, pasted into YAML directly, or echoed into logs. Even in private repositories, treat credentials as if they could leak.

    Environment protection rules and required reviewers

    Environments add a valuable safety layer for deployments. You can require manual approval before a job targeting production runs. You can also scope secrets specifically to that environment.

    This means your test workflow can run freely, while production deployment stays protected behind a review step. For teams, this creates accountability. For solo developers, it prevents accidental production releases from a late-night push.

    Least privilege, PATs, OIDC, and fine-grained permissions

    By default, workflows may receive more token access than they need. It is better to define explicit permissions and grant only what each job requires.

    ### permissions:
      contents: read
    

    If a deployment job needs to write releases or pages content, grant that only there, not globally.

    ### jobs:
    ### deploy:
    ### permissions:
          contents: read
          pages: write
          id-token: write
    

    OIDC (OpenID Connect) is one of the best security improvements available in GitHub Actions. Instead of storing long-lived cloud credentials in secrets, your workflow can request a short-lived identity token and exchange it with a cloud provider such as AWS, Azure, or Google Cloud. This reduces secret sprawl and lowers the blast radius if something goes wrong.

    A personal access token should be a fallback, not your first option. If you must use one, prefer fine-grained permissions and short scope.

    Avoiding secrets in logs

    Logs are useful, but they can become a leak point. Avoid printing environment variables or command output that might expose sensitive values.

    GitHub masks known secrets automatically, but do not depend on masking alone. The safest pattern is never to echo secrets in the first place. If you need to debug authentication problems, print surrounding context, not the credential itself.

    Debugging Workflows and Reading Logs

    Where to find logs and how to interpret them

    When a workflow fails, the first place to look is the Actions tab. Open the failed run, click the job, then expand the failed step. You will usually find the exact command that broke, its output, and the exit code.

    Read from the bottom upward. The final error line often tells you the symptom, but the lines above it explain the real cause. A missing dependency, wrong file path, or permission issue can be easy to miss if you only skim the red text.

    Common failure modes and fixes

    A very common beginner failure is that the workflow never triggers. Usually that comes down to the wrong branch, a malformed on block, or the file living outside .github/workflows/.

    Another common issue is dependency mismatch. The app works locally, but fails in Actions because the runner uses a different Node or Python version. In that case, make the version explicit with setup actions.

    Permission problems are also frequent, especially during deployments. If you see errors like Resource not accessible by integration, check your permissions block and verify whether the workflow token is allowed to perform that action.

    Using workflow commands and step outputs for debugging

    You can add debugging output with normal shell commands such as pwd, ls -la, node -v, python --version, or printenv with care. These small checks often reveal path or environment issues quickly.

    You can also pass data between steps using outputs. That becomes helpful when you want to inspect generated values or conditionally run later steps.

    - name: Set output
      id: vars
      run: echo "build_name=my-app" >> $GITHUB_OUTPUT
    
    - name: Use output
      run: echo "Build is ${{ steps.vars.outputs.build_name }}"
    

    Enabling debug logging

    GitHub supports additional debug logging when needed. You can enable runner and step debugging through repository secrets or settings described in the official documentation.

    For beginners, the practical lesson is this, make your workflows observable. Clear step names, explicit commands, and small validation steps save time when something breaks.

    Advanced Topics and Next Steps

    Reusable workflows for multi-repo setups

    If you manage several repositories, copying the same CI file everywhere becomes a maintenance burden. A reusable workflow lets you define a pipeline once and call it from other repositories.

    name: Reusable CI
    
    ## on:
      workflow_call:
    
    ### jobs:
    ### test:
        runs-on: ubuntu-latest
    ### steps:
          - uses: actions/checkout@v4
          - run: echo "Shared workflow"
    

    This pattern is especially useful for agencies, internal platforms, and teams with many similar projects.

    Self-hosted runners

    Self-hosted runners make sense when you need private infrastructure access, custom software, or specialized hardware. They can also help in regulated environments where hosted runners are not suitable.

    They do come with trade-offs. You are responsible for updates, security, scaling, and reliability. Beginners should usually stay with GitHub-hosted runners until there is a clear need to switch.

    Deployments and cloud providers

    GitHub Actions can deploy to a wide range of services, from GitHub Pages to major cloud platforms. The most secure modern approach is often OIDC-based authentication, where the workflow exchanges a temporary identity token for cloud access.

    That setup requires a little more initial work, but it is worth it. You avoid storing long-lived secrets and gain more auditable access control.

    Integrating with other tools

    GitHub Actions works well with tools like Dependabot, CodeQL, container registries, and external CI/CD systems. Over time, many teams build a workflow ecosystem where security checks, dependency updates, and deployments all happen from the same repository.

    The key is not to automate everything at once. Add layers gradually, and keep each workflow understandable.

    Practical Project: A Beginner CI/CD Pipeline Example

    Project overview

    Imagine a simple Node.js web app. You want it to run tests on every push and pull request, build the app on the main branch, upload the build as an artifact, and deploy it to GitHub Pages.

    This example combines several patterns from this guide into one realistic workflow. It is the kind of setup many tutorials skip, even though it is where beginners get the most value.

    Full workflow walkthrough

    name: CI/CD Pipeline
    
    ## on:
    ### push:
        branches:
          - main
    ### pull_request:
    ### workflow_dispatch:
    
    ### permissions:
      contents: read
    
    ### jobs:
    ### test:
        runs-on: ubuntu-latest
        strategy:
    ### matrix:
            node-version: [20]
    ### steps:
          - name: Check out code
            uses: actions/checkout@v4
    
          - name: Set up Node
            uses: actions/setup-node@v4
    ### with:
              node-version: ${{ matrix.node-version }}
              cache: npm
    
          - name: Install dependencies
            run: npm ci
    
          - name: Run tests
            run: npm test
    
          - name: Run lint
            run: npm run lint
    
    ### build:
        if: github.ref == 'refs/heads/main'
        needs: test
        runs-on: ubuntu-latest
    ### steps:
          - name: Check out code
            uses: actions/checkout@v4
    
          - name: Set up Node
            uses: actions/setup-node@v4
    ### with:
              node-version: 20
              cache: npm
    
          - name: Install dependencies
            run: npm ci
    
          - name: Build app
            run: npm run build
    
          - name: Upload artifact
            uses: actions/upload-artifact@v4
    ### with:
              name: site-build
              path: dist/
    
    ### deploy:
        if: github.ref == 'refs/heads/main'
        needs: build
        runs-on: ubuntu-latest
    ### permissions:
          contents: read
          pages: write
          id-token: write
    ### environment:
          name: github-pages
    ### steps:
          - name: Download artifact
            uses: actions/download-artifact@v4
    ### with:
              name: site-build
              path: dist/
    
          - name: Upload Pages artifact
            uses: actions/upload-pages-artifact@v3
    ### with:
              path: dist/
    
          - name: Deploy to GitHub Pages
            uses: actions/deploy-pages@v4
    

    Explaining the structure

    The test job runs first on every push and pull request. It installs dependencies, runs tests, and checks linting. This is your quality gate.

    The build job depends on test through needs: test, so it only runs if the test job succeeds. It also only runs on the main branch. That keeps pull request runs lighter while still validating code quality.

    The deploy job depends on the build output and has a tighter permissions block. That is an example of least privilege in action. It gets deployment-specific permissions only where needed.

    How to adapt this workflow to your stack

    If you use Python, swap in actions/setup-python, pip install, pytest, and your packaging commands. If you use Java, replace the setup and build steps with your Gradle or Maven commands.

    The structure remains similar. Test first. Build second. Deploy last. Keep jobs separate when they serve different purposes, and pass artifacts between them rather than rebuilding everything repeatedly.

    Troubleshooting FAQ and Helpful Commands

    Why did my workflow not trigger?

    If your workflow did not run, first confirm the file is inside .github/workflows/ and committed to the correct branch. Then inspect the on block. A workflow configured for push to main will not run on pushes to develop.

    Also check whether Actions are enabled for the repository and whether organization policies restrict them. These settings are easy to overlook, especially in business or client-owned repos.

    How to fix authentication and permission problems

    If you hit 403 or Resource not accessible by integration, check the workflow token permissions first. Many deployment problems come from missing contents, packages, pages, or id-token permissions.

    If you rely on secrets, verify the secret name exactly matches what the workflow references. A typo in secrets.MY_TOKEN is enough to break the job silently or produce confusing downstream errors.

    Speeding up workflows and reducing costs

    The easiest performance improvements are caching dependencies, limiting workflows to relevant branches, and avoiding duplicate setup across jobs where possible. Matrix builds are powerful, but they also multiply run time, so use them where version coverage matters.

    You can also separate lightweight pull request checks from heavier deployment workflows. That keeps feedback fast and avoids burning minutes unnecessarily.

    Useful GitHub CLI commands

    If you use the GitHub CLI, a few commands make workflow management easier.

    gh workflow list
    gh run list
    gh run view
    gh run watch
    gh run download
    

    These commands help you inspect runs, monitor progress, and download artifacts without opening the browser every time.

    Resources and Next Steps

    The official GitHub documentation should be your primary reference once you understand the basics. It is comprehensive, accurate, and especially useful when you need syntax details for events, expressions, permissions, and environments.

    The GitHub Marketplace is helpful for discovering actions, but use it thoughtfully. Prefer well-maintained actions, review the source for sensitive workflows, and pin versions carefully. Community examples can be useful too, especially when adapting workflows for a specific stack.

    After working through this beginner GitHub Actions guide, you should be able to create a workflow file, trigger runs from repository events, read logs, run tests automatically, use artifacts, and deploy with better security practices. The next step is simple, automate one repetitive task in your own repository today. Start small, keep it readable, and improve it with each run.

    Appendix: Quick Reference Cheat Sheet

    Common YAML snippets

    A matrix strategy for multiple Node versions:

    strategy:
    ### matrix:
        node-version: [18, 20, 22]
    

    A secret used as an environment variable:

    ### env:
      API_KEY: ${{ secrets.API_KEY }}
    

    Artifact upload:

    - uses: actions/upload-artifact@v4
    ### with:
        name: build-files
        path: dist/
    

    Workflow event examples

    A push trigger for the main branch:

    ## on:
    ### push:
        branches:
          - main
    

    A manual trigger:

    ## on:
    ### workflow_dispatch:
    

    A scheduled nightly run:

    ## on:
    ### schedule:
        - cron: "0 2 * * *"
    

    Permissions block examples

    Minimal read-only permissions:

    ### permissions:
      contents: read
    

    Deployment-friendly job permissions:

    ### permissions:
      contents: read
      pages: write
      id-token: write
    

    Debugging commands and log tips

    Useful debugging commands inside a run step include:

    pwd
    ls -la
    node -v
    npm -v
    python --version
    

    Use clear step names so failed runs are easier to scan. Check the last failing command, then read a few lines above it for the actual cause. When in doubt, reduce the workflow to the smallest failing example and rebuild from there.