JNTZN

Tag: javascript

  • How to Prepare for Common Frontend Interview Questions

    How to Prepare for Common Frontend Interview Questions

    Frontend interviews can feel deceptively simple. You look at the job description, see familiar words like HTML, CSS, JavaScript, React, and assume a few review sessions will be enough.

    Then the interview starts, and suddenly you are asked to explain event delegation, compare == and === (MDN), discuss rendering performance, or build a component while narrating your decisions in real time.

    That gap between knowing frontend development and being able to answer common frontend interview questions clearly is what trips up many candidates. Interviewers are rarely checking only whether you have memorized definitions. They want to see how you think, how you prioritize, how you debug, and whether you understand the trade-offs behind the tools you use every day.

    If you want to prepare for common questions in frontend interviews, the smartest approach is not endless cramming, it is structured preparation. You need a clear understanding of the topics that appear most often, the reasoning interviewers expect, and a repeatable way to practice. Once you do that, interviews become much less unpredictable and much more manageable.

    What It Means to Prepare for Common Frontend Interview Questions

    Preparing for frontend interviews is not just about collecting a giant list of questions and trying to memorize perfect answers. It is about building fluency across the core areas of frontend work. That usually includes HTML semantics, CSS layout, specificity, JavaScript fundamentals, browser behavior, accessibility, performance, frameworks, testing, and practical problem-solving.

    A good frontend interview often blends theory with real-world scenarios. One moment you may be asked what semantic HTML is, and the next you may need to explain why a page feels slow, how to improve a component’s accessibility, or what happens when a browser parses a script. In that sense, preparation is less like studying flashcards, and more like training for a conversation where your technical judgment matters.

    When candidates search for how to prepare for frontend interview questions, they usually mean learning to answer with both accuracy and context. For example, it is not enough to say that Flexbox is for one-dimensional layouts and Grid is for two-dimensional layouts. A stronger answer explains when each is more maintainable, how browser support factors in less today than in the past, and why choosing the right layout model reduces future complexity.

    What Interviewers Are Actually Evaluating

    Frontend interviewers are usually looking at several things at once. They care about technical correctness, but they also care about communication. If you know the answer but explain it in a confusing way, that can weaken your performance. If you make a small mistake but reason through it well, that can actually help.

    They also want to know whether your knowledge is shallow or durable. Someone who has only memorized terms often struggles when a question is reframed. Someone who understands the underlying concept can still answer when the exact wording changes. That is why interview preparation should focus on patterns, not just scripts.

    Another important factor is practical awareness. Modern frontend work is not isolated coding, it touches user experience, collaboration, performance, maintainability, and cross-browser behavior. The best answers often reflect that broader understanding.

    Key Aspects of Preparing for Frontend Interviews

    Master the Core Frontend Foundations

    The most common frontend interview questions still revolve around the basics. That surprises some candidates, especially those who have spent most of their time inside a framework. But strong frontend teams know that frameworks change, while the foundations remain essential.

    With HTML, expect questions about semantic elements, document structure, forms, accessibility, and SEO implications. Interviewers may ask why a <button> is better than a clickable <div>, or how proper heading hierarchy improves both usability and page structure. These questions sound basic, but they reveal whether you understand the web as a platform, not just as a canvas for components.

    With CSS, common questions often focus on the box model, positioning, specificity, inheritance, stacking context, Flexbox, Grid, responsive design, and layout debugging. Many interviewers also like scenario-based prompts, such as how you would center an element, build a responsive card layout, or prevent layout shifts. Strong answers connect CSS choices to maintainability and user experience, not just visual output.

    With JavaScript, the scope gets wider. You may be asked about data types, closures, scope, hoisting, promises, the event loop, asynchronous programming, prototypes, this, array methods, immutability, and DOM manipulation. This is often where candidates feel the most pressure because JavaScript questions can move from beginner-friendly to deeply conceptual very quickly.

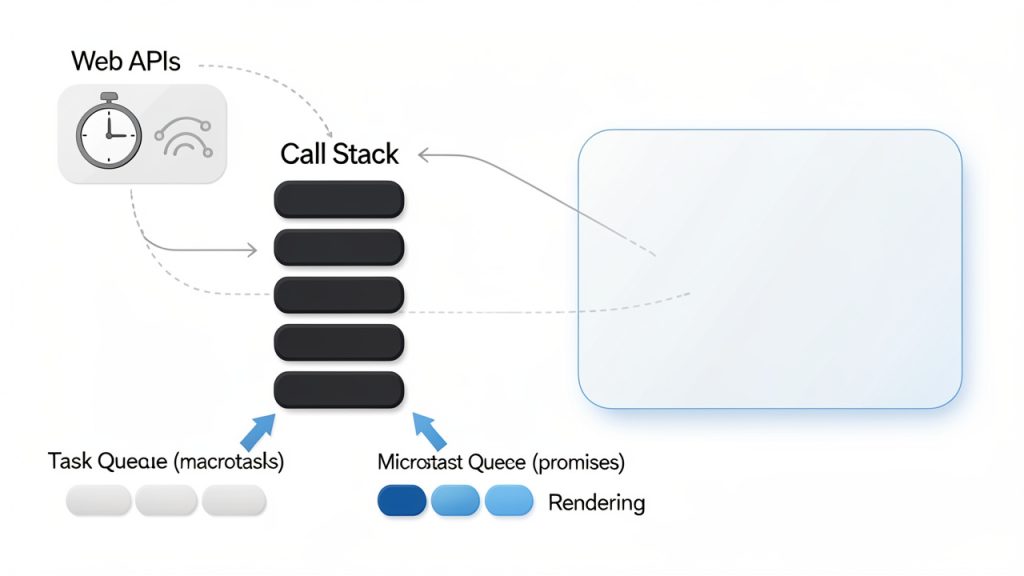
    Simplified event loop diagram: display the Call Stack, Web APIs (timers, XHR), Task Queue (macrotasks), Microtask Queue (promises), and the Rendering step. Use arrows to show how functions go to the Call Stack, async callbacks move to queues, microtasks drain before rendering, and rendering happens when the stack is empty.

    Understand Browser Behavior, Not Just Syntax

    A frontend developer works in the browser, so interviewers often test whether you understand how the environment behaves. This includes rendering, repaint versus reflow, caching, parsing, script loading, and how the DOM and CSSOM interact. You do not need to answer like a browser engineer, but you should understand enough to explain common performance and behavior issues.

    For example, if asked why a page is slow, a strong candidate might talk about oversized bundles, too many render-blocking resources, expensive DOM updates, unnecessary re-renders, image optimization, and network latency. That answer shows applied thinking. It turns abstract knowledge into practical diagnosis.

    The same is true for accessibility. Interviewers increasingly ask about keyboard navigation, ARIA usage, color contrast, focus management, and screen reader support. Accessibility is no longer a nice extra, it is part of competent frontend engineering. If you can explain how semantic HTML reduces the need for excessive ARIA, you already sound more experienced.

    Be Ready for Framework-Specific Questions

    If the role mentions React, Vue, Angular, or another framework, expect interview questions tailored to that ecosystem. In React interviews, for example, common topics include component lifecycle, hooks, state management, props, controlled versus uncontrolled inputs, memoization, reconciliation, and rendering behavior.

    The mistake many candidates make is answering framework questions as if they are reciting documentation. Interviewers usually want to know how you use the framework to solve problems. If asked about useEffect, a better answer goes beyond syntax. Explain when to use it, when not to use it, how dependencies affect execution, and what kinds of bugs can happen if it is misused.

    Framework knowledge is strongest when tied back to the underlying platform. A candidate who understands both React and the DOM often performs better than a candidate who only knows React patterns in isolation.

    Expect Practical Coding and Debugging Questions

    Not every frontend interview includes a live coding exercise, but many do. The task may be small, such as building a search filter, implementing a debounce function, or styling a responsive component. Sometimes the challenge is less about finishing and more about showing your approach.

    Interviewers pay attention to how you break down the problem, how you name things, whether you consider edge cases, and how you recover when something goes wrong. In frontend roles especially, debugging is often just as important as writing new code. You may be given a broken UI and asked to identify the issue, or shown a piece of code and asked how you would improve it.

    That means your preparation should include speaking while coding. Silent competence can be hard for an interviewer to evaluate. Clear reasoning, even when imperfect, often creates a stronger impression than a flawless but unexplained solution.

    Prepare for Behavioral Questions with a Frontend Lens

    Frontend interviews are not purely technical. You will likely be asked about collaboration, feedback, deadlines, and trade-offs. These questions matter because frontend developers frequently work across design, product, backend, QA, and support teams.

    A generic answer about teamwork is usually weak. A stronger answer uses frontend-specific situations. For instance, you might describe how you handled conflicting design requirements, advocated for accessibility despite time pressure, or improved performance without disrupting the release schedule. This shows maturity and real-world experience.

    Behavioral questions also reveal how you handle constraints. Frontend work often involves balancing ideal solutions with practical timelines. Employers want people who can make thoughtful decisions under real conditions.

    Common Frontend Interview Questions You Should Be Able to Answer

    The exact questions vary, but some themes appear again and again. The table below shows a practical way to think about them.

    Topic Area Common Question What Interviewers Want to Hear
    HTML What is semantic HTML and why does it matter? Understanding of structure, accessibility, maintainability, and SEO
    CSS What is the difference between Flexbox and Grid? Clear explanation of layout use cases and trade-offs
    CSS How does specificity work? Ability to reason about style conflicts and maintainable CSS
    JavaScript What is a closure? Conceptual understanding plus a practical use case
    JavaScript Explain the event loop Awareness of async execution, call stack, task queues
    JavaScript Difference between == and === Type coercion knowledge and safe comparison habits
    Browser What causes reflow and repaint? Performance awareness and rendering cost understanding
    Accessibility How do you make a component accessible? Semantic markup, keyboard support, focus states, ARIA when needed
    React What is the difference between state and props? Core component model understanding
    React When would you use useEffect? Ability to explain side effects and dependency management
    Performance How would you optimize a slow frontend app? Structured thinking across network, rendering, code splitting, assets
    Testing What should be tested in a frontend app? Balanced view of unit, integration, and user-focused testing

    You do not need a rehearsed speech for every question. What you need is a reliable answer framework. Start with a concise definition. Then explain why it matters. Then give a practical example. That structure works across a huge range of interview topics.

    For instance, with closures, define the concept simply. Then explain that closures allow a function to retain access to variables from its outer scope. Finally, mention real uses such as data privacy, event handlers, or factory functions. That format feels natural and demonstrates actual understanding.

    How to Build Better Answers Instead of Memorizing Scripts

    Use the Definition, Context, Example Method

    A common reason candidates freeze is that they try to remember the perfect wording. That rarely works under pressure. A better method is to build answers in three parts, definition, context, and example.

    The definition proves you know the concept. The context shows why it matters in frontend work. The example makes the answer concrete. This is much easier to recall than a rigid paragraph, and it sounds more human in conversation.

    Take event delegation as an example. You can define it as attaching a single event listener to a parent element to handle events from child elements through bubbling. Then give context by explaining that it helps with performance and dynamic content. Then share an example like handling clicks in a list where items are added later. That answer is both technical and practical.

    Diagram showing event delegation: a parent container with a single click listener and several child items. Arrows illustrate an event originating on a child, bubbling up to the parent listener; include labels for 'event target', 'event currentTarget (listener)', and 'bubbling phase'. Optional small inset shows how adding/removing child items doesn't require attaching new listeners.

    Practice Explaining Trade-Offs

    Senior and mid-level frontend interviews often become more interesting when trade-offs enter the conversation. It is one thing to define server-side rendering, it is another to explain when it helps, when it adds complexity, and what kinds of applications benefit most.

    Trade-off thinking is a strong signal of real experience. It shows that you do not treat tools as magic. You understand that every choice affects maintainability, performance, developer experience, and user outcomes. If you can explain why one solution is appropriate in one case but excessive in another, your answers become much more credible.

    This applies to styling strategies, state management, testing approaches, and optimization techniques. Mature frontend engineering is rarely about one universally correct answer, it is about making informed decisions under constraints.

    How to Get Started with Frontend Interview Preparation

    The most effective way to prepare for common frontend interview questions is to create a focused study plan. Random review sessions often feel productive, but they leave major gaps. A better approach is to separate your preparation into core foundations, framework knowledge, coding practice, and communication.

    Start by identifying the role level and stack. If you are interviewing for a junior frontend role, the emphasis may be on HTML, CSS, JavaScript fundamentals, and simple component work. If you are interviewing for a mid-level or senior role, expect deeper questions about architecture, performance, testing, accessibility, and collaboration.

    Then review the fundamentals in a deliberate order. HTML and accessibility first, then CSS and layouts, then JavaScript concepts, then browser behavior, then your framework. That sequence works because it mirrors how frontend applications are actually built. It also helps you connect higher-level abstractions back to the platform underneath.

    A Simple Preparation Routine

    If you need a starting point, keep it compact and repeatable:

    1. Review one core topic daily, such as closures, Flexbox, semantic HTML, or React state.
    2. Answer 3 to 5 common interview questions out loud without reading notes.
    3. Solve one small coding or debugging problem related to frontend work.
    4. Refine one weak answer by adding context and a real example.

    This kind of routine works because it combines recall, explanation, and practical application. It also exposes weak spots quickly. If you cannot explain something simply, you probably do not know it as well as you think.

    Practice Out Loud, Not Only in Your Head

    This step is often overlooked. Reading articles and watching videos can create the illusion of readiness, but interviews are verbal. You need to hear yourself explain concepts. That is how you notice where your answer is vague, rambling, or too abstract.

    Practicing aloud also improves pacing. Many candidates know the material but answer too quickly, too defensively, or with too much jargon. When you rehearse speaking, you become more comfortable giving concise and structured responses. That alone can significantly improve interview performance.

    If possible, do mock interviews with another developer. If not, record yourself. It may feel awkward, but it is one of the fastest ways to improve clarity and confidence.

    Use Projects as Proof of Understanding

    One of the best ways to prepare for frontend interviews and the common questions that come with them is to revisit your own work. Your projects are evidence. They give you real examples for technical and behavioral answers, and they help you move beyond textbook responses.

    If an interviewer asks about performance optimization, it is much stronger to describe how you reduced bundle size, lazy-loaded components, or fixed unnecessary re-renders in a real project. If asked about accessibility, you can discuss keyboard navigation, semantic markup, or screen reader improvements you actually implemented.

    Before any interview, review two or three projects you know well. Be ready to explain the architecture, the challenges, the trade-offs, the bugs, and what you would improve. These stories are often more memorable than polished definitions.

    Know the Difference Between Not Knowing and Panicking

    Even strong candidates get questions they cannot fully answer. What matters is how you respond. Interviewers usually do not expect perfection. They expect thoughtfulness, honesty, and the ability to reason from what you do know.

    If you are unsure, start with the part you understand. Clarify the question if needed. Think aloud. Relate it to a nearby concept. That approach is much better than guessing wildly or going silent. Frontend work constantly involves ambiguity, so calm reasoning under uncertainty is itself a valuable skill.

    Mistakes That Hurt Frontend Interview Performance

    One frequent mistake is over-focusing on framework trivia while neglecting core web fundamentals. A candidate may know many React hooks but struggle to explain form behavior, CSS positioning, or the event loop. That imbalance becomes obvious quickly.

    Another issue is giving answers that are technically correct but disconnected from real frontend work. Interviewers are usually not impressed by memorized definitions alone. They want relevance. Explain why the concept matters in a product, a team, or a user experience.

    Candidates also hurt themselves when they rush into coding without clarifying the problem. In frontend interviews, requirements matter. Responsive behavior, accessibility, edge cases, and user interaction details often matter just as much as raw implementation speed. A few thoughtful questions at the start can make your solution much stronger.

    Final Thoughts and Your Next Step

    To prepare for common questions in frontend interviews, focus on understanding rather than memorization. Build confidence in the fundamentals, connect concepts to real browser behavior, practice framework-specific topics in context, and get comfortable explaining your reasoning out loud. That combination is what turns scattered knowledge into interview readiness.

    Your next step is simple. Pick the top ten frontend interview questions most relevant to your target role, answer each one aloud using the definition, context, example format, and refine the weak spots. Do that consistently for a week, and your interviews will start to feel less like a test and more like a conversation you are ready to lead.

  • Base64 to Text: Decode Base64 Safely and Easily

    Base64 to Text: Decode Base64 Safely and Easily

    A long string ending in = can look like nonsense, but it often hides something very ordinary, a message, a config value, a file header, or plain readable text. If you have a Base64 string and need to turn it back into text, the good news is that the process is usually simple. The challenge is knowing which tool to use, how to spot the right variant, and how to avoid privacy mistakes along the way.

    This guide explains Base64 to text conversion in plain language first, then gives you practical methods for browsers, terminals, and common programming languages. It also covers the parts many quick converter pages skip, including URL-safe Base64, data URI cleanup, character encoding issues, JWT payloads, and secure handling of sensitive data.

    What is Base64 and why you encounter it

    Definition: Base64 encoding in simple terms

    Base64 is a way to represent binary data as text. Instead of sending raw bytes directly, Base64 transforms them into a limited set of characters that are easier to transport through systems built for text.

    That is why a Base64 string often looks like a block of letters, numbers, slashes, plus signs, and sometimes one or two = characters at the end. It is not meant for humans to read directly. It is meant for computers to pass around safely.

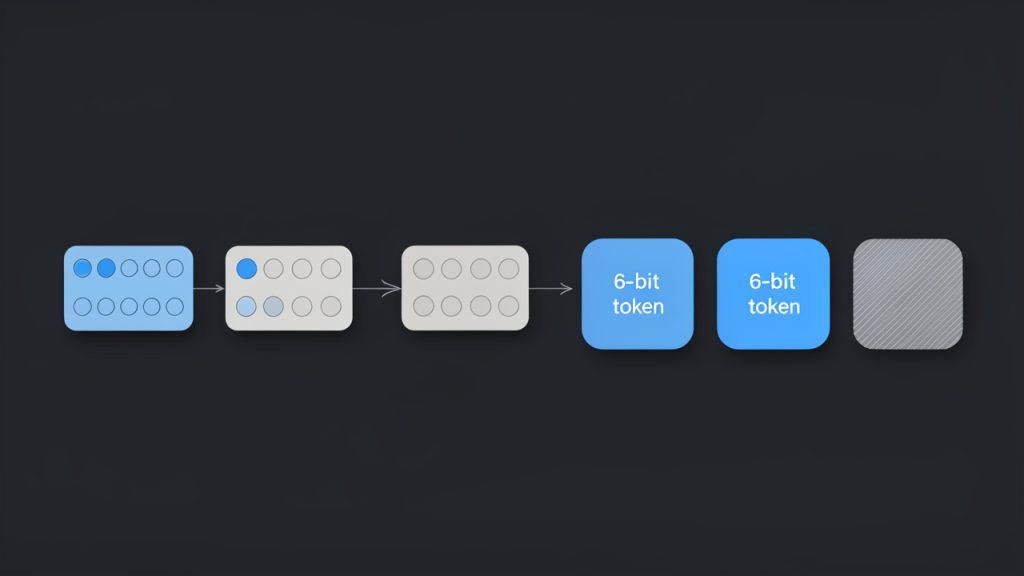
    A quick technical note helps here. Base64 takes data and splits it into 6-bit chunks, then maps each chunk to a character from a 64-character alphabet. If the original data length does not divide evenly, Base64 uses padding, usually =, to complete the output.

    Why Base64 exists: binary-to-text transport and common use-cases

    Many older and modern systems handle text more reliably than raw binary. Base64 solves that compatibility problem. It lets images, attachments, tokens, and other binary content travel through channels that expect text.

    That is why you see Base64 in APIs, HTML data URIs, email attachments, certificate files, and authentication tokens. It is not encryption, and it is not compression. It is simply an encoding format.

    The trade-off is size. Base64 makes data about 33% larger than the original. That sounds inefficient, and it is, but the benefit is portability and predictable transport.

    Where you commonly see Base64

    You will often run into Base64 in places where systems need to embed or move data without worrying about binary corruption. A common example is an image embedded directly into HTML or CSS using a data URI, such as data:image/png;base64,....

    Developers also see Base64 in API payloads, particularly when binary files are sent in JSON. Security-related tools use it in JWT tokens, though those use the URL-safe variant. Email systems use Base64 for attachments and MIME parts, and certificate-related formats may contain Base64-encoded blocks inside text files.

    If a string is long, contains only letters, digits, +, /, _, -, and maybe =, there is a fair chance you are looking at Base64 or one of its close variants.

    How Base64 encoding works (brief technical overview)

    The algorithm in steps: grouping, 6-bit chunks, mapping to alphabet, padding

    The process is easier to understand if you think in layers. Original text is first stored as bytes. Those bytes are grouped in sets of 3, which gives 24 bits. Base64 then splits those 24 bits into 4 groups of 6 bits each.

    Each 6-bit value maps to one Base64 character. That is how 3 bytes become 4 text characters.

    For example, the text Hi becomes the Base64 string SGk=. The trailing = appears because Hi is only 2 bytes, not 3, so the output needs padding to complete the final block.

    Diagram showing the Base64 encoding process: 3 input bytes (24 bits) grouped together, split into four 6-bit chunks, each mapped to a Base64 character. Include an example: ASCII for 'Hi' (0x48 0x69) shown as bytes, padded with zeros to make 24 bits, resulting 6-bit values, mapped to characters 'S', 'G', 'k', '=' with the '=' shown as padding. Annotate '3 bytes -> 4 chars', '6-bit chunks', and 'padding when input length ≠ multiple of 3'.

    Base64 alphabet and variants

    Standard Base64 uses this character set: uppercase letters, lowercase letters, digits, +, and /. Padding is done with =.

    A very common variant is Base64URL, used in URLs and JWTs. It replaces + with - and / with _. It also often omits padding. That small change matters, because a standard decoder may reject URL-safe input unless you normalize it first.

    Another variation appears in MIME email content, where line breaks may be inserted every 76 characters. If you copy encoded data from an email, those line breaks usually need to be removed before decoding.

    Side-by-side comparison of Base64 alphabets/variants: left column labeled 'Standard Base64' showing characters A–Z a–z 0–9 + / and '=' padding; right column labeled 'Base64URL' replacing '+' with '-' and '/' with '_' and noting 'padding often omitted'. Include a small note/arrow showing how to normalize URL-safe to standard (+/ and add padding) before decoding.

    Common pitfalls: padding, line breaks, character set assumptions

    Many Base64 decoding errors come from tiny formatting issues. Missing padding is common in JWTs and URL-safe strings. Embedded whitespace or line breaks are common in emails and certificates. Data URI prefixes are common in web contexts.

    Another frequent issue is not Base64 itself, but the character encoding of the decoded bytes. You may decode the Base64 correctly and still see gibberish if the output is not UTF-8 text. It could be Latin-1, UTF-16, compressed data, or even a binary file.

    That is why Base64 to text conversion is really a two-step interpretation. First decode the Base64. Then determine what the resulting bytes actually represent.

    How to convert Base64 to text: quick methods

    Online tools and one-click converters

    For non-sensitive data, a browser-based converter is the fastest route. Paste the Base64 string, decode it, and inspect the result.

    Tools on domains such as base64.guru, www.base64decode.org, and www.utilities-online.info are commonly used for quick checks. They are convenient, but convenience comes with a warning. If the string may contain tokens, personal data, customer records, API secrets, or private messages, avoid random online tools and decode locally instead.

    If your input begins with a data URI prefix like data:text/plain;base64,, remove everything before the comma first. Most good tools handle this automatically, but not all do.

    Browser devtools and console

    If you want a local method in the browser, open developer tools and use JavaScript in the console. This works well for short text strings.

    const input = "SGVsbG8gd29ybGQ=";
    const cleaned = input.replace(/^data:[^,]+,/, "").replace(/s+/g, "");
    const text = decodeURIComponent(
      Array.from(atob(cleaned), c => "%" + c.charCodeAt(0).toString(16).padStart(2, "0")).join("")
    );
    console.log(text);
    

    For a URL-safe string, normalize it first.

    const input = "SGVsbG8td29ybGQ";
    const normalized = input
      .replace(/-/g, "+")
      .replace(/_/g, "/")
      .padEnd(Math.ceil(input.length / 4) * 4, "=");
    
    console.log(atob(normalized));
    

    The first example handles UTF-8 text more reliably than a plain atob() call. That matters when the decoded text includes non-English characters.

    Command-line options on Linux and macOS

    On Unix-like systems, the built-in base64 command is often enough.

    echo 'SGVsbG8gd29ybGQ=' | base64 --decode
    

    If the input may contain whitespace or a data URI prefix, clean it first.

    echo 'data:text/plain;base64,SGVsbG8gd29ybGQ=' | sed 's/^data:[^,]*,//' | tr -d 'nrt ' | base64 --decode
    

    To normalize a URL-safe string:

    s='SGVsbG8td29ybGQ'
    s=$(printf "%s" "$s" | tr '_-' '/+')
    pad=$(( (4 - ${#s} % 4) % 4 ))
    s="${s}$(printf '=%.0s' $(seq 1 $pad))"
    printf "%s" "$s" | base64 --decode
    

    If base64 behaves differently on your system, openssl is another option.

    echo 'SGVsbG8gd29ybGQ=' | openssl base64 -d -A
    

    The -A flag helps when line breaks are involved.

    Windows PowerShell

    PowerShell makes Base64 decoding straightforward for text.

    $input = "SGVsbG8gd29ybGQ="
    $bytes = [Convert]::FromBase64String($input)
    $text = [System.Text.Encoding]::UTF8.GetString($bytes)
    ### $text
    

    To handle a URL-safe string and missing padding:

    $input = "SGVsbG8td29ybGQ"
    $normalized = $input.Replace('-', '+').Replace('_', '/')
    switch ($normalized.Length % 4) {
      2 { $normalized += "==" }
      3 { $normalized += "=" }
    }
    $bytes = [Convert]::FromBase64String($normalized)
    [System.Text.Encoding]::UTF8.GetString($bytes)
    

    To remove a data URI prefix:

    $input = "data:text/plain;base64,SGVsbG8gd29ybGQ="
    $cleaned = $input -replace '^data:[^,]+,', ''
    [System.Text.Encoding]::UTF8.GetString([Convert]::FromBase64String($cleaned))
    

    Programming examples: Python, JavaScript, Java, C#

    If you are building the conversion into an app or script, use the language’s standard library where possible.

    Python:

    import base64
    
    s = "SGVsbG8gd29ybGQ="
    cleaned = s.split(",", 1)[-1].strip()
    decoded = base64.b64decode(cleaned)
    print(decoded.decode("utf-8"))
    

    Python with URL-safe Base64:

    import base64
    
    s = "SGVsbG8td29ybGQ"
    cleaned = s.split(",", 1)[-1].strip()
    padding = "=" * (-len(cleaned) % 4)
    decoded = base64.urlsafe_b64decode(cleaned + padding)
    print(decoded.decode("utf-8"))
    

    JavaScript in Node.js:

    const input = "SGVsbG8gd29ybGQ=";
    const cleaned = input.replace(/^data:[^,]+,/, "").replace(/s+/g, "");
    const text = Buffer.from(cleaned, "base64").toString("utf8");
    console.log(text);
    

    Java:

    import java.nio.charset.StandardCharsets;
    import java.util.Base64;
    
    String input = "SGVsbG8gd29ybGQ=";
    String cleaned = input.replaceFirst("^data:[^,]+,", "").replaceAll("\s+", "");
    byte[] decoded = Base64.getDecoder().decode(cleaned);
    String text = new String(decoded, StandardCharsets.UTF_8);
    System.out.println(text);
    

    C#:

    using System;
    using System.Text;
    
    string input = "SGVsbG8gd29ybGQ=";
    string cleaned = System.Text.RegularExpressions.Regex.Replace(input, @"^data:[^,]+,", "");
    byte[] bytes = Convert.FromBase64String(cleaned);
    string text = Encoding.UTF8.GetString(bytes);
    Console.WriteLine(text);
    

    Step-by-step: Decode Base64 to readable text securely

    Step 1: Identify if string is Base64

    A Base64 string often has a recognizable pattern. It usually contains only letters, digits, +, /, _, -, and optional = padding. It may be very long and may not contain obvious words.

    A quick heuristic is useful, but not perfect. Some ordinary strings can accidentally match the Base64 character set. The best test is to try decoding with a strict decoder and see whether the result makes sense.

    Step 2: Clean the input

    Before decoding, remove anything that does not belong to the encoded payload. That includes data URI prefixes, line breaks, spaces, tabs, and sometimes enclosing quotes.

    If you are dealing with JWTs or URL parameters, convert - back to + and _ back to /. Then restore missing = padding if needed so the length becomes a multiple of 4.

    Step 3: Choose a safe tool

    If the string may contain credentials, customer records, signed tokens, internal logs, or confidential documents, decode it offline using your terminal or a local script.

    Online converters are fine for test strings and harmless samples. They are not a good home for secrets. The same principle applies to screenshots, browser sync, and clipboard history. Sensitive data has a way of traveling farther than expected.

    Step 4: Decode and interpret the result

    Once decoded, inspect the output carefully. If it is readable text, you are done. If it looks scrambled, the issue may be the text encoding rather than the Base64.

    UTF-8 is the most common encoding, but not the only one. Tools like file on Linux or libraries such as chardet in Python can help identify likely encodings.

    echo 'SGVsbG8gd29ybGQ=' | base64 --decode | file -
    
    import chardet, base64
    data = base64.b64decode("SGVsbG8gd29ybGQ=")
    print(chardet.detect(data))
    

    Step 5: Troubleshooting common errors

    If you see invalid character errors, the input may contain whitespace, a data URI prefix, or URL-safe characters that were not normalized.

    If decoding succeeds but the output looks like random symbols, the data may not be text at all. It could be an image, a PDF, compressed bytes, or another encoded layer. In some cases, it is text in a different character set, such as UTF-16 or ISO-8859-1.

    Examples: Real-world Base64-to-text conversions

    Decoding a data URI

    Suppose you have this input:

    data:text/plain;base64,SGVsbG8sIHdvcmxkIQ==

    Remove the prefix and decode the rest. The result is:

    Hello, world!

    If the data URI says image/png instead of text/plain, the decoded output is binary image data, not readable text. That distinction matters.

    Extracting a message from a Base64 email part

    An email body or attachment section may include:

    VGhhbmsgeW91IGZvciB5b3VyIG9yZGVyLg==

    That decodes to:

    Thank you for your order.

    In real emails, line breaks are often inserted automatically. Remove them before decoding.

    Decoding a JWT payload

    JWTs are split into three parts separated by dots. The middle part is the payload and usually uses Base64URL, not standard Base64.

    A payload like:

    eyJzdWIiOiIxMjM0NTY3ODkwIiwibmFtZSI6IkpvaG4gRG9lIiwiaWF0IjoxNTE2MjM5MDIyfQ

    decodes to JSON text like:

    {"sub":"1234567890","name":"John Doe","iat":1516239022}

    This is useful for inspection, but decoding a JWT is not the same as validating it. Anyone can decode it. Trust requires signature verification.

    Recovering text from logs or config files

    You might find a config value like:

    YXBpX2tleT1kZW1vMTIz

    Decoded, this becomes:

    api_key=demo123

    That can be helpful in troubleshooting, but it also shows why Base64 should never be treated as a security feature. It only obscures content, it does not protect it.

    Security, privacy, and integrity considerations

    Never paste secrets into untrusted online tools

    This is the most important practical rule. A Base64 string may contain passwords, private tokens, invoices, identity data, or full file contents. If you paste it into an online converter, you may be sharing that information with a third party.

    Use browser tools, local scripts, or terminal commands whenever the data matters. For businesses and freelancers, that small habit reduces avoidable risk.

    Malicious payloads and why decoding may be risky

    Decoded content is not always harmless text. It could be JavaScript, a macro-enabled document, an executable, or compressed malware. Decoding alone does not execute content, but opening the resulting file might.

    If the decoded output is not clearly text, treat it like an unknown file. Save it carefully, inspect it in a controlled environment, and scan it before opening.

    Verifying integrity

    Base64 does not prove authenticity or integrity. It only changes representation.

    If you need to know whether decoded data is genuine, look for checksums, digital signatures, or protocol-level verification. With JWTs, that means validating the signature using the correct key and algorithm. Reading the payload is easy. Trusting it is a separate step.

    Handling encoded files safely

    When Base64 wraps a file, decode it to disk only if necessary. Then use antivirus or sandbox tools if the origin is uncertain.

    For teams handling customer uploads, logs, or attachments, a simple policy helps: decode locally, inspect file type, scan, then open.

    Advanced topics and troubleshooting

    When decoding yields gibberish

    If the result is unreadable, several things may be happening. The decoded bytes may use the wrong character set. The content may be compressed. Or the string may be encoded more than once.

    A classic clue for gzip-compressed data is the magic byte sequence 1f 8b after decoding. In that case, you must decompress after Base64 decoding.

    echo 'H4sIAAAAA...' | base64 --decode | gunzip
    

    Detecting and handling double-encoded data

    Sometimes Base64 is applied twice. After the first decode, you get another Base64-looking string instead of meaningful text.

    If the first decoded result still matches Base64 patterns and decodes cleanly again, you may be dealing with double-encoded data. This shows up in logs, migrations, and systems where multiple layers try to “safely” wrap the same value.

    Base64 vs other encodings

    Base64 is not the only text-friendly encoding. Hex is simpler and easier to debug by eye, but it doubles size. Base32 is useful in some interoperability contexts. Base58 avoids visually confusing characters and is popular in blockchain-related systems.

    For general binary-to-text transport, Base64 remains the default because it balances efficiency and compatibility well.

    Performance and size considerations

    Base64 increases storage and transfer size by roughly one-third. For occasional values, that is minor. For large attachments or high-volume APIs, it matters.

    Encoding and decoding are fast, but moving oversized payloads through JSON or email still adds cost. If performance is important, prefer direct binary transfer where the system supports it.

    Tools and resources: recommended utilities and references

    The best tools are usually the ones already on your machine. Terminal utilities such as base64, openssl, and PowerShell’s [Convert]::FromBase64String() are reliable and private. For application code, use the standard libraries in Python, Node.js, Java, and .NET rather than hand-rolled decoders.

    If you need an online converter for harmless sample data, choose well-known sites and avoid anything that asks for sign-in, permissions, or uploads unrelated metadata. Examples people commonly use include base64.guru and base64decode.org, but local decoding is still the safer default.

    For authoritative references, start with RFC 4648 for Base64 and Base64URL rules. For JWT behavior, consult RFC 7519. For email-related line wrapping and content transfer details, MIME standards remain the key reference point.

    FAQ: quick answers to common reader questions

    Is Base64 encryption?

    No. Base64 is encoding, not encryption. Anyone can decode it with basic tools.

    Why does decoding sometimes produce strange characters?

    Usually because the decoded bytes are not UTF-8 text, or because the content is binary, compressed, or encoded again. The Base64 decode may be correct even if the displayed text is not.

    Can I safely share Base64-encoded strings?

    Only if you would also be comfortable sharing the underlying content. Base64 does not meaningfully protect sensitive information.

    How do I detect if a string is Base64 programmatically?

    The most dependable method is to try decoding with validation enabled, then inspect whether the result is expected. Pattern matching helps, but it is only a heuristic.

    Conclusion and best-practices checklist

    Base64 to text conversion is easy once you know what to look for. Clean the input, identify the right variant, decode with a trusted local tool, and then interpret the output using the correct text encoding. If something looks wrong, the issue is often padding, URL-safe characters, MIME line breaks, or non-UTF-8 output.

    Use online converters only for non-sensitive samples. For everything else, decode locally and inspect carefully. If your next step is practical, start with the method that matches your environment: browser console, terminal, PowerShell, or a short script in your preferred language.

  • Minify JS Online: Fast JavaScript Minification for Small Sites

    Minify JS Online: Fast JavaScript Minification for Small Sites

    JavaScript files often grow quietly. A few utility functions here, a plugin there, one more analytics snippet, and suddenly your site feels heavier than it should. Pages take longer to render, users bounce sooner, and performance scores start slipping for reasons that seem frustratingly small. One of the simplest fixes is also one of the most overlooked: minify JS online.

    For small business owners, freelancers, developers, and anyone managing a website without a full DevOps pipeline, online JavaScript minification is a practical shortcut. You do not need a complicated build system to remove unnecessary characters, reduce file size, and make scripts faster to deliver. You just need to understand what minification does, when to use it, and how to do it safely.

    What is Minify js online?

    Minify JS online refers to using a browser-based tool to compress JavaScript code by removing anything the browser does not need to execute it. That usually includes whitespace, line breaks, comments, and sometimes even shorter variable names where safe. The result is a leaner version of the same script, designed to load faster while preserving functionality.

    Think of it like packing for a trip. Your original JavaScript file is a suitcase with everything laid out neatly, folded, and labeled for readability. That is great for developers. The browser, however, does not care about neat folding or labels. It only cares that the essentials are in the bag. Minification strips away the presentation and keeps the logic.

    A suitcase packing analogy: on the left an open suitcase with neatly folded clothes, labels, and notes (representing readable, development JavaScript); on the right the same suitcase compressed with only essentials visible, no labels (representing the minified production file).

    This matters because websites move across networks, not just within your own device. Even a modest reduction in file size can improve loading time, especially on slower mobile connections or for visitors far from your hosting server. If your site relies on JavaScript for menus, forms, sliders, checkout flows, or tracking, smaller files can directly improve responsiveness.

    How minification differs from compression

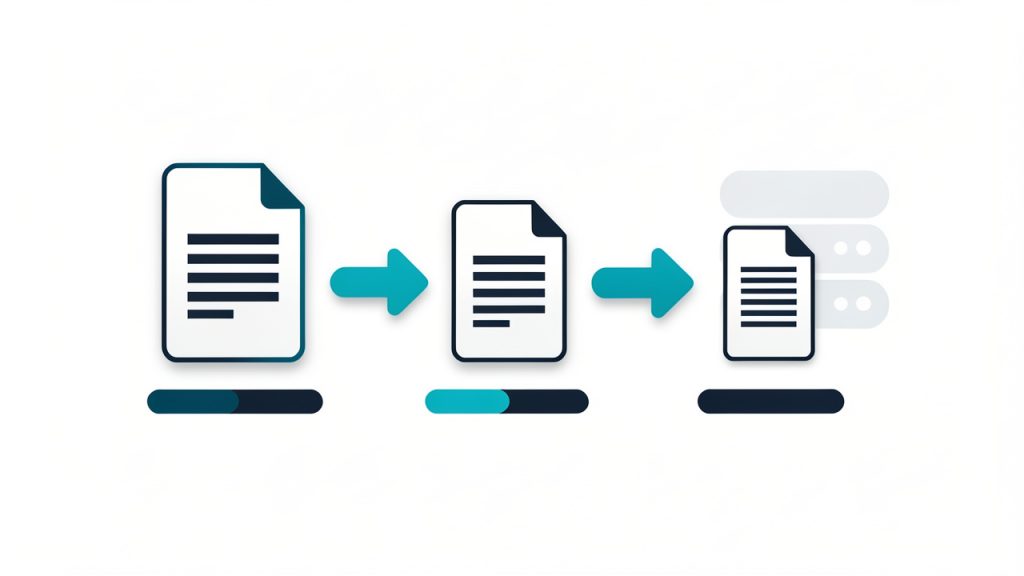
    It helps to separate minification from compression, because the terms are often mixed together. Minification changes the code itself by removing unnecessary characters and simplifying structure where possible. Compression, such as Gzip or Brotli, happens at the server level and reduces the file during transfer.

    A simple pipeline diagram showing two-step optimization: 1) 'Minification (removes whitespace/comments, shortens names)' applied to the code file, then 2) 'Compression (Gzip/Brotli)' applied at the server/network layer, with arrows and file-size bars indicating incremental size reduction at each step.

    These two methods are not competitors, they work best together. A minified file is already smaller before it reaches the server, and then compression can reduce it even further in transit. If you want better performance, using both is usually the right move.

    Why online tools appeal to non-technical users

    Not everyone wants to install Node.js, configure bundlers, or manage a command-line workflow just to optimize one JavaScript file. That is why online minifiers remain popular. They are fast, accessible, and useful for one-off tasks or lightweight projects.

    For freelancers updating client landing pages, marketers embedding scripts, or small teams maintaining a brochure site, an online tool can remove friction. Paste the code, click a button, copy the result, and publish the slimmer version. It is simple, and in many cases, that simplicity is exactly the point.

    Key Aspects of Minify js online

    Using an online JS minifier sounds straightforward, but there are important details that affect quality, reliability, and safety. The best results come from understanding what to expect from the tool and what trade-offs may come with convenience.

    Smaller file size and faster page loads

    The most obvious benefit of choosing to minify JS online is file size reduction. JavaScript written for humans tends to include indentation, comments, spacing, and descriptive variable names. All of that improves maintainability, but none of it is required for execution.

    When you minify the script, the browser downloads less data. That can shave milliseconds or more off the loading process, which matters more than many site owners realize. Performance is cumulative. A little improvement in one script, another in an image, and another in server caching can add up to a noticeably faster experience.

    This is especially valuable for mobile users. On high-speed desktop internet, a bulky script may feel acceptable. On a weaker connection, it becomes friction. Faster delivery can lead to better engagement, lower abandonment, and a smoother first impression.

    Cleaner delivery, not cleaner development

    A common misunderstanding is that minification is a way to improve the codebase itself. It is not. Minified JavaScript is harder to read, harder to debug, and unpleasant to maintain. Its purpose is delivery, not development.

    That means you should always keep the original, readable source file. Treat the minified output as a production asset, not as your working version. If something breaks later and the only version you have is minified, troubleshooting becomes far more difficult than it needs to be.

    Potential obfuscation, but not true security

    Some people assume minified code is protected code. That is only partly true, and not in a meaningful security sense. Minification can make JavaScript less pleasant to read at a glance, but it does not secure business logic, API keys, or sensitive operations.

    If confidential data or critical validation logic lives in client-side JavaScript, minification will not protect it. Browsers still receive the code, and determined users can still inspect it. Security must come from server-side design, authentication, authorization, and proper data handling, not from shrinking the script.

    Online convenience versus local control

    Online tools are convenient, but they come with trade-offs. When you paste code into a web-based tool, you are often sending that code through a third-party service. For public scripts or non-sensitive code, that may be acceptable. For proprietary client work, internal tools, or unreleased products, it may not be.

    This is where context matters. If you are minifying a simple front-end helper for a small website, an online tool is usually fine. If you are handling commercial code, scripts with tokens, or anything confidential, a local build process may be safer.

    The choice is not about which option is universally better. It is about matching the tool to the risk level and workflow.

    Minification and debugging

    One reason developers hesitate to minify too early is debugging. A readable source file makes it much easier to find syntax issues, inspect logic, and diagnose browser errors. Once code is minified, line numbers often collapse and stack traces become less intuitive.

    That is why the timing of minification matters. You should test the original version first, confirm it works, and only then create the minified build. If a problem appears after minification, compare the production file to the tested source and verify that no unsupported syntax or formatting issue crept in.

    Typical features of online JS minifiers

    Not all online tools do the exact same job. Some only remove whitespace and comments. Others perform more advanced optimizations, such as shortening variable names, collapsing expressions, or warning about syntax issues.

    If you are a casual user, basic functionality may be enough. If you are optimizing larger scripts or trying to squeeze out better performance, advanced options can make a measurable difference.

    How to Get Started with Minify js online

    The good news is that getting started is easy. The better news is that doing it well does not require much extra effort. A smart process helps you get the benefits of minification without introducing avoidable bugs.

    Start with a clean, tested JavaScript file

    Before you minify anything, make sure your original JavaScript works exactly as intended. This sounds obvious, but many users discover errors only after minification and assume the tool caused the issue. In reality, minification often exposes an existing problem, such as a missing semicolon in older code patterns, malformed syntax, or hidden formatting mistakes.

    Work from a readable source file that you have already tested in the browser. Keep that original version saved separately. If you are editing scripts for a client, preserve a backup before making any production changes.

    Use a simple workflow

    A reliable online minification workflow can be very short:

    1. Paste or upload your tested JavaScript into the online minifier.
    2. Run the minification and review the output for obvious issues.
    3. Replace or save the production version, then test it on your live or staging page.

    That is enough for many small projects. The key is not the complexity of the process, but the discipline of testing before and after.

    Check browser behavior after minification

    Once you publish the minified file, load the pages that depend on it and actually use the features involved. Click the menu. Submit the form. Open the modal. Trigger the slider. Watch for console errors and broken interactions.

    Minification should preserve behavior, but website environments are messy. Scripts can conflict, load in the wrong order, or depend on external libraries. If something changes after deployment, do not assume the minifier is inherently broken. Compare versions, check dependencies, and verify that file references are correct.

    Be careful with third-party or already minified files

    Many libraries already ship with a .min.js version. If you try to minify an already minified file again, you may not gain much, and you might make debugging harder. In some cases, aggressive reprocessing can even create avoidable issues depending on the tool and the script.

    If you are using common libraries, check whether an official minified build already exists. That version is often the safest production choice because it was generated and tested by the library maintainers.

    Know when online minification is enough

    For a small brochure site, a single landing page, a lightweight portfolio, or a few custom scripts, using an online tool to minify JS online is often all you need. It is quick, free, and low-friction.

    But once your project grows, your workflow may need to evolve. If you are managing multiple files, transpiling modern JavaScript, bundling dependencies, or deploying frequently, manual online minification becomes less practical. At that point, build tools such as bundlers, task runners, or CI-based workflows offer better consistency.

    This is not a reason to avoid online minifiers. It is simply a reminder that the right tool depends on the stage of the project.

    Practical signs you should switch to a local workflow

    An online tool is ideal when speed and simplicity matter most. A local or automated workflow starts making more sense when you notice repeatable friction. That usually happens when you are editing several JavaScript files each week, versioning production assets, or collaborating with other developers who need a predictable build process.

    Here is a quick comparison to help frame the decision:

    Situation Online JS Minifier Local Build Tool
    One or two files Excellent fit Possible, but more setup
    Non-technical user Easy to use Can feel complex
    Frequent deployments Repetitive Efficient
    Sensitive or proprietary code Less ideal Better control
    Team collaboration Limited Stronger workflow
    Advanced optimization Moderate Best option

    For many readers, the sweet spot is simple: use online minification for lightweight tasks, and graduate to local automation when your process starts repeating itself.

    Common mistakes to avoid

    One of the biggest mistakes is overwriting the original source file with the minified one. It saves a moment now and creates headaches later. Always keep your readable version. Future edits should happen there, not in the compressed file.

    Another frequent issue is minifying code that has not been tested in isolation. If you are copying snippets from plugins, forums, or mixed project files, syntax problems can slip through unnoticed. Minification is not a substitute for validation. It is the last polish before delivery.

    There is also a privacy mistake that many users do not think about. If your JavaScript contains tokens, endpoint details, client-specific logic, or unpublished features, pasting it into an online tool may not be appropriate. Convenience should not override basic caution.

    How minification supports SEO and user experience

    While JavaScript minification is not a magic SEO button, it contributes to the broader performance signals search engines care about. Faster pages tend to create better user experiences. Better user experiences can support stronger engagement. And technical efficiency helps reduce the drag that slows modern websites down.

    This matters even more on mobile-first websites. Search visibility is tied increasingly to real-world usability, not just keywords and metadata. If your pages feel sluggish because they rely on bloated scripts, that can affect both visitors and performance benchmarks.

    For small business websites, the value is practical. A faster site feels more professional. It reduces friction before a user calls, books, buys, or fills out a form. In many cases, the person visiting your site will never notice that your JavaScript was minified. They will only notice that the site feels quick and smooth. That is the outcome that matters.

    Conclusion

    Choosing to minify JS online is one of the simplest ways to make a website leaner without investing in a full development pipeline. It reduces unnecessary file weight, supports faster loading, and gives small teams and solo site owners a practical path to better front-end performance.

    Start with a tested source file, use an online minifier carefully, keep the original version untouched, and verify the result in a real browser. If your workflow stays small, that may be all you need. If your project grows, you can always move to a local build setup later. The next step is simple: take one JavaScript file from your site, minify it, test it, and measure the difference.

  • How to Convert Base64 to Image Files (Quick Guide)

    How to Convert Base64 to Image Files (Quick Guide)

    A Base64 image string looks harmless until you need to turn it into a real file, display it in a browser, or debug why it refuses to render. That is where most people get stuck. You might have a string from an API, an HTML email, a database export, or a frontend app, and all you really want is a usable image.

    The good news is that Base64 to image conversion is simple once you know what format you are holding, how to clean it, and which tool fits your workflow. Whether you are a developer saving files on a server, a freelancer testing API responses, or a small business owner using an online tool for a one-off job, the same rules apply.

    This guide explains what Base64 does, why images are encoded this way, how to convert Base64 to image files in multiple languages, and how to avoid the common mistakes that waste time. It also covers the parts many tutorials skip, including image type detection, security checks, performance tradeoffs, and troubleshooting.

    What is Base64 and why it’s used for images

    What Base64 encoding does

    Base64 is a way to represent binary data, such as an image, using plain text characters. Computers store images as raw bytes, but many systems are designed to safely move text. Base64 acts like a translator, converting binary content into a text-friendly form made from letters, numbers, +, /, and sometimes = for padding.

    That text is not an image by itself. It is an encoded version of the image data. To turn Base64 to image, you decode the string back into the original bytes and then save or display those bytes as a PNG, JPEG, GIF, WebP, or another image format.

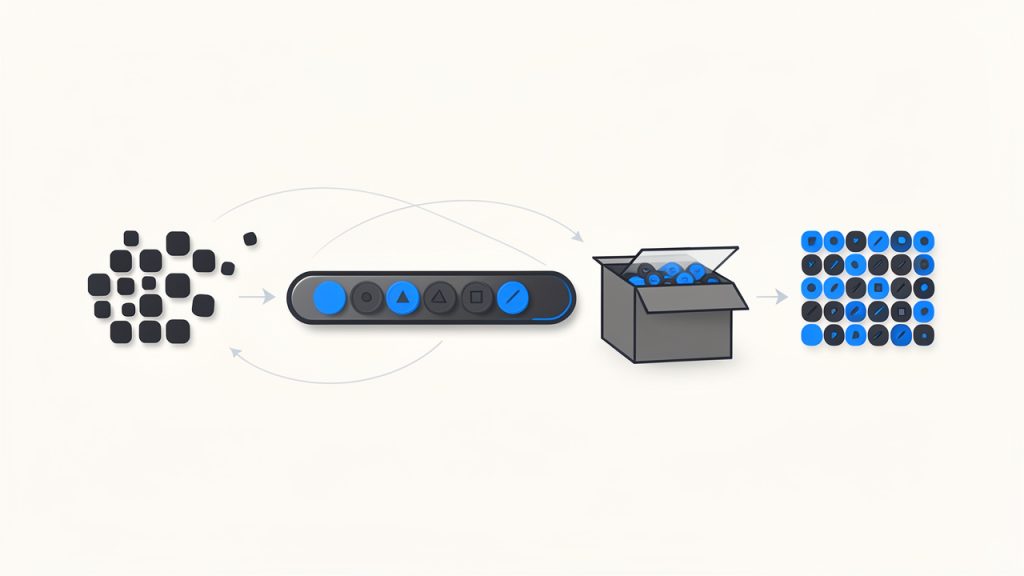
    A useful mental model is this: Base64 is like packing a product into a shipping box that fits the transport system better. The box adds bulk, but it helps the item travel through channels that prefer text.

    Visual metaphor showing raw image bytes being 'packed' into a Base64 text string and then unpacked back into bytes — include a simple conveyor: bytes (binary) -> Base64 characters (A–Z, a–z, 0–9, +, /, =) boxed for transport -> decoded bytes (image file).

    Why images are embedded as Base64

    Images are often embedded as Base64 because it makes transfer and embedding easier in certain contexts. One of the most common examples is a data URI, which looks like data:image/png;base64,.... This lets a browser render an image directly from a string, without requesting a separate file URL.

    That is useful for inline images in HTML or CSS, especially for very small assets like icons, placeholders, or tiny logos. Email templates also use embedded images in some cases, because external image loading may be blocked or delayed by the email client. Some APIs return Base64 image data because it can be bundled into a JSON response without needing separate file storage or signed URLs.

    There is convenience here, but it comes with tradeoffs. Base64 makes it easy to move image data around, but it is not always the most efficient format for storage or delivery.

    Diagram of a data URI embedded in HTML: show a browser window rendering an <img> whose src is a long data:image/png;base64,... string — include a highlighted snippet of the data URI and an arrow to the rendered inline image (no separate network request).

    Pros and cons of using Base64 for images

    The biggest downside is size. Base64 adds roughly 33% overhead compared with the original binary file. A 300 KB image can become around 400 KB or more once encoded. That affects bandwidth, API payload size, page weight, and memory use.

    Caching is another important factor. If an image is embedded directly into HTML or CSS as a data URI, the browser cannot cache it separately from that file. If the page changes, the image may be downloaded again as part of the document. By contrast, an external image file can be cached independently and reused across multiple pages.

    The upside is fewer HTTP requests for tiny assets, simpler packaging in APIs, and easier portability in systems that only handle text. For small icons or one-off embedded images, Base64 can be practical. For large photos, product galleries, or repeated assets, external files are usually better.

    How to convert Base64 string to an image, quick examples

    Online converters and when to use them

    If you just need a quick result and you are not handling sensitive data, an online Base64 to image converter is the fastest option. You paste the string, the tool decodes it, and you preview or download the image.

    This works well for debugging API responses, checking if a string is valid, or converting a one-time asset. It is less suitable for private customer files, internal documents, or anything security-sensitive. In those cases, local conversion is safer.

    A reliable tool should let you preview the decoded image, identify the file type, and alert you if the Base64 is malformed.

    Convert Base64 to image using JavaScript in the browser

    In the browser, the easiest case is when you already have a full data URI. You can assign it directly to an image element.

    <img id="preview" alt="Preview" />
    <script>
      const base64 = "data:image/png;base64,iVBORw0KGgoAAAANSUhEUgAA...";
      document.getElementById("preview").src = base64;
    </script>
    

    If you want to turn a raw Base64 string into a downloadable file, first strip any prefix, decode it, and build a Blob.

    const input = "data:image/png;base64,iVBORw0KGgoAAAANSUhEUgAA...";
    const match = input.match(/^data:(image/[a-zA-Z0-9.+-]+);base64,(.+)$/);
    const mimeType = match ? match[1] : "image/png";
    const base64Data = match ? match[2] : input;
    const byteCharacters = atob(base64Data);
    const byteNumbers = new Array(byteCharacters.length);
    for (let i = 0; i < byteCharacters.length; i++) {
      byteNumbers[i] = byteCharacters.charCodeAt(i);
    }
    const byteArray = new Uint8Array(byteNumbers);
    const blob = new Blob([byteArray], { type: mimeType });
    const url = URL.createObjectURL(blob);
    const a = document.createElement("a");
    a.href = url;
    a.download = "image.png";
    a.click();
    URL.revokeObjectURL(url);
    

    This approach is useful for frontend tools and browser-based image previews. For very large payloads, though, it can use a lot of memory because the whole string is decoded in one go.

    Convert Base64 to image using Node.js

    Node.js makes this straightforward with Buffer. If the string includes a data URI prefix, remove it first.

    const fs = require("fs");
    const input = "data:image/png;base64,iVBORw0KGgoAAAANSUhEUgAA...";
    const base64Data = input.replace(/^data:image/[a-zA-Z0-9.+-]+;base64,/, "");
    const buffer = Buffer.from(base64Data, "base64");
    fs.writeFileSync("output.png", buffer);
    console.log("Image saved as output.png");
    

    If you do not know the file type in advance, detect it before choosing the extension. That is especially important in production systems that receive images from users or third-party APIs.

    Convert Base64 to image using Python

    Python’s built-in base64 module handles decoding cleanly.

    import base64
    import re
    input_data = "data:image/png;base64,iVBORw0KGgoAAAANSUhEUgAA..."
    base64_data = re.sub(r"^data:image/[a-zA-Z0-9.+-]+;base64,", "", input_data)
    image_bytes = base64.b64decode(base64_data)
    with open("output.png", "wb") as f:
        f.write(image_bytes)
    print("Image saved as output.png")
    

    For stricter validation, use base64.b64decode(base64_data, validate=True) so invalid characters trigger an error instead of being silently ignored.

    Convert Base64 to image using PHP

    PHP includes base64_decode(), which is enough for most cases.

    <?php
    $input = "data:image/png;base64,iVBORw0KGgoAAAANSUhEUgAA...";
    $base64 = preg_replace('/^data:image/[a-zA-Z0-9.+-]+;base64,/', '', $input);
    $data = base64_decode($base64, true);
    if ($data === false) {
        die("Invalid Base64 data");
    }
    file_put_contents("output.png", $data);
    echo "Image saved as output.png";
    ?>
    

    The second argument to base64_decode enables strict mode, which helps catch malformed input early.

    Convert Base64 to image using command-line tools

    On Linux or macOS, command-line decoding is fast and practical for debugging.

    echo 'iVBORw0KGgoAAAANSUhEUgAA...' | base64 -d > output.png
    

    If your system uses a different flag:

    echo 'iVBORw0KGgoAAAANSUhEUgAA...' | base64 --decode > output.png
    

    If the data is hex-encoded after another processing step, xxd can help, but for standard Base64 to image conversion, base64 -d is the usual tool.

    Handling common Base64 variants and pitfalls

    Recognizing and stripping the data URI prefix

    A lot of conversion failures happen because the input is not just Base64. It includes a prefix like data:image/jpeg;base64,. That header is useful because it tells you the MIME type, but most decoders need only the content after the comma.

    The safe pattern is to detect whether the string starts with data: and split on the first comma. Everything after that is the actual Base64 payload. If you forget this step, your decoder may error out or produce a corrupt file.

    URL-safe Base64 vs standard Base64

    Not all Base64 strings use the same alphabet. URL-safe Base64 replaces + with - and / with _. This variant appears in web tokens, query strings, and some APIs because it avoids characters that can cause issues in URLs.

    If you try to decode URL-safe Base64 with a standard decoder, it may fail unless you first normalize those characters back to the standard form. Many libraries support URL-safe decoding explicitly, but it is worth checking documentation instead of assuming all Base64 is identical.

    Padding characters and when they matter

    The = character at the end of a Base64 string is padding. It helps ensure the encoded length fits Base64’s block structure. Some systems omit padding, especially in URL-safe variants.

    Missing padding does not always break decoding, but some decoders require it. A simple fix is to add = characters until the string length is divisible by 4. If the payload still fails after that, the issue is probably not padding alone.

    Invalid characters and error handling

    Whitespace, line breaks, transport errors, or accidental copy-paste changes can break a Base64 string. The result might be an exception, a corrupt image, or an output file that exists but will not open.

    Good practice is to validate before decoding and wrap the decode step in error handling. In Python, use strict validation. In PHP, use strict mode. In JavaScript and Node.js, check the input format and fail gracefully if the decoded bytes do not match an expected image signature.

    Large payloads and memory considerations

    A very large Base64 string can stress memory because the text version is already bigger than the binary file, and decoding often creates additional copies in memory. That is one reason browser-based conversion can freeze tabs when the payload is large.

    On servers, avoid full-buffer decoding for very large files when possible. Stream the input, decode in chunks, and write directly to disk or object storage. This matters in image-heavy apps, upload services, and automation pipelines.

    Detecting image type from Base64

    Using the data URI MIME type if present

    If your Base64 string begins with something like data:image/webp;base64, you already have the simplest clue about the image type. In many workflows, that is enough to choose the file extension and set the correct Content-Type.

    Still, do not trust it blindly. A malicious or buggy source can label a payload as PNG when it is actually something else. For anything security-sensitive, compare the declared MIME type with the actual decoded bytes.

    Magic bytes approach

    Most image formats have recognizable magic bytes at the beginning of the file. After decoding a small portion of the Base64 string, you can inspect the first few bytes and identify the type.

    Here are common signatures:

    FormatMagic bytes (hex)Notes
    PNG89 50 4E 47Starts with .PNG signature
    JPEGFF D8 FFCommon for .jpg and .jpeg
    GIF47 49 46ASCII GIF
    WebP52 49 46 46 + 57 45 42 50RIFF container with WEBP marker

    This technique is more reliable than trusting a filename or a MIME prefix alone. It is a smart check when saving user uploads or processing third-party API content.

    Libraries and tools to detect format automatically

    If you do this often, use a library. In Node.js, file-type can inspect buffers and detect the format. In Python, python-magic and Pillow are common choices. In PHP, finfo, GD, or Imagick can help verify the actual file type and whether the image can be opened safely.

    Automation is especially useful when the Base64 string has no prefix and the extension is unknown.

    Security considerations

    Malicious payloads hidden in Base64

    Base64 does not make content safe. It only changes the representation. A harmful file can still be encoded as Base64 and passed through APIs, forms, or databases.

    That includes malformed files, oversized payloads, polyglot files that pretend to be images, and hidden content techniques such as steganography. If your system accepts Base64 image uploads, treat them like any untrusted file upload.

    Validating image content before displaying or saving

    The best defense is to decode the data, verify the actual image format, and then open it with a trusted image library. In many cases, the safest pattern is to re-encode the image into a known-good format like PNG or JPEG using a library such as Pillow, GD, or Imagick.

    That strips unexpected metadata, normalizes structure, and reduces the risk of passing through malformed or disguised content. It also lets you enforce size limits, dimensions, and file type restrictions.

    Rate limiting and resource exhaustion attacks

    Because Base64 strings are text, they are easy to send in huge quantities. Attackers can abuse this to consume CPU, memory, disk space, or bandwidth. Even legitimate users can unintentionally trigger issues by uploading extremely large inline images.

    Set strict maximum payload sizes, limit decode time where possible, and rate-limit endpoints that accept Base64 image data. Reject requests before decode if the string length already exceeds your policy threshold.

    Serving decoded images safely

    If you save and serve decoded images, send the correct Content-Type header and avoid content sniffing issues. If you render Base64 data directly into a page, review your Content-Security-Policy rules to ensure data: URLs are allowed only where appropriate.

    If image data is user-generated, sanitize any related metadata and do not mix untrusted strings directly into HTML without context-aware escaping. The risk is not just the image bytes, but also how surrounding content is handled.

    Performance best practices and alternatives

    When to use Base64 vs external image files

    A practical rule of thumb is simple. Use Base64 for tiny assets where reducing requests matters more than efficient caching. Use external files for anything medium or large, especially photos, product images, user uploads, and repeated UI assets.

    For example, a 1 KB icon embedded inline may be fine. A 200 KB product image embedded in JSON is usually a bad trade.

    Impact on page speed and caching

    Base64 can reduce the number of requests, but it increases document size. That matters on slower networks and mobile devices. If images are embedded in HTML, CSS, or JavaScript bundles, the browser must download that entire file before it can reuse the image.

    An external image file can be cached separately, lazy-loaded, served from a CDN, and reused across pages. That often leads to better real-world performance than inlining everything.

    Techniques to reduce size

    If you must move images as Base64, optimize the underlying image first. Compress it, resize it, and choose a modern format. Converting large PNGs or JPEGs to WebP or AVIF can reduce the file dramatically before any Base64 encoding happens.

    Server-side compression can help surrounding payloads, but remember that Base64 itself is still overhead. The best savings usually come from image optimization, not from trying to make the encoded text smaller.

    CDNs and data URI tradeoffs

    A CDN shines when images are separate files. It can cache near the user, apply optimized delivery, and reduce load on your origin server. Data URIs bypass those benefits because the image is tied to the parent file.

    If your workflow needs compact inline graphics, consider inline SVG for simple vector icons or traditional sprite strategies for tightly controlled assets. These options can be more efficient than Base64 for certain UI elements.

    Advanced scenarios and tools

    Embedding images in emails

    Email is one of the classic places where Base64 images appear, but client support is inconsistent. Some clients block images, some strip certain constructs, and large email bodies can hurt deliverability.

    For tiny logos or icons, inline embedding can work. For larger images, linked hosted files are often more manageable. Keep total email size low and test across major clients before relying on embedded images heavily.

    Storing Base64 images in databases

    Storing Base64 directly in a database is convenient, but usually inefficient. You pay the 33% size overhead, increase row size, and make backups heavier. Queries can also become slower and more memory-intensive.

    A better pattern is to store the image as binary in object storage or a file system, then save only metadata and a URL or key in the database. If you must accept Base64 at the API layer, decode it immediately and store the binary result instead of the original encoded string.

    Streaming decode for very large images

    For very large inputs, streaming is the right architecture. In Node.js, you can process incoming data with streams rather than buffering the entire payload. In Python, chunked processing or upload handlers can reduce memory pressure.

    This matters less for occasional small files and much more for batch systems, media pipelines, or services accepting user-generated content at scale.

    Automated conversion pipelines and tooling

    If your workflow repeatedly handles Base64 images, build a pipeline. Decode, detect type, validate dimensions, re-encode into a standard format, optimize, and store.

    Useful tools include Node packages like file-type and native Buffer, Python libraries such as Pillow and python-magic, and PHP image libraries like GD or Imagick. Command-line tools can also fit into scripts and CI pipelines for quick checks.

    Step-by-step troubleshooting checklist

    If your Base64 to image conversion fails, check these in order:

    1. Confirm the prefix: If the string starts with data:image/...;base64,, strip everything before the comma before decoding.
    2. Verify the variant: If it contains - and _, it may be URL-safe Base64 and needs normalization.
    3. Fix padding: If the length is not divisible by 4, add = until it is.
    4. Inspect the bytes: After decoding, check the first bytes for PNG, JPEG, GIF, or WebP signatures.
    5. Validate the MIME type: Make sure declared type and actual content match.
    6. Check memory limits: Large strings can crash browser tabs or exhaust server memory. Use streaming for big files.
    7. Review CSP rules: If a browser will not display an inline data URI, your Content-Security-Policy may block data: sources.

    A simple command-line check can help quickly:

    echo 'YOUR_BASE64_STRING' | base64 -d > test_image.bin
    file test_image.bin
    

    If file reports a valid image format, your Base64 is probably fine and the issue is elsewhere, such as MIME type or frontend rendering.

    Examples and common use-cases

    Inline avatars in single-page apps

    A single-page app might embed tiny default avatars as Base64 to avoid extra requests during initial render. That can be acceptable for a few very small placeholders.

    But once users upload real profile photos, external file storage becomes better. The photos can be resized, cached independently, and delivered through a CDN instead of bloating API responses.

    Small icon sprites embedded in emails

    An email template with a few tiny monochrome icons may use embedded image data to reduce dependence on remote loading. This can make branding more consistent in some clients.

    Still, the total message size matters. What works for a 500-byte icon becomes a problem when a marketing email embeds multiple large images directly in the HTML.

    APIs that return Base64 images vs returning URLs

    Some internal APIs return Base64 because it simplifies a single JSON response. That is fine for signatures, QR codes, or generated thumbnails. For larger assets, returning a URL is usually better because it keeps API responses smaller and lets the client fetch only what it needs.

    This is one of the most common design decisions teams revisit as an app grows. What feels simple early on can become expensive later.

    Converting legacy Base64 storage to modern workflows

    A legacy system might store customer images as Base64 text in a database. Migrating that setup usually means decoding each record, detecting the real type, re-encoding where needed, storing the file in object storage, and replacing the text field with a reference.

    Teams often see immediate benefits: smaller databases, faster backups, easier CDN delivery, and simpler frontend rendering.

    Resources, libraries and online tools

    Recommended libraries by language

    The following tools are widely used and practical:

    LanguageLibraries / ToolsBest use
    Node.jsBuffer, file-typeDecode Base64, detect image type
    Pythonbase64, Pillow, python-magicDecode, validate, re-encode
    PHPbase64_decode, GD, Imagick, finfoDecode and verify image content
    CLIbase64, file, xxdQuick validation and debugging

    Online Base64 to image converters and validators

    For one-off jobs, online tools can save time. The best ones offer preview, MIME detection, and validation. Use them for non-sensitive content only, or self-host an internal version if privacy matters.

    If you work with client data, financial documents, or user uploads, local or server-side conversion is the safer choice.

    Further reading and official docs

    Official language documentation is the best source for edge cases and strict decoding behavior. For production systems, also review your image library docs, storage platform guidance, and security recommendations for file uploads and content validation.

    Conclusion and quick reference

    Base64 to image conversion is easy once you separate the actual payload from any data URI prefix, decode it with the right tool, and verify the resulting bytes. The biggest mistakes usually come from trusting the MIME type blindly, ignoring URL-safe variants, or using Base64 where normal image files would perform better.

    Your next step depends on your use case. For a quick one-off, use an online converter. For app development, decode locally in JavaScript, Node.js, Python, or PHP. For production systems, add validation, file type detection, size limits, and a storage strategy that avoids unnecessary Base64 bloat.

    Cheat sheet: common commands and snippets

    TaskSnippet
    Browser preview<img src="data:image/png;base64,..." />
    Node.js save filefs.writeFileSync("output.png", Buffer.from(base64Data, "base64"))
    Python save fileopen("output.png", "wb").write(base64.b64decode(base64_data))
    PHP save filefile_put_contents("output.png", base64_decode($base64, true))
    Linux decode`echo ‘BASE64’
    Strip data URI prefixRemove data:image/...;base64, before decoding
    Fix missing paddingAdd = until length is divisible by 4
    Detect PNG bytes89 50 4E 47
    Detect JPEG bytesFF D8 FF
    Detect GIF bytes47 49 46

    If you are building a workflow around Base64 images, the smartest move is simple: decode early, validate carefully, optimize the real image, and store files in a format built for delivery.

  • Mobile Detection in JavaScript — Capability-First

    Mobile Detection in JavaScript — Capability-First

    Mobile users now make up a huge share of web traffic, yet many sites still handle mobile detection on JavaScript poorly. The result is familiar, slow-loading pages, broken touch interactions, unnecessary popups, or features that behave differently on phones and tablets than they do on desktops. For developers, freelancers, and small business owners trying to build practical, fast web experiences, this is not a minor detail. It directly affects usability, conversion, and customer trust.

    The tricky part is that mobile detection on JavaScript is not a single technique. It can mean checking screen size, reading the user agent, detecting touch capability, or observing feature support in the browser. Each method solves a different problem, and each has limitations. The best approach is usually not to ask, “Is this a mobile device?” but rather, “What capabilities does this device and browser actually have?”

    What is Mobile detection on javascript?

    At its core, mobile detection on JavaScript is the process of identifying whether a visitor is likely using a mobile device, and sometimes what kind of mobile environment they are using. This information can be used to adapt navigation, optimize interactions, load lighter assets, adjust layouts, or tweak behaviors for touch-first use cases.

    Many people assume this is as simple as checking if the screen is small. In practice, it is more nuanced. A small browser window on a desktop is not the same as a phone. A large tablet can have a screen wider than some laptops. A foldable device may change shape while the user is interacting with your app. JavaScript can help detect these situations, but only when you understand what signal you are actually measuring.

    The older style of mobile detection relied heavily on the user agent string, which is a text identifier sent by the browser. For years, developers parsed this string to guess whether the device was an iPhone, Android phone, iPad, or desktop browser. That method still exists, but it is less reliable than it used to be. Browsers increasingly reduce or standardize user agent data for privacy and compatibility reasons. See more about the user agent string on MDN: user agent string.

    Modern front-end development leans more toward responsive design and feature detection. Instead of making broad assumptions about device category, developers use CSS media queries and JavaScript checks to respond to viewport size, touch support, orientation, pointer type, network conditions, or browser features. This produces more resilient applications and reduces edge-case failures.

    Why developers still use mobile detection

    Even though responsive design handles much of the layout work, there are still practical reasons to detect mobile contexts with JavaScript. A business website might want to simplify a complex pricing table on smaller viewports. A booking app may switch from hover-driven interactions to tap-based controls. A dashboard could delay nonessential scripts for users on constrained mobile connections.

    There is also a performance angle. If you know a user is likely on a mobile environment, you may choose to lazy-load high-resolution media, compress interactions, or avoid expensive animations. That does not mean serving a lesser experience. It means serving a more appropriate one.

    Device detection versus capability detection

    This distinction matters. Device detection tries to answer what the device is. Capability detection tries to answer what the browser can do. If your goal is to improve usability, capability detection is usually safer.

    For example, if you want to know whether to show hover-based tooltips, checking for a “mobile” user agent is a weak solution. A better approach is to ask whether the device has a fine pointer or supports hover. That is a capability question, and JavaScript can work with those signals more effectively than a broad mobile label.

    Side-by-side comparison showing device detection vs capability detection

    Key Aspects of Mobile detection on javascript

    Infographic showing main detection methods as tiles: User agent, Viewport, Touch, Media queries, Pointer & hover

    To make smart decisions, you need to understand the main detection methods and what they are good at. No single method is perfect, so the strength comes from using the right tool for the right job.

    User agent detection

    User agent detection is still widely used because it is simple and familiar. In JavaScript, developers often inspect navigator.userAgent and search for markers like Android, iPhone, or iPad.

    function isMobileByUserAgent() {
      return /Android|iPhone|iPad|iPod|Opera Mini|IEMobile|WPDesktop/i.test(
        navigator.userAgent
      );
    }
    
    console.log(isMobileByUserAgent());
    

    This approach can work for quick heuristics, especially in legacy codebases or analytics scripts. It is also helpful when you need rough categorization for known device families.

    The downside is reliability. User agent strings can be spoofed, changed, or normalized across browsers. They are not future-proof, and they often break when new devices appear. If your business logic depends heavily on them, maintenance becomes painful.

    Viewport and screen size detection

    A more common pattern is to detect the viewport width and adapt behavior accordingly. This aligns closely with responsive web design and often matches what users actually experience on screen.

    function isSmallViewport() {
      return window.innerWidth <= 768;
    }
    
    console.log(isSmallViewport());
    

    This is useful when your concern is layout or available screen real estate. If a side menu should collapse below a certain width, viewport detection is a perfectly reasonable solution.

    Still, it is important to be precise about what this means. It does not tell you whether the user is on a phone. It only tells you the current viewport is small. A resized desktop browser may trigger the same result. For many interface decisions, that is fine. For device classification, it is not enough.

    Touch capability detection

    Some developers equate touch support with mobile usage, but that shortcut can be misleading. Many laptops support touch, and some mobile browsers may behave differently than expected. Even so, touch capability is still valuable when your interface needs different gestures or controls.

    function supportsTouch() {
      return (
        'ontouchstart' in window ||
        navigator.maxTouchPoints > 0 ||
        navigator.msMaxTouchPoints > 0
      );
    }
    
    console.log(supportsTouch());
    

    This works best when you are answering a specific interaction question. If you need bigger tap targets, swipe gestures, or drag behavior tuned for touch, this check can help. If you are trying to decide whether the visitor is “mobile,” it is too broad on its own.

    Media queries in JavaScript

    JavaScript can also read the same kinds of conditions used in CSS media queries. This is often one of the cleanest ways to align styling and scripting logic.

    const mobileQuery = window.matchMedia('(max-width: 768px)');
    
    function handleViewportChange(e) {
      if (e.matches) {
        console.log('Likely mobile-sized viewport');
      } else {
        console.log('Larger viewport');
      }
    }
    
    handleViewportChange(mobileQuery);
    mobileQuery.addEventListener('change', handleViewportChange);
    

    This approach is especially useful when your UI changes dynamically. A user may rotate a phone, resize a browser, or move between split-screen modes. Media-query-based detection lets your scripts respond in real time instead of assuming the device state never changes.

    Pointer and hover detection

    A more modern and often overlooked strategy is checking input behavior. This matters because many mobile-specific UX issues are actually input issues.

    const hasCoarsePointer = window.matchMedia('(pointer: coarse)').matches;
    const supportsHover = window.matchMedia('(hover: hover)').matches;
    
    console.log({ hasCoarsePointer, supportsHover });
    

    A coarse pointer usually indicates finger-based interaction, while hover support tends to correlate with mouse or trackpad use. This is often more useful than broad mobile detection when deciding how menus, tooltips, and interactive controls should behave.

    Comparing common approaches

    The most effective mobile detection strategy depends on the question you are asking. The table below shows where each method fits best.

    Method Best For Strengths Limitations
    User agent detection, Rough device categorization Rough device categorization Simple, familiar, quick to implement Fragile, spoofable, less future-proof
    Viewport width, Layout and responsive behavior Layout and responsive behavior Matches screen space, easy to maintain Does not identify actual device type
    Touch detection, Touch-specific interactions Touch-specific interactions Good for gesture and tap-related logic Touch does not always mean mobile
    Media queries via JavaScript, Dynamic responsive behavior Dynamic responsive behavior Syncs with CSS logic, reacts to changes Still focused on conditions, not device identity
    Pointer and hover detection, Input-specific UX adjustments Input-specific UX adjustments Excellent for interaction design Not a complete mobile classification system

    Why “mobile” is often the wrong target

    One of the biggest mistakes in JavaScript mobile detection is treating all phones and tablets as a single category. A modern flagship phone on a fast connection can outperform an old desktop machine in some tasks. A tablet with a keyboard may behave more like a laptop than a phone. A foldable device can switch from narrow to wide layouts instantly.

    That is why a context-first approach works better. If you need to adapt layout, use viewport logic. If you need to adjust interactions, use pointer and hover detection. If you need to reduce heavy effects on constrained devices, combine feature and performance signals. This gives you fewer false assumptions and a cleaner architecture.

    How to Get Started with Mobile detection on javascript

    The easiest way to begin is to stop chasing a perfect definition of mobile and instead define the exact behavior you want to change. That framing simplifies the implementation. You are no longer trying to identify every possible device. You are solving a specific user experience problem.

    For example, if your navigation breaks on touch-first devices, focus on pointer and touch detection. If your content feels cramped on smaller screens, focus on viewport-based logic. If a third-party script causes slowdowns on smaller devices, focus on screen width, network-aware loading, and progressive enhancement.

    Start with responsive design first

    Before writing JavaScript detection logic, make sure your layout is already responsive with CSS. In many cases, CSS media queries solve the problem more elegantly than JavaScript. Mobile detection on JavaScript should usually support behavior, not replace responsive design.

    When the visual layout and spacing are already responsive, your JavaScript becomes lighter and more intentional. You only add device-aware logic where interaction, performance, or conditional loading truly requires it.

    Use feature detection for behavior changes

    If the goal is to change how an interface behaves, feature detection is usually the right starting point. This means checking whether the browser supports a capability rather than trying to infer it from the device label. See more on feature detection: feature detection.

    Here is a practical example that adapts a menu interaction based on hover support:

    const canHover = window.matchMedia('(hover: hover)').matches;
    
    const menuButton = document.querySelector('.menu-button');
    const menu = document.querySelector('.menu');
    
    if (canHover) {
      menuButton.addEventListener('mouseenter', () => {
        menu.classList.add('open');
      });
    
      menuButton.addEventListener('mouseleave', () => {
        menu.classList.remove('open');
      });
    } else {
      menuButton.addEventListener('click', () => {
        menu.classList.toggle('open');
      });
    }
    

    This is a strong pattern because it adapts to how the user interacts, not what device name they happen to use. A touch laptop and a phone may both avoid hover-dependent logic, while a desktop browser keeps the richer mouse-friendly behavior.

    Combine signals when necessary

    Sometimes one signal is not enough. If you need to make a broader guess about mobile usage, combining checks can improve accuracy without pretending you have certainty.

    function isLikelyMobile() {
      const smallScreen = window.matchMedia('(max-width: 768px)').matches;
      const coarsePointer = window.matchMedia('(pointer: coarse)').matches;
      const mobileUA = /Android|iPhone|iPad|iPod|Opera Mini|IEMobile|WPDesktop/i.test(
        navigator.userAgent
      );
    
      return smallScreen && (coarsePointer || mobileUA);
    }
    
    console.log(isLikelyMobile());
    

    This still should not be used as a hard security or business-critical rule. It is a heuristic. For UI tuning, though, it can be practical when you need a fallback category for analytics or lightweight experience adjustments.

    Watch for resize and orientation changes

    One common mistake is checking once on page load and never updating again. Mobile conditions can change while the page is open. Orientation changes, split-screen apps, foldable devices, and browser resizing all affect the environment.

    function updateDeviceState() {
      const mobileSized = window.matchMedia('(max-width: 768px)').matches;
      document.body.classList.toggle('mobile-sized', mobileSized);
    }
    
    window.addEventListener('resize', updateDeviceState);
    window.addEventListener('orientationchange', updateDeviceState);
    updateDeviceState();
    

    This kind of event-based update keeps your interface aligned with the current context. It is especially important for dashboards, web apps, booking systems, and tools that remain open for long sessions.

    Avoid common implementation mistakes

    The first mistake is using user agent detection as the only source of truth. It feels convenient, but it creates hidden bugs over time. The second is using mobile detection to gate essential content. Users should not lose core functionality because your script guessed wrong.

    Another common issue is overengineering. Not every site needs a complex device detection layer. If your goal is simply to stack cards on smaller screens or enlarge tap areas, CSS and a few targeted JavaScript checks are enough. Keep the logic tied to actual product needs.

    A practical setup for most websites

    For many business sites and web apps, a sensible approach looks like this:

    1. Use CSS media queries for layout and spacing.
    2. Use matchMedia() in JavaScript for behavior tied to viewport or input type.
    3. Use feature detection for touch, hover, or pointer-related interactions.
    4. Use user agent checks sparingly for edge cases or analytics, not as your main strategy.

    That workflow gives you flexibility without making your front end brittle. It is also easier to test, explain, and maintain across projects.

    Testing your mobile detection logic

    Testing matters because mobile detection bugs often hide in edge cases. A page can seem fine in a desktop browser resized to phone width, then behave differently on an actual device with touch input and browser chrome.

    Use browser developer tools for quick viewport checks, but also test on real phones and tablets whenever possible. Pay attention to orientation changes, keyboard overlays, tap behavior, hover states, and performance under slower conditions. If your site serves customers, not just developers, these details shape the user experience more than the detection method itself.

    Conclusion

    Mobile detection on JavaScript is less about identifying a perfect device category and more about choosing the right signal for the job. User agent detection can still help in limited cases, but modern development works better when you focus on viewport size, feature support, touch capability, and input behavior. That approach is more resilient, more accurate for UX decisions, and easier to maintain.

    The next step is simple. Review one part of your site that behaves differently on phones, such as navigation, forms, media, or interactive widgets. Then ask what you really need to detect: screen space, touch, hover, or a rough mobile heuristic. Once you answer that clearly, your JavaScript becomes cleaner, and your users get a smoother experience on every device.