JNTZN

Tag: web development

  • A Practical Introduction to TypeScript for JavaScript Developers

    A Practical Introduction to TypeScript for JavaScript Developers

    JavaScript is fast to write, easy to start with, and powerful enough to run everything from browser interactions to large backend systems. It is also famously easy to break in subtle ways. A misspelled property name, a function called with the wrong kind of argument, or an object shape that changes halfway through a project can turn a productive afternoon into a debugging session that eats your week.

    That’s why many teams move from plain JavaScript to TypeScript. For JavaScript developers, TypeScript is not a different world. It is JavaScript with a stronger safety net, better tooling, and clearer contracts between parts of your code. If you have ever wished your editor could catch more mistakes before runtime, or you have inherited a codebase that feels too loose to trust, TypeScript is worth learning.

    This guide offers a practical introduction to TypeScript for JavaScript developers. You will learn what TypeScript is, why it matters, which core concepts make the biggest difference, and how to start using it without slowing yourself down.

    What TypeScript Means for JavaScript Developers

    TypeScript is a superset of JavaScript created by Microsoft. That means every valid JavaScript file is, in principle, compatible with TypeScript, but TypeScript adds extra features on top, especially static typing.

    Static typing means you can describe the kind of data a variable, function, or object should hold before the code runs. Instead of waiting until runtime to discover that a function expected a number but got a string, TypeScript can often flag that mistake while you are still writing the code.

    For JavaScript developers, this matters because TypeScript does not ask you to abandon what you already know. You still use familiar syntax, functions, arrays, objects, modules, promises, and classes. The difference is that TypeScript helps you make your assumptions explicit. It turns many silent errors into visible warnings.

    JavaScript vs TypeScript in Practice

    In plain JavaScript, this kind of function is common:

    function formatPrice(price) {
      return "$" + price.toFixed(2);
    }
    
    console.log(formatPrice(19.99));
    console.log(formatPrice("19.99"));
    

    This looks harmless until a string slips in. The second call throws a runtime error because strings do not have toFixed(). For more on that method, see MDN’s toFixed() documentation.
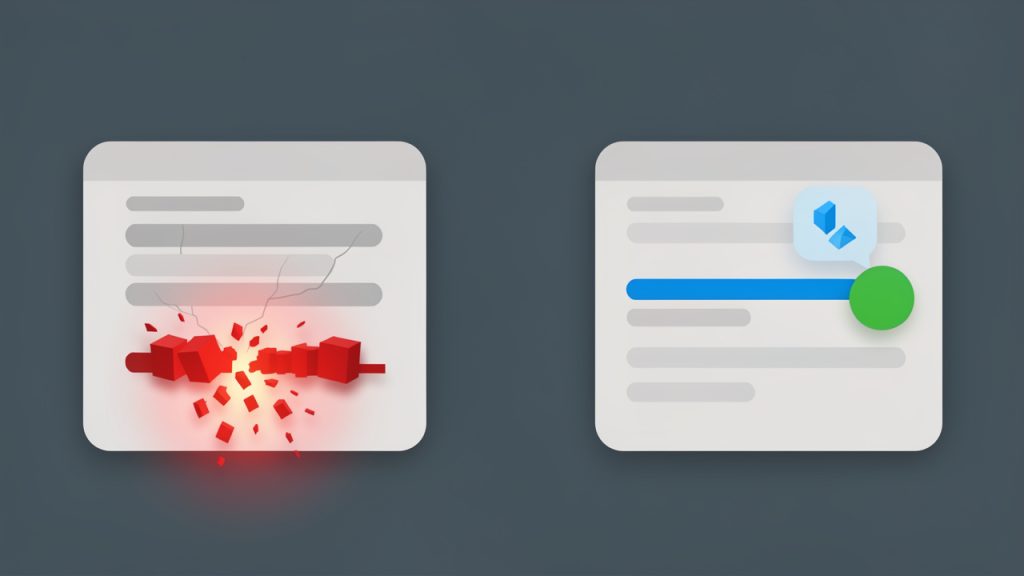
    Side-by-side comparison showing a runtime error in plain JavaScript vs a compile-time/type-check warning in TypeScript. Left panel: the formatPrice JavaScript snippet with an arrow to a red runtime error stack or a crashed browser/console. Right panel: the TypeScript version with an editor lint/tooltip highlighting the invalid call (formatPrice("19.99")) and a green check for the correct call.

    In TypeScript, you can define what the function expects:

    function formatPrice(price: number): string {
      return "$" + price.toFixed(2);
    }
    
    console.log(formatPrice(19.99));
    // console.log(formatPrice("19.99"));
    

    Now the problem is caught before you run the code. That is the core value of TypeScript. It shortens the distance between writing code and finding mistakes.

    Why TypeScript Became So Popular

    TypeScript became popular because modern JavaScript applications became large. A small script can survive on conventions and discipline alone. A growing application with multiple developers, shared modules, API calls, and frequent changes needs stronger structure.

    TypeScript helps in several ways. It improves editor autocomplete, makes refactoring safer, documents intent directly in code, and reduces the number of bugs caused by wrong assumptions. In teams, it creates a shared language around data structures and function contracts.

    It also fits naturally into modern frontend and backend development. React, Next.js, Node.js, NestJS, Angular, and many other tools have strong TypeScript support. For many projects today, TypeScript is no longer an advanced option. It is the default.

    Key Aspects of TypeScript for JavaScript Developers

    A good introduction to TypeScript for JavaScript developers should focus less on theory and more on the ideas that change daily coding. You do not need to master every advanced type feature on day one. You need to understand the pieces that improve code quality right away.

    Types Help You Describe Intent

    A type tells TypeScript what kind of value something should hold. That can be a string, number, boolean, array, object, or a custom structure.

    Here is a simple example:

    let username: string = "Ava";
    let loginCount: number = 12;
    let isAdmin: boolean = false;
    

    The syntax is simple. After the variable name, you add a colon and describe the type. This small addition gives your editor more intelligence and gives future readers more confidence.

    The real advantage appears when values move through your application. TypeScript tracks those expectations across files and function calls. That turns loose assumptions into clear rules.

    Type Inference Means You Do Not Have to Annotate Everything

    One common fear is that TypeScript makes code noisy. In reality, TypeScript often infers types automatically.

    Illustration of type inference vs explicit annotations. Show two editor snippets: one with let city = "Berlin" and an editor hint saying 'city: string (inferred)', and one with let username: string = "Ava" and a small label 'explicit annotation'. Emphasize that inference keeps code clean while giving type info to the editor.

    let city = "Berlin";
    let quantity = 5;
    

    TypeScript understands that city is a string and quantity is a number, even without explicit annotations. This keeps code readable while still giving you the benefits of type checking.

    For JavaScript developers, this is an important mindset shift. TypeScript is not about manually labeling every line. It is about adding type information where it improves clarity, safety, or maintainability.

    Functions Become Safer and Easier to Use

    Functions are where TypeScript delivers immediate value. You can define the types of parameters and return values, which makes the function easier to understand and harder to misuse.

    function calculateDiscount(price: number, percentage: number): number {
      return price * (percentage / 100);
    }
    

    This function clearly communicates its contract. Anyone using it knows what to pass and what comes back. If someone tries to pass "20" instead of 20, TypeScript will object early.

    That is especially useful in business applications, admin dashboards, e-commerce tools, and APIs, where many bugs start as data mismatches rather than complex logic problems.

    Objects and Interfaces Bring Structure to Data

    JavaScript developers often work with objects that represent users, products, invoices, settings, or API responses. In plain JavaScript, the structure of these objects is often informal. In TypeScript, you can define it explicitly.

    interface Product {
      id: number;
      name: string;
      price: number;
      inStock: boolean;
    }
    
    const item: Product = {
      id: 101,
      name: "Wireless Mouse",
      price: 29.99,
      inStock: true
    };
    

    An interface acts like a blueprint. It tells TypeScript what properties an object must have and what types those properties should be.

    This improves more than error checking. It also improves communication. When you see a Product type in code, you immediately understand the shape of the data. That makes codebases easier to navigate and easier to extend.

    Optional Properties Reflect Real-World Data

    Not all data is complete all the time. A customer may have a phone number, or may not. An API may return an optional image URL. TypeScript handles this elegantly.

    interface Customer {
      name: string;
      email: string;
      phone?: string;
    }
    

    The question mark marks phone as optional. This reflects reality and forces you to think carefully about missing values.

    That is one of TypeScript’s hidden strengths. It encourages you to model data honestly instead of pretending everything is always present and valid.

    Union Types Let Values Be Flexible Without Being Vague

    JavaScript is flexible, and TypeScript does not remove that flexibility. It refines it. A union type allows a value to be one of several known types.

    function printId(id: number | string): void {
      console.log("ID:", id);
    }
    

    This is useful when your code genuinely accepts more than one input form. The difference is that TypeScript makes that flexibility explicit.

    Instead of saying, “this value can be anything,” you say, “this value can be one of these valid options.” That keeps flexibility while reducing chaos.

    Type Narrowing Helps You Handle Different Cases Safely

    When a value can have multiple types, TypeScript helps you narrow it down through checks.

    function formatInput(input: string | number): string {
      if (typeof input === "string") {
        return input.toUpperCase();
      }
    
      return input.toFixed(2);
    }
    

    Inside the if block, TypeScript knows input is a string. Outside it, TypeScript knows it must be a number. This feature, called type narrowing, is one of the reasons TypeScript feels so practical rather than theoretical.

    It rewards good defensive coding. When you check values properly, TypeScript becomes smarter and more helpful.

    TypeScript Improves Tooling as Much as It Improves Code

    Many developers first appreciate TypeScript not because of the compiler, but because of the editor experience. Better autocomplete, smarter navigation, clearer inline hints, and safer renaming can make development noticeably faster.

    If you use Visual Studio Code, the integration is especially strong. Jumping to definitions, discovering available properties, and refactoring across large files becomes smoother because the editor understands your code at a deeper level.

    For freelancers and small teams, this matters. Better tooling saves time. Time saved on debugging and code hunting is time you can spend shipping features or serving clients.

    Compilation Is Part of the Workflow

    Browsers and Node.js do not run TypeScript directly in the same way they run standard JavaScript. TypeScript code is typically compiled into JavaScript.

    That sounds more intimidating than it is. In practice, a build tool or framework often handles this for you. You write .ts or .tsx files, and your tooling converts them into JavaScript behind the scenes.

    The TypeScript compiler also checks your types during this process. So compilation is not just translation. It is also validation.

    A Quick Comparison

    Feature JavaScript TypeScript
    Typing Dynamic, mostly checked at runtime Static, checked before runtime
    Error Detection Many issues found during execution Many issues caught during development
    Tooling Support Good Excellent, especially for large projects
    Learning Curve Lower at the start Slightly higher, better long-term structure
    Refactoring Safety More manual caution needed Safer with type-aware tooling

    How to Get Started with TypeScript

    The best way to begin is not by rewriting everything you own. Start small. TypeScript works best when introduced as a practical upgrade, not a dramatic reset.

    If you already know JavaScript well, the transition is usually smooth. The challenge is not syntax. It is learning to think more clearly about the shape and flow of data.

    Start with the Basics You Already Use

    Focus first on four areas: variable types, function parameters, return types, and object shapes. Those concepts give you a strong return on effort.

    You do not need advanced generics, decorators, conditional types, or complex utility types to benefit from TypeScript. Those are useful later, but they are not required for a solid introduction.

    A practical first step is to install TypeScript in a project and create a basic configuration file:

    npm install --save-dev typescript
    npx tsc --init
    

    This creates a tsconfig.json file that tells TypeScript how to behave. Many defaults are fine at first, but one setting deserves attention: strict mode.

    Use Strict Mode Early

    Strict mode turns on stronger checks. It can feel demanding at first, but it teaches good habits quickly.

    In your tsconfig.json, look for this:

    {
      "compilerOptions": {
        "strict": true
      }
    }
    

    With strict mode enabled, TypeScript becomes much better at catching undefined values, unsafe assumptions, and weakly typed code paths.

    For JavaScript developers, this can feel like TypeScript is being picky. In reality, it is highlighting exactly the areas where bugs tend to hide.

    Convert One File or One Module at a Time

    You do not need to convert a whole project overnight. Rename a file from .js to .ts, fix the most obvious type issues, and keep moving.

    A sensible migration path often looks like this:

    1. Start with utility files that have clear inputs and outputs.
    2. Type your shared data models such as users, orders, or products.
    3. Move to business logic where type safety gives the most value.
    4. Handle edge cases such as null values and optional fields.

    This gradual approach keeps the learning curve manageable and prevents TypeScript from feeling like a blocker.

    Learn the Difference Between any and Better Alternatives

    New TypeScript users often reach for any because it silences errors. It tells TypeScript, “trust me, this can be anything.” That may feel convenient, but it removes most of the protection TypeScript provides.

    let data: any = "hello";
    data = 42;
    data = { active: true };
    

    There are cases where any is unavoidable, especially during migration, but it should be temporary. A better alternative in many cases is unknown, which forces you to check a value before using it.

    function processValue(value: unknown): void {
      if (typeof value === "string") {
        console.log(value.toUpperCase());
      }
    }
    

    This keeps flexibility while preserving safety.

    Understand Common Types You Will Use Daily

    Most TypeScript code relies on a relatively small set of concepts. If you understand these well, you can be productive quickly.

    • Primitive types: string, number, boolean
    • Arrays: string[], number[]
    • Objects and interfaces: custom data shapes
    • Union types: values with multiple allowed forms
    • Optional properties: fields that may be missing

    That is enough to type a large amount of real-world application code. The advanced features are helpful later, but they build on these basics.

    A Realistic Example for a JavaScript Developer

    Suppose you are fetching user data and displaying it. In JavaScript, you might write:

    function greetUser(user) {
      return "Hello, " + user.name.toUpperCase();
    }
    

    This works until user is missing name, or name is not a string.

    In TypeScript, you can define the shape first:

    interface User {
      name: string;
      email: string;
    }
    
    function greetUser(user: User): string {
      return "Hello, " + user.name.toUpperCase();
    }
    

    Now both the function and the data it expects are easier to trust. That confidence adds up across an entire codebase.

    Use TypeScript with Modern Frameworks

    If you work with React, Next.js, Vue, Angular, or Node.js, you do not need to assemble everything manually. Most modern tools support TypeScript from the start.

    For example, creating a new project with TypeScript is often a built-in option. That means the setup burden is lower than many developers expect. In some environments, the hardest part is not configuration. It is simply getting comfortable reading and writing typed code every day.

    Common Friction Points, and Why They Are Worth It

    The first few days with TypeScript can feel slower. You will see new errors. You will need to think more carefully about null, undefined, and data from APIs. You may wonder why code that “works fine” now requires more explicit handling.

    That friction is the point. TypeScript asks you to handle uncertainty where uncertainty already exists. It does not create complexity so much as reveal it.

    Once you accept that, the experience changes. The compiler stops feeling like an obstacle and starts feeling like a second reviewer who catches mistakes instantly.

    Practical Advice for Learning Faster

    One of the best ways to learn TypeScript is to take JavaScript code you already understand and add types to it. A to-do app, price calculator, form handler, or API utility is enough. Familiar code helps you focus on TypeScript itself rather than solving a new business problem at the same time.

    It also helps to read TypeScript error messages patiently. At first they can seem dense, but they usually point to a real mismatch between what your code promises and what it actually does. Over time, you start to recognize patterns.

    Another good habit is to define types close to your business concepts. If your app deals with clients, invoices, subscriptions, bookings, or products, create interfaces for those things early. That turns your codebase into something that documents itself.

    Finally, avoid chasing every advanced language feature too soon. A strong practical introduction to TypeScript for JavaScript developers should build confidence, not overwhelm. Learn enough to improve your current work, then expand your knowledge as your projects demand it.

    Conclusion

    TypeScript gives JavaScript developers a better way to manage complexity. It catches errors earlier, improves editor support, makes refactoring safer, and helps you describe your data and logic with much more precision. You still write JavaScript at heart, but with clearer contracts and fewer unpleasant surprises.

    The best next step is simple: take a small JavaScript file, convert it to TypeScript, and type the functions and objects you already use every day. That hands-on practice will teach you more than theory alone, and it will quickly show why TypeScript has become such a valuable tool in modern development.

  • How to Convert a PDF to Base64 — A Simple Guide

    How to Convert a PDF to Base64 — A Simple Guide

    Turning a PDF into Base64 sounds technical, but the idea is surprisingly simple. You take a PDF file, convert its binary data into plain text, and end up with a long string of characters that can be passed through apps, APIs, forms, and databases more easily than the original file in some situations.

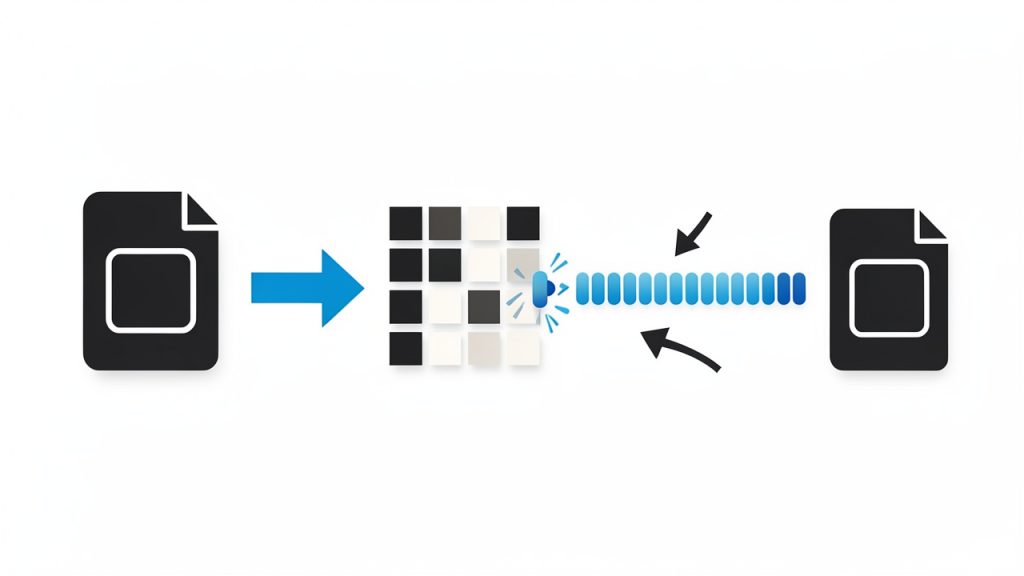
    PDF binary to Base64 diagram

    If you are a small business owner sharing documents between systems, a freelancer automating client workflows, or a developer building file uploads into a web app, understanding how to convert a PDF to Base64 can save time and reduce friction. It is one of those practical file-handling tricks that quietly powers a lot of modern software.

    What Is a PDF to Base64 Conversion?

    A PDF to Base64 conversion is the process of encoding a PDF file into a text-based format using the Base64 standard. A PDF is normally stored as binary data, which works well for file systems but not always for text-only channels. Base64 changes that binary content into a string made up of letters, numbers, and a few symbols.

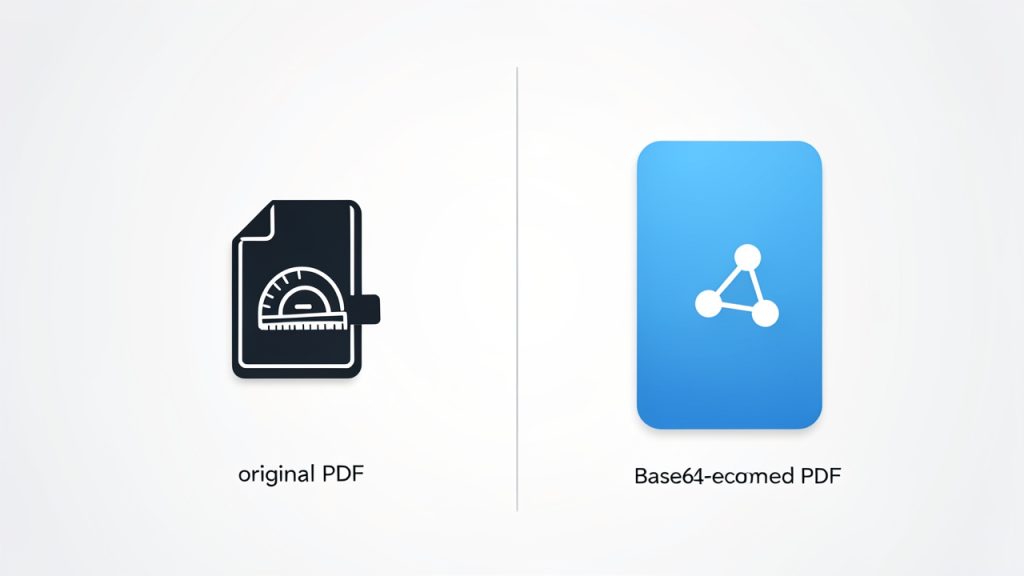
    This does not “improve” or compress the PDF. In fact, Base64 usually makes the file around 33% larger. Its value is compatibility, not efficiency. When a system expects text instead of raw file data, Base64 acts like a translator.

    Think of it as repackaging a printed document into a sealed envelope with a standardized label. The contents stay the same, but the format becomes easier for certain delivery methods to handle. That is why converting a PDF to Base64 is common in APIs, email payloads, JSON requests, browser-based tools, and document automation workflows.

    Trade-off infographic: Original PDF vs Base64-encoded PDF

    Why people use Base64 for PDFs

    The main reason is convenience. Some platforms do not accept direct binary uploads or handle them inconsistently. A Base64 string can be embedded inside a text request, stored in a field, or transferred through systems that are designed around strings rather than files.

    It is also useful when you want to keep data self-contained. For example, instead of uploading a PDF as a separate attachment and passing around a file reference, you can include the encoded content directly in the request body. That can simplify integrations when you are connecting forms, CRMs, e-signature tools, or internal business software.

    What Base64 does not do

    Base64 is not encryption. This is one of the most important points to understand. If someone has the encoded string, they can decode it back into the original PDF with minimal effort.

    It is also not a replacement for secure storage or access control. If your PDF contains contracts, invoices, IDs, or confidential business records, you still need proper security practices. Base64 is a format conversion, not a privacy feature.

    Key Aspects of Converting a PDF to Base64

    Understanding the mechanics helps you make better decisions about when to use it and when not to.

    It is best for transfer, not for long-term storage

    A PDF encoded in Base64 becomes plain text, which makes it easy to include in API payloads, browser requests, and text fields. That is helpful for moving documents between tools.

    For storage, though, it is often less efficient than keeping the original PDF file. The larger encoded size can increase database load, slow down responses, and create unnecessary overhead. If you only need to store the file and retrieve it later, the original PDF is usually the better option.

    It works well in web and API workflows

    One of the most common use cases for converting a PDF to Base64 is in web development and software integrations. Some APIs accept documents as a Base64 string inside a JSON payload. That lets a single request carry both metadata and file content.

    For example, an invoicing system might send a client record, invoice number, and PDF attachment together in one structured request. In that case, encoding the PDF as Base64 creates a cleaner handoff between services.

    It increases size but improves compatibility

    This trade-off is central. Base64 makes a file larger, but also makes it more portable across systems built for text. Whether that trade-off is worth it depends on your use case.

    Here is a simple comparison:

    Format Best For File Size Impact Easy to Embed in Text Requests Human Readable
    Original PDF Storage, downloads, file systems Smaller No No
    Base64-encoded PDF APIs, text-based transfer, embedded data Larger Yes Partially, as text string

    The string itself is not meaningfully readable by people, but it is readable by systems that expect text input. That distinction matters.

    It can affect performance in large workflows

    For occasional document handling, converting a PDF to Base64 is usually straightforward. In high-volume operations, the extra processing and size overhead can matter more.

    If your business handles hundreds or thousands of PDFs daily, encoding and decoding each one may affect speed, memory usage, and bandwidth. In those cases, direct file storage or object-based uploads may be a better architectural choice.

    Validation matters

    Not every long text string is a valid Base64 PDF. If you are accepting encoded documents from users or external systems, validation is important. A malformed string can cause failed uploads, decoding errors, or corrupted files.

    A reliable PDF to Base64 tool should preserve file integrity and ideally help confirm that the decoded output matches the original document. That becomes especially important when dealing with signed files, legal forms, or customer-facing records.

    How to Get Started With Converting a PDF to Base64

    If you are new to this, the easiest path is to use a simple online PDF-to-Base64 converter or a built-in encoding function in your workflow tool. Most people do not need to understand the binary math behind it. They just need a dependable result.

    Start with a clear use case

    Before converting anything, ask one practical question: Why do I need the PDF in Base64? That answer shapes the right approach.

    If you need to send a PDF into an API, Base64 may be exactly right. If you only want to email, archive, or share the file normally, the extra conversion may add complexity without any real benefit. Good file handling starts with the destination in mind.

    Use an online tool for quick one-off tasks

    For non-technical users, a browser-based converter is often the fastest option. You upload the PDF, the tool generates the Base64 output, and you copy the text or download the result.

    This is useful for testing integrations, building prototypes, or handling occasional files. If the PDF contains sensitive information, make sure the tool is trustworthy and clear about privacy. For confidential files, local conversion is usually safer than uploading documents to an unknown website.

    Use code when conversion is part of a workflow

    If you are a developer or automating a recurring task, doing the conversion in code makes more sense. It reduces manual work and keeps the process consistent.

    Here are a few simple examples.

    In JavaScript, converting a PDF file buffer to Base64 is straightforward:

    const fs = require('fs');
    
    const pdfBuffer = fs.readFileSync('document.pdf');
    const base64String = pdfBuffer.toString('base64');
    
    console.log(base64String);
    

    This reads the PDF file and returns the Base64-encoded string. That string can then be inserted into an API request, saved temporarily, or passed to another function.

    In Python, the process looks very similar:

    import base64
    
    with open("document.pdf", "rb") as pdf_file:
        base64_string = base64.b64encode(pdf_file.read()).decode("utf-8")
    
    print(base64_string)
    

    This opens the PDF in binary mode, encodes it, and converts the result into a UTF-8 string that can be used in text-based systems.

    If you need to turn the Base64 string back into a PDF later, the reverse process is just as simple.

    JavaScript:

    const fs = require('fs');
    
    const base64String = 'PASTE_YOUR_BASE64_STRING_HERE';
    const pdfBuffer = Buffer.from(base64String, 'base64');
    
    fs.writeFileSync('restored-document.pdf', pdfBuffer);
    

    Python:

    import base64
    
    base64_string = "PASTE_YOUR_BASE64_STRING_HERE"
    
    with open("restored-document.pdf", "wb") as pdf_file:
        pdf_file.write(base64.b64decode(base64_string))
    

    These examples matter because they show the real purpose of converting a PDF to Base64. It is not an abstract technical exercise. It is a practical way to move documents through digital systems.

    Watch for common issues

    A few problems come up repeatedly. One is copying only part of the encoded string, which leads to broken files during decoding. Another is adding extra spaces or line breaks in systems that expect one continuous string.

    There is also the issue of prefixes. In some web contexts, the Base64 data may appear with a prefix such as data:application/pdf;base64,. That can be useful in browsers, but some APIs require only the raw encoded content. Knowing which format your destination expects avoids unnecessary errors.

    Choose the right method for your situation

    The best approach depends on your workflow:

    1. Use an online converter for quick, one-time tasks.
    2. Use built-in automation tools for business processes with no-code or low-code systems.
    3. Use custom code for apps, integrations, and repeated high-volume operations.

    That is the practical spectrum. The less often you need it, the simpler your setup should be. The more often you use it, the more valuable automation becomes.

    Practical Use Cases for Small Businesses, Freelancers, and Developers

    For small businesses, converting a PDF to Base64 often shows up in back-office operations. Invoices, signed agreements, purchase orders, and onboarding documents may need to move between tools that do not share a native file system. Base64 helps bridge that gap.

    Freelancers may encounter it when sending branded proposals through automation platforms, embedding generated PDFs into client portals, or connecting web forms to storage tools. In these cases, the conversion feels invisible when everything works, but understanding it makes troubleshooting much easier.

    Developers use Base64-encoded PDFs in more deliberate ways. It appears in REST APIs, serverless functions, browser apps, mobile backends, and document-generation systems. For them, the key question is usually not how to encode a PDF, but whether Base64 is the right transport layer for the job.

    Best Practices When Working With PDF and Base64

    The smartest approach is to treat Base64 as a delivery format, not a universal file strategy. Use it when compatibility matters more than file size. Avoid it when efficient storage or fast downloads are the priority.

    It is also wise to keep the original PDF whenever possible. That gives you a clean source file and reduces the risk of degradation caused by mishandling encoded data. While Base64 itself does not damage a file, broken strings, truncation, or formatting errors certainly can.

    For sensitive documents, prioritize privacy. If you are using a web-based PDF-to-Base64 converter, check how files are processed, whether uploads are stored, and how quickly data is deleted. Businesses dealing with contracts, IDs, financial records, or health information should be especially cautious.

    Conclusion

    Converting a PDF to Base64 is a practical solution for a specific problem: moving file data through text-based systems. It makes PDFs easier to embed in APIs, automate in workflows, and pass between applications that do not handle binary files well.

    The important thing is knowing when to use it. If you need portability and text-friendly transfer, Base64 is extremely useful. If you need compact storage and speed, the original PDF is usually better. Start with your end goal, choose the simplest method that fits, and test the output before building it into an important workflow.

  • Step-by-Step Guide to Building a Developer Portfolio Website

    Step-by-Step Guide to Building a Developer Portfolio Website

    A developer portfolio can open doors before you ever speak to a recruiter, client, or hiring manager. It is often the first proof that you can build, communicate, and think like a professional. A weak portfolio gets skimmed and forgotten. A focused one creates trust in minutes.

    The good news is that building a developer portfolio website is not as complicated as many people assume. You do not need a flashy, animation-heavy homepage or weeks of design work. What you need is a clear structure, a few strong projects, clean presentation, and a site that loads fast and tells your story well.

    If you want to build a portfolio website step by step as a developer, this guide will walk you through the process from planning and structure to writing content, choosing tools, launching, and improving over time. The goal is not just to make a website that looks good. The goal is to create one that helps people understand what you can do and why they should contact you.

    What It Means to Build a Portfolio Website Step by Step as a Developer

    A developer portfolio website is a personal site that showcases your skills, projects, background, and professional identity. Think of it as a hybrid between a resume, a product demo, and a landing page for your career. It should answer a few core questions quickly: who you are, what kind of developer you are, what you have built, and how someone can work with or hire you.

    Many developers make the mistake of treating a portfolio like a scrapbook. They add every class project, every language they have touched, and a long list of technologies with no context. That approach usually creates noise, not credibility. A strong portfolio is curated. It highlights the most relevant work and explains it in a way that makes your value obvious.

    Building your portfolio step by step matters because it helps you make better decisions. Instead of jumping straight into templates, colors, and animations, you first define your audience and your message. Then you choose the structure, write content, build the site, optimize it, and publish it. This process leads to a portfolio that feels intentional rather than rushed.

    For developers, this site does double duty. It shows both your technical ability and your product thinking. Even simple choices, such as navigation, project descriptions, accessibility, performance, and mobile responsiveness, say something about how you build software. In that sense, your portfolio is itself a project.

    Key Aspects of Building a Developer Portfolio Website

    Start with the audience, not the design

    Before choosing a framework or a color palette, decide who the website is for. A freelance web developer trying to attract small business clients needs a different portfolio from a backend engineer applying to startups. The first may focus on outcomes, client communication, and service packages. The second may emphasize architecture, APIs, deployment, and engineering decisions.

    This affects everything from your homepage headline to the projects you feature. If your target audience is recruiters, clarity and speed matter most. If your target is clients, trust signals and business results become more important. If you want both, you need a portfolio that balances technical depth with simple explanations.

    When you understand the audience, the site becomes easier to build. You know what to include, what to leave out, and what tone to use. That is why the best portfolio websites feel clear. They are not trying to impress everyone.

    Focus on a simple structure that supports your goals

    A portfolio does not need ten pages. In most cases, a small, well-structured site performs better than a large one. Visitors usually scan quickly. They want to find key information without hunting through menus.

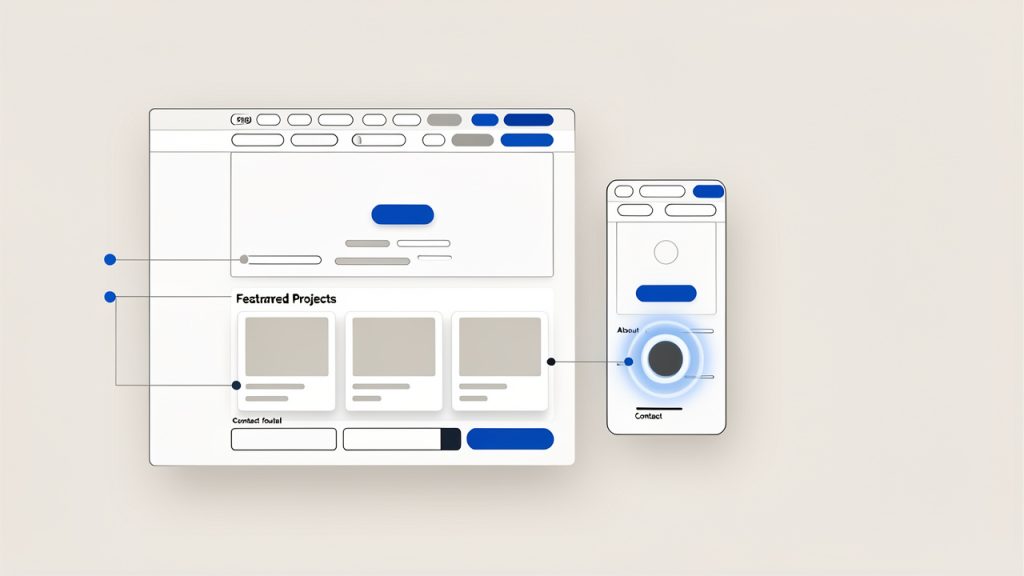
    A strong structure often includes these core sections:

    1. Home: A clear introduction, your role, and your value.
    2. Projects: A curated set of your best work with meaningful explanations.
    3. About: Your background, strengths, and what kind of work you enjoy.
    4. Contact: A simple way to reach you, plus links to GitHub and LinkedIn.

    If you have relevant writing, talks, open-source work, or a resume, those can be added thoughtfully. But the main experience should remain focused. Every page should support one central goal, helping the visitor understand your skills and take the next step.

    A clean, minimal wireframe of a small portfolio site (desktop and mobile thumbnails) showing a top nav, hero section with headline and CTA, a 'Featured Projects' grid with 3 project cards, a compact 'About' block, and a 'Contact' footer. Labels annotate each area (Home, Projects, About, Contact) and a note: "one central goal per page."

    Your projects matter more than your tech stack list

    One of the most important parts of any guide on how to build a developer portfolio website step by step is project selection. Your projects are the strongest proof of your ability. A list of tools tells people what you have seen. Projects show what you can actually build.

    Choose two to five projects that represent your current level and direction. It is better to show three polished projects than twelve unfinished ones. Each project should explain the problem, your role, the tools used, the key decisions you made, and the result.

    This is where many portfolios fall short. Developers often link to a repository and expect the work to speak for itself. But most visitors will not read your code. They will read your explanation. A project description should help both technical and non-technical readers understand why the work matters.

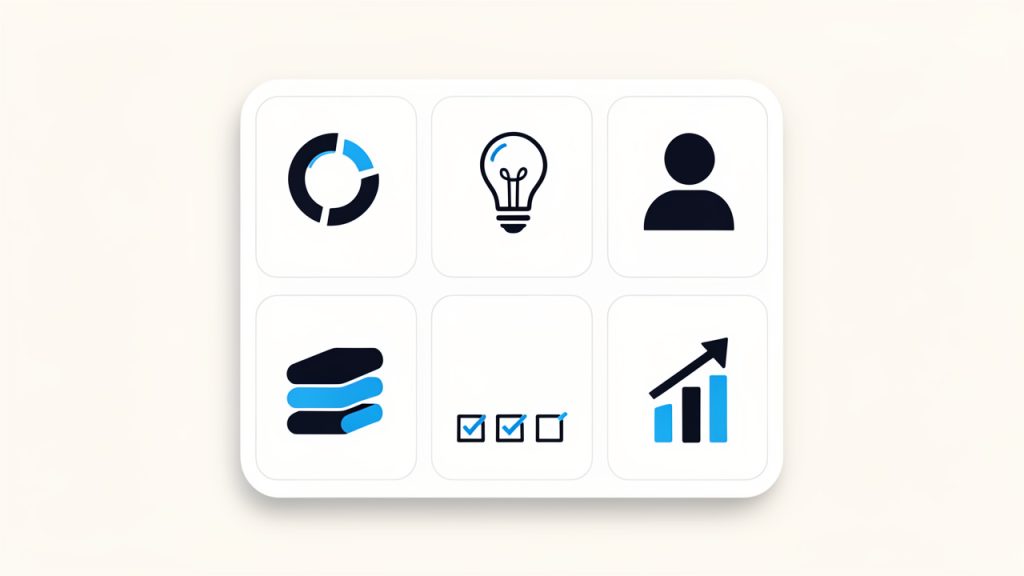
    A single project case-study card template divided into labeled sections: Challenge (problem statement icon), Solution (lightbulb/implementation), Role (person icon), Stack (tech icons or tag list), Key decisions (checkboxes), Result (metric or outcome). Keep layout compact so it can be reused for multiple projects.

    Good writing is part of good development

    Developers sometimes underestimate how much writing influences the effectiveness of a portfolio. Yet your words shape first impressions almost as much as the design does. A vague headline like “Passionate developer building innovative solutions” says almost nothing. A sharper line like “Frontend developer building fast, accessible interfaces for SaaS products” is specific and useful.

    The same applies to project descriptions, your about page, and calls to action. Clear writing signals clear thinking. It makes your technical work easier to trust. It also helps with search visibility, since relevant phrases around your niche, tools, and projects improve discoverability.

    If writing feels difficult, keep it simple. Describe what you built, why you built it, what challenges you solved, and what happened as a result. Use plain language. Avoid filler. The goal is not to sound impressive. The goal is to be understood.

    Design should support readability and trust

    A portfolio website does not need to win design awards. It needs to feel clean, modern, and easy to use. Visual hierarchy matters more than visual complexity. Typography, spacing, contrast, and consistency will do more for your site than fancy effects.

    Good portfolio design is often invisible. Visitors notice that it feels easy to scan, easy to navigate, and pleasant to read. That is exactly what you want. If your animations make the site harder to use, or your dark theme lowers readability, those choices hurt more than they help.

    Trust is also visual. A site with broken layouts, inconsistent spacing, cluttered sections, or obvious template leftovers makes people wonder how carefully you work. On the other hand, a calm and polished interface suggests discipline and professionalism.

    Performance, accessibility, and responsiveness are part of the portfolio

    Your portfolio is not just content. It is an example of your engineering standards. If the site is slow, inaccessible, or broken on mobile, visitors may assume your production work is similar.

    That is why performance and usability are not optional extras. Compress images, avoid unnecessary dependencies, use semantic HTML, and make sure the site works well on phones and tablets. Add descriptive alt text where appropriate. Use color contrast that supports readability. Test forms and links.

    These choices matter for users, and they also matter for credibility. A developer portfolio should demonstrate care. Even a simple static site can stand out if it is fast, accessible, and well-structured.

    Choose the right build approach for your goals

    There is no single correct tech stack for a portfolio. The best choice depends on your goals, time, and comfort level. Some developers want a fast launch with minimal maintenance. Others want the portfolio itself to showcase a modern stack.

    Approach Best For Pros Trade-offs
    Static HTML/CSS/JS Beginners, minimal portfolios Fast, lightweight, easy to host Less scalable for frequent content updates
    React or Next.js Frontend developers, modern app showcase Great for component-based design, flexible, strong ecosystem More setup and complexity
    Astro Content-focused portfolios with strong performance Excellent speed, modern workflow, low JS by default Smaller ecosystem than React
    Vue or Nuxt Developers already working in Vue Smooth developer experience, flexible architecture Slightly less common in portfolio tutorials
    Website builder or template platform Freelancers who need speed over customization Quick setup, low technical overhead Limited control, less technical showcase

    If you are early in your career, do not overthink the stack. A clean portfolio built with basic web technologies can outperform a half-finished site built with the latest framework. If you are applying for frontend roles, your stack can become part of the demonstration. But even then, usability matters more than novelty.

    How to Get Started with a Developer Portfolio Website

    Define the message before you write a single line of code

    Start by answering a few practical questions. What roles are you targeting? What type of work do you want more of? What are your strongest skills right now? Which projects best support that story?

    This exercise helps you avoid the common trap of building a generic site. For example, if you want full-stack roles, your featured projects should show both interface work and backend logic. If you want freelance work from small businesses, your messaging should emphasize outcomes, communication, reliability, and practical solutions.

    Once you know the message, write a simple positioning statement. It should explain who you are, what you build, and who you help. This line often becomes the core of your homepage hero section.

    Plan the content architecture

    Now sketch the structure of the site before building anything. Think of it as creating the skeleton before adding the skin. Decide what pages or sections you need, how navigation will work, and what each section should accomplish.

    A homepage should usually include a concise introduction, a snapshot of your best projects, a short skills section, and a clear call to action. Your projects page should make it easy to browse deeper. Your about page should add personality and context, not repeat your resume word for word.

    At this stage, it is useful to think like a visitor. If someone lands on your site and spends 90 seconds there, what should they learn? That question keeps the structure focused.

    Gather your assets and proof points

    Before development begins, collect everything you need. This includes project screenshots, live links, repository links, short summaries, your headshot if you plan to use one, social links, and your resume. Organizing this early makes the build process much smoother.

    Also gather evidence that strengthens your story. That might include GitHub contributions, measurable project outcomes, testimonials from clients or teammates, blog posts, certifications, or open-source activity. These are not mandatory, but they can add depth and trust when used selectively.

    Try to avoid empty claims. Saying you are “results-driven” means little unless the site shows actual results. Specific proof always beats generic adjectives.

    Build the core pages with clean, maintainable code

    If you are comfortable coding your own site, keep the first version lean. You can always expand later. Start with semantic markup, mobile-first layout decisions, and a reusable design system for spacing, type, buttons, and cards. A consistent system helps the site feel polished without requiring a complex visual design process.

    Here is a simple HTML starting point for a homepage structure:

    <!DOCTYPE html>
    <html lang="en">
    <head>
      <meta charset="UTF-8" />
      <meta name="viewport" content="width=device-width, initial-scale=1.0" />
      <meta name="description" content="Portfolio of Alex Kim, a full-stack developer building fast, scalable web applications." />
      <title>Alex Kim | Full-Stack Developer</title>
      <link rel="stylesheet" href="styles.css" />
    </head>
    <body>
      <header class="site-header">
        <nav>
          <a href="/" class="logo">Alex Kim</a>
          <ul>
            <li><a href="#projects">Projects</a></li>
            <li><a href="#about">About</a></li>
            <li><a href="#contact">Contact</a></li>
          </ul>
        </nav>
      </header>
    
      <main>
        <section class="hero">
          <h1>Full-stack developer building fast, user-focused web applications</h1>
          <p>I create modern web products with React, Node.js, and PostgreSQL, with a strong focus on performance and usability.</p>
          <a href="#projects">View Projects</a>
        </section>
    
        <section id="projects">
          <h2>Featured Projects</h2>
          <article>
            <h3>Project Name</h3>
            <p>A brief explanation of the problem, your solution, and the outcome.</p>
          </article>
        </section>
    
        <section id="about">
          <h2>About</h2>
          <p>I am a developer focused on building reliable, accessible products that solve real user problems.</p>
        </section>
    
        <section id="contact">
          <h2>Contact</h2>
          <p>Email me at <a href="mailto:alex@example.com">alex@example.com</a></p>
        </section>
      </main>
    </body>
    </html>
    

    This structure is intentionally simple. It covers the basics without distraction. Once the content is in place, you can improve the visual layer with CSS and, if necessary, add framework features such as routing, CMS integration, or component-based architecture.

    If you are using React, Next.js, Astro, or another framework, the same content principles still apply. Framework choice changes implementation, not the core strategy.

    Write project case studies, not just captions

    The strongest portfolio projects read like short case studies. They explain the challenge, your process, and the result. This tells readers how you think, not just what you made.

    For each featured project, cover a few essentials in compact form. Explain what problem the project solves. Clarify whether it was a personal build, freelance project, team product, or coursework. Mention the stack, but do not stop there. Include one or two key decisions that show engineering judgment. Then describe the outcome, even if the result is learning rather than business metrics.

    A simple structure works well: challenge, solution, stack, role, and result. You do not need to turn every project into a full essay. You just need enough context to make the work meaningful.

    Add SEO basics without making the writing awkward

    If you want your portfolio to be discoverable, basic SEO matters. This does not mean stuffing awkward phrases into every paragraph. It means using natural language around the topics people might search for, such as developer portfolio, frontend developer portfolio website, full-stack projects, JavaScript developer, or freelance web developer.

    Use a clear title tag and meta description for each page. Include descriptive headings. Give project pages meaningful names. If you write blog posts, choose topics related to your niche and technical expertise. Internal links between your home page, projects, and articles also help search engines understand the site.

    Search visibility grows over time when your content is useful and specific. A portfolio with thoughtful project write-ups often performs better than one with minimal text because search engines have more context to index.

    Make sure the site feels complete on mobile

    A surprising number of developer portfolios still look great on desktop and messy on phones. Since many recruiters, clients, and collaborators first view sites on mobile, this is a serious weakness.

    Responsive design is not just about shrinking elements. It is about preserving clarity. Headlines should remain readable, project cards should stack cleanly, navigation should stay simple, and touch targets should be easy to tap. Test on real devices if possible, not just browser tools.

    If your site feels effortless on mobile, visitors are more likely to explore. That extra minute of engagement can be the difference between a bounce and an inquiry.

    Deploy quickly and iterate in public

    Do not wait for the portfolio to feel perfect. Version one should be strong enough to publish, but not delayed by endless tweaks. Many developers spend weeks adjusting fonts and animations while their actual work remains hidden.

    Deploying early lets you learn faster. You can share the site with peers, mentors, or online communities and ask for direct feedback. Which projects feel strongest? Is the homepage message clear? Are there any confusing sections? This input often reveals blind spots that are hard to see alone.

    Modern deployment is easier than ever. Platforms like Vercel, Netlify, and GitHub Pages make it simple to host a portfolio, connect a custom domain, and push updates. A custom domain is especially worth getting because it makes your site feel more professional and easier to remember.

    Track what matters after launch

    A portfolio is not a one-time task. It is a living professional asset. After launch, pay attention to what is working. Which project links get clicked? Do visitors contact you after reading your home page, or after browsing a case study? Are people reaching your site through search, social media, or direct links?

    Simple analytics can help you refine the site. You may discover that one project consistently draws attention, which suggests expanding it into a deeper case study. You may notice visitors dropping off before reaching your contact section, which suggests improving page flow or calls to action.

    Regular updates matter too. Add stronger projects as your skills improve. Remove older work that no longer represents your level. Refresh your introduction if your focus changes. The best portfolios evolve with your career.

    Common Mistakes Developers Should Avoid

    Trying to impress with everything at once

    One of the fastest ways to weaken a portfolio is to overload it. Too many projects, too many colors, too many badges, too much jargon. Instead of looking advanced, the site feels unfocused.

    Restraint is a strength. When you choose only your best work and present it clearly, visitors can understand your value faster. That is what makes a portfolio effective.

    Writing generic copy that could belong to anyone

    If your homepage could be pasted onto a thousand other developer websites without anyone noticing, it is too generic. Statements like “I love solving problems with technology” are common because they feel safe. But safe copy is forgettable.

    Use specific language about what you build, what kind of problems you enjoy solving, and what tools or domains you work in. Specificity makes you memorable.

    Ignoring the business side of presentation

    Even if you are applying for technical roles, your portfolio still needs to communicate outcomes. What did your work improve? Speed, usability, conversions, maintainability, developer workflow, or customer experience? Outcomes help people connect your code to real value.

    This is especially important for freelancers. Clients often care less about the framework and more about whether you can deliver a website or product that helps their business. Your portfolio should meet them where they are.

    A Practical Launch Checklist

    Before publishing your first version, review these essentials:

    • Message clarity: Your homepage clearly states who you are and what kind of developer you are.
    • Project quality: You feature a small number of strong, relevant projects with context.
    • Contact path: Visitors can easily email you or find your professional profiles.
    • Mobile readiness: The site is easy to read and navigate on phones and tablets.
    • Performance basics: Images are optimized and pages load quickly.
    • Proofreading: Spelling, grammar, links, and button labels have been checked.

    This short checklist catches most of the issues that make a portfolio feel unfinished. It is not glamorous work, but it matters.

    Conclusion

    To build a portfolio website step by step as a developer, start with strategy before design. Know your audience, define your message, choose a focused structure, and present only your strongest work. Then build the site with clean code, clear writing, mobile responsiveness, and simple navigation. A good portfolio does not try to say everything. It says the right things well.

    Your next step is straightforward. Choose three projects, write one sharp homepage headline, and sketch the first version of your site today. Publish a simple version sooner than feels comfortable, then improve it as your skills and goals evolve. A live portfolio that clearly shows your value will do more for your career than a perfect draft sitting unfinished on your laptop.