JNTZN

Tag: Windows

  • How to Convert BMP Files to JPG — Easy Methods & Best Tools

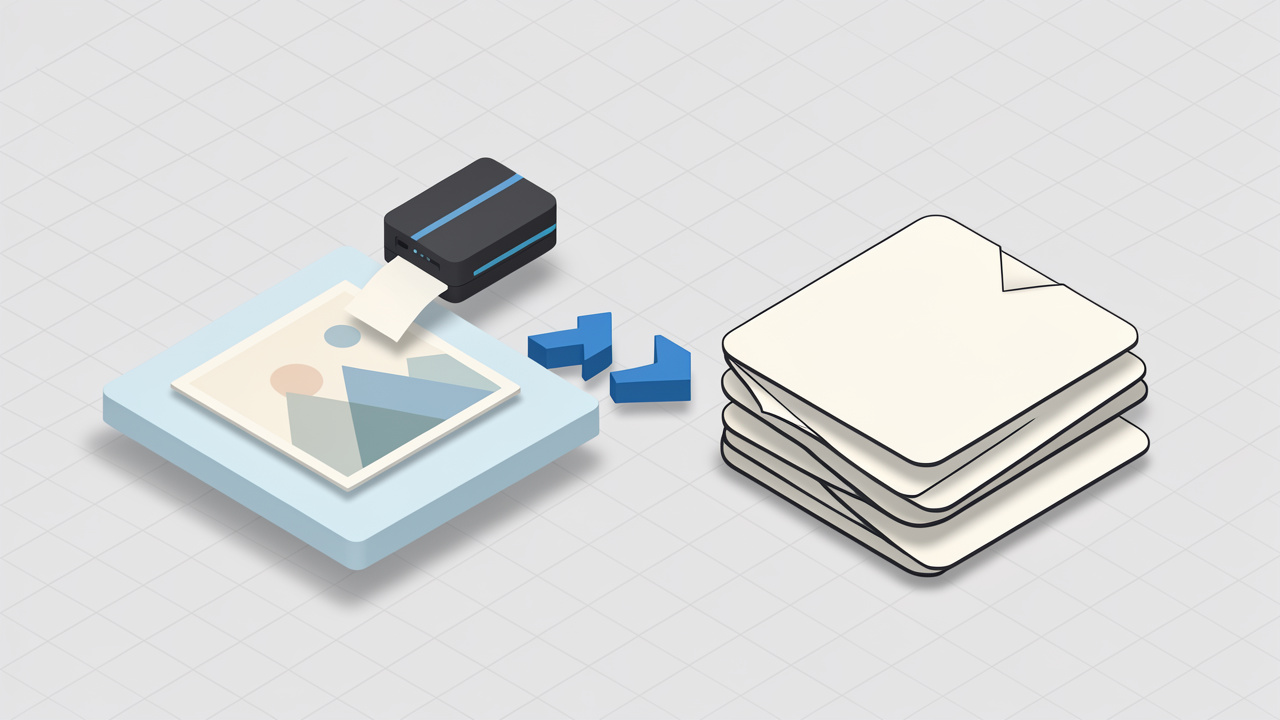
    A bulky BMP file can be the reason an email bounces, a web page loads slowly, or a shared folder fills up far faster than expected. If you have scanner output, legacy screenshots, or exported graphics sitting in BMP format, converting them to JPG is usually the quickest way to make those images easier to store, send, and publish.

    The good news is that converting BMP to JPG is simple on Windows, macOS, Linux, and the web. The better news is that you do not need expensive software for most cases. Built-in apps, free batch tools, and a few trusted online converters can handle the job in minutes.

    What matters is choosing the right method for your situation. A freelancer sending client previews has different needs than a developer automating image cleanup, and both are different from a business handling private documents. This guide walks through the easiest methods, the best tools, and the quality settings that help you get smaller files without unpleasant surprises.

    What Are BMP and JPG (JPEG) Image Formats?

    Brief history and common uses of BMP

    BMP, short for bitmap, is one of the oldest and most straightforward image formats used in Windows environments. It stores image data in a very direct way, which is part of why BMP files are often large. Historically, BMP was common for desktop graphics, screenshots, simple image storage, and software that favored compatibility over efficiency.

    You will still run into BMP files today, especially from older applications, industrial software, scanners, archived assets, and certain exported screenshots. In many workflows, BMP appears not because it is the best format, but because it is the default output of a device or legacy program.

    That simplicity has one major trade-off. BMP files tend to take up a lot of storage space compared with modern compressed formats. A folder full of BMP images can become difficult to email, sync, or manage in cloud storage.

    JPG/JPEG, and why it’s widely used

    JPG/JPEG is one of the most widely used image formats in the world. It was designed to compress photographic images efficiently, which makes it ideal for websites, email attachments, digital photos, and general file sharing.

    The reason JPG became so dominant is simple. It offers a strong balance between visual quality and small file size. A well-saved JPG can look nearly identical to the original image for everyday viewing, while using only a fraction of the storage space of a BMP.

    That is why JPG is usually preferred for product photos, blog images, client proofs, social media uploads, and images that need to move quickly across devices and platforms.

    Key technical differences, compression, file size, color depth, metadata support

    The biggest difference between BMP and JPG is compression. BMP is typically uncompressed or minimally compressed, while JPG uses lossy compression. Lossy means some image data is discarded to reduce file size. This is not always visible to the eye, especially at higher quality settings, but it does mean the conversion is not perfectly reversible.

    By contrast, a lossless format preserves all original image data. BMP often behaves this way in practice, which is why it stays large. That can be useful when you need exact pixel fidelity, but it is inefficient for everyday sharing.

    In real terms, BMP is like storing every detail in full, while JPG is like packing a suitcase intelligently so it takes less space. You still bring what matters, but a few details get optimized away.

    BMP and JPG can also differ in metadata handling and support across platforms. JPG usually plays more nicely with web browsers, content management systems, smartphones, and photo apps. BMP is broadly supported, but far less practical in modern publishing and sharing workflows.

    Why convert BMP files into JPG?

    Main reasons: file size reduction, web compatibility, sharing and storage

    Most people convert BMP files to JPG for one reason first: smaller files. That size reduction can be dramatic. A BMP image that takes 10 MB might shrink to under 1 MB as a JPG, depending on the image content and chosen quality level.

    That size difference matters in day-to-day work. Smaller images upload faster, download faster, and are easier to email or attach in project management tools. They also consume less cloud storage, which becomes important when you are handling hundreds or thousands of files.

    JPG is also a better fit for the web. Many websites, portfolio platforms, and online marketplaces accept JPG as a standard upload format. If your BMP files come from a scanner or older design tool, converting them can make them immediately usable online.

    When you should not convert

    Converting to JPG is not always the right move. If you need lossless quality, such as for archival graphics, detailed diagrams, intermediate editing files, or images you plan to resave many times, JPG may not be ideal.

    You should also avoid JPG if the original image needs transparency. JPG does not support an alpha channel in the way PNG and some other formats do. If your BMP contains transparency-related workflow needs or must preserve exact edges and text, PNG is often a better choice.

    Another important point is that repeated JPG saves can reduce quality over time. If you open, edit, and resave a JPG again and again, compression artifacts can accumulate. That is why it is smart to keep the original BMP or convert a master copy to a lossless format before making multiple revisions.

    Real-world scenarios and quick size comparison

    A practical example helps. If you scan a letter-sized page or export a screenshot-heavy document as BMP, the file might be anywhere from 5 MB to 20 MB. The same image saved as JPG could land between 0.2 MB and 2 MB, depending on compression level, resolution, and image content.

    Format

    Typical File Size

    Best Use Case

    Trade-off

    BMP

    5 MB to 20 MB

    Editing, archival, raw exports

    Very large files

    JPG

    0.2 MB to 2 MB

    Web, email, sharing, storage

    Some quality loss

    For a small business owner sending 50 product images to a client, that difference can mean the gap between a manageable ZIP file and a frustrating upload failure.

    How to convert BMP files to JPG on Windows (step-by-step)

    Using built-in Photos or Paint apps

    If you only need to convert one or two files, Windows already gives you a simple path. Paint is the easiest built-in option.

    Follow these steps in Paint:

    1. Open Paint and load your BMP image.
    2. Click File.
    3. Choose Save as.
    4. Select JPEG picture.
    5. Choose a location, rename the file if needed, and click Save.

    That is the classic method, and it works on most Windows systems without extra downloads.

    The Photos app may also let you open and export or save a copy, depending on your Windows version. If you see a Save As or Export option, select JPG/JPEG as the output format. Photos is convenient, but Paint is more universally consistent.

    Batch conversion with PowerShell

    When you need to convert a whole folder of BMP files to JPG, PowerShell can help, though it is less flexible than dedicated image tools. A simple approach is to load each BMP and save it as a JPG using .NET image handling.

    Use this example in a folder that contains your BMP files:

    Add-Type -AssemblyName System.Drawing
    
    Get-ChildItem *.bmp | ForEach-Object {
        $bmpPath = $_.FullName
        $jpgPath = [System.IO.Path]::ChangeExtension($bmpPath, ".jpg")
        $image = [System.Drawing.Image]::FromFile($bmpPath)
        $image.Save($jpgPath, [System.Drawing.Imaging.ImageFormat]::Jpeg)
        $image.Dispose()
    }
    

    This script is useful for quick local conversions. If you need better control over JPEG quality, resizing, or metadata, dedicated tools are usually better.

    Microsoft PowerToys does not directly replace a full image batch converter, but it can support image workflow tasks such as resizing. For true format conversion at scale, a program like IrfanView or XnConvert is more practical.

    Using free desktop programs like IrfanView and XnConvert

    IrfanView is one of the best lightweight tools for Windows. It is fast, free for personal use, and excellent for batch work. You can convert BMP images to JPG while also resizing, renaming, and adjusting compression.

    In IrfanView, open the Batch Conversion/Rename dialog, choose JPG as the output format, add your BMP files, and start the process. The interface looks old-fashioned, but it is extremely efficient.

    XnConvert is another strong option. It has a cleaner interface and works well for users who want visual control over output settings. You can choose JPEG quality, preserve or strip metadata, apply filters, and export multiple files in one run.

    If you regularly handle scanner output, product photos, or image archives, these desktop tools are much faster than opening files one by one.

    How to convert BMP files to JPG on macOS

    Using Preview app for single and batch conversion

    On macOS, Preview is the easiest built-in solution. For a single file, open the BMP image, then go to File > Export. Choose JPEG from the format menu, adjust the quality slider, and save.

    For multiple files, open them together in Preview. Select the thumbnails in the sidebar, then use File > Export Selected Images if available, or open them together and export in sequence depending on your macOS version. In newer workflows, you may need to select the files in Finder, open them in Preview, highlight all thumbnails, then export.

    The useful part is the quality slider. This gives you a direct trade-off between file size and image clarity. For everyday web and email use, a medium-high quality setting is usually the sweet spot.

    Using Automator for automated batch conversions

    If you repeat this task often, Automator can save time. You can build a small workflow that takes BMP images from a folder and converts them to JPG automatically.

    A simple Automator workflow usually includes selecting Finder items, copying them to a chosen output folder, and applying a format change step. That is ideal for recurring office processes, such as handling scanned image dumps at the end of each day.

    This approach works especially well for teams that want a no-code automation inside macOS. Once saved, the workflow can be run again with almost no setup.

    Using ImageMagick via Homebrew

    For developers or power users, ImageMagick on macOS is hard to beat. After installing it with Homebrew, you can convert files from Terminal quickly and precisely.

    A typical command looks like this:

    magick *.bmp -quality 85 jpg:
    

    This is useful when you want repeatable batch conversion, shell scripting, or integration into a larger workflow. It is also better than manual exporting if you need to process many files with consistent settings.

    How to convert BMP files to JPG on Linux

    Using ImageMagick from the command line

    Linux users often prefer ImageMagick because it is script-friendly and widely available. Depending on your distribution, you can install it from the package manager and then run conversions from the terminal.

    For batch conversion, this command is common:

    magick mogrify -format jpg -quality 85 *.bmp
    

    This creates JPG versions of your BMP files using a quality level of 85, which is a solid default for general use.

    There is an important distinction between convert and mogrify. convert creates a new output file from one input at a time, while mogrify is designed for bulk processing and can alter many files in one command. That power is helpful, but it also means you should be careful with file paths and permissions.

    Using GUI tools like GIMP and XnView MP

    If you prefer a graphical interface, GIMP can open BMP files and export them as JPG. This is better for one-off conversions or images that need touch-up before export.

    XnView MP is another good Linux-friendly option for batch conversion. It provides a more approachable workflow than the terminal while still offering useful controls like quality percentage, resize rules, and metadata settings.

    GUI tools make sense if you want visual confirmation before saving. Command-line tools make more sense when speed, automation, or bulk handling matters most.

    Batch conversion examples and quality adjustment

    A batch job should always start with a test. Convert three to five BMP files first, inspect the results, and confirm the quality setting is right. For text-heavy images or screenshots, JPG compression can sometimes create visible artifacts around sharp edges.

    If that happens, increase the quality value or consider PNG instead. Linux gives you plenty of flexibility, but that flexibility works best when paired with a quick visual check.

    Online tools for quick, no-install conversions

    Top reliable online converters and short pros and cons

    Online tools are popular because they remove installation entirely. For quick, non-sensitive images, they are often the fastest option.

    Some commonly used services include CloudConvert, Convertio, and FreeConvert. These platforms usually support drag-and-drop uploads, output quality options, and download links within seconds.

    Tool

    Best For

    Strengths

    Watch Outs

    CloudConvert

    General use

    Clean interface, good format support

    Free limits may apply

    Convertio

    Quick browser conversions

    Very easy for one-off tasks

    Upload limits on free tier

    FreeConvert

    Casual users

    Simple workflow, compression controls

    File size caps on free plans

    These tools are convenient, but convenience should not override privacy.

    How to use an online converter safely

    Before uploading, check the service’s privacy policy, file retention policy, and maximum file size. Reputable platforms typically explain whether files are deleted automatically after a certain period.

    If you are converting public product photos, old screenshots, or non-sensitive assets, online tools are usually fine. If the image contains invoices, IDs, internal documents, customer information, or proprietary visuals, a local converter is safer.

    It is also worth checking whether the service compresses aggressively or preserves quality settings. Some online tools optimize for speed, not precision.

    When not to use online converters

    Avoid online conversion when files are sensitive, very large, or part of a large batch. Uploading 200 BMP files through a browser is slow and unreliable compared with a desktop batch tool.

    For recurring business workflows, browser-based conversion also creates unnecessary manual work. That is where desktop automation or command-line tools become far more efficient.

    Automated and bulk conversion solutions

    Using scripts and command-line batch jobs

    If BMP-to-JPG conversion is part of a recurring process, automation can save hours over time. On Windows, PowerShell works well for folder-based tasks. On Linux and macOS, Bash plus ImageMagick is a common choice.

    Here is a simple Bash loop:

    for f in *.bmp; do
      magick "$f" -quality 85 "${f%.bmp}.jpg"
    done
    

    That kind of script is useful when a scanner, export tool, or shared folder constantly produces BMP files that need cleanup.

    Dedicated batch-conversion programs

    For non-developers, batch programs like IrfanView, XnConvert, and FastStone are often the best middle ground. They provide the scale of automation without requiring terminal commands.

    These tools are ideal for photographers preparing previews, ecommerce teams shrinking catalogs, and administrators standardizing image uploads. They also let you combine conversion with resizing, watermarking, renaming, or metadata control in one pass.

    Integrating conversion into workflows

    Businesses with repeatable processes can go further by integrating conversion into a larger workflow. A scanned file can land in a watched folder, trigger a script, convert to JPG, and then sync to cloud storage or a document system.

    Developers may connect this to server-side scripts, cron jobs, or automation platforms. The value is not just speed. It is consistency. Every image gets converted the same way, with the same quality rules, every time.

    Preserving image quality: best practices and settings

    Choosing the right JPEG quality level

    The most important setting in JPG export is quality. For most web and email uses, a quality range of 75 to 85 is the sweet spot. It usually keeps images looking clean while dramatically reducing file size.

    If the image contains lots of text, diagrams, or sharp UI elements, you may want to go a bit higher. If it is a natural photo with soft gradients, 80 or even 75 may still look excellent.

    A lower number means a smaller file, but not always a better result. Over-compression can produce blockiness, halos, and fuzzy edges. Test visually, not just numerically.

    When to resize or crop before converting

    If an image is much larger than needed, resize before or during conversion. There is little value in saving a 5000-pixel-wide JPG if it will only appear as a 1200-pixel website image.

    Cropping also helps. Removing unnecessary empty space or borders lowers file size and improves clarity where it matters. This is especially useful for product images and scanned documents.

    Working with metadata and color profiles

    Some conversion tools preserve EXIF metadata and color profiles, while others strip them by default. That can matter if you want to keep capture details, timestamps, orientation data, or consistent color rendering.

    For web publishing, stripping metadata may reduce file size slightly. For archive or catalog workflows, preserving it may be more important. Color profiles are especially worth keeping if accurate brand or product color matters.

    If lossless is required

    If you need perfect fidelity, JPG is the wrong target. In that case, consider PNG, TIFF, or WebP lossless. These formats preserve image data better, though file sizes are usually larger than JPG.

    A good rule is simple. Keep the original BMP, create a JPG copy for sharing, and use a lossless format when quality must remain exact.

    Troubleshooting common problems

    Blurry or poor-quality results

    If the converted JPG looks worse than expected, first inspect the original BMP. Some source files are already low quality, and conversion cannot restore missing detail.

    Next, raise the JPEG quality setting and avoid resaving the same JPG repeatedly. It also helps to test a different converter. Some tools apply more aggressive default compression than others.

    Corrupted BMP files

    If a BMP file will not open or convert, confirm that it is not already damaged. Try opening it in a different app such as Paint, Preview, GIMP, or IrfanView.

    If one program fails but another succeeds, the issue may be format compatibility rather than full corruption. Some BMP variants use unusual headers, bit depths, or compression options that certain tools handle poorly.

    Large batch jobs failing or timing out

    When batch conversions fail, file count and memory usage are often the culprits. Break the job into smaller groups, write output to a separate folder, and confirm you have enough disk space.

    For browser-based tools, timeouts are common with large uploads. That is one more reason bulk jobs should usually stay local.

    Errors converting unusual BMP variants

    Some BMP files use RLE compression, uncommon bit depths, or legacy encoding structures. If a basic app refuses to convert them, try a more robust tool such as ImageMagick, GIMP, IrfanView, or XnConvert.

    On command-line systems, inspect the file details before converting. ImageMagick can help identify whether the file structure is standard enough for normal export. When one converter fails, another may still decode it correctly.

    Recommended tools and use cases (quick reference)

    Choosing the right conversion method depends less on the file format and more on your workflow. If you need a single quick conversion, built-in tools are usually enough. If you need scale or precision, desktop and command-line tools are better.

    Use Case

    Best Tool

    Cost

    Why It Fits

    One-off single conversion

    Paint, Preview

    Free

    Fast, built in, no setup

    Batch conversions

    IrfanView, XnConvert

    Free / freemium

    Good controls, easy bulk processing

    Privacy-sensitive images

    Local desktop apps, ImageMagick

    Free

    No cloud upload required

    Automation and developer workflows

    ImageMagick, PowerShell, Bash scripts

    Free

    Repeatable, scriptable, scalable

    Occasional browser-based use

    CloudConvert, Convertio, FreeConvert

    Free / freemium

    No installation, quick access

    For most non-technical users, Paint or Preview is enough for occasional tasks. For recurring business use, XnConvert and IrfanView offer the best balance of ease and power. For developers and admins, ImageMagick is the most flexible long-term solution.

    FAQs

    Is JPG always smaller than BMP?

    Almost always in practical use, yes. JPG uses lossy compression, so it usually produces much smaller files than BMP. The exact reduction depends on the image content and quality setting.

    Does converting BMP to JPG reduce image quality?

    Yes, at least technically. JPG discards some image data during compression. At high quality settings, the visual loss may be minimal, but it is still not lossless.

    Can I convert back from JPG to BMP without loss?

    No. You can convert a JPG file into BMP format, but the lost detail does not come back. BMP will simply store the already-compressed JPG image in a larger container.

    What’s the best JPG quality setting for web?

    For most web images, 75 to 85 is the best starting range. Use the lower end for smaller files and the higher end when sharp detail matters.

    Conclusion and quick step checklist

    If you just need to convert a few images, the built-in apps on your computer are usually enough. If you need batch processing, quality control, or automation, move to tools like XnConvert, IrfanView, or ImageMagick. And if the images are private, keep the entire process local rather than using an online converter.

    The smartest next step is to choose one sample BMP file and test your preferred method before converting everything. That gives you a quick reality check on size, quality, and workflow fit.

    Before you convert, run through this checklist:

    1. Back up the original BMP files if quality matters.
    2. Choose the right JPG quality, usually 75 to 85 for general use.
    3. Resize or crop first if the image is larger than necessary.
    4. Check privacy requirements before uploading to an online tool.
    5. Test a small batch before processing hundreds of files.

    If you want the simplest route, start with Paint on Windows or Preview on macOS. If you want the best long-term solution for regular BMP-to-JPG work, use a dedicated batch tool or ImageMagick and standardize your settings.
  • How to Convert JPG Images to PDF — Easy Methods & Best Tools

    How to Convert JPG Images to PDF — Easy Methods & Best Tools

    A JPG can be opened almost anywhere, but it is often the wrong format when you need a document that looks polished, prints correctly, combines multiple pages, or stays intact when shared. That is why many people need to convert a JPG into a PDF, whether they are sending invoices, uploading application documents, archiving receipts, or turning phone snapshots into something more professional.

    The good news is that converting images to PDF is usually quick. In many cases, you do not even need to install anything. Windows, macOS, iPhone, iPad, and Android all offer built-in ways to save a JPG as a PDF, while online converters and desktop apps add batch processing, compression, OCR, and stronger editing controls.

    This guide covers the easiest ways to create a PDF from JPG files, the best tools for different needs, and the trade-offs that matter most, especially quality, privacy, file size, and convenience. If you only need a one-off conversion, there is a fast option for you. If you handle client documents, bulk image folders, or sensitive files, there is a better workflow for that too.

    Why Convert a JPG to a PDF?

    A JPG is ideal for a single image. A PDF is better when that image needs to behave like a document. That difference matters more than many users expect.

    For everyday work, PDFs solve several practical problems at once. They are easier to share in a professional context, more predictable when printed, and much better for bundling multiple pages into a single file. If you have ten receipt photos, a contract signature page, or a stack of scanned notes, sending them as separate image files is messy. Turning them into one PDF makes the result easier to open, store, annotate, and archive.

    PDF files also preserve layout more reliably across devices. A JPG can still be viewed almost anywhere, but it has no real concept of page order, document metadata, page size, or password protection. A PDF does. That is why PDFs are commonly preferred for forms, signed paperwork, reports, applications, invoices, and legal records.

    How JPG and PDF Differ

    A JPG, or JPEG, is an image format built for photographs and compressed graphics. It uses lossy compression, which means some image data is discarded to reduce file size. That is excellent for sharing photos quickly, but repeated saving can reduce clarity over time. A JPG is also usually a single image, not a true multi-page document.

    A PDF, by contrast, is a document container. It can hold one image or many images, along with text, metadata, fonts, annotations, links, and security settings. When you convert a JPG to a PDF, you are usually wrapping the image inside a document format rather than changing it into a text-editable file.

    That distinction explains a common misunderstanding. Converting a low-quality JPG into a PDF does not magically improve image sharpness. If the original image is blurry, the PDF will still be blurry. The best conversions preserve what you already have while giving you better structure, sharing, and output options.

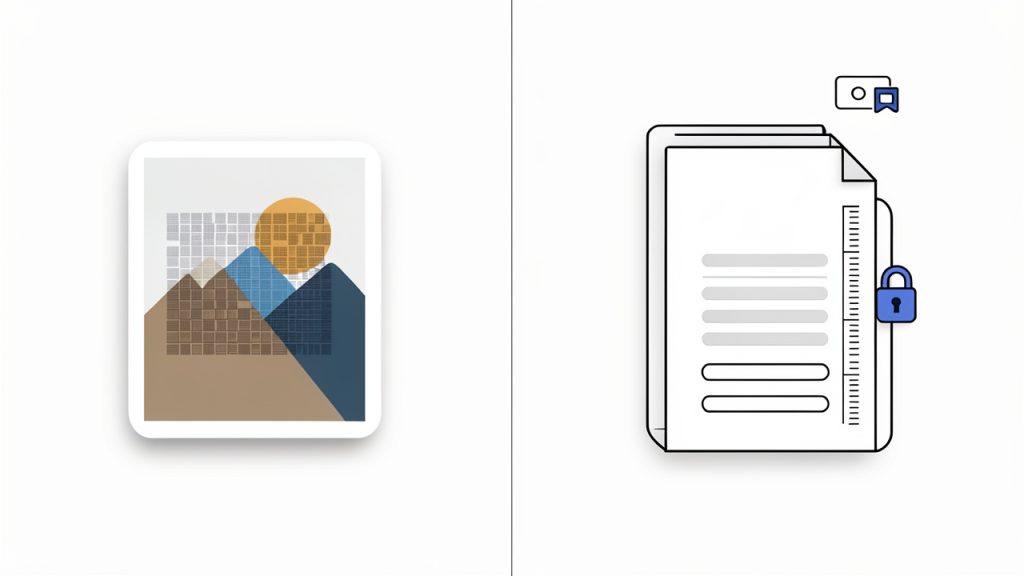
    Side-by-side illustration comparing a JPG (single floating photo) and a PDF (stack of pages in a document container with icons for metadata, password lock, and text layer). The JPG side shows lossy compression artifacts; the PDF side shows multiple pages, page size ruler, and a lock to indicate security.

    Fast Methods to Convert JPG to PDF

    If speed matters most, start with the tools already on your device. They are often enough for one-off tasks and basic multi-page PDFs.

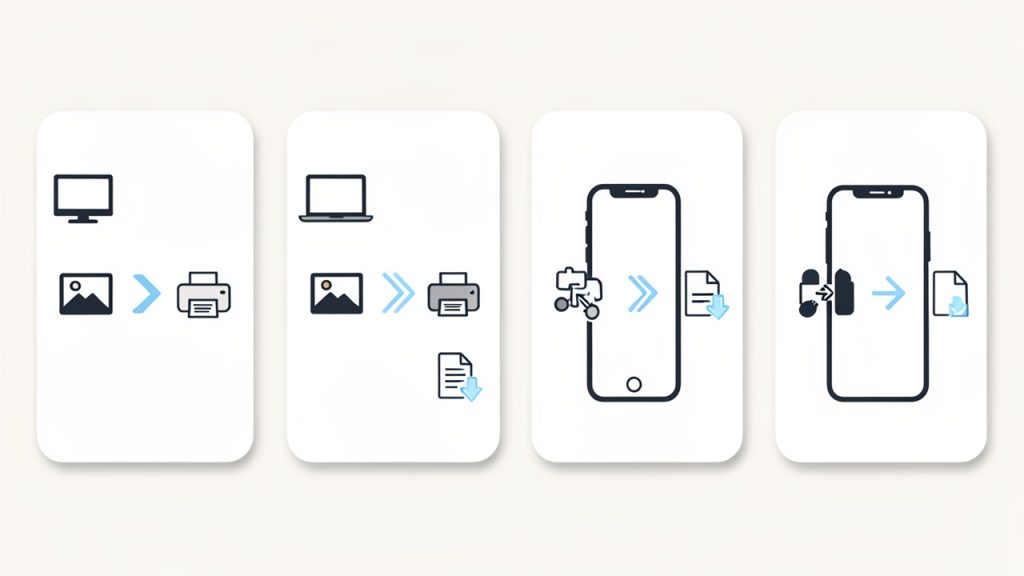
    A simple platform workflow graphic with four labeled panels/icons: Windows (Photos -> Print -> Microsoft Print to PDF), macOS Preview (Open in Preview -> Print -> Save as PDF), iPhone/iPad (Photos -> Share -> Print -> pinch-out -> Save), Android (Gallery/Photos -> Share/Print -> Save as PDF). Each panel shows the minimal tap/click sequence with small device icons.

    Windows 10 and Windows 11

    Windows includes Microsoft Print to PDF, which works with many image viewing apps. Open the JPG in Photos or another viewer, choose Print, then select Microsoft Print to PDF as the printer. After that, set paper size, quality, orientation, and fit options, then save the resulting PDF.

    If you want to combine multiple JPG files into one PDF, select all the images in File Explorer, right-click, and choose Print. Windows will let you arrange the images and output them into a single PDF file. Before saving, double-check page order. If filenames are inconsistent, Windows may sort them in an unexpected sequence.

    macOS Preview

    On a Mac, Preview is one of the easiest local tools for JPG-to-PDF conversion. Open one or more JPG files in Preview. If you are combining images, make sure the thumbnail sidebar is visible so you can drag pages into the correct order. Then choose File > Print, followed by Save as PDF from the PDF menu.

    Preview is especially useful for light cleanup. Before exporting, you can rotate pages, reorder them, or remove extras. For many users, that makes it a better option than uploading files to a website.

    iPhone and iPad

    On iPhone and iPad, you can turn a JPG into a PDF using the Share menu. In Photos, select the image, tap Share, then choose Print. On the print preview screen, pinch outward on the thumbnail preview. iOS will generate a PDF preview, which you can then share or save to Files.

    For multiple images, select them first in Photos, then repeat the same process. This method is slightly hidden, but it is reliable and does not require a third-party app. It is especially helpful when you need to send travel documents, receipts, or handwritten notes while away from your desk.

    Android

    Many Android devices support PDF creation through the Print option inside Google Photos, Files, or gallery apps. Open the image, tap Share or the menu icon, choose Print, then set Save as PDF as the destination. You can then save the file locally or upload it to cloud storage.

    The exact menu path varies by manufacturer, so Samsung, Pixel, and other Android phones may look slightly different. If your device supports selecting multiple images before printing, you can often combine them into a single PDF without extra software.

    Adobe Acrobat for More Control

    If you need professional output, Adobe Acrobat offers a cleaner workflow. You can create PDFs from images, combine many files into one document, reorder pages, compress large outputs, and apply OCR if the images contain text.

    This is the better choice when the PDF is going to a client, a court filing portal, a procurement system, or any environment where consistency matters. Acrobat is not the fastest tool for casual use, but it is one of the most complete.

    Best Free Online and Offline Tools for JPG-to-PDF Conversion

    Different users need different tools. Some want the fastest possible web converter. Others need offline privacy, batch processing, or mobile scanning. The options below cover the most useful choices.

    Quick Comparison

    Tool Best For Platform Free Option Batch Support OCR/Advanced Editing Privacy Fit
    Smallpdf Fast browser-based conversions Web Yes, limited Yes Limited on free tier Moderate
    ILovePDF Quick online workflows and file merging Web Yes Yes Some extra PDF tools Moderate
    PDFCandy Flexible free online PDF utilities Web/Desktop options Yes Varies Some editing tools Moderate
    Adobe Acrobat Pro Professional, secure, advanced workflows Desktop/Web Trial only Yes Strong High, especially local workflows
    Preview Free local conversion on Mac macOS Yes Yes Basic only High
    PDF24 Creator Free Windows desktop utility Windows Yes Yes Good utility set High
    Microsoft Lens Mobile scanning to PDF iOS/Android Yes Limited Strong scanning features Moderate to high
    Adobe Scan Clean mobile document capture iOS/Android Yes Limited OCR available Moderate
    CamScanner Mobile scanning and export iOS/Android Yes, often limited Limited Good scanning tools Moderate

    1. Smallpdf

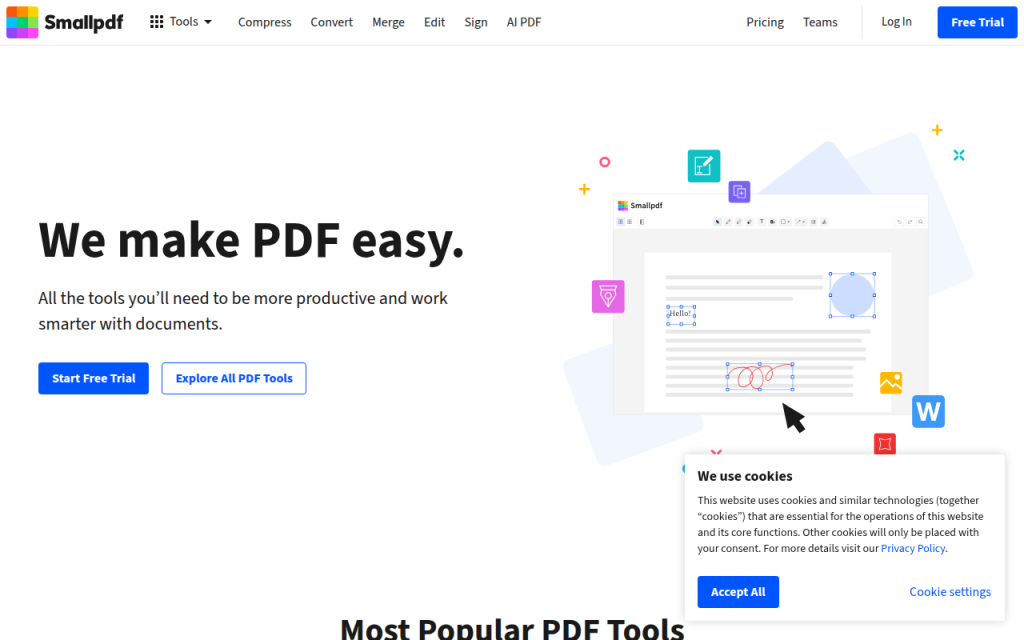
    Screenshot of smallpdf.com

    Smallpdf is one of the easiest ways to convert a JPG into a PDF online. The interface is simple, the upload flow is smooth, and it works well for users who want a quick result without learning new software. For freelancers, students, and small teams doing occasional conversions, it is often the fastest route from image to shareable document.

    Key features include browser-based conversion with drag-and-drop upload, support for multiple JPGs so you can combine images into one PDF, easy page reordering before export, and a range of adjacent PDF tools such as compression and merging. Its advantages are convenience and a clean interface; the drawbacks are free usage limits and limited suitability for confidential files unless you trust the service. Advanced features require a paid plan.

    Website: https://smallpdf.com

    2. ILovePDF

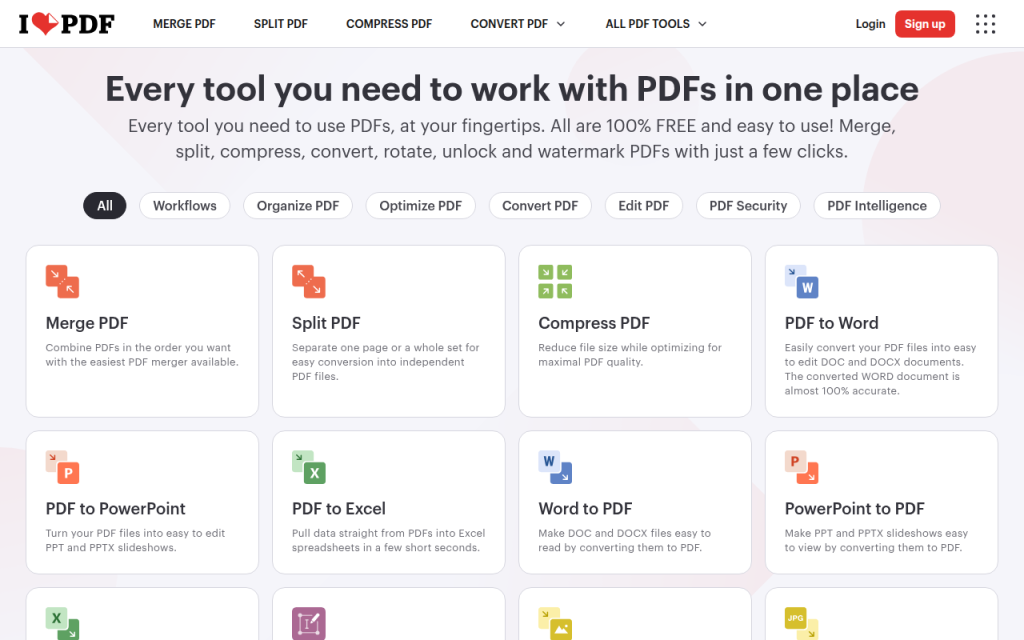
    Screenshot of ilovepdf.com

    ILovePDF combines a straightforward JPG-to-PDF converter with a broad toolkit for common document tasks. Upload one or more image files, choose orientation and page size, and convert. In addition to conversion, the platform offers merge, split, compress, and organize tools, and it integrates with cloud storage. It is a solid all-around option for small business owners who handle invoices, forms, and customer paperwork. Free limits apply for heavy use, and uploads may not be appropriate for highly sensitive documents without extra caution.

    Website: https://www.ilovepdf.com

    3. PDFCandy

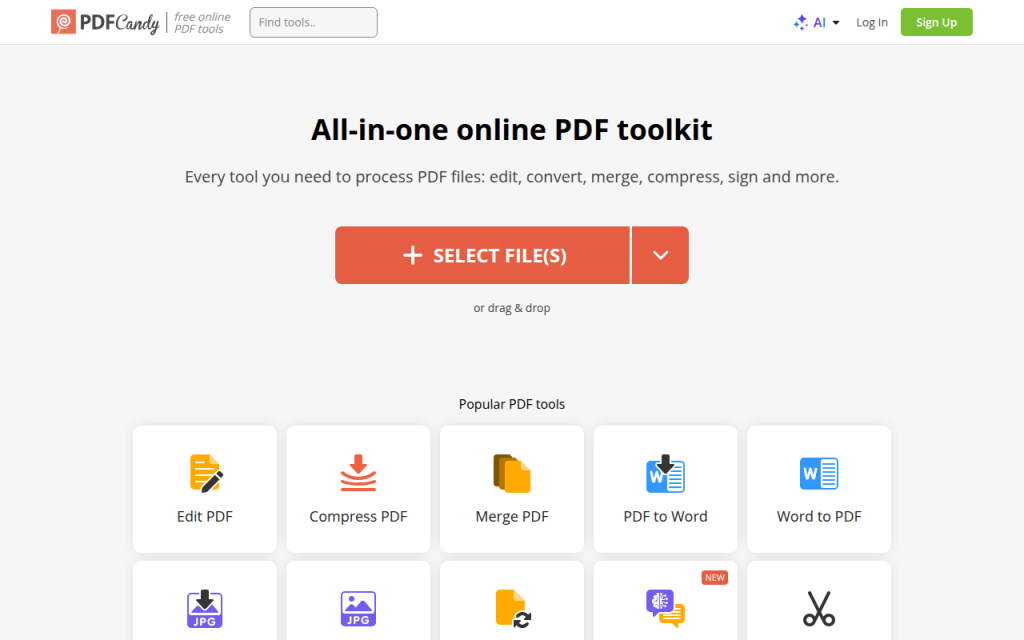
    Screenshot of pdfcandy.com

    PDFCandy is a flexible option for users who want more than a single conversion page. It offers image-to-PDF conversion alongside editing, compression, and other format conversion features, making it appealing for people who work across many file types. PDFCandy is useful when your workflow includes converting images one day, compressing PDFs the next, and extracting pages later on. It provides a wide feature set accessible through a simple browser workflow, with desktop options available in some cases. Performance depends on file size and browser, and privacy considerations apply to any online service.

    Website: https://pdfcandy.com

    4. Adobe Acrobat Pro

    Adobe Acrobat Pro is the professional benchmark for image-to-PDF conversion. It is not the lightest or cheapest option, but it is the tool people choose when the result needs to be dependable. If you regularly prepare client documents, submit paperwork to regulated systems, or need searchable PDFs with OCR, Acrobat earns its place.

    Its advantages are depth of capability: combine many images, optimize file size, run OCR, add passwords, edit page order, redact content, and export in various formats. The downsides are cost and complexity for casual users. Acrobat is usually sold as a subscription.

    Website: https://www.adobe.com

    5. Preview

    Preview is the unsung hero for Mac users. It is free, built in, and surprisingly capable for creating PDFs from JPG files. You can open images, arrange them visually, rotate or delete pages, and export everything into a single PDF without uploading anything. For privacy-conscious users, that local workflow is a major advantage. The main limitation is that Preview is macOS-only and does not provide advanced OCR or enterprise features.

    Website: https://www.apple.com/macos/preview

    6. PDF24 Creator

    PDF24 Creator is a strong free desktop option for Windows users who want offline control. It is particularly useful for batch conversions, merging files, and performing utility tasks without sending anything to the web. Think of it as a local PDF workstation: it is not as polished as Acrobat, but it covers common needs such as file assembly, compression, and document creation while keeping everything on your machine.

    The tool is free, works offline, and is ideal for repeated document tasks; the trade-off is a utilitarian interface and Windows-only availability.

    Website: https://tools.pdf24.org

    7. PDFsam

    PDFsam is known for splitting and merging PDFs and is useful in a JPG-to-PDF workflow when you need to organize and refine PDFs after creating them. If your images are already in PDF form, PDFsam helps you combine sets, reorder sections, and prepare cleaner final packages. It is a smart companion tool for larger workflows. There is a free basic version and paid editions for expanded capabilities.

    Website: https://pdfsam.org

    8. ImageMagick

    ImageMagick is a powerful choice for developers, IT teams, and power users who want scripted or repeatable conversion workflows. It is excellent when you need automation, server-side processing, or command-line control over many files at once. Use ImageMagick to automate repeated conversions, rename files systematically, or integrate image handling into scripts. The learning curve is steeper and PDF policy settings on some systems may require troubleshooting, but ImageMagick is open source and free.

    Website: https://imagemagick.org

    9. Microsoft Lens

    Screenshot of microsoft.com

    Microsoft Lens is one of the best mobile apps for turning photos into useful PDFs. It is especially strong for scanning documents, whiteboards, receipts, and notes rather than simply wrapping an existing photo into a PDF. Lens crops edges, improves readability, and integrates with Microsoft 365 workflows, which is helpful if you use Outlook, OneDrive, Word, or Teams. The app is free and works well for mobile professionals who need cloud handoff and decent scan quality.

    Website: https://www.microsoft.com

    10. Adobe Scan

    Adobe Scan is a polished mobile app for turning camera captures into PDFs quickly. It is particularly effective for receipts, contracts, handwritten notes, and other documents that need cleanup before export. The app offers good auto-detection, cropping, and OCR integration so scanned text can become searchable. Adobe Scan is free to start, with expanded capabilities tied to Adobe services.

    Website: https://www.adobe.com/acrobat/mobile/scanner-app.html

    11. CamScanner

    Screenshot of camscanner.com

    CamScanner is a popular mobile option for converting photographed documents into PDFs on the go. It provides enhancement filters, cropping tools, and a mobile-first convenience that suits freelancers, students, field staff, and small teams. It works best when the source is a physical page rather than an already clean digital image. Be aware of export limits, potential watermarks on free plans, and privacy terms before relying on any cloud-based scanning app for sensitive paperwork.

    Website: https://www.camscanner.com

    When to Use an Online Tool vs an Offline App

    Online converters are best when the job is simple, the files are not sensitive, and speed matters more than anything else. If you have two JPGs from a product manual or a non-confidential receipt, a browser-based tool is often the easiest answer.

    Offline tools are better when the images contain personal data, financial details, legal documents, medical information, contracts, or client records. They are also the smarter choice for batch jobs, recurring workflows, and anyone who wants predictable output without upload limits.

    A useful rule is simple: if you would hesitate to email the image openly, you should probably not upload it to a random converter either.

    Advanced Tips for Better PDF Results

    Quality problems usually begin before conversion. If the original JPG is small, heavily compressed, rotated incorrectly, or poorly lit, the resulting PDF will inherit those flaws. Check image resolution, orientation, and cropping before creating the PDF.

    For text-heavy images, OCR can be transformative. OCR, or optical character recognition, turns an image-based PDF into a searchable document so you can select text, search inside the file, and improve accessibility. Adobe Acrobat, Adobe Scan, and some other tools do this well, but accuracy depends on image clarity and contrast.

    Compression also deserves care. Aggressive compression reduces file size, but it can blur text and damage readability, especially with receipts, forms, and thin lines. For archival or print-ready documents, aim for moderate compression and test the output before sending.

    Privacy, Security, and Legal Considerations

    Privacy is a common blind spot. Web tools are safe enough for ordinary use, but not all services handle uploads the same way. Some delete files quickly; others retain them longer. Some process files server-side, while others use more privacy-friendly methods.

    Before uploading anything sensitive, read the provider’s privacy policy and retention terms. Look for automatic deletion, encryption in transit, account requirements, and whether files are used for service improvement or analytics. If you handle HR records, tax forms, ID documents, signed contracts, or health data, local processing is the safer route.

    If the PDF contains sensitive content, consider adding password protection or redacting information after conversion. Passwords restrict opening or editing, while redaction permanently removes visible and hidden sensitive content rather than simply covering it up.

    Troubleshooting Common JPG-to-PDF Problems

    If your PDF looks blurry, the most common cause is a low-resolution source image or excessive compression during export. Start with a higher-quality JPG, choose a larger paper size, or disable aggressive optimization. Scanned text should remain crisp enough to read at normal zoom; if it does not, fix the image quality first.

    If the page orientation is wrong, rotate the image before conversion when possible. Some systems interpret photo orientation based on EXIF metadata, which can produce surprises. Preview on macOS is especially good for correcting this before export. On Windows, checking the print preview carefully can save frustration.

    Large file sizes usually come from high-resolution photos, many pages, or minimal compression. If the file is too big to upload or email, run it through a trusted compression tool afterward and review the compressed result carefully, especially if the document contains fine print.

    If you cannot combine multiple images into one PDF, the issue is usually the workflow, not the files. On Windows, select all images together before printing to PDF. On Mac, open them in one Preview window and arrange them in the sidebar. In online tools, make sure multi-file upload is supported before converting.

    When to Use JPG vs PDF

    Use a JPG when the file is truly just an image, such as a product photo, social media graphic, or casual snapshot. It is lightweight, widely supported, and easy to insert into websites, slides, and chat messages.

    Use a PDF when the image needs to function like a document. That includes job applications, invoices, signed forms, proposals, receipts, scanned IDs, handouts, and archive files. If order, print consistency, professionalism, or security matters, PDF is usually the better choice.

    A helpful mental shortcut: if the recipient needs to view a picture, send a JPG. If they need to review a document, send a PDF.

    Recommended Workflows

    For a one-time personal conversion, use your device’s built-in tools first. They are fast, free, and private enough for ordinary needs. On Mac, use Preview. On Windows, use Print to PDF. On iPhone or Android, use the Print-to-PDF share flow.

    For business use, especially with repeated conversions, adopt a deliberate workflow: standardize filenames, check page order before export, compress only after reviewing readability, and keep a local copy of the original images. That reduces errors when you need to resend or revise the document later.

    For confidential files, stay offline whenever possible. Convert locally, apply OCR only if needed, add passwords when sharing, and use proper redaction tools if sensitive content must be removed. This is the safer path for legal, HR, finance, and healthcare-adjacent workflows.

    Appendix: Quick Reference for Power Users

    For advanced users, command-line tools can automate repeated conversions and bulk jobs. ImageMagick is a common choice, although configuration varies by system and some installations restrict PDF operations by default for security reasons.

    Common patterns include converting multiple JPG images into a single PDF via command-line tooling, then optimizing the resulting PDF with Ghostscript for compression. These tools are best suited to developers, IT admins, and anyone building repeatable automation rather than occasional manual conversions.

    The best way to convert a JPG into a PDF depends on what you care about most. If you want speed, use Smallpdf, ILovePDF, or your device’s built-in print features. If you want privacy and offline control, stick with Preview, PDF24 Creator, or Adobe Acrobat on desktop. If you want to capture paper documents from a phone, Microsoft Lens, Adobe Scan, and CamScanner are strong mobile options.

    The next step is simple. Pick the method that matches your situation, run a test conversion, and check three things before you send the file: clarity, page order, and file size. Those three checks prevent most problems and turn a quick image export into a document you can send with confidence.