JNTZN

Tag: png

  • How to Convert a GIF into a Still Image

    How to Convert a GIF into a Still Image

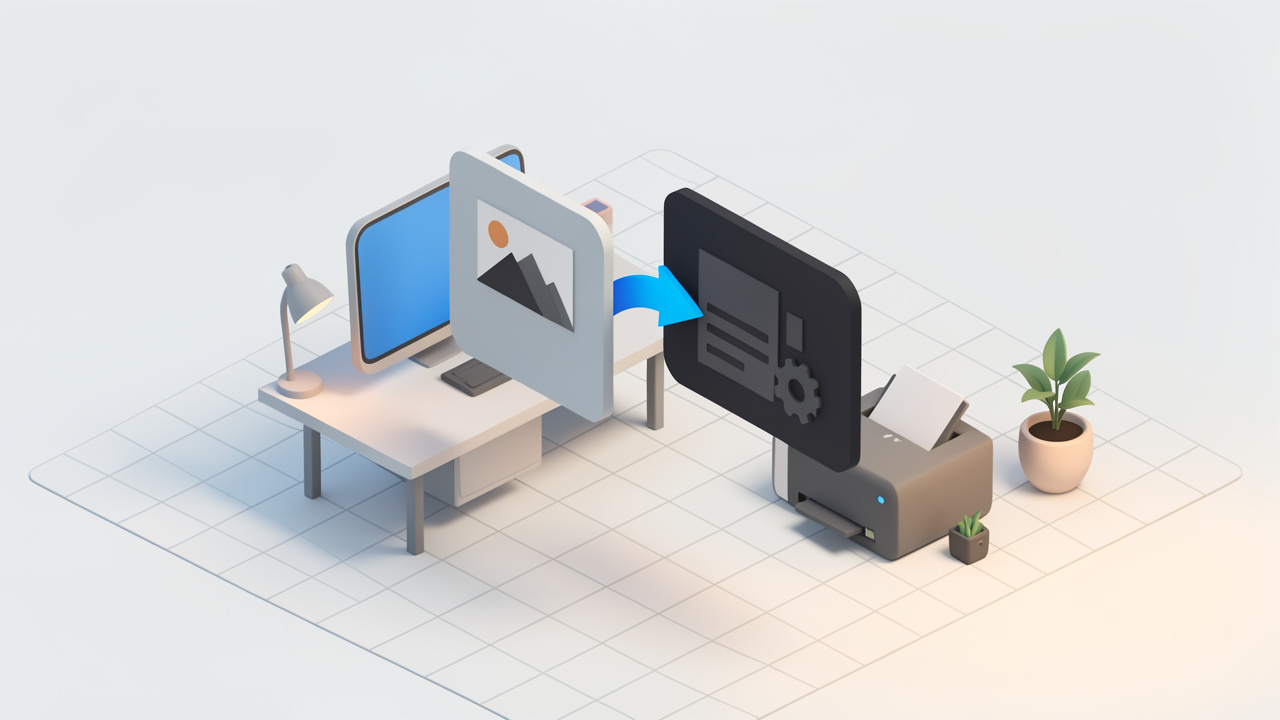
    A GIF can be useful for a quick animation, but it becomes a problem the moment you need a clean still image, a website asset, a product screenshot, or a frame you can actually edit. That is why so many people end up searching for a way to turn a GIF into an image format they can use immediately.

    If you run a small business, manage client content, build websites, or create social posts, converting a GIF into an image is often less about file formats and more about speed. You want the right frame, the right quality, and a file that works everywhere, without installing heavy software or wasting time on trial and error. The good news is that the process is usually simple once you understand what is happening behind the scenes.

    What is converting a GIF into an image?

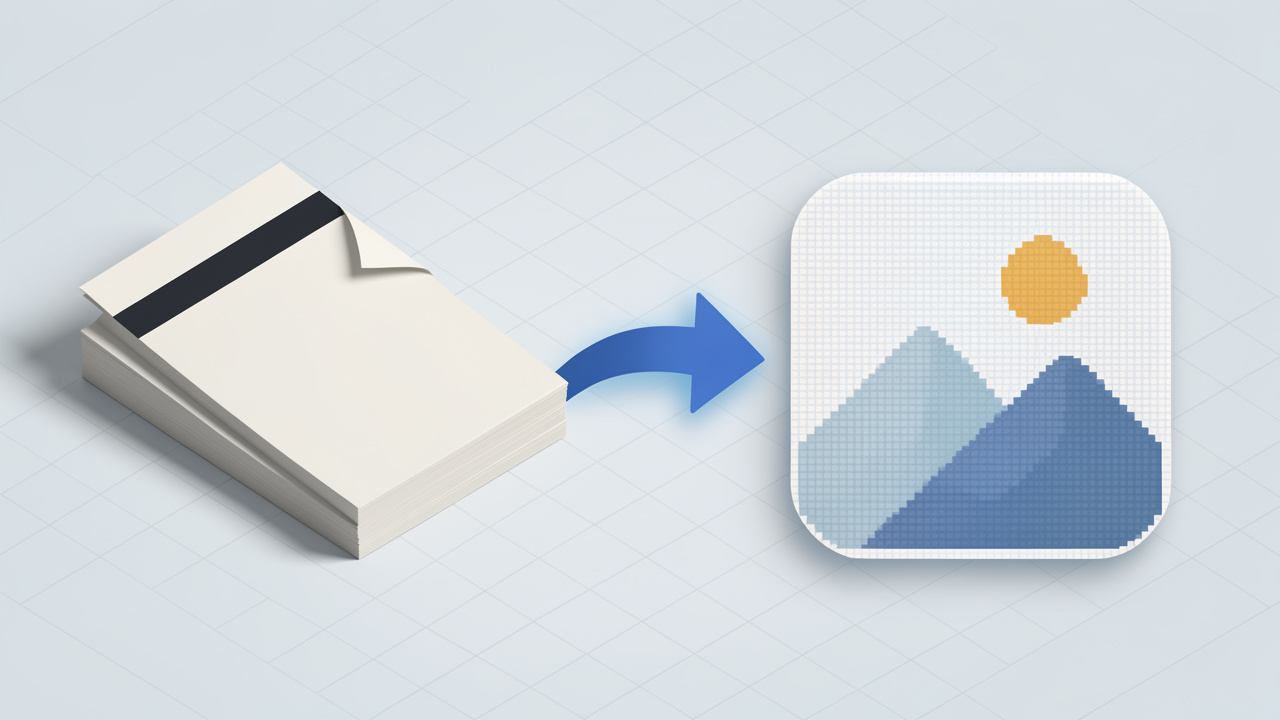
    Converting a GIF into an image is the process of extracting either a single frame or multiple frames from a GIF and saving them as standard image files such as JPG, PNG, or WebP. In plain terms, you are turning an animated or static GIF into one or more still images.

    This matters because a GIF is not always the most practical format. Animated GIFs are built from a sequence of frames, much like a flipbook. If all you need is one visual from that sequence, keeping the entire animation adds unnecessary weight and complexity. A still image is easier to upload, edit, compress, and reuse across websites, documents, e-commerce listings, and presentations.

    For many users, converting a GIF into an image usually means one of two things. The first is exporting every frame as individual image files. The second is capturing a specific frame and saving it as a standalone image. Both are common, but they serve different purposes.

    Static GIF vs Animated GIF

    A static GIF contains just one frame. In that case, converting it to an image is straightforward because there is no motion to preserve or choose from. You are simply changing the container format.

    An animated GIF contains many frames. Here, the conversion process is more selective. You may want the first frame, the sharpest frame, or every frame. That decision affects quality, file size, and how useful the final output will be.

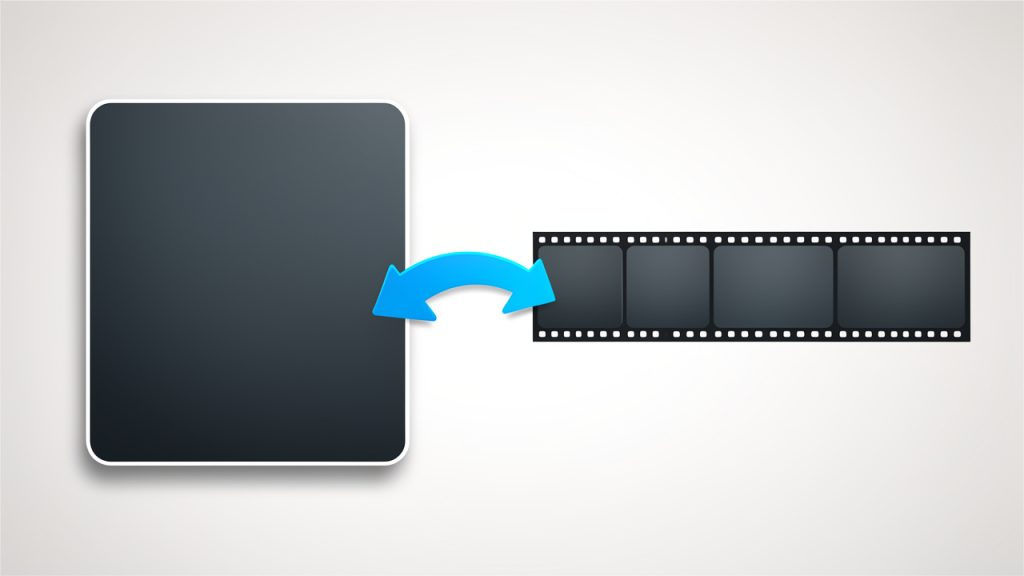
    Side-by-side visual comparing a static GIF (single frame) and an animated GIF (a film-strip of multiple frames). Label the static GIF as "1 frame" and the animated GIF as "multiple frames (like a flipbook)" with an arrow showing extracting one frame.

    Why people convert GIFs into images

    In day-to-day work, the reasons are practical. A freelancer might need a product shot from an animated demo. A developer may want a lightweight image for a landing page instead of an animation that slows performance. A business owner could need a clean thumbnail for an email campaign or marketplace listing.

    There is also the issue of compatibility. Some tools, editors, content management systems, and social platforms handle standard image formats more reliably than GIFs. Converting a GIF into an image gives you more control and fewer surprises.

    Key aspects of converting a GIF to an image

    The biggest misconception is that every conversion is the same. It is not. The right way to convert a GIF depends on what you need the final image to do.

    Choosing the right output format

    The output format shapes both quality and usability. PNG is often the best choice when you want crisp edges, transparency support, and minimal quality loss. It works especially well for logos, interface elements, screenshots, and graphics with text.

    JPG is better for photographic content where smaller file size matters more than perfect sharpness. If the frame from your GIF looks like a photo or a complex scene, JPG can reduce weight significantly. The trade-off is compression, which may soften details.

    WebP is increasingly useful for web performance. It can produce small files with good quality, although support and workflow preferences vary depending on the platform you use.

    Format Best For Strengths Trade-Offs
    PNG Graphics, screenshots, transparent assets Sharp quality, lossless, transparency support Larger file sizes
    JPG Photos, blog visuals, general web use Small size, widely supported Lossy compression, no transparency
    WebP Modern websites, performance-focused publishing Efficient compression, good quality Not ideal for every legacy workflow

    Single frame vs all frames

    This is where many users get stuck. If your goal is a single usable image, extracting one frame is usually enough. That keeps the process quick and avoids clutter.

    If you are repurposing motion into design assets, storyboards, or step-by-step visuals, exporting all frames may be smarter. For example, a tutorial creator might pull each stage of an animated walkthrough into separate PNGs. A designer might scan through all frames to choose the cleanest one.

    The important point is to be intentional. Exporting all frames from a long GIF can produce dozens or even hundreds of image files. That is useful only when you actually need them.

    Image quality and compression

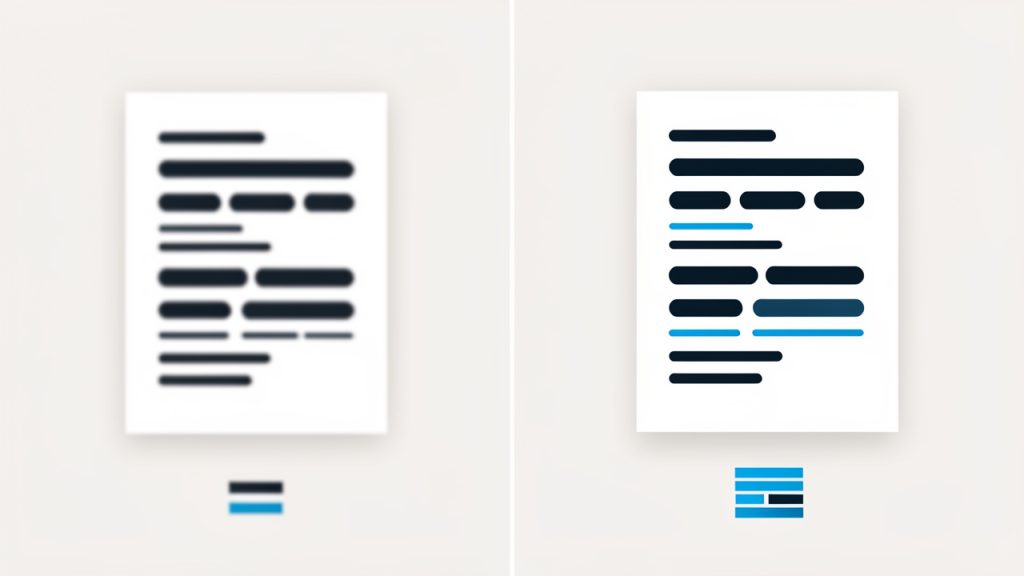
    Not all GIFs start from high-quality source material. GIFs are often already compressed and limited in color range. That means converting a GIF into an image does not magically improve it. You can preserve what is there, but you usually cannot recover detail that was already lost.

    This is especially noticeable with gradients, shadows, and photographic scenes. A GIF may show banding or rough color transitions. Saving that frame as a PNG preserves the frame well, but it does not repair the original limitations. If visual quality is critical, it helps to start with the original video or source design file whenever possible.

    Transparency considerations

    Some GIFs use transparency, and not every output format handles that the same way. PNG is a safer option if you need the background to remain transparent.

    If you save a transparent GIF frame as a JPG, the transparent areas will usually be replaced with a solid background color, often white or black. That can be fine for some use cases, but it is a poor fit for logos, cutouts, and overlay graphics.

    Speed, privacy, and convenience

    For productivity-minded users, the best tool is often the one that gets the job done in seconds. Online converters are popular because they remove friction. You upload the GIF, choose a frame or format, and download the result.

    Still, privacy matters. If the GIF contains client work, internal assets, or sensitive visuals, you may prefer a tool that processes files locally in the browser or a desktop editor that keeps files on your machine. Convenience is valuable, but not at the cost of control.

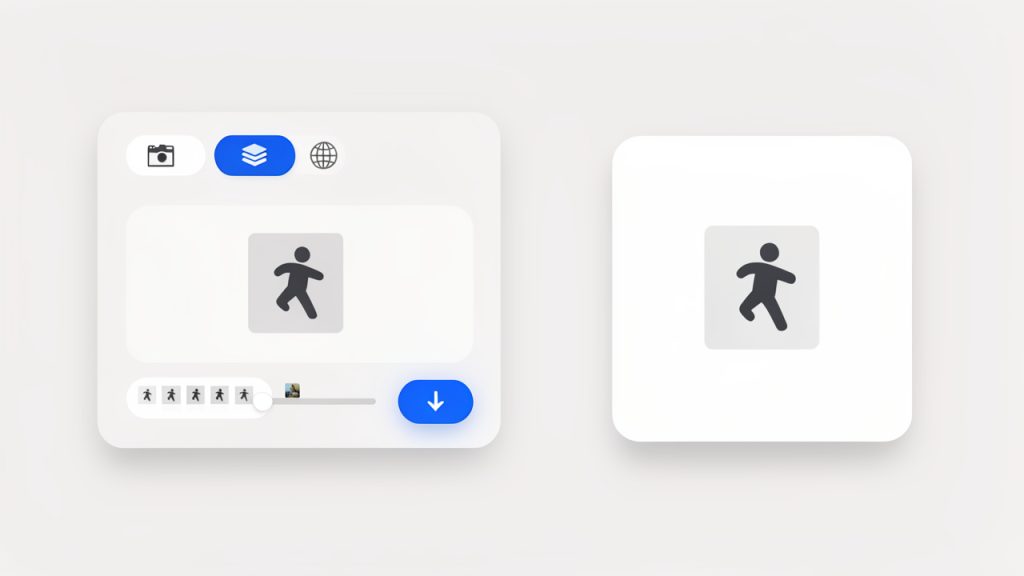
    Mockup of an online converter interface: upload area with a GIF preview, a timeline/frame scrubber to pick a frame, a format dropdown (PNG, JPG, WebP), and an export/download button. Show the exported single PNG preview to the right.

    Here is an example online tool interface you might see, with a frame scrubber and export options for PNG, JPG, or WebP.

    How to get started converting GIFs into images

    The fastest way to start is to define your end goal before you touch the file. Ask yourself whether you need a thumbnail, a transparent asset, a shareable still, or a frame-by-frame extraction. That single decision will make the rest of the process much easier.

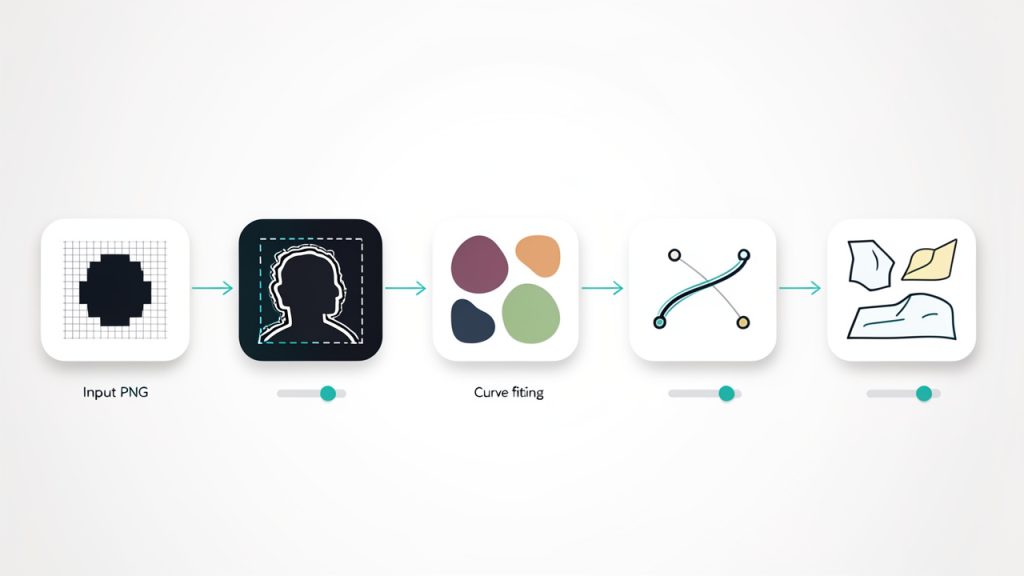
    For most people, an online converter is enough. You upload the GIF, select the output image format, choose a frame if needed, then export. The process feels simple because it is simple. The real skill lies in choosing the right options, not in performing the conversion itself.

    A practical workflow that saves time

    A clean workflow prevents rework. Start by checking whether the GIF is animated or static. Then preview the frames to identify the exact still image you want. If the GIF contains text, UI elements, or product details, zoom in before exporting so you do not accidentally pick a blurred transition frame.

    Next, choose the output format based on use case rather than habit. If you need a crisp on-brand visual, pick PNG. If you need a lightweight image for a blog post or internal doc, JPG may be enough. If this is going on a modern website and file size matters, WebP is worth considering.

    Finally, download the image and inspect it before publishing. Look for compression artifacts, awkward cropping, lost transparency, or a frame that does not represent the animation well. A five-second check can save you from shipping the wrong asset.

    Basic steps most tools follow

    1. Upload the GIF you want to convert.
    2. Choose the output format, such as PNG, JPG, or WebP.
    3. Select a frame if the GIF is animated, or export all frames if needed.
    4. Download the image and review quality before using it.

    Common mistakes to avoid

    One common mistake is picking the first frame automatically. In many animated GIFs, the first frame is only a transition and not the best visual. A better frame might appear a second later.

    Another issue is using JPG for everything. It is familiar, but it is not always the right choice. If your image contains text, logos, sharp edges, or transparency, JPG can degrade the result more than expected.

    A third mistake is expecting the conversion to improve a low-quality GIF. Conversion changes the format, not the original fidelity. If the source is poor, the output will reflect that.

    Best use cases for small businesses, freelancers, and developers

    For small business owners, converting a GIF into an image is useful when creating product thumbnails, email graphics, marketplace visuals, or social media stills. A clean image often performs better in places where animation is distracting or unsupported.

    For freelancers, it is a practical asset-reuse strategy. You can pull stills from client GIFs for proposals, mockups, portfolio pages, or content repurposing. One animated asset can become multiple static deliverables.

    For developers and web teams, converting GIFs into images can improve page speed and user experience. Not every page needs autoplay animation. In many cases, a well-chosen still image gives the same visual message with much lower weight.

    Conclusion

    Turning a GIF into an image is a small task with outsized value. It helps you move faster, publish cleaner assets, and use visuals in more places without format headaches. Once you understand the difference between extracting a single frame and exporting multiple frames, the process becomes far more predictable.

    The next step is simple. Take one GIF you already use, decide what role the final image should play, and convert it with that purpose in mind. When you match the frame and format to the job, converting a GIF into an image becomes a reliable part of your content, design, and productivity toolkit.

  • Convert SVG to PNG Online — Fast, Accurate Exports

    Convert SVG to PNG Online — Fast, Accurate Exports

    You do not need design software to turn an SVG into a PNG anymore. If you have a logo, icon, illustration, or web graphic in SVG format and need a quick raster version for email, social media, presentations, or product listings, using an online converter is often the fastest path.

    That matters because SVG and PNG serve different jobs. SVG files are ideal for scalable graphics, while PNG files are better when you need broad compatibility, fixed dimensions, or transparent backgrounds in apps that do not handle vector formats well. If you want to convert SVG to PNG online, the good news is that the process is usually simple, fast, and accessible from any browser.

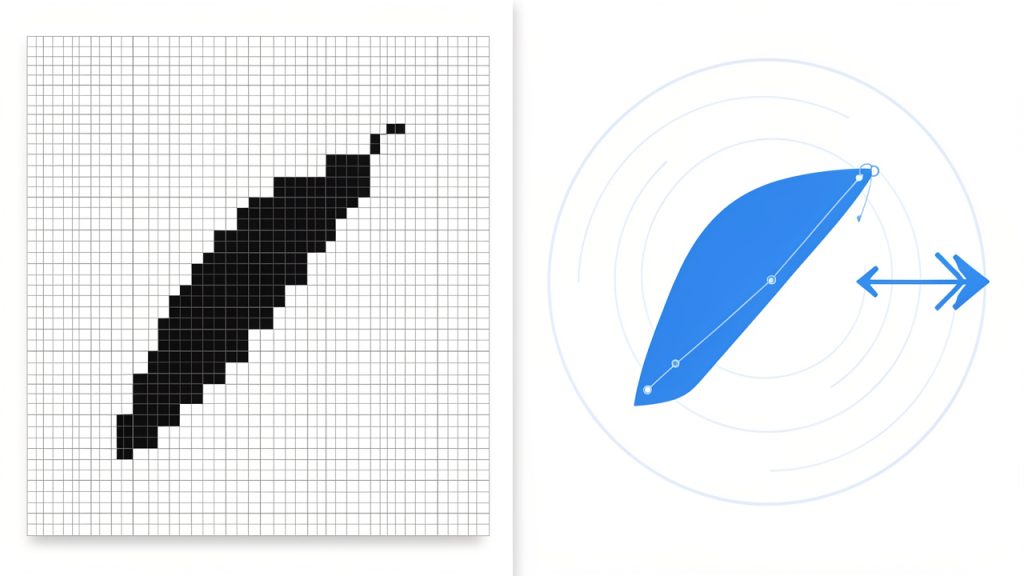
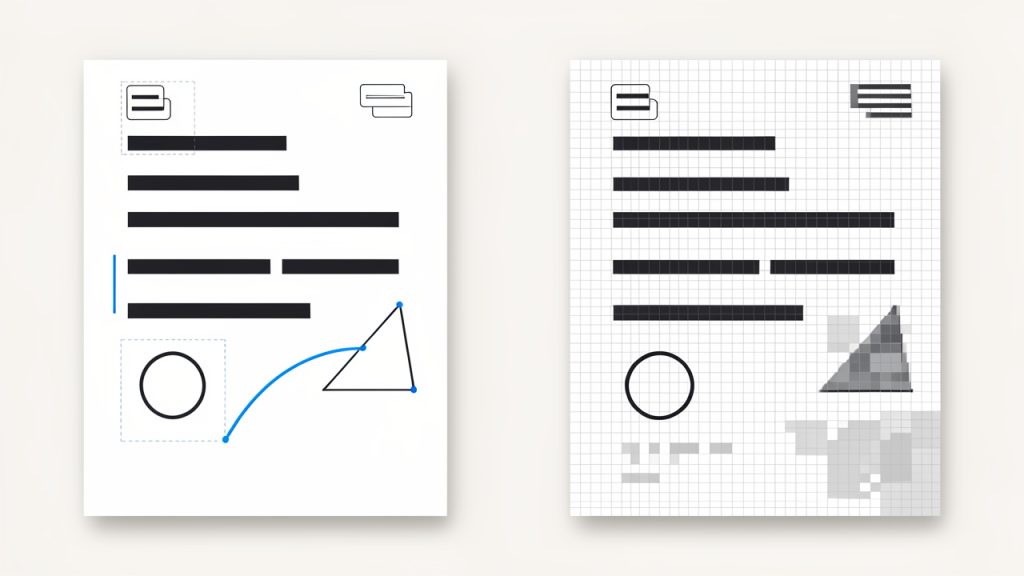
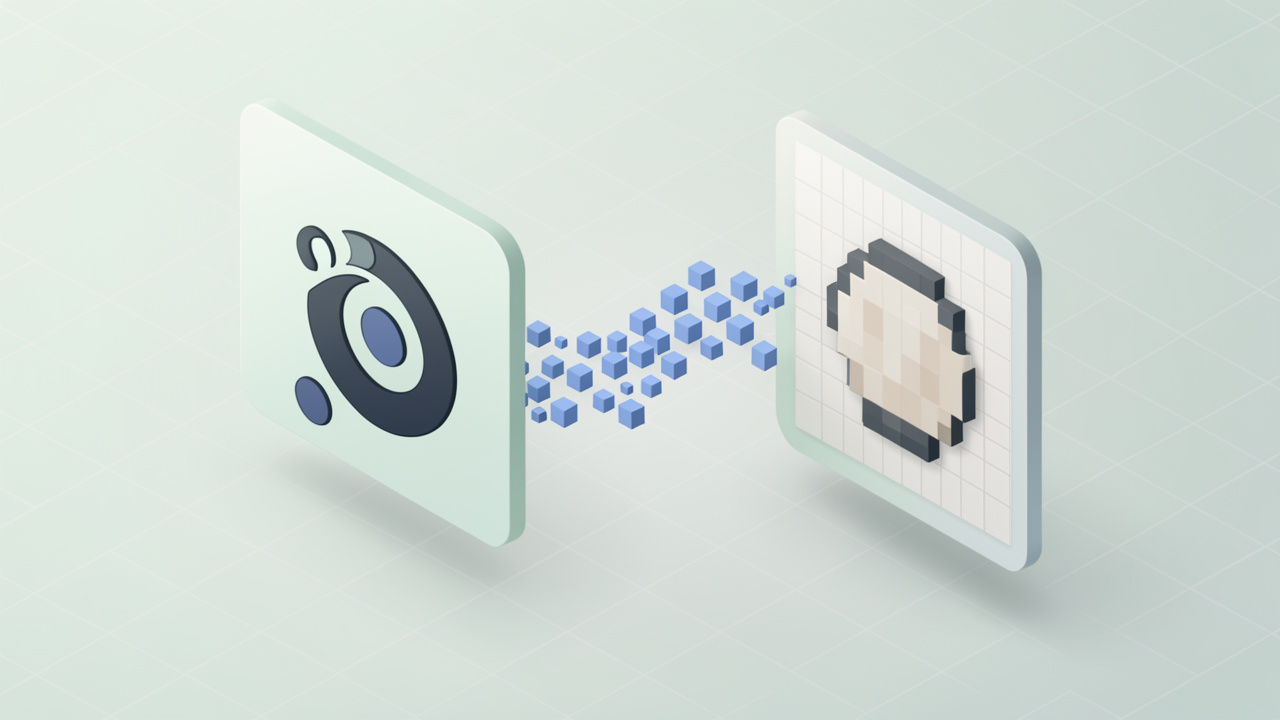
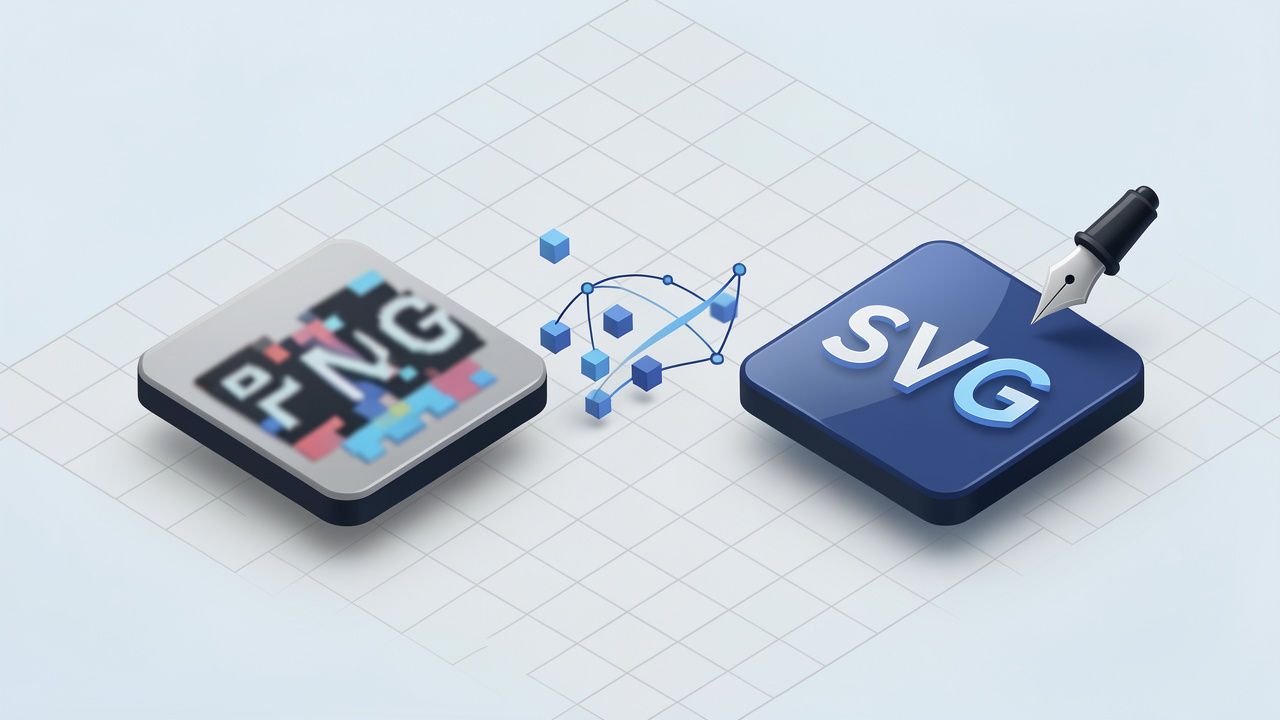
    Side-by-side comparison showing the same logo as an SVG (left) and a PNG (right). The SVG side remains perfectly sharp when zoomed or enlarged; the PNG side becomes visibly pixelated when scaled up. Include small zoom-in callouts to emphasize sharp vs pixelated edges.

    What is Convert svg to png online?

    To convert SVG to PNG online means using a browser-based tool to transform a vector graphic file into a pixel-based image, without installing desktop software. You upload an SVG, choose settings such as size or quality if needed, and download a PNG version in seconds.

    This is especially useful for small business owners and freelancers who work across different platforms. A brand logo may exist as an SVG for clean scaling on a website, but marketplaces, document editors, ad platforms, or messaging tools often require PNG uploads instead. An online converter bridges that gap quickly.

    The difference between the two formats is worth understanding. Scalable Vector Graphics, or SVG, is built from mathematical paths and shapes. It stays sharp at virtually any size. Portable Network Graphics, or PNG, is a raster image made of pixels. It cannot scale infinitely without losing clarity, but it is widely supported and excellent for screenshots, interface assets, and graphics that need transparency.

    In practical terms, converting from SVG to PNG is like taking a blueprint and turning it into a finished photograph at a chosen size. The original vector remains flexible, but the PNG becomes a fixed output that is easier to share in many everyday workflows.

    Key Aspects of Convert svg to png online

    Why people convert SVG to PNG

    Most users are not converting formats for technical reasons alone. They are solving a compatibility problem. If a client wants a logo for PowerPoint, if an ecommerce platform rejects SVG uploads, or if a social media scheduler only accepts PNG, then conversion becomes a necessary step.

    There is also a convenience factor. PNG files are predictable. They display the same way in most apps, can preserve transparent backgrounds, and are simple to insert into documents, slide decks, and design tools. For many users, that reliability matters more than keeping a file in vector format.

    Quality depends on output size

    One of the biggest misunderstandings around SVG conversion is assuming every PNG output will look perfect automatically. The quality of the PNG depends heavily on the export dimensions you choose. Since SVG is vector-based, it can render sharply at many sizes. But once exported to PNG, the image is locked into a specific pixel width and height.

    That means a logo converted at 300 pixels wide may look fine on a website but blurry on a printed handout or a high-resolution display. Choosing the right dimensions from the start is critical. If the image will appear in multiple places, it is often smart to export several PNG sizes rather than rely on one file for every use case.

    A three-panel example of the same graphic exported at different PNG widths (e.g., 150px, 300px, 900px). Show the small export appearing crisp for small use, the mid-size as appropriate for web, and the too-small/upsampled image looking blurry. Label each panel with its pixel dimensions and a short note about appropriate use.

    Transparency and background settings matter

    One major reason PNG remains popular is its support for transparent backgrounds. This is important for logos, icons, and layered graphics that need to sit cleanly on white, dark, or colored surfaces.

    When using an online SVG to PNG converter, check whether the tool preserves transparency by default. Some tools may flatten the image onto a white background, which can create problems later. If you are preparing assets for branding or UI work, transparency is not a small detail, it is often the difference between a polished result and one that looks improvised.

    Fonts, styling, and rendering can affect results

    Not every SVG behaves the same way in every converter. Some SVG files rely on embedded styles, linked fonts, masks, filters, or advanced effects. If the online tool does not fully support those elements, the PNG output may look slightly different from the original.

    This is common with exported artwork from design tools or custom web graphics. Text may shift if the converter cannot access the intended font. Effects such as shadows or clipping masks may render inconsistently. For simple icons and logos, this is rarely a major issue. For complex illustrations, it is worth testing output before final delivery.

    Privacy and file handling should not be ignored

    Convenience is important, but so is file security. When you convert SVG to PNG online, your file usually passes through a web service. If the SVG contains unpublished branding, client assets, product designs, or proprietary illustrations, you should pay attention to how that service handles uploads and deletions.

    For everyday public graphics, online conversion is generally low-friction and efficient. For sensitive commercial files, it is smarter to use a trusted service with clear privacy practices or switch to an offline workflow if needed. This is especially relevant for agencies, developers, and businesses managing confidential design assets.

    Online tools versus desktop apps

    An online converter is often the best option when speed and simplicity matter. You do not need to install software, update plugins, or learn a full design suite just to create a PNG. That makes browser-based tools attractive for non-designers and busy teams.

    Desktop software still has advantages when you need precise color management, batch processing, complex artboard handling, or complete control over export settings. The right choice depends on your workflow. For one-off tasks and lightweight production work, online conversion is usually enough. For repeat-heavy or highly controlled design pipelines, dedicated software may be worth it.

    Common use cases at a glance

    Use Case Why Convert SVG to PNG Best Practice
    Website asset fallback Some systems or email builders do not support SVG well Export at exact display size and 2x size
    Logo sharing Clients often need easy-to-use files Preserve transparency and create multiple sizes
    Ecommerce listings Platforms may require PNG or raster uploads Use clean edges and a consistent background
    Social media graphics PNG is widely accepted and predictable Match platform dimensions before export
    Presentations and documents Office tools handle PNG more reliably Use high enough resolution to avoid blur

    What makes a good online converter

    A good SVG to PNG online tool should do more than complete the conversion. It should preserve sharpness, retain transparency, render the design accurately, and make the process quick enough that it does not interrupt your work. That balance of quality and speed is what separates a useful tool from one you only use once.

    Look for a converter that supports custom dimensions, clean downloads, and straightforward file handling. If you regularly prepare assets for multiple outputs, the ability to scale exports without distortion is particularly valuable. Some tools also support drag-and-drop uploads, batch conversion, or cloud imports, which can save time in a professional workflow.

    The importance of sizing for real-world use

    Size is not just a technical setting, it is a business decision. A freelancer sending a client logo pack needs different PNG sizes than a developer exporting web UI icons. A small ecommerce seller may need a product badge sized for listings, while a marketing team may need a larger transparent graphic for paid ads.

    This is why the best approach is to think backward from where the image will appear. If the PNG is going on a website header, choose dimensions that match that area. If it may appear on high-density displays, prepare a larger version as well. Starting with use case instead of guesswork reduces rework later.

    Batch conversion and workflow efficiency

    For users managing many files, the real question is not whether conversion works, but whether it scales. If you have dozens of icons, product labels, or branded illustrations, converting files one by one can become tedious quickly.

    Some online tools address this with batch processing, allowing multiple SVG files to be converted at once. This is especially useful for developers preparing asset libraries or small teams standardizing image formats across platforms. Even a modest time saving per file adds up when repeated over a month of work.

    Browser convenience for non-designers

    One reason online converters have become so common is that they remove the learning curve. You do not need to know Illustrator, Figma, Inkscape, or image export settings in depth. In most cases, a browser and a file are enough.

    That accessibility opens the door for people who are not part of a formal design team. A virtual assistant updating product images, a founder preparing a pitch deck, or a freelance writer inserting a logo into a media kit can all handle the task without relying on specialist software. That kind of independence is valuable in fast-moving businesses.

    How to Get Started with Convert svg to png online

    Getting started is straightforward, but a few smart decisions upfront will improve your results. Before uploading anything, know where the PNG will be used. A website icon, slide graphic, and printable logo all require different export sizes. If you choose dimensions after conversion, you may end up stretching the file and reducing quality.

    It also helps to inspect the SVG itself. If the file contains unusual fonts, filters, or layered effects, test the output carefully. Simple graphics usually convert without issue, while more complex artwork may need a second pass or a different converter for the cleanest result.

    A practical starting workflow looks like this:

    1. Choose the SVG file you want to convert.
    2. Upload it to an online SVG to PNG converter in your browser.
    3. Set output size and transparency options if the tool allows it.
    4. Download the PNG and inspect it at the size you plan to use.
    5. Export additional sizes if the image will appear across multiple platforms.

    Once the PNG is downloaded, do not stop at a quick glance. Open it in the actual context where it will be used. A file that looks crisp in a download preview may appear too small in a presentation or slightly soft on a retina screen. Checking the final environment saves time and avoids avoidable revisions.

    If you work with brand assets regularly, create a small naming system for outputs. For example, keeping variants like logo-500px, logo-1000px, and logo-transparent helps prevent confusion later. This is a simple habit, but it makes asset management much easier as your file library grows.

    Common mistakes to avoid

    A frequent mistake is converting at too low a resolution. Because the SVG source is scalable, users sometimes assume they can create a tiny PNG now and enlarge it later. That is where quality breaks down. Once exported as PNG, the image is fixed in pixels.

    Another issue is ignoring background handling. If you need a transparent logo but export it with a white background, that problem may not become obvious until the file is placed on a dark website banner or colored flyer. A small export oversight can create an unprofessional result.

    There is also the temptation to use the first available tool without checking output accuracy. For basic files, that may be fine. For client-facing visuals, always verify alignment, color, and text rendering. A conversion should be invisible to the end user. If they can tell something changed, the output needs another look.

    Who benefits most from online SVG to PNG conversion

    Small business owners benefit because they often need quick, compatible graphics without hiring a designer for every minor task. Freelancers benefit because they can deliver assets in the format clients actually use, not just the format they were created in.

    Developers gain a fast way to prepare image fallbacks, app assets, or marketing visuals for environments that do not support vector graphics consistently. Productivity-focused users benefit from removing unnecessary software steps. When a browser can do the job in under a minute, the workflow becomes lighter and more efficient.

    Conclusion

    To convert SVG to PNG online is to solve a practical format problem with speed and flexibility. It allows you to take clean, scalable vector graphics and turn them into widely supported image files for documents, websites, ecommerce platforms, presentations, and social media. The process is simple, but the best results come from paying attention to size, transparency, rendering accuracy, and privacy.

    If you need a fast next step, start with one SVG file and export it in the exact dimensions required for its destination. Check the result in real use, then save additional sizes if needed. That small bit of care turns a quick conversion into a polished, professional asset you can use with confidence.

  • WebP’ten PNG’ye: Ne Zaman Dönüştürülmelidir, Araçlar ve Komutlar

    WebP’ten PNG’ye: Ne Zaman Dönüştürülmelidir, Araçlar ve Komutlar

    Converting WebP to PNG sounds simple until you actually need the result to work everywhere. Maybe a design team needs a transparent image in a legacy workflow. Maybe a CMS refuses WebP uploads. Maybe you just want a raster file you can edit without surprises.

    The good news is there are fast online tools, reliable desktop apps, and developer-friendly commands that make WebP to PNG conversion easy. The better news is that you do not always need to convert at all. In many cases, keeping WebP is the smarter choice.

    1. What is WebP and why convert it to PNG?

    WebP is a modern image format created by Google to reduce file size while keeping good visual quality. It supports both lossy compression, which discards some data to shrink files, and lossless compression, which preserves pixel data more faithfully. It also supports transparency, which makes it useful for logos, UI assets, and images with cutouts.

    PNG is older, but still incredibly important. It is a lossless format, so it preserves image data without the quality loss associated with recompression. PNG is widely supported across browsers, operating systems, editing apps, and print-oriented workflows, which is why it remains a default choice for screenshots, graphics, and files that need consistent handling.

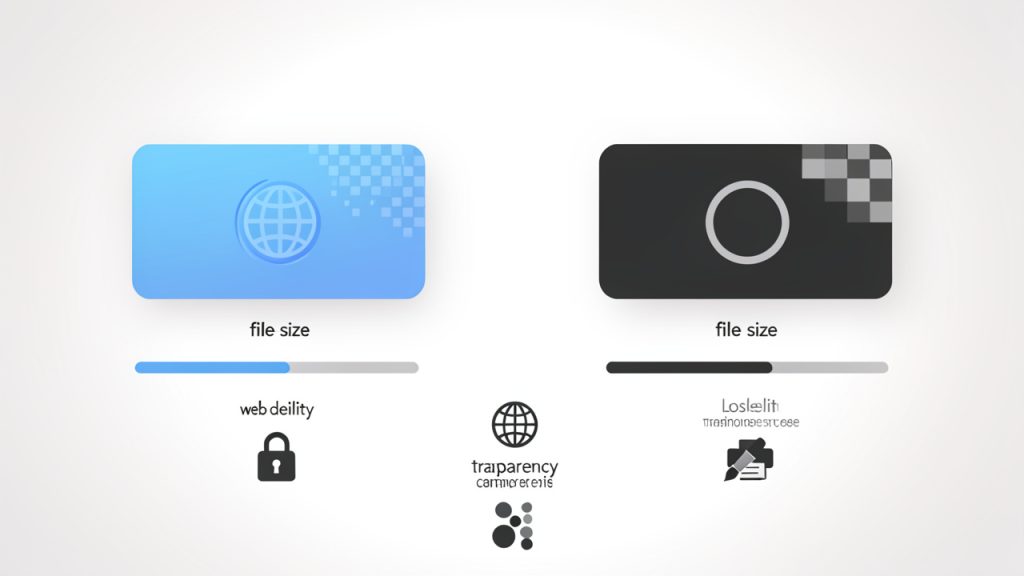
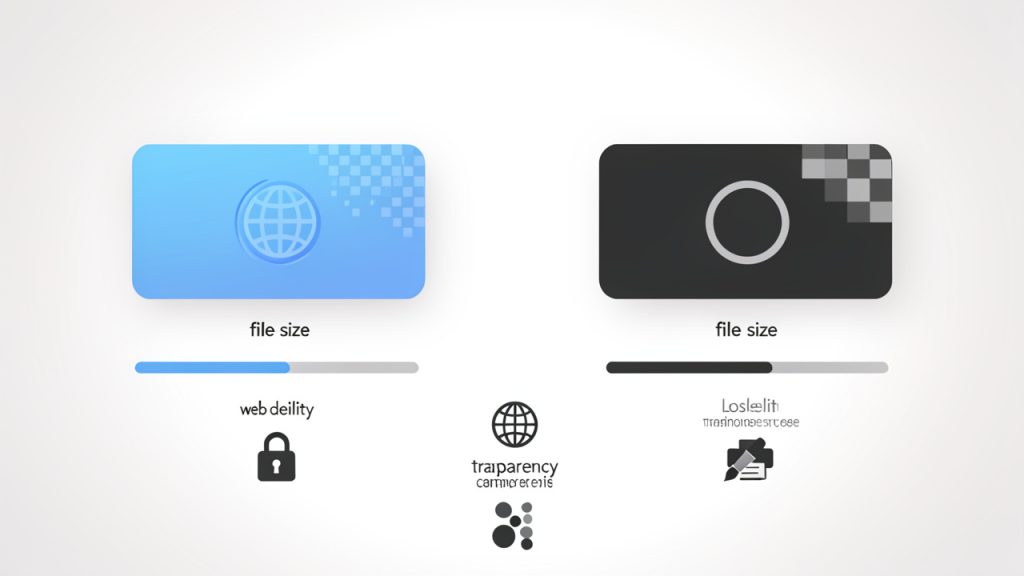
    Side-by-side visual comparison showing a WebP file and a PNG file: icons or thumbnails with callouts for key attributes (lossy/lossless support, typical file size, transparency support, common use cases like web delivery vs editing/printing). Include a small bar or numeric indicator showing typical file-size difference.

    Overview of WebP: origins, features, and typical use cases

    WebP was designed for the web, especially where bandwidth matters. It usually delivers smaller files than PNG and often smaller than JPEG too, depending on the content. That makes it ideal for websites, responsive image delivery, e-commerce listings, and content-heavy pages where performance matters. If the image is going to be displayed in a browser and you control the environment, WebP is often the more efficient format.

    Overview of PNG: features, strengths, and when it’s preferred

    PNG shines when you need exact visual fidelity. It is especially good for screenshots, icons, diagrams, UI assets, and images that need transparent backgrounds. It is also favored when software compatibility matters. Many older applications, print tools, DAM systems, and content workflows still handle PNG more reliably than WebP.

    Why conversion is needed: compatibility, editing, transparency, and printing

    The most common reason to convert WebP to PNG is compatibility. Some apps, platforms, and legacy systems still do not accept WebP. Others accept it poorly, especially in editing pipelines or batch import workflows. PNG is often a better fit for image editing in many cases because it behaves predictably in tools like Photoshop alternatives, desktop viewers, and asset managers. If you work with printing, archived assets, or screenshots that must stay visually consistent, PNG is often the safer format.

    2. When you should and shouldn’t convert WebP to PNG

    This is the decision most people skip, but it matters. Conversion is useful when PNG solves a real problem. If the only reason is habit, keeping WebP may be better.

    When to convert: compatibility, editing, archiving, design work, screenshots and raster manipulation

    Convert to PNG when the file must work in a legacy app, be edited in a tool that does not handle WebP well, or be used in a workflow that expects PNG. It is also a good choice for screenshots, UI mockups, technical diagrams, and raster assets that may be annotated, retouched, or archived for long-term access. In these cases, PNG’s predictability is a practical advantage.

    When to keep WebP: web performance, storage, responsive images

    Keep WebP when the image is primarily for web delivery and you care about speed, storage efficiency, and lower bandwidth usage. For modern websites, WebP often offers a better trade-off, and serving WebP through responsive images can dramatically reduce payload size, especially for photo-heavy pages.

    Trade-offs: file size, quality, metadata, alpha/transparency fidelity

    The biggest trade-off is file size. PNG is typically larger than WebP, sometimes much larger. That matters for storage, backups, uploads, and page weight. Quality is more nuanced. If the source WebP is lossy, converting it to PNG does not restore lost detail. It only preserves the current decoded pixels. Transparency usually survives well, but color profiles and metadata may not always transfer cleanly depending on the tool. A simple rule helps here: convert when compatibility matters more than file size, and keep WebP when performance matters more than universal editing support.

    Quick decision checklist

    • Will this image be edited, printed, or archived? PNG is often better.
    • Will it be served on a modern website only? WebP is often better.
    • Does the target app reject WebP? Convert it.
    • Is file size critical? Keep WebP if possible.

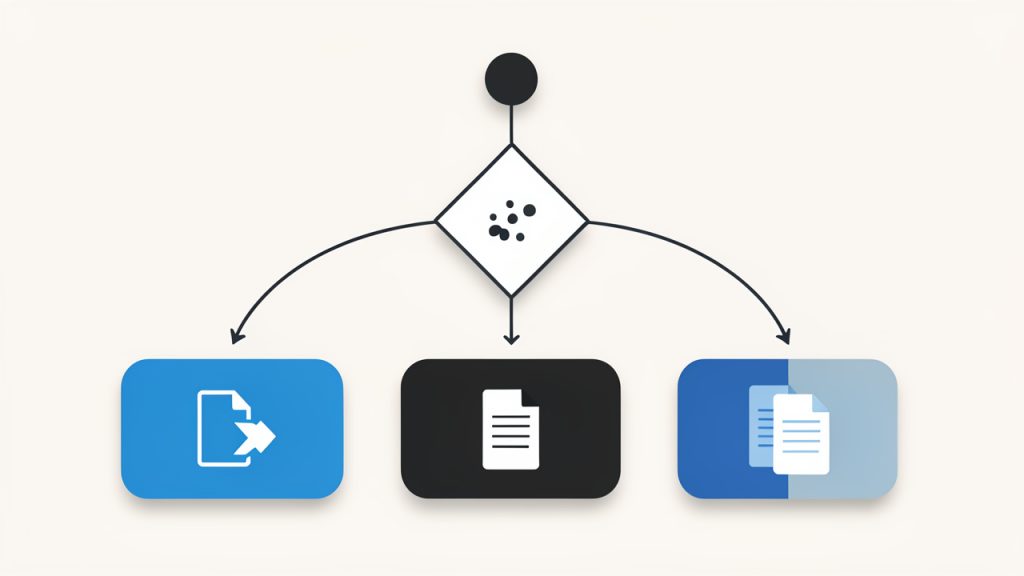
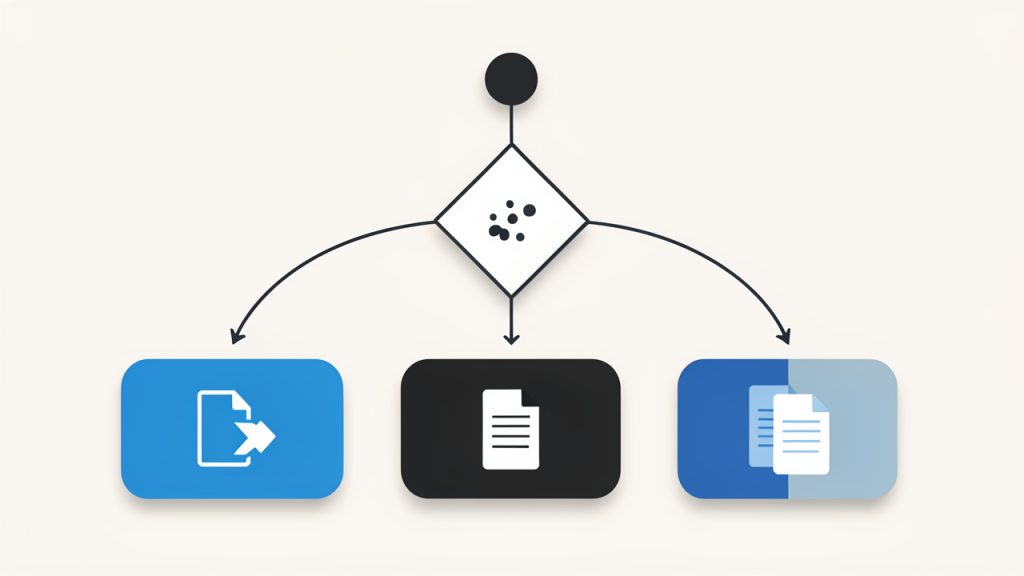
    A simple decision flowchart for the "Quick decision checklist": start node asks questions (Will this be edited/printed/archived? Is it for a modern website only? Does target app reject WebP? Is file size critical?) with arrows to outcomes: "Convert to PNG", "Keep WebP", or "Generate both (derive PNG for legacy)".

    3. Quick online tools to convert WebP to PNG

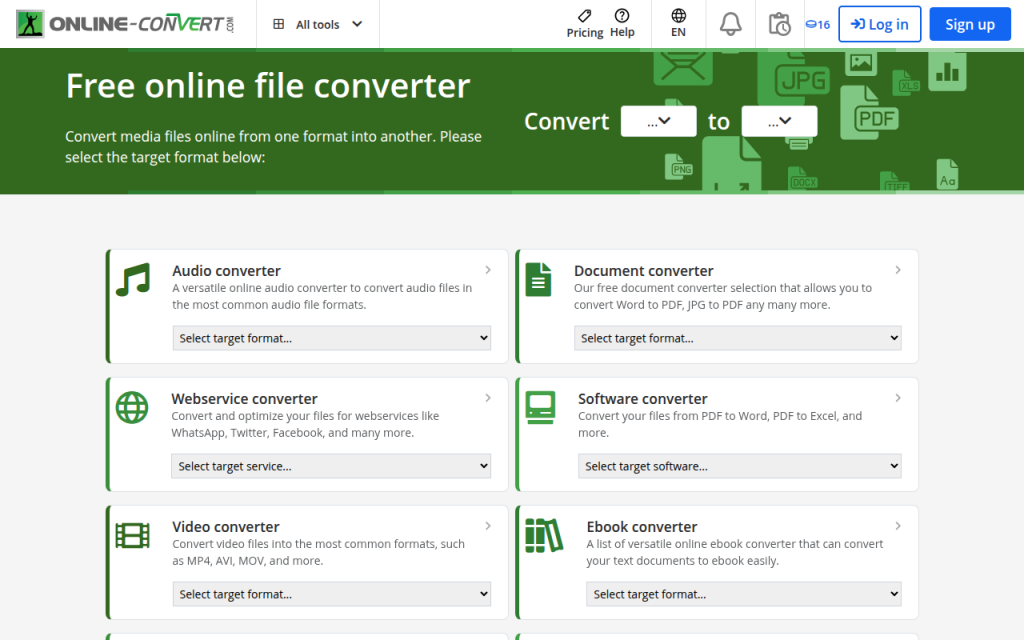
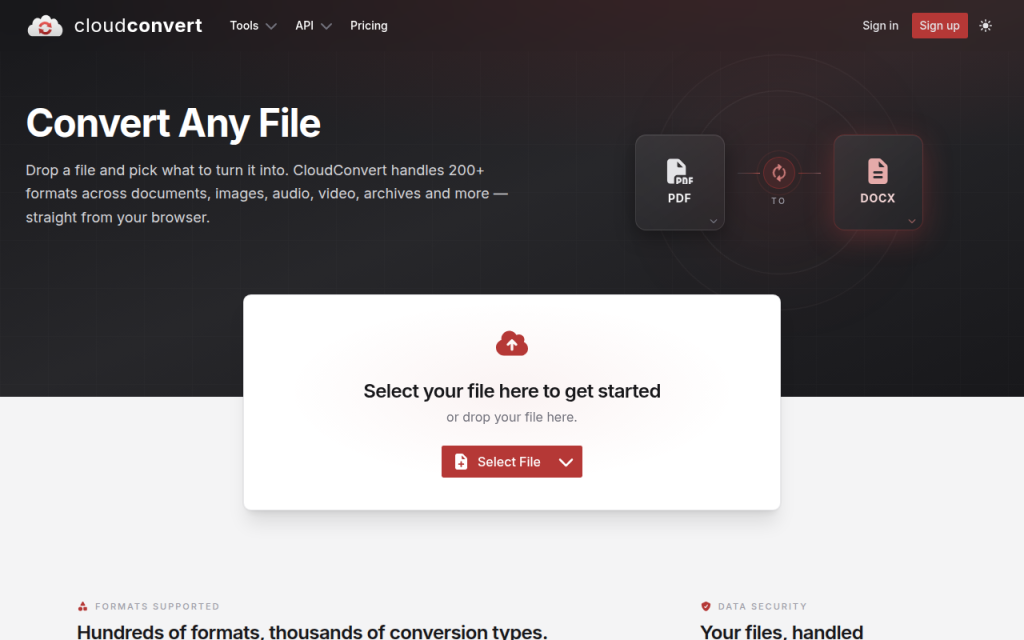
    If you need the fastest path, online converters are hard to beat for one-off conversions, quick proofs, and non-sensitive assets. Popular services include CloudConvert, Convertio, Ezgif, FreeConvert, and Online-Convert. They vary by batch support, metadata handling, file-size limits, and privacy posture. CloudConvert is flexible and supports batch jobs and an API. Convertio is fast and easy. Ezgif is lightweight and approachable for simple image tasks. FreeConvert and Online-Convert offer broad format support and more tuning options on paid tiers. For privacy-sensitive images, avoid third-party uploads and use an offline method instead.

    CloudConvert: https://cloudconvert.com, Convertio: https://convertio.co, Ezgif: https://ezgif.com, FreeConvert: https://www.freeconvert.com, Online-Convert: https://www.online-convert.com

    Security and privacy considerations for uploading images

    Online tools are convenient, but they create risk. If the image contains client work, private product shots, sensitive documents, internal screenshots, or personally identifiable information, uploading it to a third-party service may be inappropriate. Metadata is another concern. EXIF data can include camera info, location, timestamps, and software details. Some converters strip metadata automatically, while others may preserve parts of it. If privacy matters, assume nothing and verify the tool’s behavior. If the file is confidential, use an offline desktop method instead.

    4. Converting WebP to PNG on desktop

    Desktop conversion gives you more control, better privacy, and stronger batch workflow support. It is the right choice when you work with many files or care about repeatability.

    Windows: built-in and third-party options

    Windows users sometimes try Photos or Paint first. The trouble is that built-in tools can be inconsistent depending on version and installed codecs. A more dependable option is IrfanView, which is fast for image conversion and batch processing when the proper plugins are installed. The common workflow is to open the WebP file, choose save or export, and select PNG.

    Websites: https://www.microsoft.com/windows, https://www.irfanview.com

    macOS: Preview, ImageMagick, GraphicConverter

    On macOS, Preview is often enough for individual files: open the WebP, then export as PNG. For more control, ImageMagick is excellent for batch jobs, repeatable conversions, and automation. GraphicConverter provides a polished GUI with deep format support for users who want extensive options.

    Websites: https://www.apple.com, https://imagemagick.org, https://www.lemkesoft.de

    Linux: ImageMagick, GIMP, command-line examples

    Linux users typically rely on command-line tools. ImageMagick is the workhorse, and GIMP is a reliable GUI fallback. For a single file:

    magick input.webp output.png
    

    If your system uses the older command syntax:

    convert input.webp output.png
    

    For batch conversion in a directory:

    mkdir -p png_OUT
    for f in *.webp; do magick "$f" "${f%.webp}.png"; done
    

    ImageMagick usually preserves transparency automatically when the source supports alpha.

    Website: https://www.gimp.org

    Batch conversion with desktop apps

    Batch conversion is where desktop tools become much more efficient than online converters. IrfanView, GraphicConverter, and ImageMagick all support batch workflows. Processing dozens or thousands of files with consistent naming and predictable output makes desktop tools the smarter long-term option.

    5. Command-line and developer-friendly methods

    For developers, the command line is often the cleanest path because it is scriptable, auditable, and easy to integrate into build systems.

    ImageMagick: commands and flags

    ImageMagick can convert WebP to PNG, preserve alpha, and be integrated into shell scripts or CI jobs:

    magick input.webp output.png
    

    To keep metadata when possible:

    magick input.webp -define png:preserve-iCCP=true output.png
    

    Avoid -strip unless you want metadata removed. For batch conversion:

    for f in *.webp; do magick "$f" "${f%.webp}.png"; done
    

    ffmpeg: when to use it and example commands

    ffmpeg is useful in media pipelines, especially when WebP is part of a broader video or animation workflow. For a single WebP frame:

    ffmpeg -i input.webp output.png
    

    For animated WebP, ffmpeg can extract frames or inspect timing, though specialized WebP tools may be simpler for some tasks.

    Website: https://ffmpeg.org

    libwebp tools: dwebp usage and options

    The libwebp toolkit offers dwebp, a precise decoder for WebP files. For a dedicated WebP-to-PNG path:

    dwebp input.webp -o output.png
    

    libwebp tools can be easier to reason about than a general-purpose image suite when you need specific decoding behavior.

    Website: https://developers.google.com/speed/webp

    Node.js and Python libraries with sample code

    For application code, use libraries that already understand both formats.

    Node.js with sharp:

    import sharp from "sharp";
    
    await sharp("input.webp")
    ## .png()
      .toFile("output.png");
    

    sharp is fast and widely used in production.

    Python with Pillow:

    from PIL import Image
    
    img = Image.open("input.webp")
    img.save("output.png", "PNG")
    

    Pillow is ideal for scripts, automation, and lightweight batch jobs.

    Websites: https://sharp.pixelplumbing.com, https://python-pillow.org

    6. Automating conversion in workflows and CMS

    Manual conversion does not scale. If your team handles images regularly, automation will save time and reduce mistakes.

    Automated server-side conversion

    A common pattern is convert-on-upload. Store the original WebP, then create a PNG derivative for compatibility or downstream systems. This lets modern browsers receive WebP while legacy systems, admin tools, or print workflows get PNG. Another pattern is on-demand conversion, useful when PNG output is rare and you do not want to store multiple variants. The trade-off is extra compute at request time.

    Plugins and integrations for WordPress, Shopify, and headless CMSs

    Many CMS platforms have plugins or media pipelines that can serve format-specific variants. WordPress users often rely on image optimization plugins that generate or serve WebP while allowing fallback formats. For Shopify and headless CMS setups, the image pipeline around the platform is usually where conversion logic belongs, for example a middleware function that converts WebP to PNG only for systems that require it.

    Build-time conversion in static site generators

    Static site generators such as Gatsby, Hugo, and Eleventy are a strong fit for build-time image processing. If the site is rebuilt during deployment, you can generate PNG derivatives once and cache them as part of the output. This is useful when one source image must produce both a WebP asset for the site and a PNG asset for tooling that still expects PNG.

    7. Quality, color, and transparency pitfalls, and how to avoid them

    Conversion is usually safe, but subtle issues can surprise you.

    Common issues: color shifts, banding, alpha channel problems

    Color shifts often happen when color profiles are ignored or reinterpreted by different tools. Banding can appear if gradients are limited or if a lossy WebP is decoded and then viewed in contexts that expose quantization artifacts. Alpha channel issues are less common, but they matter. If transparency is present, make sure the tool preserves it and the target app understands the PNG alpha channel correctly.

    How to preserve transparency and color profiles

    Prefer tools known to preserve alpha reliably, such as ImageMagick, libwebp’s dwebp, Pillow, or sharp. For color accuracy, use tools that keep embedded profiles when possible. Avoid unnecessary metadata stripping unless intentional. When moving assets between design software and web workflows, verify the image in the target environment as part of QA.

    Testing and validation

    Open the converted PNG in at least two different viewers and compare it against the original. For teams, automate basic checks for dimensions, transparency presence, file size thresholds, and checksum tracking so problems show up before assets ship.

    8. Performance, storage, and best practices

    PNG is dependable, but it can be expensive in storage terms, so be selective.

    File size comparisons: WebP vs PNG

    As a rough rule, WebP often beats PNG on file size by a wide margin for photographic content and many mixed images. PNG can be acceptable for simple graphics, but it grows quickly with color complexity. For example, a 1 MB WebP might become a 3 MB or 5 MB PNG, depending on the image.

    When to use PNG-8 vs PNG-24 vs indexed palettes

    If the image has a limited color set, PNG-8 or indexed palettes can dramatically reduce size, which helps icons, simple logos, and flat graphics. Use PNG-24 for full color and smooth gradients. Test indexed palettes visually before adopting aggressive color reduction.

    Optimizing PNGs after conversion

    After converting, further shrink the result with PNG optimizers such as pngcrush, optipng, or zopflipng. A typical workflow is convert first, then optimize the PNG. That keeps quality decisions separate from compression tuning.

    Websites: http://optipng.sourceforge.net, https://pmt.sourceforge.io/pngcrush/, https://github.com/google/zopfli

    9. Privacy, security, and legal considerations

    Image conversion sounds harmless, but in business settings it can carry real risk.

    Risks of uploading images to third-party converters

    Third-party converters may store files temporarily, log metadata, or process uploads on infrastructure outside your control. For internal prototypes that may be fine. For client materials, unreleased product images, or sensitive screenshots, use offline tools.

    EXIF, IPR, and redistribution concerns

    EXIF metadata can reveal camera details, timestamps, and sometimes location data. When converting and redistributing assets, review metadata intentionally. Also remember conversion does not change ownership or usage rights. If you do not have the right to reuse an image, converting it does not make it safer to publish.

    Recommended safeguards and policies for teams

    Define when online conversion is allowed and when offline tools are mandatory. Use offline tools for anything confidential, strip metadata when appropriate, and document which conversion pipeline is used for public assets. That keeps compliance and process hygiene under control.

    10. Troubleshooting and FAQs

    Why does my converted PNG look different?

    Common causes include color profile differences, lossy source compression, or viewer discrepancies. If the source WebP was lossy, some detail loss is permanent. Try a different conversion tool, check whether metadata and profiles were preserved, and compare the image in a second viewer.

    How do I convert animated WebP to PNG?

    A single PNG cannot preserve animation. Animated WebP must be handled as frames. If you need still images, extract each frame. If you need animation preserved, consider GIF or MP4. ffmpeg or specialized WebP tools can help with frame extraction.

    I get errors with ImageMagick, what should I check?

    Confirm your ImageMagick build includes WebP support, check file permissions and path names, and use the correct command syntax for your version. On newer systems, use magick instead of the older convert command.

    How do I batch-convert thousands of images efficiently?

    Use a script and process files in chunks. ImageMagick or sharp are common choices. Add logging, retry handling, and post-conversion optimization so the workflow remains stable at scale.

    11. Cheat-sheet: commands and tools at a glance

    Task Tool Command
    Convert one WebP to PNG ImageMagick magick input.webp output.png
    Batch convert a folder ImageMagick for f in *.webp; do magick "$f" "${f%.webp}.png"; done
    Decode with libwebp dwebp dwebp input.webp -o output.png
    Convert in Node.js sharp sharp("input.webp").png().toFile("output.png")
    Convert in Python Pillow img.save("output.png", "PNG")
    Extract from animation workflow ffmpeg ffmpeg -i input.webp output.png

    For one-offs, use a trustworthy online converter for non-sensitive images. For offline desktop work, Preview, Paint, IrfanView, or GraphicConverter are convenient. For bulk server-side conversion, ImageMagick and sharp are strong general-purpose choices. For precision WebP decoding, use dwebp.

    Checklist before converting: confirm whether you really need PNG, whether the file contains transparency, and whether metadata matters. After converting, verify dimensions, transparency, color, and file size.

    12. Conclusion and recommended workflow

    The best WebP to PNG workflow depends on the job. If you need speed and the file is harmless, an online converter is fine. If you need control, privacy, or batch processing, use ImageMagick, dwebp, sharp, or Pillow. If you are building a modern web stack, consider keeping WebP for delivery and generating PNG only where compatibility demands it.

    A practical default is simple, keep WebP for performance, convert to PNG only when compatibility, editing, or workflow constraints require it. That approach saves storage, avoids unnecessary recompression, and keeps your image pipeline cleaner.

    Next step: choose one offline method, test it on a sample image with transparency and metadata, and standardize that conversion path for your team.

  • WebP to PNG: When to Convert, Tools & Commands

    WebP to PNG: When to Convert, Tools & Commands

    Converting WebP to PNG sounds simple until you actually need the result to work everywhere. Maybe a design team needs a transparent image in a legacy workflow. Maybe a CMS refuses WebP uploads. Maybe you just want a raster file you can edit without surprises.

    The good news is there are fast online tools, reliable desktop apps, and developer-friendly commands that make WebP to PNG conversion easy. The better news is that you do not always need to convert at all. In many cases, keeping WebP is the smarter choice.

    1. What is WebP and why convert it to PNG?

    WebP is a modern image format created by Google to reduce file size while keeping good visual quality. It supports both lossy compression, which discards some data to shrink files, and lossless compression, which preserves pixel data more faithfully. It also supports transparency, which makes it useful for logos, UI assets, and images with cutouts.

    PNG is older, but still incredibly important. It is a lossless format, so it preserves image data without the quality loss associated with recompression. PNG is widely supported across browsers, operating systems, editing apps, and print-oriented workflows, which is why it remains a default choice for screenshots, graphics, and files that need consistent handling.

    Side-by-side visual comparison showing a WebP file and a PNG file: icons or thumbnails with callouts for key attributes (lossy/lossless support, typical file size, transparency support, common use cases like web delivery vs editing/printing). Include a small bar or numeric indicator showing typical file-size difference.

    Overview of WebP: origins, features, and typical use cases

    WebP was designed for the web, especially where bandwidth matters. It usually delivers smaller files than PNG and often smaller than JPEG too, depending on the content. That makes it ideal for websites, responsive image delivery, e-commerce listings, and content-heavy pages where performance matters. If the image is going to be displayed in a browser and you control the environment, WebP is often the more efficient format.

    Overview of PNG: features, strengths, and when it’s preferred

    PNG shines when you need exact visual fidelity. It is especially good for screenshots, icons, diagrams, UI assets, and images that need transparent backgrounds. It is also favored when software compatibility matters. Many older applications, print tools, DAM systems, and content workflows still handle PNG more reliably than WebP.

    Why conversion is needed: compatibility, editing, transparency, and printing

    The most common reason to convert WebP to PNG is compatibility. Some apps, platforms, and legacy systems still do not accept WebP. Others accept it poorly, especially in editing pipelines or batch import workflows. PNG is often a better fit for image editing in many cases because it behaves predictably in tools like Photoshop alternatives, desktop viewers, and asset managers. If you work with printing, archived assets, or screenshots that must stay visually consistent, PNG is often the safer format.

    2. When you should and shouldn’t convert WebP to PNG

    This is the decision most people skip, but it matters. Conversion is useful when PNG solves a real problem. If the only reason is habit, keeping WebP may be better.

    When to convert: compatibility, editing, archiving, design work, screenshots and raster manipulation

    Convert to PNG when the file must work in a legacy app, be edited in a tool that does not handle WebP well, or be used in a workflow that expects PNG. It is also a good choice for screenshots, UI mockups, technical diagrams, and raster assets that may be annotated, retouched, or archived for long-term access. In these cases, PNG’s predictability is a practical advantage.

    When to keep WebP: web performance, storage, responsive images

    Keep WebP when the image is primarily for web delivery and you care about speed, storage efficiency, and lower bandwidth usage. For modern websites, WebP often offers a better trade-off, and serving WebP through responsive images can dramatically reduce payload size, especially for photo-heavy pages.

    Trade-offs: file size, quality, metadata, alpha/transparency fidelity

    The biggest trade-off is file size. PNG is typically larger than WebP, sometimes much larger. That matters for storage, backups, uploads, and page weight. Quality is more nuanced. If the source WebP is lossy, converting it to PNG does not restore lost detail. It only preserves the current decoded pixels. Transparency usually survives well, but color profiles and metadata may not always transfer cleanly depending on the tool. A simple rule helps here: convert when compatibility matters more than file size, and keep WebP when performance matters more than universal editing support.

    Quick decision checklist

    • Will this image be edited, printed, or archived? PNG is often better.
    • Will it be served on a modern website only? WebP is often better.
    • Does the target app reject WebP? Convert it.
    • Is file size critical? Keep WebP if possible.

    A simple decision flowchart for the "Quick decision checklist": start node asks questions (Will this be edited/printed/archived? Is it for a modern website only? Does target app reject WebP? Is file size critical?) with arrows to outcomes: "Convert to PNG", "Keep WebP", or "Generate both (derive PNG for legacy)".

    3. Quick online tools to convert WebP to PNG

    If you need the fastest path, online converters are hard to beat for one-off conversions, quick proofs, and non-sensitive assets. Popular services include CloudConvert, Convertio, Ezgif, FreeConvert, and Online-Convert. They vary by batch support, metadata handling, file-size limits, and privacy posture. CloudConvert is flexible and supports batch jobs and an API. Convertio is fast and easy. Ezgif is lightweight and approachable for simple image tasks. FreeConvert and Online-Convert offer broad format support and more tuning options on paid tiers. For privacy-sensitive images, avoid third-party uploads and use an offline method instead.

    CloudConvert: https://cloudconvert.com, Convertio: https://convertio.co, Ezgif: https://ezgif.com, FreeConvert: https://www.freeconvert.com, Online-Convert: https://www.online-convert.com

    Security and privacy considerations for uploading images

    Online tools are convenient, but they create risk. If the image contains client work, private product shots, sensitive documents, internal screenshots, or personally identifiable information, uploading it to a third-party service may be inappropriate. Metadata is another concern. EXIF data can include camera info, location, timestamps, and software details. Some converters strip metadata automatically, while others may preserve parts of it. If privacy matters, assume nothing and verify the tool’s behavior. If the file is confidential, use an offline desktop method instead.

    4. Converting WebP to PNG on desktop

    Desktop conversion gives you more control, better privacy, and stronger batch workflow support. It is the right choice when you work with many files or care about repeatability.

    Windows: built-in and third-party options

    Windows users sometimes try Photos or Paint first. The trouble is that built-in tools can be inconsistent depending on version and installed codecs. A more dependable option is IrfanView, which is fast for image conversion and batch processing when the proper plugins are installed. The common workflow is to open the WebP file, choose save or export, and select PNG.

    Websites: https://www.microsoft.com/windows, https://www.irfanview.com

    macOS: Preview, ImageMagick, GraphicConverter

    On macOS, Preview is often enough for individual files: open the WebP, then export as PNG. For more control, ImageMagick is excellent for batch jobs, repeatable conversions, and automation. GraphicConverter provides a polished GUI with deep format support for users who want extensive options.

    Websites: https://www.apple.com, https://imagemagick.org, https://www.lemkesoft.de

    Linux: ImageMagick, GIMP, command-line examples

    Linux users typically rely on command-line tools. ImageMagick is the workhorse, and GIMP is a reliable GUI fallback. For a single file:

    magick input.webp output.png
    

    If your system uses the older command syntax:

    convert input.webp output.png
    

    For batch conversion in a directory:

    mkdir -p png आउट
    for f in *.webp; do magick "$f" "png/${f%.webp}.png"; done
    

    ImageMagick usually preserves transparency automatically when the source supports alpha.

    Website: https://www.gimp.org

    Batch conversion with desktop apps

    Batch conversion is where desktop tools become much more efficient than online converters. IrfanView, GraphicConverter, and ImageMagick all support batch workflows. Processing dozens or thousands of files with consistent naming and predictable output makes desktop tools the smarter long-term option.

    5. Command-line and developer-friendly methods

    For developers, the command line is often the cleanest path because it is scriptable, auditable, and easy to integrate into build systems.

    ImageMagick: commands and flags

    ImageMagick can convert WebP to PNG, preserve alpha, and be integrated into shell scripts or CI jobs:

    magick input.webp output.png
    

    To keep metadata when possible:

    magick input.webp -define png:preserve-iCCP=true output.png
    

    Avoid -strip unless you want metadata removed. For batch conversion:

    for f in *.webp; do magick "$f" "${f%.webp}.png"; done
    

    ffmpeg: when to use it and example commands

    ffmpeg is useful in media pipelines, especially when WebP is part of a broader video or animation workflow. For a single WebP frame:

    ffmpeg -i input.webp output.png
    

    For animated WebP, ffmpeg can extract frames or inspect timing, though specialized WebP tools may be simpler for some tasks.

    Website: https://ffmpeg.org

    libwebp tools: dwebp usage and options

    The libwebp toolkit offers dwebp, a precise decoder for WebP files. For a dedicated WebP-to-PNG path:

    dwebp input.webp -o output.png
    

    libwebp tools can be easier to reason about than a general-purpose image suite when you need specific decoding behavior.

    Website: https://developers.google.com/speed/webp

    Node.js and Python libraries with sample code

    For application code, use libraries that already understand both formats.

    Node.js with sharp:

    import sharp from "sharp";
    await sharp("input.webp")
    ## .png()
      .toFile("output.png");
    

    sharp is fast and widely used in production.

    Python with Pillow:

    from PIL import Image
    img = Image.open("input.webp")
    img.save("output.png", "PNG")
    

    Pillow is ideal for scripts, automation, and lightweight batch jobs.

    Websites: https://sharp.pixelplumbing.com, https://python-pillow.org

    6. Automating conversion in workflows and CMS

    Manual conversion does not scale. If your team handles images regularly, automation will save time and reduce mistakes.

    Automated server-side conversion

    A common pattern is convert-on-upload. Store the original WebP, then create a PNG derivative for compatibility or downstream systems. This lets modern browsers receive WebP while legacy systems, admin tools, or print workflows get PNG. Another pattern is on-demand conversion, useful when PNG output is rare and you do not want to store multiple variants. The trade-off is extra compute at request time.

    Plugins and integrations for WordPress, Shopify, and headless CMSs

    Many CMS platforms have plugins or media pipelines that can serve format-specific variants. WordPress users often rely on image optimization plugins that generate or serve WebP while allowing fallback formats. For Shopify and headless CMS setups, the image pipeline around the platform is usually where conversion logic belongs, for example a middleware function that converts WebP to PNG only for systems that require it.

    Build-time conversion in static site generators

    Static site generators such as Gatsby, Hugo, and Eleventy are a strong fit for build-time image processing. If the site is rebuilt during deployment, you can generate PNG derivatives once and cache them as part of the output. This is useful when one source image must produce both a WebP asset for the site and a PNG asset for tooling that still expects PNG.

    7. Quality, color, and transparency pitfalls, and how to avoid them

    Conversion is usually safe, but subtle issues can surprise you.

    Common issues: color shifts, banding, alpha channel problems

    Color shifts often happen when color profiles are ignored or reinterpreted by different tools. Banding can appear if gradients are limited or if a lossy WebP is decoded and then viewed in contexts that expose quantization artifacts. Alpha channel issues are less common, but they matter. If transparency is present, make sure the tool preserves it and the target app understands the PNG alpha channel correctly.

    How to preserve transparency and color profiles

    Prefer tools known to preserve alpha reliably, such as ImageMagick, libwebp’s dwebp, Pillow, or sharp. For color accuracy, use tools that keep embedded profiles when possible. Avoid unnecessary metadata stripping unless intentional. When moving assets between design software and web workflows, verify the image in the target environment as part of QA.

    Testing and validation

    Open the converted PNG in at least two different viewers and compare it against the original. For teams, automate basic checks for dimensions, transparency presence, file size thresholds, and checksum tracking so problems show up before assets ship.

    8. Performance, storage, and best practices

    PNG is dependable, but it can be expensive in storage terms, so be selective.

    File size comparisons: WebP vs PNG

    As a rough rule, WebP often beats PNG on file size by a wide margin for photographic content and many mixed images. PNG can be acceptable for simple graphics, but it grows quickly with color complexity. For example, a 1 MB WebP might become a 3 MB or 5 MB PNG, depending on the image.

    When to use PNG-8 vs PNG-24 vs indexed palettes

    If the image has a limited color set, PNG-8 or indexed palettes can dramatically reduce size, which helps icons, simple logos, and flat graphics. Use PNG-24 for full color and smooth gradients. Test indexed palettes visually before adopting aggressive color reduction.

    Optimizing PNGs after conversion

    After converting, further shrink the result with PNG optimizers such as pngcrush, optipng, or zopflipng. A typical workflow is convert first, then optimize the PNG. That keeps quality decisions separate from compression tuning.

    Websites: http://optipng.sourceforge.net, https://pmt.sourceforge.io/pngcrush/, https://github.com/google/zopfli

    9. Privacy, security, and legal considerations

    Image conversion sounds harmless, but in business settings it can carry real risk.

    Risks of uploading images to third-party converters

    Third-party converters may store files temporarily, log metadata, or process uploads on infrastructure outside your control. For internal prototypes that may be fine. For client materials, unreleased product images, or sensitive screenshots, use offline tools.

    EXIF, IPR, and redistribution concerns

    EXIF metadata can reveal camera details, timestamps, and sometimes location data. When converting and redistributing assets, review metadata intentionally. Also remember conversion does not change ownership or usage rights. If you do not have the right to reuse an image, converting it does not make it safer to publish.

    Recommended safeguards and policies for teams

    Define when online conversion is allowed and when offline tools are mandatory. Use offline tools for anything confidential, strip metadata when appropriate, and document which conversion pipeline is used for public assets. That keeps compliance and process hygiene under control.

    10. Troubleshooting and FAQs

    Why does my converted PNG look different?

    Common causes include color profile differences, lossy source compression, or viewer discrepancies. If the source WebP was lossy, some detail loss is permanent. Try a different conversion tool, check whether metadata and profiles were preserved, and compare the image in a second viewer.

    How do I convert animated WebP to PNG?

    A single PNG cannot preserve animation. Animated WebP must be handled as frames. If you need still images, extract each frame. If you need animation preserved, consider GIF or MP4. ffmpeg or specialized WebP tools can help with frame extraction.

    I get errors with ImageMagick, what should I check?

    Confirm your ImageMagick build includes WebP support, check file permissions and path names, and use the correct command syntax for your version. On newer systems, use magick instead of the older convert command.

    How do I batch-convert thousands of images efficiently?

    Use a script and process files in chunks. ImageMagick or sharp are common choices. Add logging, retry handling, and post-conversion optimization so the workflow remains stable at scale.

    11. Cheat-sheet: commands and tools at a glance

    TaskToolCommand
    Convert one WebP to PNGImageMagickmagick input.webp output.png
    Batch convert a folderImageMagickfor f in *.webp; do magick "$f" "${f%.webp}.png"; done
    Decode with libwebpdwebpdwebp input.webp -o output.png
    Convert in Node.jssharpsharp("input.webp").png().toFile("output.png")
    Convert in PythonPillowimg.save("output.png", "PNG")
    Extract from animation workflowffmpegffmpeg -i input.webp output.png

    For one-offs, use a trustworthy online converter for non-sensitive images. For offline desktop work, Preview, Paint, IrfanView, or GraphicConverter are convenient. For bulk server-side conversion, ImageMagick and sharp are strong general-purpose choices. For precision WebP decoding, use dwebp.

    Checklist before converting: confirm whether you really need PNG, whether the file contains transparency, and whether metadata matters. After converting, verify dimensions, transparency, color, and file size.

    12. Conclusion and recommended workflow

    The best WebP to PNG workflow depends on the job. If you need speed and the file is harmless, an online converter is fine. If you need control, privacy, or batch processing, use ImageMagick, dwebp, sharp, or Pillow. If you are building a modern web stack, consider keeping WebP for delivery and generating PNG only where compatibility demands it.

    A practical default is simple, keep WebP for performance, convert to PNG only when compatibility, editing, or workflow constraints require it. That approach saves storage, avoids unnecessary recompression, and keeps your image pipeline cleaner.

    Next step: choose one offline method, test it on a sample image with transparency and metadata, and standardize that conversion path for your team.