JNTZN

Tag: TIFF

  • How to Convert TIFF Files to JPG

    TIFF files are excellent when image quality matters. They preserve detail, support lossless compression, and are widely used in scanning, print production, photography, and archiving. The problem starts when you actually need to share one. A TIFF can be large, slow to upload, and awkward to open on everyday devices or websites.

    That is why so many people look for a simple way to convert TIFF to JPG. JPEG files are smaller, faster, and far more compatible with email, browsers, online forms, and everyday business workflows. If you have a scanned invoice, a product photo, a design proof, or a document archive that needs to be easier to use, changing a TIFF into a JPG is often the practical move.

    For small business owners, freelancers, developers, and productivity-focused users, the goal is not just conversion. It is getting the right balance of quality, file size, speed, and compatibility. That balance matters, because the wrong settings can leave you with blurry images, oversized files, or lost detail. Understanding what happens during a TIFF-to-JPG conversion helps you avoid those trade-offs and make smarter choices.

    What Is TIFF to JPG?

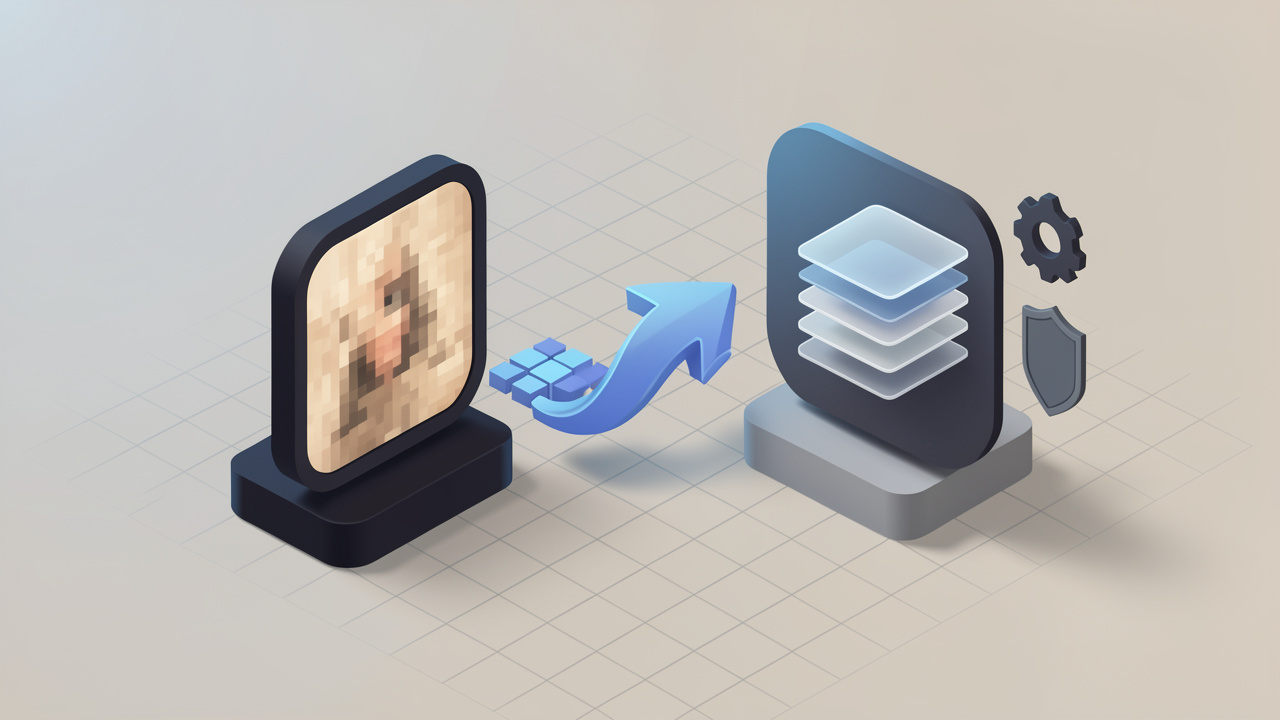
    Converting a TIFF to a JPG means taking an image stored in the TIFF format and saving it as a JPEG file. On the surface, that sounds simple. In practice, you are moving from one file type built for quality and flexibility to another built for efficiency and broad compatibility.

    A TIFF, short for Tagged Image File Format, is commonly used when preserving visual information is important. It can store high-resolution images, multiple pages, transparency in some workflows, and either uncompressed or losslessly compressed data. That makes it useful for scanned documents, professional photography, publishing, medical images, and archival storage.

    A JPG, or JPEG, is designed for compressed image storage. It reduces file size by selectively discarding some image data that the human eye is less likely to notice, this process is called lossy compression. The benefit is obvious: smaller files that load quickly and work almost everywhere. The trade-off is that each conversion can reduce image quality, especially if compression is set too aggressively.

    In everyday terms, TIFF is like a master copy in a filing cabinet. JPG is like a clean, shareable copy you send out to clients or upload to a website. Both have value, but they serve different purposes.

    Why People Convert TIFF Files

    Most people do not convert TIFF files because they dislike TIFF. They convert them because TIFF is often too heavy for everyday use. A scanned contract saved as TIFF may be technically excellent, but it can be inconvenient to email. A product image from a designer may look perfect in TIFF, but it may be far too large for a storefront listing or social post.

    There is also the issue of compatibility. While many professional tools open TIFF files easily, not every mobile app, website, content management system, or client device handles them well. JPG, by contrast, is a near-universal standard. If your priority is convenience, a JPEG is usually the safer option.

    This is especially true for teams that move quickly. A freelancer sending previews, a business owner uploading product shots, or a developer optimizing media assets often needs an image format that simply works, with minimal friction.

    Key Aspects of Converting TIFF to JPG

    The biggest thing to understand is that this is not just a file extension change. It is a format transformation. TIFF and JPG store image data differently, so the output depends heavily on the original file and the settings used during conversion.

    Image Quality and Compression

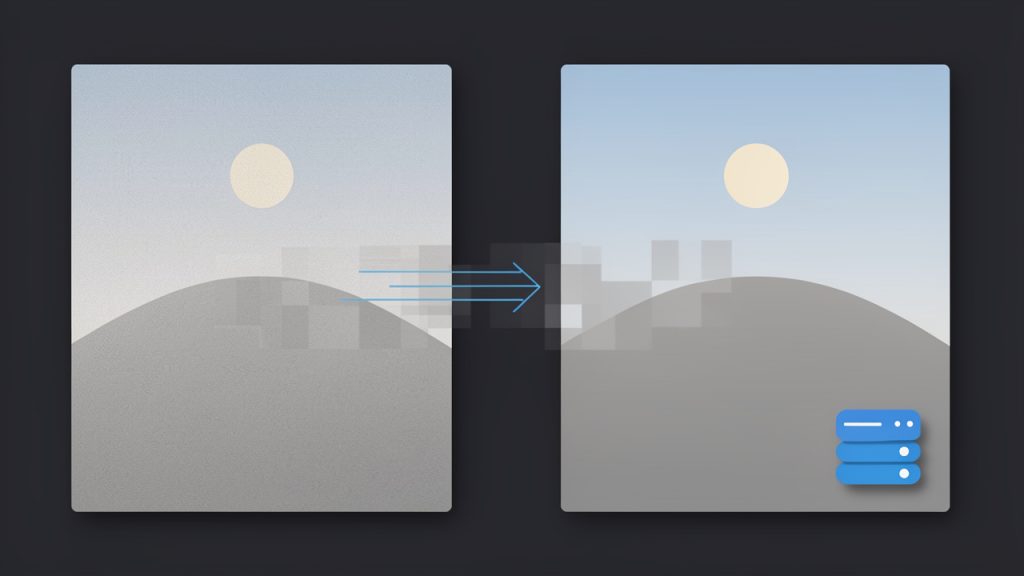
    When you convert TIFF to JPG, the most important decision is usually the compression level or quality setting. A higher JPEG quality preserves more detail but results in a larger file. A lower setting creates a smaller file but increases the risk of visible artifacts, softness, or color distortion.

    This matters more for some images than others. A photo with gradients and natural textures may still look good as a compressed JPG. A scanned document with tiny text or a diagram with sharp lines may suffer more quickly. In those cases, pushing compression too far can make the image less readable or less professional.

    If you are converting business documents, forms, or portfolio samples, it is worth checking the output at full size before sending or uploading it. What looks fine in a small preview may reveal compression damage when zoomed in.

    File Size and Performance

    One of the main reasons to change TIFF into JPG is file size. TIFF files can be very large, especially if they are uncompressed or saved at high resolution. That affects upload times, storage usage, page speed, and sharing convenience. For guidance on how size affects user experience, see resources about page speed.

    JPEG files are often dramatically smaller. This makes them a smart choice for websites, email attachments, cloud folders, and mobile access. If your workflow depends on speed, converting to JPG can remove a lot of friction.

    For productivity-minded users, this is often the real win. Smaller files mean faster transfers, quicker previews, easier collaboration, and fewer complaints from clients who cannot open oversized attachments.

    Resolution and Dimensions

    A TIFF-to-JPG conversion does not always mean resizing, but the two often happen together. Some tools let you keep the original resolution while changing only the format. Others also allow you to reduce dimensions, adjust DPI, or optimize the image for screen use.

    That can be useful, but it also creates risk. If you lower dimensions too much, the file may become unusable for print or detailed viewing. If you keep everything at full size, the JPEG may still be larger than necessary. The right choice depends on the purpose of the file.

    For example, a 300 DPI scan intended for print may need different handling than a product image intended for a web page. One should preserve detail. The other should prioritize speed and responsiveness.

    Color Profiles and Visual Accuracy

    Not all conversions look identical after export. TIFF files often carry rich color information and may include color profiles used in professional workflows. JPG supports color too, but the conversion process may shift tones slightly depending on the tool and settings.

    This is especially relevant for designers, photographers, and print professionals. If color accuracy matters, you should compare the original TIFF and converted JPG side by side. Whites, shadows, skin tones, or branded colors can shift in subtle ways.

    For casual use, those changes may not matter. For client-facing visual work, they can matter a lot. A good converter should preserve the image as faithfully as possible while still achieving a reasonable file size.

    Multi-Page TIFF Files

    A standard JPEG is a single image. A TIFF can sometimes contain multiple pages or frames, which is common with scanned documents or fax archives. When converting to JPG, this creates an important limitation: each page usually becomes a separate JPEG, or only one page is exported depending on the tool.

    If you work with document scans, this detail matters. A multi-page TIFF is not the same as a one-page photo. Before converting, make sure your tool tells you how it handles multiple pages, otherwise you could lose part of the document set without realizing it.

    Transparency and Layers

    Some TIFF files may include features that do not translate cleanly into JPEG, such as transparency. Since JPG does not support transparent backgrounds, those areas usually become white or another solid color during conversion.

    For logos, product cutouts, or graphics prepared for design workflows, this can be a problem. If you need transparency, PNG may be a better destination format than JPG. The right output format depends on the use case, not just on what is most common.

    TIFF vs JPG at a Glance

    Feature TIFF JPG
    Compression None or lossless Lossy
    File Size Usually large Usually much smaller
    Image Quality Very high, ideal for masters Good to very good, depends on compression
    Compatibility Strong in professional software Excellent across devices and platforms
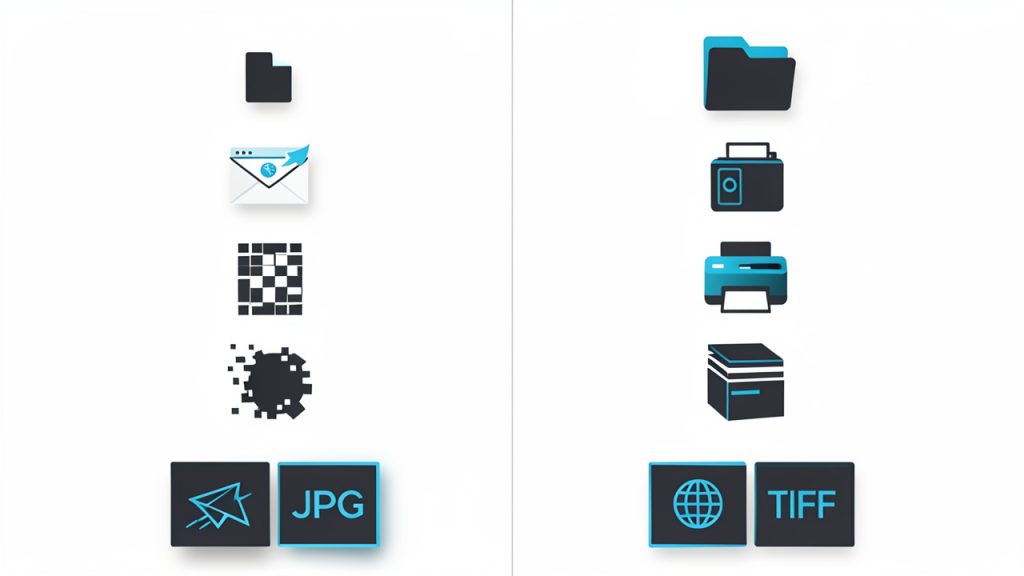
    Best Use Case Archiving, scanning, print, editing Sharing, web, email, everyday use
    Multi-Page Support Yes, in many cases No
    Transparency Possible in some workflows Not supported

    How to Get Started with TIFF to JPG

    If your goal is to convert a TIFF file quickly and correctly, the first step is to decide why you are converting it. That answer determines almost everything else, from the quality setting to whether JPG is even the right final format.

    If you are preparing images for a website, a moderate-to-high JPEG quality is usually enough. If you are sharing scanned receipts or invoices, clarity matters more than perfect fidelity, so a balanced compression setting often works well. If you are preserving originals for future editing or compliance, keep the TIFF and create JPG copies instead of replacing the source file.

    Choose the Right Conversion Method

    There are several common ways to convert TIFF images into JPEGs. Online tools are popular because they are fast, simple, and accessible from any device. They are especially useful for occasional tasks and light workflows.

    Desktop software offers more control. This is often the better choice when you need batch processing, color management, high-resolution output, or privacy for sensitive files. Built-in operating system tools can also work for basic conversions, though they may offer fewer export options.

    For business users handling contracts, IDs, medical records, or confidential client material, privacy should be part of the decision. Convenience matters, but so does knowing where the file goes and whether it is retained after upload.

    A Practical Workflow That Works

    A reliable TIFF-to-JPG workflow is straightforward when you approach it with intention.

    1. Check the source file and confirm whether it is single-page or multi-page.
    2. Decide the purpose of the JPG, such as web upload, email sharing, or internal storage.
    3. Choose quality settings based on that purpose, usually aiming for clear output without excessive file size.
    4. Preview the result at full size, especially if the image contains text, fine detail, or brand-sensitive colors.
    5. Keep the original TIFF in case you need a higher-quality version later.

    This sequence prevents the most common problems. It keeps the conversion purposeful instead of random, and it protects you from overwriting the best-quality source.

    Batch Conversion for Busy Workflows

    If you regularly handle scanned paperwork, catalogs, product photos, or client uploads, converting one file at a time becomes inefficient fast. Batch conversion is the better approach. It allows you to process multiple TIFF files into JPGs in a single pass, often with consistent settings across the entire group.

    That consistency matters. It helps maintain uniform quality, naming structure, and image dimensions. For small businesses and freelancers, this can save significant time during onboarding, content uploads, or document prep. For developers and operations teams, it also reduces repetitive manual work and makes image pipelines easier to manage.

    The key is to avoid treating batch conversion as purely mechanical. A single preset may not suit every image. If your files vary widely, scanned text documents and product photography, for example, you may want separate presets for each category.

    Common Mistakes to Avoid

    One of the most common mistakes is converting the only copy of a TIFF file and then deleting the original. Since JPG is lossy, that can permanently reduce your available image quality. The smarter move is to keep TIFF as the master file and use JPEG as the delivery format.

    Another mistake is over-compressing. Small file sizes are useful, but not if they make a document unreadable or an image visibly degraded. It is also easy to overlook dimensions. A 6000-pixel image turned into JPG is still large if you do not resize it for the web.

    Users also run into trouble with multi-page TIFFs. If the converter exports only the first page, you may end up sharing incomplete information. Always verify page handling before finalizing the output, especially for business documents.

    When JPG Is the Wrong Choice

    JPEG is practical, but it is not always the best destination format. If you need transparent backgrounds, PNG may be better. If you need editable layers or a preservation copy, keep the TIFF. If the file is really a document rather than an image, PDF may be more suitable for sharing.

    This is where context matters more than habit. Many people search for a way to convert TIFF to JPG because JPG feels familiar. That is understandable. But the best format is the one that matches the job. Converting for convenience is smart. Converting without considering the outcome can create more work later.

    Conclusion

    Converting TIFF to JPG is ultimately about making high-quality images easier to use. TIFF gives you detail, flexibility, and archival strength. JPG gives you speed, smaller file sizes, and universal compatibility. Knowing when and how to move between the two formats helps you get the benefits of both.

    If you are starting now, keep the process simple. Preserve the original TIFF, convert with a clear purpose, and review the result before you send or publish it. That small bit of discipline saves time, protects image quality, and makes your workflow noticeably smoother.
  • How to Convert a PDF into Images

    A PDF that looks perfect on your screen can fall apart the moment you need it as an image. Text turns fuzzy, transparent backgrounds disappear, file sizes explode, or a multi-page document suddenly becomes a folder full of confusing filenames.

    If you have ever tried to turn a PDF into a shareable thumbnail, a slide image, a website asset, or an OCR-ready scan, you already know that a simple export is not always enough. If you have ever tried to turn a PDF into a shareable thumbnail, a slide image, a website asset, or an OCR-ready scan, you already know that a simple export is not always enough.

    The good news is that converting a PDF to an image is straightforward once you understand the trade-offs. The right format, the right DPI, and the right tool make the difference between a crisp, lightweight result and a blurry, oversized mess. Whether you are a small business owner preparing product sheets, a freelancer sending visual proofs, a developer building an automated workflow, or a productivity-minded user trying to streamline daily tasks, there is a practical path that fits.

    This guide explains how to convert a PDF into an image using online tools, desktop apps, command-line utilities, and developer libraries. It also covers image formats, quality settings, privacy concerns, batch processing, and troubleshooting so you can get the result you want the first time.

    Introduction: Why convert a PDF into an image?

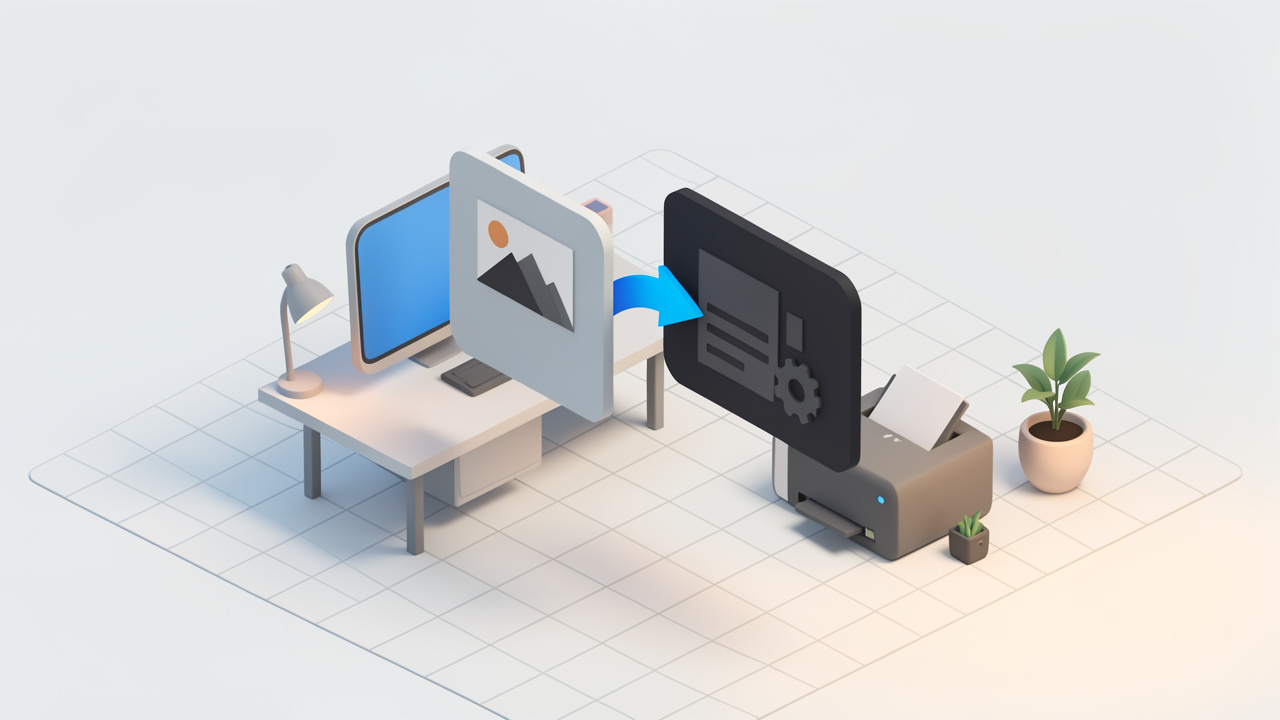
    Converting a PDF into an image solves a surprisingly wide range of everyday problems. For websites, it is useful for generating page previews, thumbnails, and visual snippets that load quickly in browsers.

    For presentations and social sharing, an image is often easier to place, crop, or embed than a full PDF. Teams also convert pages from PDFs into images for annotation, approvals, or chat-based collaboration where image previews are more convenient than document attachments.

    There are also technical and archival reasons. Some users rasterize PDF pages for OCR workflows, especially when dealing with scans or inconsistent source files. Others need image outputs for print proofs, legacy systems, or software that accepts PNG, JPEG, or TIFF but not PDF. In legal, education, and operations workflows, converting selected pages into images can be a fast way to preserve visual appearance when layout matters more than editability.

    The catch is that conversion changes the nature of the file. A PDF can contain vector graphics, embedded fonts, transparency, layers, and multiple pages. An image is usually a flat raster snapshot. That means choices around format, resolution, and compression directly affect sharpness, color fidelity, transparency, and file size. Common mistakes include exporting at too low a DPI, choosing JPEG for line art, or forgetting that a 20-page PDF may become 20 separate files.

    You will also run into format choices quickly. JPEG is good for photos and smaller file sizes. PNG is better for screenshots, line art, and transparency. TIFF is common in archival and print workflows. WebP offers modern compression benefits for web use, while BMP is rarely the best option except in niche legacy environments. The right choice depends on how and where the image will be used.

    Understanding the technical differences: PDFs vs. raster images

    Vector vs. raster, what changes during conversion

    A PDF is more like a set of instructions than a photograph. It can say, “draw this letter in this font at this size,” or “place this line exactly here.” That is why text in a PDF often stays sharp no matter how far you zoom in. When you convert that same page to an image, those instructions are flattened into a grid of pixels.

    This matters most for text and diagrams. A clean vector chart in a PDF can look razor-sharp at any size. Once rasterized, its quality depends entirely on the resolution you choose during export. If you convert a page at 72 DPI, small text may look soft or jagged. At 300 DPI, that same page usually looks much better, especially for print or OCR.

    How resolution affects quality and file size

    DPI, or dots per inch, controls how much detail ends up in the image. Higher DPI means more pixels, which usually means better visual quality and larger files. Lower DPI keeps files small but can make text, logos, and thin lines look blurry.

    A practical way to think about it is this: 72 to 150 DPI is usually fine for web previews, email sharing, and on-screen viewing. 300 DPI is the standard safe choice for print and OCR. If the source PDF contains fine typography, engineering drawings, or detailed tables, going above 300 DPI can help, but file sizes increase fast.

    Color profiles, transparency, and compression artifacts

    Not all output issues are caused by DPI. Color profiles can shift how images appear across devices and printers. A PDF prepared for print may use CMYK color data, while many image workflows expect RGB. If the conversion tool handles color poorly, the result can look dull or off-brand.

    Transparency is another frequent surprise. PDFs can support transparent elements, but some image formats cannot preserve them well. PNG handles transparency reliably. JPEG does not, so transparent areas may become white or another flat background color.

    Compression also changes the result. JPEG uses lossy compression, which is efficient for photos but can create visible artifacts around text and edges. PNG and TIFF can preserve detail more cleanly, although often at the cost of larger files.

    Multi-page PDFs and output behavior

    A PDF can contain one page or one hundred. An image file usually represents a single page or frame. That is why most PDF-to-image workflows export each page as a separate file. If your PDF has ten pages, expect ten outputs unless your tool offers a contact sheet or combined image option.

    Naming matters here. Good tools automatically generate filenames like document-1.png, document-2.png, and so on. Poorly configured exports can overwrite earlier pages or create inconsistent numbering. For batch workflows, predictable naming is essential.

    Choose the right image format for your needs

    JPEG for photographs and smaller files

    JPEG is the best fit when your PDF pages contain photographs, gradients, or scanned imagery and you want smaller file sizes. It is widely supported, easy to share, and ideal for web previews where perfection is less important than speed.

    The trade-off is quality loss. Each time a JPEG is compressed, some detail disappears. That is usually acceptable for photo-heavy pages, but not great for text-heavy handouts, UI screenshots, or logos. If you choose JPEG, use moderate to high quality settings to reduce visible artifacts.

    PNG for text, line art, and transparency

    PNG is often the safest all-around option when clarity matters. It preserves sharp edges well, which makes it especially useful for screenshots, diagrams, invoices, forms, slide exports, and pages with transparent backgrounds.

    If your PDF contains simple graphics, black text on white backgrounds, or interface elements, PNG usually looks cleaner than JPEG. The downside is larger file sizes, especially for high-resolution pages with photographic content.

    TIFF for archival and print workflows

    TIFF is a strong choice for archival storage, publishing pipelines, and print production. It supports lossless compression and high quality, which makes it valuable when image integrity matters more than convenience.

    The cost is compatibility and size. TIFF files are often much larger than JPEG or PNG, and they are not as convenient for casual web sharing. For internal archives, print vendors, and document imaging systems, though, TIFF remains highly relevant.

    WebP and newer formats

    WebP is attractive for websites because it can deliver smaller files than JPEG and PNG while still maintaining good visual quality. If your main goal is faster page loads, WebP is worth considering.

    Support is now broad in modern browsers, but some older systems and workflows still prefer PNG or JPEG. For public-facing web assets, WebP is often a smart optimization step after conversion rather than the initial export format.

    When to use SVG or keep vector output

    Sometimes the best PDF to image workflow is not turning the content into a raster image at all. If the page is mostly vector art, icons, or simple illustrations, exporting to SVG can preserve sharpness and scalability. This is especially useful for logos, diagrams, and web graphics.

    If your end use accepts PDF directly, keeping the original format may still be the best decision. Converting to an image makes sense when compatibility, display, or workflow requirements demand it, not just because it seems simpler.

    Methods to convert PDF to image: tools and workflows

    There is no single best tool for every situation. The right method depends on your priorities: convenience, privacy, price, automation, or output control.

    Online converters

    Online converters are the fastest route for occasional tasks. You upload a file, choose PNG or JPEG, click convert, and download the output. For small, non-sensitive PDFs, this is hard to beat for convenience. Many users like these services because they work on any device and require no installation.

    The weakness is privacy. If your PDF contains contracts, invoices, client work, personal data, or internal documents, uploading it to a third-party service may be a bad idea. You also have limited control over rendering settings, color handling, and advanced export options.

    Desktop software

    Desktop tools give you more control and usually better privacy. Adobe Acrobat offers reliable export options and strong support for professional PDFs. Preview on macOS is quick and built in, making it a great lightweight option for Mac users. GIMP and IrfanView can help with opening and exporting PDFs, especially when you also want image editing or batch actions.

    For most small business and freelance workflows, desktop software is the sweet spot. It balances ease of use with output quality, and it keeps files local.

    Command-line tools

    For power users, ImageMagick, Ghostscript, and pdftoppm from Poppler are excellent. They offer precise control over DPI, file naming, page ranges, and automation. These tools are widely used in Linux environments, CI pipelines, server-side jobs, and batch processing scripts.

    The main barrier is usability. Command-line tools are fast and powerful, but they are less approachable if you are unfamiliar with terminal commands. Once configured, though, they are often the most efficient option.

    Programming libraries and APIs

    Developers integrating PDF to image conversion into apps often use Python libraries such as pdf2image and PyMuPDF, or Node tools such as pdf-poppler and pdfjs. These libraries are useful when conversion needs to happen in a web app, a backend service, or an internal automation process.

    An API-based approach also helps when you need scale, event-driven processing, or integration with storage, OCR, or document workflows. The trade-off is implementation effort and the need to manage rendering dependencies.

    Step-by-step how-tos

    Online converter workflow

    If you are using an online converter for a quick page export, follow this simple process:

    1. Upload the PDF to a reputable converter.
    2. Choose the output format, usually PNG for clarity or JPEG for smaller size.
    3. Set page range or select a single page if the tool supports it.
    4. Adjust quality or resolution settings when available.
    5. Download the output and verify text sharpness before sharing.

    For safety, avoid this method for sensitive documents unless the provider clearly states deletion timelines, encryption practices, and data retention limits.

    Adobe Acrobat export steps

    In Adobe Acrobat, open the PDF and choose the export option from the tools menu. Select Image as the export category, then choose JPEG, PNG, or TIFF. If settings are available, choose the desired resolution and color space before exporting. Acrobat generally handles fonts and layout well, so it is one of the more dependable options for client-facing materials.

    macOS Preview quick steps

    Preview can open a PDF page and export it as an image with very little friction. Open the PDF, navigate to the page you want, then use the export command and pick PNG or JPEG as the output format. For simple one-page extractions, it is fast and effective. For advanced multi-page export or batch processing, you will usually need a more specialized tool.

    ImageMagick example

    If you want command-line control, ImageMagick remains a popular choice. A common example is:

    magick -density 300 input.pdf output.png
    

    This command renders the PDF at 300 DPI before conversion. That density setting is important. Without it, the output may default to a lower resolution and appear blurry.

    For multi-page PDFs, ImageMagick typically creates separate files automatically, often with numbered suffixes. If you need only one page, you can specify the page index:

    magick -density 300 "input.pdf[0]" output-page1.png
    

    pdftoppm high-quality export examples

    Poppler’s pdftoppm is often preferred for reliable PDF rendering and speed. To export a PDF to PNG at 300 DPI, use:

    pdftoppm -png -r 300 input.pdf output
    

    This creates files like output-1.png, output-2.png, and so on. If you want only a specific page, add page limits:

    pdftoppm -png -r 300 -f 1 -singlefile input.pdf output-page1
    

    For JPEG output, switch the format flag:

    pdftoppm -jpeg -r 200 input.pdf output
    

    Python example with pdf2image

    For developers, pdf2image offers a practical Python route. First install the package and make sure Poppler is available on your system.

    from pdf2image import convert_from_path
    
    pages = convert_from_path("input.pdf", dpi=300)
    pages[0].save("page-1.png", "PNG")
    

    That handles a single page save after converting all pages. For a multi-page export:

    from pdf2image import convert_from_path
    
    pages = convert_from_path("input.pdf", dpi=300)
    
    for i, page in enumerate(pages, start=1):
        page.save(f"output-{i}.png", "PNG")
    

    This approach is useful in dashboards, upload pipelines, and automated document services where PDFs need to become images on demand.

    Optimizing output: quality, size, and accessibility

    A good conversion is not just about getting an image. It is about getting an image that is sharp enough, small enough, and usable enough for its final destination.

    For web use, 72 to 150 DPI is usually enough. For OCR and print, 300 DPI is the standard recommendation. If you go much higher without a clear reason, you often get larger files with little visible improvement. This is especially true for plain text documents destined for screens.

    Compression comes next. JPEG quality settings should be high enough to avoid ugly artifacts around letters and edges. PNG files can often be optimized after export with tools like pngquant, while JPEG files can be trimmed with jpegoptim. These tools reduce size without forcing a full re-render from the original PDF.

    pngquant --quality=65-85 --ext .png --force output.png
    
    jpegoptim --max=85 image.jpg
    

    Resizing is another simple win. If you converted a letter-size page at 300 DPI and only need a thumbnail for a website, the exported file is probably far larger than necessary. Reducing dimensions after conversion can dramatically improve load times.

    Accessibility is often overlooked. Once text becomes an image, screen readers cannot interpret it unless you add alt text where the image is published. If the original purpose of the PDF was to convey readable text, ask whether rasterizing is actually the right move. In many cases, keeping the PDF searchable or applying OCR is more accessible than flattening everything into pixels.

    Batch processing and automation strategies

    When you need to convert more than a few files, manual export becomes tedious fast. Batch processing saves time, but it also introduces consistency concerns around naming, logging, and error handling.

    A simple Bash loop with pdftoppm can process an entire folder of PDFs:

    for file in *.pdf; do
      base="${file%.pdf}"
      pdftoppm -png -r 300 "$file" "$base"
    done
    

    That script converts every PDF in the current directory into numbered PNG files. If you prefer ImageMagick, a similar loop works there too:

    for file in *.pdf; do
      base="${file%.pdf}"
      magick -density 300 "$file" "${base}.png"
    done
    

    For no-code automation, watch-folder workflows can be surprisingly effective. On macOS, Automator or Shortcuts can detect new PDFs in a folder and trigger conversion steps. In cloud workflows, Zapier and Make can move files between storage systems and APIs, though they are better for orchestration than heavy rendering.

    On servers, scaling means thinking about memory and concurrency. PDF rendering can be CPU-intensive, especially with high DPI settings or large batches. A queue-based architecture with worker limits is safer than trying to process everything at once. Logging should capture source filename, page count, output format, DPI, and conversion errors so failed jobs can be retried cleanly.

    Privacy, security, and legal considerations

    A PDF often contains more than visible text. It may include invoices, contracts, financials, IDs, signatures, or sensitive internal documents. Uploading that file to an online converter means trusting a third party not just with the visible content, but also with whatever metadata and retention practices sit behind the service.

    For confidential material, local tools are safer. Desktop software, self-hosted conversion tools, and server-side libraries keep the data within your environment. If cloud processing is unavoidable, check whether files are encrypted in transit, how long uploads are stored, whether deletion is automatic, and whether the provider uses files for training or analytics.

    Retention policies matter. Even reputable tools may keep files temporarily for processing or abuse prevention. If you work in regulated environments, that may be unacceptable. Secure deletion practices and internal handling policies should be part of your workflow, not an afterthought.

    There is also a legal dimension. Converting a PDF into an image does not remove copyright restrictions. If the source content is protected, you still need the right to reproduce, share, or publish it.

    Troubleshooting common problems

    Blurry or pixelated text

    This is the most common complaint, and the cause is usually low DPI. Re-export at 300 DPI if the image will be printed, OCR’d, or viewed closely. For web use, try 150 DPI first and inspect small text before settling. Also make sure you are using PNG rather than JPEG for text-heavy pages.

    Missing fonts or garbled characters

    If the source PDF does not embed fonts correctly, some converters may substitute or misrender text. Adobe Acrobat and Poppler-based tools often handle these cases better than lightweight converters. If possible, regenerate the original PDF with embedded fonts before converting.

    Large file sizes

    If the image is too big, reduce the DPI, resize the dimensions, or switch formats. Text-heavy pages often compress well as optimized PNGs. Photo-heavy pages are better suited to JPEG or WebP. Do not default to TIFF unless you truly need archival or print-grade output.

    Corrupted or unreadable output

    Sometimes the issue is the source PDF, not the export tool. Try opening the file in another renderer, re-saving the PDF, or printing it to a new PDF before converting. If one tool fails, test another. Different rendering engines interpret problematic PDFs differently.

    Tool recommendations: best options by use case

    Use Case Recommended Tool Platform Cost Why It Stands Out
    Quick one-off conversion CloudConvert Web Free/Paid Easy interface, flexible formats, good for occasional non-sensitive files
    Fast browser-based tasks Zamzar Web Free/Paid Simple workflow, broad file support
    Professional document export Adobe Acrobat Windows, macOS, Web Paid Strong rendering quality, dependable font handling, TIFF/JPEG export
    Mac-native quick export Preview macOS Free Built in, fast, ideal for simple page exports
    Free image editing after conversion GIMP Windows, macOS, Linux Free Useful if you need to tweak or crop output
    Lightweight Windows workflow IrfanView Windows Free Fast, practical, good for occasional desktop use
    Automation and scripting pdftoppm (Poppler) Windows, macOS, Linux Free Excellent rendering, clean multi-page export, batch friendly
    Flexible command-line rendering ImageMagick Windows, macOS, Linux Free Powerful for conversion pipelines and format control
    Python app integration pdf2image Cross-platform Free Straightforward API, popular for backend workflows
    Advanced Python rendering PyMuPDF Cross-platform Free/Paid options Fast, powerful, useful for extraction and rendering tasks
    Node-based conversion pdf-poppler Cross-platform Free Helpful for app automation in JavaScript environments

    If privacy is your top concern, prefer Preview, Adobe Acrobat, pdftoppm, or ImageMagick running locally. If speed and convenience matter most for a harmless file, a web converter can be perfectly adequate.

    Frequently asked questions

    Will converting a PDF into an image make text unsearchable?

    Yes, in most cases. Once the page is rasterized, the text becomes pixels rather than selectable characters. If searchability matters, keep the PDF or apply OCR after conversion.

    Can I convert back from image to PDF without quality loss?

    You can place the image into a new PDF, but that does not restore vector text or lost detail. The PDF will simply contain the image. If the original export was low quality, that loss remains.

    What DPI should I use for OCR?

    300 DPI is the standard recommendation for OCR. Lower resolutions can work for large, clean text, but 300 DPI gives OCR software a better chance of recognizing characters accurately.

    How do I keep vector graphics sharp?

    If possible, keep the content in PDF or export to SVG instead of a raster format. If you must create an image, use a high DPI and choose PNG or TIFF for cleaner edges.

    Conclusion and practical checklist

    A successful PDF to image workflow comes down to a few smart choices. First, pick the right format for the content. PNG for text and graphics, JPEG for photos, TIFF for archival, WebP for web optimization. Then choose the right DPI based on use case, usually 72 to 150 for web and 300 for print or OCR. Finally, use the right tool for the job: online for convenience, desktop for privacy and ease, command-line for automation, and libraries for app integration.

    If you want a simple rule of thumb, use PNG at 150 DPI for web graphics, JPEG at moderate quality for photo-heavy pages, and PNG or TIFF at 300 DPI for print, OCR, or records. After conversion, optimize the file, check text sharpness, and think about accessibility and privacy before publishing or sharing.

    For your next step, choose one workflow and test it on a real file you use often. If you need a quick result, start with Preview or an online converter. If you need repeatable quality or automation, move straight to Poppler, ImageMagick, or a Python library. The right setup can turn PDF to image conversion from an occasional annoyance into a fast, reliable part of your workflow.

  • How to Convert PNG to TIFF for Print and Archival Use

    How to Convert PNG to TIFF for Print and Archival Use

    If you have ever tried to upload a logo, scan, or product image and been told the file format is wrong, you already know how frustrating image conversion can be. A PNG file may look perfect on screen, but some print workflows, document archives, publishing systems, and design tools still prefer TIFF. That is where converting PNG to TIFF becomes useful.

    For small business owners, freelancers, developers, and anyone who wants quick results without wrestling with complex software, the goal is simple: preserve image quality, avoid compatibility problems, and finish the job fast. The good news is that a PNG-to-TIFF conversion is usually straightforward once you understand what each format does best and when the switch actually makes sense.

    What Is PNG to TIFF?

    Converting a PNG to a TIFF means taking an image stored in the Portable Network Graphics format and saving it as a Tagged Image File Format file. Both are image formats known for quality, but they were built with different use cases in mind.

    PNG is widely used for digital graphics, screenshots, web visuals, and images that need transparency. It is efficient, sharp, and supported almost everywhere online. TIFF, by contrast, is more common in professional printing, scanning, publishing, archiving, and workflows where detailed image data matters more than lightweight file size.

    The distinction becomes clearer when you think about where the image is going next. PNG is excellent for screens. TIFF is often preferred for print and production environments. If you are preparing scanned records, sending artwork to a print vendor, or working with software that favors archival-quality image files, converting from PNG to TIFF can solve a practical compatibility problem.

    That said, the conversion is not automatically an upgrade in every situation. TIFF files are often much larger, and if your original PNG was created for the web, changing formats alone will not magically add new detail. The value of the conversion lies in workflow fit, not just in the file extension.

    Key Aspects of PNG to TIFF

    Why people convert PNG files to TIFF

    The most common reason to convert a PNG image to TIFF is compatibility with professional systems. Print shops, prepress teams, document management platforms, and certain editing tools may request TIFF because it is a long-established format in commercial imaging.

    Another reason is file handling flexibility. TIFF supports several compression methods and can be used in workflows where image metadata, layered scanning processes, or archival requirements matter. For businesses storing scanned contracts, illustrations, or historical records, TIFF often feels more at home than PNG.

    There is also a trust factor in legacy environments. Some organizations standardize around TIFF because their equipment, scanners, and internal processes were built around it years ago. In those cases, converting PNG files to TIFF is less about theory and more about meeting an existing requirement cleanly.

    PNG vs TIFF at a glance

    Both formats can preserve high visual quality, but they behave differently in everyday use. PNG is usually better for fast-loading digital graphics. TIFF is usually better for professional imaging pipelines where editing, storage standards, or print preparation are involved.

    PNG vs TIFF at a glance

    Feature PNG TIFF
    Best use Web graphics, screenshots, transparent images Print, scanning, publishing, archival storage
    Compression Lossless Lossless or other compression options
    Transparency Strong support Limited or workflow-dependent
    File size Usually smaller Often larger
    Common audience Web designers, marketers, app users Printers, publishers, archivists, designers
    Compatibility Excellent for browsers and digital platforms Excellent for professional imaging tools

    This comparison helps explain why many users search for a way to convert PNG into TIFF. They are not necessarily chasing better-looking images. They are trying to make the file suitable for a specific system or output.

    Quality considerations that matter

    One of the biggest misconceptions is that converting a PNG file to TIFF will automatically improve image quality. It will not. A conversion can preserve quality, but it cannot invent detail that was never in the original file.

    If your PNG is already a low-resolution screenshot, saving it as TIFF only gives you a larger file containing the same underlying image quality. On the other hand, if your PNG contains crisp artwork, scans, diagrams, or high-resolution design elements, converting to TIFF can help preserve that content in a format that works better for production or archiving.

    Resolution, color mode, and compression settings matter too. If you are preparing files for print, it is worth checking whether the output needs a certain DPI, color profile, or compression style. This is where many quick conversions succeed technically but fail practically. The file opens, but it is not optimized for the actual job.

    File size and storage trade-offs

    TIFF files are often significantly larger than PNG files. That can be a good thing in controlled professional workflows, but it can become a burden if you are handling lots of assets, storing files in shared drives, or emailing attachments back and forth.

    For a freelancer delivering print-ready artwork, larger TIFF files may be totally acceptable. For a small business owner trying to manage hundreds of product images in cloud storage, the extra weight can create friction. Storage costs, upload times, and sharing speed all start to matter.

    The practical lesson is simple: convert only when the format change serves a clear purpose. If your image is staying online, PNG may remain the better option. If it is heading into print, scanning, publishing, or archival storage, TIFF may be the right move despite the larger file size.

    How to Get Started with PNG to TIFF

    Decide whether TIFF is actually necessary

    Before converting anything, ask where the file will be used. This single question saves time. If the image is for a website, digital ad, presentation, app interface, or social post, PNG is often already ideal.

    If the file is headed to a print vendor, book layout, document archive, or specialized graphics workflow, TIFF may be required or recommended. In that case, conversion makes sense. Knowing the destination keeps you from creating oversized files you do not need.

    This is especially important for productivity-minded users who rely on simple online tools. The fastest workflow is not just about conversion speed. It is about avoiding unnecessary steps in the first place.

    Use a reliable conversion method

    There are several ways to convert a PNG image into TIFF. Many users choose an online converter because it is quick, free, and requires no installation. Others prefer desktop software for privacy, batch processing, or more control over output settings.

    A good conversion tool should preserve image clarity, retain the correct dimensions, and make it easy to download the output without confusion. If you are working with sensitive documents, privacy policies matter. If you are handling a high volume of files, batch conversion becomes more important than interface polish.

    Simple 4-step flowchart showing the typical conversion workflow

    For most casual and business users, the process usually looks like this:

    1. Upload the PNG file to the converter or open it in your image software.
    2. Choose TIFF as the output format and review any settings available.
    3. Export or convert the file and save the result.
    4. Check the output for quality, dimensions, and usability in the target system.

    That simple workflow covers most cases. The smart part is in the review step. Always open the final TIFF and confirm it behaves the way you expect before sending it to a client, printer, or archive.

    Pay attention to resolution and color

    If the output is going to print, image resolution deserves a closer look. A file that appears sharp on a laptop screen can still print poorly if the source dimensions are too small. TIFF supports professional workflows well, but it cannot compensate for a weak original image.

    Color handling matters too. Some design and print environments expect consistent color profiles. If your conversion tool offers color options, do not ignore them blindly. A simple format switch can become a production issue if colors shift or if the receiving system expects a specific profile.

    For logos, illustrations, and product imagery, it is a good idea to test one sample conversion first. That gives you a chance to inspect detail, color, and file behavior before processing an entire batch.

    Know when batch conversion helps

    If you are converting one or two files, almost any decent tool will do. But if you manage catalogs, scanned paperwork, design assets, or client deliverables, batch conversion can save real time.

    A freelance designer preparing assets for a printer may need to convert dozens of PNG exports into TIFF. A small business digitizing records may need to standardize hundreds of scanned images. In these cases, efficiency matters as much as quality.

    Look for a solution that handles multiple files consistently and keeps filenames organized. The less manual cleanup required afterward, the more productive the workflow becomes. This is where simple tools often outperform bloated software, especially for users who value speed over advanced editing features.

    Common mistakes to avoid

    Many format problems come from assumptions, not technology. People often believe TIFF is always better, larger always means higher quality, or conversion alone will make a web image print-ready. Those assumptions create disappointing results.

    Another common issue is skipping the final check. A converted file may technically be a TIFF but still have the wrong orientation, weak resolution, or unexpected color changes. The safest approach is to treat conversion as one part of the workflow, not the final answer.

    If you work with client files, it also helps to confirm exact format requirements before converting. Some clients ask for TIFF when they actually mean a “high-quality image.” Others may need very specific settings. A quick clarification can prevent rework.

    Conclusion

    Converting PNG files to TIFF is less about changing one file extension to another and more about choosing the right format for the job. PNG remains excellent for digital use, while TIFF is often better suited to print, scanning, publishing, and archival workflows. The best choice depends on where the image is headed and what the receiving system expects.

    If you need to convert a PNG file into TIFF, start with the end use, choose a reliable tool, and review the output carefully. That small amount of attention can save time, avoid compatibility headaches, and help you keep image quality intact. The next step is simple: test one file first, verify the result, and then scale up if the workflow fits your needs.