JNTZN

Tag: workflow

  • How to Convert PNG Files to PDF Quickly

    How to Convert PNG Files to PDF Quickly

    Turning a PNG into a PDF sounds like a tiny task until you need to do it quickly, keep the image quality sharp, and make sure the file is easy to share. That is where many people hit friction. A screenshot, scanned receipt, signed form, design mockup, or product image may look fine as a standalone image, but once it needs to be emailed, printed, archived, or combined with other pages, PDF is usually the format people expect.

    For small business owners, freelancers, developers, and productivity-focused users, converting PNG files into PDFs is less about file types and more about workflow. You want something simple, reliable, and preferably free. You also want to avoid bloated software, confusing settings, and quality loss. The good news is that converting a PNG file into a PDF is usually straightforward once you understand what changes, what stays the same, and what options matter.

    What is converting a PNG into a PDF?

    At its core, converting a PNG into a PDF means taking an image file and packaging it into a document format.
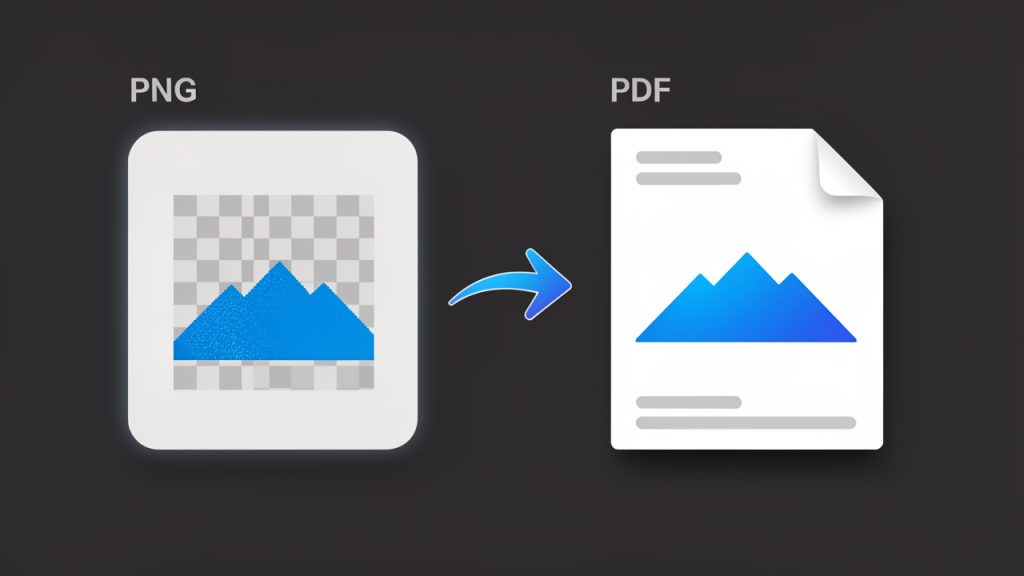
    Side-by-side comparison showing a PNG image (thumbnail of a logo/screenshot with a checkerboard transparency background) on the left and a PDF document page (same image centered on a page with header/footer metadata) on the right, with an arrow labeled “Convert” between them. Visual cues: ‘PNG (lossless image)’ and ‘PDF (document wrapper)’ labels, small icons for file types, and a subtle note showing that layout and compatibility are added by the PDF.

    A PNG file is designed for images, especially graphics that need sharp edges, transparency, or lossless quality. PNG is a lossless image format. A PDF, on the other hand, is designed for sharing and presenting content in a consistent layout across devices and platforms.

    This distinction matters more than it first appears. A PNG is excellent when you need an image to remain crisp, such as a logo, screenshot, chart, or digital illustration. A PDF becomes more useful when that same image needs to be treated like a document. If you are sending an invoice attachment, submitting paperwork, compiling scans, or preparing visual assets for review, a PDF gives the file more structure and broader compatibility.

    The phrase people search for, often written as “PNG to PDF”, usually refers to either a one-time conversion or an ongoing need in daily work. Sometimes it is as simple as converting a single image into a one-page PDF. In other cases, it means combining multiple PNG files into one organized PDF document with the right page order, page size, and orientation.

    Why PDF is often the better final format

    PDF has become the standard for formal file exchange because it preserves layout and is widely supported. Whether your recipient opens it on a laptop, tablet, phone, or office printer, the content is far more likely to appear exactly as intended. That predictability is a major reason people convert image files into PDFs instead of sending raw images.

    There is also a psychological aspect to file format choice. A PDF feels complete. It looks more official, more stable, and easier to archive. When a client receives a PDF instead of a loose image file, the presentation often feels more polished. For businesses and freelancers, that small difference can support a more professional impression.

    When people commonly convert PNG files into PDFs

    The most common use cases are practical and repetitive. Someone scans paperwork as images and needs to combine the pages into a single PDF. A freelancer exports mockups or slides as PNG files and wants to send them as a clean presentation document. A developer captures UI screenshots for bug reports or product documentation and converts them into a shareable file that can be reviewed or stored more easily.

    In each case, the image itself is still important, but the document wrapper is what makes the file easier to move through a workflow. That is why PNG-to-PDF conversion has become such a common utility task across industries.

    Key aspects of converting PNG files into PDFs

    A good conversion is not just about changing the extension. It is about preserving what matters while making the file more useful. To do that well, it helps to understand image quality, file size, layout behavior, and compatibility.

    Image quality and resolution

    One of the first concerns people have is whether converting a PNG into a PDF will reduce quality. In many cases, the answer is no, at least not automatically. If the conversion tool embeds the PNG cleanly into the PDF, the image can remain visually identical.
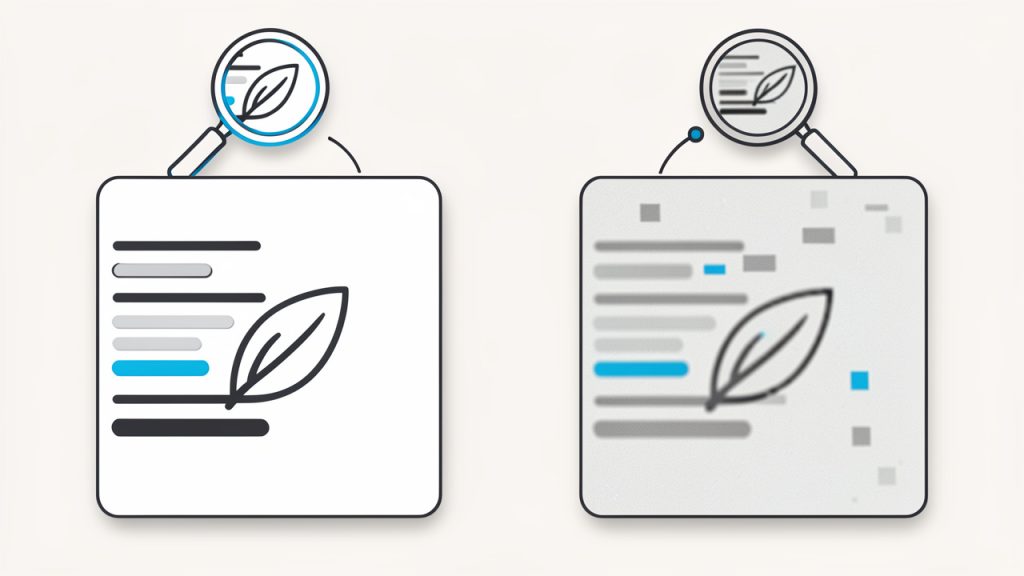
    A two-panel comparison illustrating image quality effects: left panel shows the original sharp PNG (close-up of small text and line art, labeled ‘Source PNG — lossless’), right panel shows the same image after aggressive conversion/compression (blurred edges, artifacts, labeled ‘Compressed/optimized PDF — lower quality’). Include callouts for ‘resolution unchanged’ and ‘compression can soften text’.

    That said, some tools optimize or compress files during export, and that can reduce quality if the settings are aggressive or hidden. If your PNG contains small text, interface elements, or line art, even slight compression can make the result look softer. This is especially noticeable when printing. If visual precision matters, check whether the tool allows you to control compression or output quality.

    Resolution is another factor that affects the final result. A low-resolution PNG converted into a PDF does not become sharper just because it is now in document format. The PDF can preserve the image, but it cannot invent detail that was never there. If the source PNG is blurry or pixelated, the PDF will usually reflect that same limitation.

    File size trade-offs

    A PDF is not always smaller than a PNG. In fact, depending on how the conversion is handled, the file can become larger. This surprises users who expect PDF to act like a compression shortcut. In reality, the PDF may wrap the image with additional document data, metadata, or page information, increasing the overall size.

    For business workflows, file size matters when you are emailing attachments, uploading documents to portals, or storing large numbers of files in the cloud. If you are converting multiple high-resolution PNGs into one PDF, the final document can grow quickly. In those cases, use a tool that balances compression with readability rather than simply maximizing quality at all costs.

    The right choice depends on your goal. If you need a polished print-ready document, a larger size may be acceptable. If you only need a file that can be reviewed on screen and sent quickly, a lighter PDF is often better.

    Single image vs. multi-page PDF

    Not every conversion works the same way. A single PNG can become a one-page PDF with minimal effort. A batch of PNGs is more complex because page order, page breaks, orientation, and page sizing all come into play.

    This is where a good converter becomes more than a format changer. It becomes a document assembly tool. If you are combining receipts, portfolio pages, contracts, forms, or screenshots, you want to be able to control sequence and page formatting. A well-structured PDF is much easier to navigate than a folder full of disconnected image files.

    Transparency, margins, and page layout

    PNG files support transparency, which is one of the format’s strengths. But PDF pages need a defined background and page area. Depending on the converter, transparent parts of the PNG may appear white, flattened, or placed against a default background when exported to PDF.

    Margins can also affect presentation. Some tools stretch the image to fit the page. Others center it and leave whitespace around the edges. Neither is inherently wrong, but the result may look very different from what you expected. This matters for scanned documents, digital art, and branding materials, where alignment and spacing contribute to readability and visual polish.

    Security and privacy considerations

    This is one of the most overlooked aspects of online conversion. If you are using a web-based tool to turn PNG files into PDFs, you are uploading your content to a server somewhere. For everyday files, that may be acceptable. For contracts, IDs, invoices, medical records, or client work, it deserves more thought.

    A privacy-conscious workflow means checking whether files are deleted automatically, whether uploads are encrypted, and whether the service has a clear retention policy. For sensitive material, a local desktop or device-based conversion method may be the safer option. Convenience is valuable, but so is control.

    Common methods compared

    Method Best For Pros Trade-Offs
    Online converter Quick one-off tasks Fast, accessible, no installation Privacy concerns, upload limits, variable quality
    Built-in print to PDF Basic local conversion Free, available on many devices, simple Limited control over page layout and batching
    Desktop software Frequent or sensitive conversions Better quality control, offline use, more settings May require installation or payment
    Mobile app On-the-go work Convenient for scans and quick sharing Smaller screen, fewer advanced options

    How to get started converting PNG files into PDFs

    For most people, the best starting point is the simplest one. Use the method already available to you, then move to a more specialized tool only if your workflow demands it. The right approach depends on whether you care most about speed, quality, privacy, or document organization.

    Start with your actual use case

    Before converting anything, ask one simple question: What is this PDF for? That answer shapes almost every decision that follows. If the file is for internal reference, speed may matter most. If it is for a client or official submission, presentation and compatibility become more important. If it contains confidential information, local processing should move higher on your list.

    This small moment of clarity prevents a lot of unnecessary trial and error. People often choose a tool first and only later realize it compresses too much, adds watermarks, limits file count, or handles page formatting poorly. Starting with the use case keeps the process efficient.

    A simple conversion workflow

    If you are new to converting PNG files into PDFs, the workflow is usually straightforward:

    1. Choose your PNG file or files.
    2. Select a trusted conversion method, either online or on your device.
    3. Check page order, orientation, and size if using multiple images.
    4. Export the PDF and review it carefully before sharing or printing.

    Even this basic process benefits from a final review. Open the PDF on a second device if possible. Make sure text is readable, page crops look correct, and image edges are not cut off. A quick check can save an awkward resend later.

    Organizing multiple PNGs into one PDF

    When converting multiple PNG files, the main challenge is not technical. It is organizational. If the images are named inconsistently or uploaded in the wrong order, the PDF can become confusing immediately. Renaming files before conversion is often worth the extra minute.

    For example, if you are combining pages from a scanned contract, names like page-1, page-2, and page-3 will reduce errors. If you are assembling design samples or report images, logical naming helps the converter maintain sequence. It also makes future edits easier if you need to rebuild the PDF later.

    Choosing the right page size and orientation

    This is a detail many users ignore until the final file looks odd. A portrait PNG placed on a landscape PDF page can create too much blank space. A wide screenshot forced into a standard letter-size page may appear too small to read comfortably. The best tools let you match the image dimensions to the page or scale the page to fit the image.

    If the PDF is meant for printing, choose standard paper sizes such as A4 or Letter. If it is only for digital viewing, a tighter image-to-page fit can make the document look cleaner and more modern. The point is not to chase perfection. It is to choose settings that serve the way the file will actually be used.

    Avoiding common problems

    Most conversion issues fall into a few predictable categories. The image looks blurry because the source file was too small or the tool compressed it. The pages are out of order because files were not arranged before export. The PDF is too large because high-resolution images were bundled without optimization. The margins look awkward because the converter applied default page settings that did not match the image shape.

    These are not complex problems, but they are frustrating when you are in a hurry. A little preparation goes a long way. Keep source images organized, know whether the file is for print or screen, and test one sample conversion before processing a larger batch.

    Online tool or local tool?

    For free, easy-to-use workflows, online tools are often the first choice. They work in the browser, require no setup, and handle basic conversions quickly. This is ideal when you are on a shared machine, switching devices, or just trying to finish a small task with minimal effort.

    Local tools make more sense when privacy, repeat usage, or output consistency matters. If you regularly convert invoices, reports, forms, or client assets, a desktop or built-in operating system solution may feel more dependable over time. It removes upload delays, avoids internet dependency, and gives you more control over where your files go.

    The best choice is not universal. It is situational. A productivity-minded user often benefits from having both options available and using each where it fits best.

    Conclusion

    Converting a PNG into a PDF is a simple task on the surface, but the best results come from understanding what the conversion is really doing. You are not improving the original image just by changing formats. You are making that image easier to share, organize, print, archive, and present. Once you see it that way, the right settings and tools become much easier to choose.

    If you need to get started today, begin with a small test file and focus on three things: image clarity, page layout, and file size. If those look right, your process is probably solid. From there, you can build a faster workflow for receipts, forms, screenshots, portfolios, or any other images you need to turn into a polished PDF document.


  • Create a New Manual Post: Fast, Clear, and Controlled

    A new manual post can be surprisingly powerful when speed, clarity, and control matter more than automation. For small business owners, freelancers, developers, and productivity-focused users, the ability to publish something directly, intentionally, and without unnecessary complexity often solves a real problem. You do not always need a sophisticated workflow to get a message live. Sometimes, you simply need a reliable way to create and share content by hand.

    That is where the idea of a manually created post becomes useful. Whether you are publishing an update on a website, adding a listing, posting to a blog, documenting a process, or sharing an announcement in a content system, a manual post gives you direct ownership over what appears, when it appears, and how it reads.

    Used well, it can improve accuracy, reduce friction, and help you stay agile.

    What Is a New Manual Post?

    A manually created post is exactly what it sounds like, a post created directly by a person instead of being generated automatically by software, imported from another source, or triggered by a scheduled workflow. In practical terms, it is the act of opening a platform, entering the content yourself, setting the title, text, images, tags, or metadata, and publishing it on your own terms.

    This matters more than it may seem at first. In many digital tools, automation is treated as the default path to efficiency. That can be useful, especially for repetitive tasks. But manual posting still plays a critical role because not every message fits a template. A product launch, policy change, urgent client note, status update, or custom article often needs context, nuance, and human judgment that automated systems cannot fully provide.

    For productivity-minded users, a manual post is not the opposite of efficiency. It is often the smarter choice when precision matters. If you have ever spent more time fixing a bad automated output than it would have taken to write the post yourself, you already understand the value. Manual creation gives you room to tailor tone, structure, timing, and detail.

    Key Aspects of a New Manual Post

    The first key aspect is control. When you create a post manually, you decide every element that goes live. That includes wording, formatting, links, calls to action, and the overall message. For small businesses, this can be the difference between sounding generic and sounding trustworthy. A manually crafted post tends to reflect the real voice of the brand, which is especially important when customer relationships depend on authenticity.

    Another important aspect is accuracy. Automated publishing systems can save time, but they can also carry over outdated data, formatting issues, duplicated text, or context that no longer applies. A manually created post forces a quick but valuable review process. You see the content as the audience will see it. That simple check often prevents mistakes that damage credibility.

    A manual post also supports timely communication. When something changes quickly, such as availability, pricing, deadlines, service interruptions, or project updates, waiting on an automation workflow can create unnecessary delay. Manual posting allows you to respond in real time. That responsiveness can be a competitive advantage, especially for freelancers and small teams that need to move fast without layers of approval or technical setup.

    There is also a strong case for better content quality. Manual posts usually perform better when the message requires empathy, explanation, or persuasion. Think about a client-facing update, a thought leadership article, or a support announcement. These are not just data entries. They are communication assets. A human-written post can adapt its tone, anticipate reader concerns, and answer questions before they arise.

    Manual vs. Automated Posting

    Both approaches have a place, but they solve different problems. Automation is excellent for scale and repetition. Manual posting is better for nuance and oversight.

    Approach Best For Main Strength Main Risk
    Manual posting Custom updates, announcements, one-off content Full control and accuracy Takes more hands-on time
    Automated posting Recurring content, scheduled updates, data-driven publishing Speed and scalability Errors can repeat at scale
    Hybrid workflow Teams balancing efficiency with quality Flexible and practical Requires process discipline

    For many users, the best solution is not choosing one over the other. It is knowing when to use each. A manually created post is often the right choice when the message is important enough that you want to review every word before publishing.

    Why It Matters for Small Teams and Solo Operators

    If you run a small business or work independently, your publishing process needs to be simple. Complex systems can create more friction than value. A new manual post fits lean operations because it requires very little overhead. You do not need a full automation stack to publish a useful update. You just need clarity about what you want to say and where it should appear.

    That simplicity is powerful. It reduces tool dependency, shortens the path from idea to publication, and makes content management easier to understand. It also lowers the risk of silent failures. With automated systems, a problem may go unnoticed until the wrong content has already been published. With a manual process, visibility is built in because you are present at the moment of creation.

    How to Get Started With a New Manual Post

    Getting started is less about technology and more about process. Most platforms already support manual posting, whether it is a CMS, e-commerce backend, project board, forum, documentation tool, or social publishing interface. The real question is how to make your manual posts consistent, useful, and quick to create.

    Start by defining the purpose of the post. Before writing anything, ask what the reader needs to know and what action, if any, they should take after reading. This keeps the post focused. A common mistake is trying to make one post do too much. A good manual post is usually built around a single clear objective, such as informing, updating, clarifying, or prompting a response.

    Next, think about structure. Even a short post benefits from a logical flow. Lead with the most important information first. Then add the details that support it. If the post includes a date, deadline, link, or instruction, make that easy to find. Readers scan before they read deeply. Clear formatting improves usability immediately.

    A Simple Starting Workflow

    You do not need a complex checklist, but a short routine helps maintain quality. A practical workflow often looks like this:

    1. Define the goal of the post in one sentence.
    2. Write the headline so the purpose is obvious.
    3. Draft the body with the most important information first.
    4. Review for clarity by removing anything vague or repetitive.
    5. Publish and verify that formatting, links, and display look correct.

    This process works because it mirrors how readers consume content. They want relevance first, details second, and confidence that the information is current and trustworthy.

    Writing a Better Manual Post

    A manually written post should feel deliberate, not merely improvised. That does not mean it must be long or polished to perfection. It means every sentence should earn its place. If a paragraph does not inform the reader, answer a likely question, or move the message forward, it probably does not need to be there.

    Use plain language wherever possible. This is especially important for operational updates, service notices, or instructions. Clear writing reduces support requests and avoids confusion. If your audience includes busy clients or team members, they will appreciate content that respects their time.

    It also helps to write with context in mind. A manually created post should match the platform where it appears. A website announcement may need a slightly more formal tone. An internal workspace update can be more direct. A marketplace or listing post may need concise factual details. Good manual posting is not just about entering text. It is about matching message to medium.

    Common Mistakes to Avoid

    One frequent issue is publishing too quickly without reviewing the final version. Because manual posting feels simple, users sometimes skip the last check. That is where broken links, inconsistent formatting, and incomplete sentences often slip through. A thirty-second review can prevent a disproportionate amount of trouble.

    Another mistake is overloading the post with background information. Manual posts are most effective when they are focused. If you need to explain multiple topics, separate them into different posts or use headings to keep the content navigable. Readers should not have to dig for the point.

    A third problem is inconsistency. If every manual post looks different, uses a different tone, or buries key information in a different place, your workflow becomes harder to maintain. Consistency creates trust. It also makes posting faster because you are not reinventing the format every time.

    Practical Use Cases for Manual Posting

    In a business setting, a manually created post is often the best tool for announcements that carry direct consequences. Think of holiday hours, service changes, urgent stock updates, policy clarifications, or project milestones. These are moments when the exact wording matters. A generic auto-generated message may technically communicate the update, but it may not communicate it well.

    Freelancers can use manual posts to publish portfolio updates, client notices, availability changes, and service explanations. Because freelance work often relies on personal credibility, a manually written post can reinforce professionalism. It feels intentional, and that matters when every piece of communication shapes perception.

    Developers and technical users may also prefer manual posts in documentation systems, changelogs, and release notes when a feature needs explanation beyond raw commit data. Automated notes can list what changed. A human-written update can explain why it changed, what users should expect, and what action to take next. That layer of interpretation is where the value lies.

    Making Manual Posting More Efficient

    Efficiency does not require full automation. Often, it comes from reducing avoidable decisions. If you publish manual posts regularly, create a lightweight internal format for yourself. Use a repeatable title style. Decide where dates, links, or action items should appear. Keep a standard tone for customer-facing content. These small choices remove friction.

    You can also improve speed by preparing reusable starting points. This is not the same as relying on generic templates for everything. It is more about having a consistent frame. For example, announcements often benefit from a pattern: what changed, who it affects, when it starts, and what to do next. That structure keeps the post useful without making it robotic.

    The goal is to keep the benefits of manual control while minimizing unnecessary effort. A strong process does exactly that. It helps you publish quickly without sacrificing accuracy or voice.

    Conclusion

    A manually created post remains one of the simplest and most effective ways to communicate online when clarity, timing, and control matter. It gives you direct ownership over the message, reduces the chance of context errors, and works especially well for businesses and individuals who need flexible publishing without heavy systems.

    If you want better results from manual posting, start small and improve the process rather than overcomplicating the tools. Create one clear post with a focused purpose, review it before publishing, and build a repeatable structure from there. That approach is practical, fast, and far more valuable than publishing content that saves time but misses the point.

  • Publish a New Manual Post: A Practical Guide

    Publishing quickly is easy. Publishing well is harder. That is why a new manual post still matters, even in a world filled with automation, templates, schedulers, and AI-assisted workflows.

    For small business owners, freelancers, developers, and productivity-focused users, the manual approach can feel slower at first. But it often produces better control, cleaner messaging, and fewer costly mistakes. When you create a post manually, you are making deliberate choices about timing, tone, format, and audience relevance, instead of handing those choices off to a system that may not understand your priorities.

    A post created by hand is not old-fashioned. In many cases, it is the most practical way to keep communication accurate and human. Whether you are publishing to a blog, a CMS, a forum, a project board, or a social platform, manual posting gives you a chance to review every detail before it goes live. That extra attention can protect your brand, improve clarity, and help your content perform better.

    What Is a New Manual Post?

    A new manual post is content that is created, formatted, reviewed, and published directly by a person rather than being auto-generated, auto-scheduled, or pulled from another system. The phrase can apply in several contexts, including blog publishing, website updates, CMS entries, community posts, marketplace listings, or internal company announcements.

    At its core, a manual post is about intentional publishing. You open the editor, write the content, choose the title, check the links, confirm the formatting, and hit publish yourself. That may sound simple, but it is a meaningful distinction. Automated systems are useful for scale, while manual posting is useful for precision.

    For many teams and solo professionals, a post made manually is the safer option when the information is sensitive, time-specific, or brand-critical. A product update, a pricing clarification, a client announcement, or a policy change often benefits from human review at every step. In those moments, accuracy matters more than speed.

    There is also a quality advantage. Manual posts tend to reflect current context better. They can respond to a live event, a customer question, a trend in your niche, or a specific issue inside your business. That responsiveness makes content feel more relevant, and relevance is what readers notice first.

    Key Aspects of a New Manual Post

    Control Over Message and Tone

    The strongest advantage of a post published manually is editorial control. You decide how direct, formal, helpful, or persuasive the message should be. That matters because tone is not cosmetic. It shapes trust.

    A freelancer writing a client update needs a different voice than a developer posting release notes. A local business announcing new hours needs a different tone than an online store introducing a seasonal offer. Manual posting allows you to match the message to the moment, instead of relying on a generic structure that may sound flat or out of place.

    This is especially important for businesses that depend on relationships. Readers can usually tell when content has been posted with care. Clear phrasing, thoughtful structure, and a natural voice all contribute to credibility.

    Accuracy and Reduced Risk

    Automation saves time, but it can also publish the wrong thing very efficiently. A manual workflow introduces a review step that reduces the chance of outdated details, broken formatting, missing links, or context errors.

    That review step is often where quality is won or lost. A post that looks fine in draft form may contain a typo in the headline, an incorrect price, or a sentence that becomes confusing once published on mobile. Manual posting creates space to catch those issues before readers do.

    For small businesses in particular, this matters more than many people realize. A single inaccurate post can create unnecessary customer support requests, damage confidence, or force a public correction. A few extra minutes spent reviewing a manual post can prevent hours of cleanup later.

    Better Fit for One-Off or Timely Content

    Not every post should be part of an automated content pipeline. Some messages are unique by nature. They depend on timing, nuance, and situational judgment.

    A manual post is ideal when the content is tied to a real-world moment. That might include an event announcement, an urgent service notice, a product availability update, or a personal commentary piece. These posts often need custom wording because they are not just filling a slot in a schedule. They are responding to something specific.

    That flexibility is valuable for productivity-minded users, too. Sometimes the fastest path is not building a system. Sometimes it is opening the editor, writing the message, and publishing it with confidence.

    Human Judgment Still Matters

    The case for manual posting is not really a case against tools. It is a case for using tools wisely. Templates, checklists, grammar assistants, and scheduling platforms can all improve workflow, but human judgment is still what makes a post effective.

    A person understands subtext. A person notices whether a sentence sounds too cold, too vague, or too promotional. A person can ask, “If I were the reader, would this make sense immediately?” That kind of judgment is difficult to automate well, especially when audience expectations change quickly.

    This is why many high-performing teams use a hybrid model. They automate repetitive tasks and keep final publishing decisions manual when quality matters most. That approach combines efficiency with oversight, which is often the smartest balance.

    SEO and Discoverability Considerations

    From an SEO perspective, a manually created post can be stronger because it is usually more focused. You can tailor the title, headings, internal links, and keyword usage to a clear intent rather than relying on a mass-produced format.

    If your goal is to rank for searches related to a new manual post, the wording should feel natural and useful. Search engines increasingly reward content that reads like it was written for people first. That means clarity, relevance, and topical depth all matter more than awkward repetition.

    A good manual post typically has a cleaner structure as well. You can refine headings, tighten the introduction, improve scannability, and remove filler before publishing. Those edits may seem small, but together they improve both user experience and search performance.

    How to Get Started with a New Manual Post

    Start With Purpose, Not Format

    Before writing a post manually, define the goal. Ask what the post needs to accomplish. Is it meant to inform, persuade, update, clarify, or drive action? The answer shapes everything that follows, from headline style to call to action.

    Many weak posts fail because they begin with format instead of purpose. Someone decides to “publish something” without deciding what the reader should understand or do afterward. Manual posting works best when the objective is clear from the beginning.

    Think of the post as a conversation with one specific person. A small business owner might picture a customer who needs reassurance. A freelancer might picture a prospect comparing service providers. A developer might picture a user looking for accurate implementation details. That mental clarity improves writing immediately.

    Build a Simple Manual Workflow

    You do not need a complicated system to publish consistently. You need a repeatable one. A basic workflow helps you move faster without sacrificing quality.

    A practical starting process looks like this:

    1. Define the goal: Decide what the post should achieve.
    2. Draft the message: Write clearly, with the audience in mind.
    3. Review details: Check facts, links, dates, formatting, and tone.
    4. Publish and verify: Confirm the live version looks correct on desktop and mobile.

    This kind of lightweight process is especially useful for solo operators and lean teams. It keeps the work organized without turning publishing into a bureaucratic task.

    Focus on Clarity First

    When creating a post manually, clarity should come before cleverness. Readers rarely reward vague language, overloaded introductions, or headlines that hide the point. They respond to content that tells them quickly why it matters.

    That means using direct wording, short paragraphs, and a logical structure. Put the most important information early. If there is an action the reader should take, state it plainly. If there is a deadline, include it where it cannot be missed.

    This is one reason manual posting remains effective. It encourages active editing. You are more likely to notice cluttered phrasing and remove it when you are handling the content yourself from draft to publication.

    Create a Practical Pre-Publish Check

    A manual process becomes much stronger when it includes a short review habit. Not a complex editorial framework, just a fast final check before publishing.

    Use these essentials:

    • Headline: Is it clear and accurate?
    • Details: Are names, dates, prices, and links correct?
    • Formatting: Does it read cleanly on screen?
    • Action: Is the next step obvious to the reader?

    This simple checkpoint is enough to catch most common publishing errors. Over time, it also trains you to write cleaner first drafts because you start anticipating the review process as you work.

    Know When Manual Is the Best Choice

    Not every piece of content needs to be posted by hand, but some absolutely should be. A useful way to decide is to compare the risk of error with the value of speed.

    Here is a practical comparison:

    Content Type Best Approach Why
    Routine evergreen updates Automated or scheduled Efficient when content changes little
    Product announcements Manual Accuracy and tone matter
    Time-sensitive service alerts Manual Requires context and careful wording
    Bulk promotional campaigns Automated with review Better for scale, but still needs oversight
    Personal brand posts Manual Human voice is a competitive advantage
    Internal knowledge base updates Mixed approach Depends on frequency and importance

    The point is not to choose one method forever. It is to use manual posting where it creates the most value.

    Improve With Each Post

    The real strength of a manual approach is that it teaches you. Every post gives feedback. You start seeing which headlines get attention, which structures keep readers engaged, and which messages create confusion.

    That learning loop is powerful. It turns publishing into a skill rather than a task. Over time, your posts become easier to write because you understand your audience better. You develop instincts for what to say, how much context to include, and where readers are likely to hesitate.

    For freelancers and small business owners, this can become a competitive edge. Better manual posts often lead to better communication overall, including proposals, landing pages, client emails, and product messaging.

    Conclusion

    A new manual post is more than content entered by hand. It is a deliberate publishing choice that prioritizes accuracy, relevance, and human judgment. In the right situations, manual posting leads to stronger messaging, fewer mistakes, and a better experience for the reader.

    If you want to get started, keep the process simple. Define the goal, write clearly, review carefully, and publish with intention. That habit alone can improve the quality of your content and the trust your audience places in it. The next step is straightforward: create your next post manually, pay attention to the results, and refine your workflow from there.

  • How to Create a New Manual Post for Better Data Quality

    Precision is the difference between a system that scales and one that creates hidden friction. When teams talk about efficiency, they often focus on automation first. Yet many workflows still depend on a carefully structured, human-created entry point, and that is where a new manual post becomes relevant.

    A manual post is not simply a piece of content entered by hand. In operational terms, it is a deliberate, user-driven submission that bypasses automation in favor of control, specificity, and contextual accuracy. For developers, operators, and anyone managing structured information, understanding when and how to create a new manual post can improve data quality, reduce propagation errors, and keep workflows aligned with real-world requirements.

    What Is a New Manual Post?

    A new manual post refers to a newly created entry, record, update, or content item that is submitted directly by a user rather than generated by an automated pipeline, import routine, or scheduled system task. The exact implementation depends on the platform. In a CMS, it may be a hand-authored article or page. In an internal tool, it may be a manually logged update, incident note, product listing, or task record.

    The defining characteristic is not the format. It is the method of creation. A manual post exists because a person initiates it, structures it, reviews it, and publishes or saves it intentionally. That distinction matters in environments where automation is powerful but not always context-aware.

    For developers, the concept is especially useful because it sits at the intersection of system design and human input. Automated systems are efficient at repetition, synchronization, and scale. Manual posts are efficient at nuance, exception handling, and judgment. A well-designed platform does not treat those two approaches as competitors, it treats them as complementary layers within the same architecture.

    In practical terms, a new manual post is often used when accuracy matters more than speed, when edge cases are common, or when the source information does not exist in a clean, machine-readable format. This includes publishing urgent updates, documenting one-off changes, entering custom records, or creating content that requires editorial discretion.

    Key Aspects of a New Manual Post

    Manual Control and Input Fidelity

    The primary advantage of a new manual post is control. A user can define the title, body, metadata, categorization, and timing with a level of precision that automated systems may not achieve without extensive configuration. This is important when the content or record is highly specific, sensitive, or context-dependent.

    Input fidelity also improves because the person creating the post can validate meaning as they go. A script can move data from one field to another, but it cannot always detect whether a note is misleading, whether a label is too broad, or whether a timestamp needs qualification. Manual posting supports those judgment calls at the source.

    This becomes even more valuable in operational environments where bad input creates downstream cost. A poorly classified item may break search relevance. An incomplete incident log may impair debugging. An inaccurate product update may lead to support tickets. The manual layer acts as a checkpoint against those failures.

    Context Over Automation

    Automation works best when rules are stable. A new manual post is useful when rules are changing, incomplete, or too complex to model economically. In other words, manual input often handles the exceptions that matter most.

    Consider a system that imports standard updates from a feed. That system may work perfectly for normal cases. But if a critical update needs commentary, clarification, or temporary override logic, a manual post provides the missing layer of context. It lets the operator say not only what changed, but also why it matters.

    This is not an argument against automation. It is an argument for architectural realism. Mature systems acknowledge that not every valuable action should be delegated to a pipeline. Some require human authorship because the risk of oversimplification is too high.

    Structured Flexibility

    A common mistake is to equate manual with unstructured. In a well-designed platform, a new manual post should still follow a schema. It may include required fields, validation constraints, controlled vocabularies, tagging logic, and permission rules. The input is manual, but the framework is disciplined.

    That balance is important for efficiency seekers. If manual posting is too loose, it creates chaos. If it is too rigid, users work around it. The ideal implementation gives users enough flexibility to express nuance while preserving the consistency needed for indexing, reporting, collaboration, and retrieval.

    This is one area where platforms such as Home can be valuable. When a workspace supports structured manual entry with clean interfaces, reusable templates, and clear permissions, teams get the benefits of human input without the usual overhead. The result is not just better posting. It is better operational hygiene.

    Auditability and Accountability

    Another key aspect of a new manual post is traceability. Because the action is user initiated, it can be tied to an author, timestamp, revision path, and approval state. That makes manual posting especially relevant in environments where change history matters.

    For developers and technical teams, auditability is often more than a compliance feature. It is a debugging tool. If a configuration note, status update, or procedural record was created manually, the system should preserve who entered it, what changed later, and which version was considered authoritative at any given time.

    This history reduces ambiguity. It also improves trust. Teams are more likely to rely on manually created records when the platform supports transparent revision tracking and clear ownership.

    Performance Trade-Offs

    A new manual post provides quality and control, but it does introduce trade-offs. Manual workflows are inherently slower than automated ones. They require attention, editorial discipline, and interface clarity. If the process is poorly designed, users may submit incomplete posts, duplicate records, or inconsistent metadata.

    That does not mean the model is inefficient. It means the efficiency comes from reducing costly mistakes, not from maximizing throughput alone. In many systems, a carefully entered manual post prevents hours of downstream cleanup.

    The correct question is not whether manual posting is fast. It is whether it is the right mechanism for the information being handled. In many high-value scenarios, the answer is yes.

    How to Get Started With a New Manual Post

    Define the Purpose First

    Before creating a new manual post, the first task is to define its role in the broader workflow. Is it a content item, a status record, a support note, a changelog entry, or a custom announcement? That purpose determines the structure, visibility, approval path, and retention requirements.

    Without that clarity, teams often create manual posts that are difficult to classify later. The content may be technically present but operationally useless because nobody knows how it should be searched, interpreted, or maintained. Starting with purpose prevents that drift.

    A useful framing model is simple: identify the audience, the outcome, and the lifecycle. Who needs the post, what action should it support, and how long will it remain relevant? Those three variables usually reveal the correct format quickly.

    Build a Minimal but Strict Template

    Getting started does not require a complex system. It does require consistency. A template gives users a stable pattern for creating each new manual post and reduces ambiguity at the point of entry.

    A practical template usually includes the following elements:

    1. Title: A specific, searchable summary of the post.
    2. Body: The core information, written with enough context to stand alone.
    3. Tags or category: Classification for filtering and retrieval.
    4. Owner or author: Clear accountability for the information.
    5. Status or date: Temporal context for interpretation.

    This structure should remain lightweight. If the template becomes overloaded with optional fields and edge-case requirements, users will resist it or fill it carelessly. The goal is to support quality, not bureaucracy.

    Prioritize Validation at the Point of Entry

    A new manual post should be easy to create, but not easy to create incorrectly. Validation matters because bad manual data is often more dangerous than missing data. It looks trustworthy while quietly introducing errors into the system.

    Good validation can be simple. Required fields prevent incomplete submissions. Character limits keep titles readable. Controlled categories reduce taxonomy drift. Date formatting rules avoid ambiguity. Permission checks ensure that only the right users can publish sensitive entries.

    For developer-facing tools, validation should also respect workflow reality. If a user is entering a manual record under time pressure, the interface should guide rather than obstruct. Strong defaults, inline hints, and draft-saving behavior all improve reliability without slowing the operator unnecessarily.

    Distinguish Manual Posts From Automated Entries

    One of the most important implementation details is separation. A new manual post should be clearly distinguishable from imported or generated records. This distinction is useful for analytics, moderation, debugging, and trust evaluation.

    If both types of records are mixed without labeling, users can misread system-generated summaries as reviewed human statements, or treat ad hoc manual notes as canonical structured data. That confusion creates operational risk.

    A simple comparison illustrates the difference:

    Aspect Manual Post Automated Post
    Creation method User initiated System generated
    Strength Context and judgment Speed and scale
    Best use case Exceptions, nuanced updates, custom entries Repetitive, rule-based publishing
    Risk profile Human inconsistency Context loss or logic errors
    Governance need Templates and review Monitoring and rule validation

    This separation also supports reporting. Teams can identify how much content or record volume depends on manual intervention, then improve either the interface or the automation layer based on actual usage patterns.

    Establish Review and Ownership

    A manual process without ownership decays quickly. Each new manual post should have a clear author and, where necessary, a reviewer. This is particularly important when the post affects customers, production environments, shared documentation, or long-lived operational records.

    Review does not need to be heavy. In some contexts, lightweight peer validation is enough. In others, especially regulated or customer-facing environments, formal approval may be required. The appropriate model depends on impact, not on ideology.

    Ownership also extends beyond publication. If a manual post can become stale, someone should be responsible for revisiting it. This keeps the system from accumulating outdated entries that still appear authoritative.

    Start Small, Then Optimize

    The fastest way to fail with manual posting is to overengineer it at launch. Teams often try to anticipate every use case, then build forms and workflows that are too complicated for everyday use. The better approach is to start with a narrow template, observe usage patterns, and refine based on actual friction.

    That iterative model is familiar to developers because it mirrors product design. Measure where users hesitate. Track incomplete submissions. Identify fields that are ignored or misunderstood. Then improve the form, taxonomy, or review path accordingly.

    If the process begins to scale across teams, a centralized environment such as Home can help consolidate templates, permissions, and visibility. That reduces fragmentation and gives manual posting a stable operational foundation rather than leaving it scattered across ad hoc tools.

    Conclusion

    A new manual post is not a fallback for systems that lack automation. It is a deliberate mechanism for introducing human judgment, contextual accuracy, and accountable input into workflows that cannot rely on rules alone. Used correctly, it improves data quality, preserves nuance, and reduces the cost of downstream correction.

    The next step is straightforward. Audit one workflow in which automated entries are currently mixed with unstructured human updates. Define the role of the manual post, introduce a minimal template, and make ownership explicit. That single improvement often reveals a larger truth: efficiency is not just about doing things faster. It is about doing the right things with enough structure to trust the result.

  • How to Create a New Manual Post

    How to Create a New Manual Post

    Manual posting sounds simple until it becomes the bottleneck. What begins as a straightforward way to publish content, log data, update systems, or push records into a workflow often turns into a repetitive, error-prone task that consumes attention better spent elsewhere.

    That is why a clear understanding of a process for creating a new manual post matters. For developers and efficiency-focused users, the goal is not merely to post something by hand. The goal is to make manual posting structured, repeatable, auditable, and as frictionless as possible. When handled correctly, a manual post remains flexible without becoming chaotic.

    A well-designed manual posting workflow can serve as a bridge between automation gaps, approval-heavy operations, and one-off exceptions. It gives teams control where full automation is either unnecessary, too expensive, or operationally risky. The difference between a useful manual post and a messy one usually comes down to process design, validation, and consistency.

    What Is a New Manual Post?

    A manual post created directly by a user generally refers to a posting action initiated by a person, rather than generated automatically by a script, API integration, scheduler, or background process.

    In a CMS, it may be a hand-created content entry. In an internal tool, it may be a manually submitted record. In operations software, it may represent a user-triggered status update, transaction, or job dispatch.

    The defining characteristic is the same across environments: a person initiates and controls the submission. That matters because human input introduces flexibility and judgment, but it also introduces variability. A manual post can handle edge cases that automation often struggles with, such as unusual formatting, conditional approvals, exception routing, or context-sensitive messaging.

    For developers, a manual post should not be viewed as the opposite of a mature system. In many cases, it is an intentional component of one. Systems that support both automated and manual submission paths tend to be more resilient because they can absorb failures, test new workflows, and handle cases that have not yet been codified into software logic.

    For efficiency-minded individuals, the concept is equally practical. A manual post is often the fallback mechanism that keeps work moving when integration is unavailable, delayed, or overengineered. Instead of waiting for the perfect toolchain, teams can maintain throughput with a reliable manual process that still preserves structure and traceability.

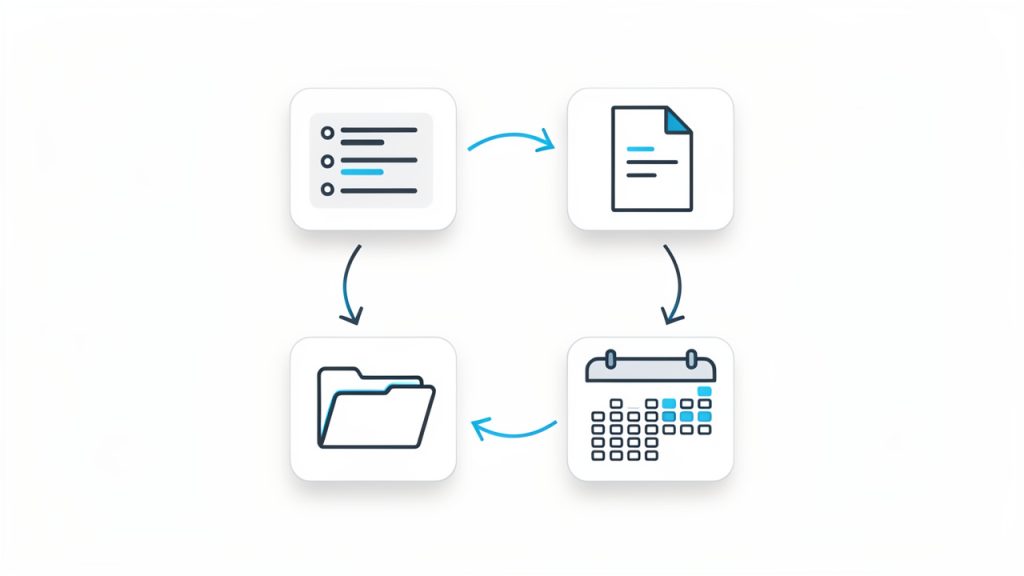
    Side-by-side diagram comparing automated vs manual posting paths: left column shows an automated pipeline (trigger → script/API → background process → published) with green arrows and minimal human touch; right column shows the manual post path (user → guided form → validation/review → submit → published) with highlights for human decision points.

    Key aspects of creating a new manual post

    Control and precision

    The strongest advantage of a manual post is direct control. A user can inspect the content, verify fields, adjust timing, and apply context before submission. This is especially useful when the posted data needs interpretation rather than mechanical transformation.

    Precision matters in environments where a small mistake can ripple through downstream systems. A manually created post allows the operator to pause, validate assumptions, and confirm intent. In content operations, that might mean checking metadata and formatting. In business systems, it might mean verifying identifiers, amounts, destinations, or approval status.

    This level of control is why many organizations keep manual posting capabilities even after introducing automation. It acts as a safeguard and an exception handler. Automation can process the predictable majority, while manual posts cover the nuanced minority.

    Flexibility in edge cases

    Most real workflows contain exceptions. The challenge is that exceptions rarely justify a full engineering sprint, yet they still need to be handled correctly. A manual post workflow excels here because it can accommodate variation without requiring immediate schema redesign or integration work.

    That flexibility is valuable, but it should not be confused with informality. The best manual posting systems define required fields, acceptable formats, validation rules, and review checkpoints. In other words, flexibility should exist within constraints, not instead of them.

    A useful way to think about this is to compare a manual post to a command-line utility with optional flags. The operator has room to adapt behavior, but the system still expects valid input. Good manual workflows operate the same way.

    Traceability and accountability

    A manual post should always leave an audit trail. When a person creates a record by hand, the system needs to capture who submitted it, when it was submitted, what values were entered, and whether later edits occurred. Without that metadata, manual actions become difficult to verify and even harder to troubleshoot.

    This is where many weak workflows break down. Teams often allow manual posts because they are convenient, but fail to make them observable. The result is a process that works until something goes wrong. Then nobody can tell whether the issue came from the source data, the operator, the timing, or a downstream system.

    For developers, auditability is not an optional enhancement. It is part of the design. Even a lightweight interface for creating a new manual post should log state transitions and preserve submission history. That approach reduces operational ambiguity and improves incident response.

    Speed versus standardization

    A manual post can be fast in the short term, and expensive in the long term if it lacks standardization. Users often optimize for immediate completion, especially under deadline pressure. They skip naming conventions, use inconsistent labels, or enter free-form data where structured fields would be more reliable.

    The solution is not to eliminate manual work entirely. The solution is to define a posting model that preserves speed while enforcing consistency. Templates, defaults, dropdowns, validation hints, and pre-filled fields can dramatically reduce input friction without sacrificing data quality.

    The trade-off can be summarized clearly:

    Aspect Manual Post Strength Manual Post Risk Recommended Mitigation
    Control High operator oversight Human inconsistency Required fields and validation
    Flexibility Handles exceptions well Process drift Standard templates
    Speed Fast for one-off actions Scales poorly when repeated Convert repeat tasks into automation
    Accuracy Can be highly precise with review Typing and formatting errors Input constraints and confirmation steps
    Auditability Strong if logged properly Weak if unmanaged User, timestamp, and revision logging

    The role of user experience

    A poor interface makes every manual post slower and less reliable. Even technically strong systems fail if the person entering the data has to interpret unclear field labels, navigate too many steps, or remember hidden business rules.

    The ideal manual posting interface behaves like a guided transaction. It should tell the user what belongs in each field, surface dependencies early, and flag invalid combinations before submission. This reduces cognitive load and increases throughput without requiring full automation.

    This is also where a platform such as Home can fit naturally. If the objective is to reduce operational drag while keeping human control, a centralized workspace can simplify how users create, review, and manage manual posts. Instead of scattering these actions across disconnected tools, teams benefit from a single environment that supports consistency and visibility.

    How to get started with creating a new manual post

    Define the exact purpose

    Before creating any workflow, it is necessary to define what the manual post is supposed to do. That sounds obvious, but many teams begin with the interface rather than the outcome. They create a form first and only later discover that users disagree on what the post represents.

    A good starting point is to identify the business event behind the action. Is the manual post publishing content, creating an internal record, triggering a task, updating status, or correcting a failed automated submission? The answer determines the required fields, validation logic, approval model, and retention policy.

    Without this clarity, the process becomes too generic. Generic workflows invite interpretation, and interpretation produces inconsistency. A focused definition creates operational stability.

    Establish required inputs

    Every manual post should have a minimum viable schema. Even if the process is lightweight, there must be a set of non-negotiable inputs that make the post usable after submission. These usually include identifiers, ownership details, timestamps, category labels, and the actual payload or message body.

    The structure should be strict enough to ensure quality and loose enough to support real work. If the form requires too many fields, users will resist it or enter placeholder values. If it requires too few, the output becomes unreliable. The design target is essential completeness, not maximal data capture.

    A practical way to begin is with a short requirements set:

    • Purpose field: What the post is intended to do.
    • Owner or submitter identity: Who is responsible for the post.
    • Timestamp or effective date: When the action takes effect.
    • Core payload or content body: The substantive data being posted.
    • Status or routing designation: Where the post belongs in the workflow.

    That baseline is often enough to support useful posting while preserving traceability.

    Build a repeatable workflow

    A process for creating a new manual post should not depend on tribal knowledge. If only experienced users know the correct sequence, the workflow is fragile by definition. Repeatability comes from documentation, interface design, and validation logic working together.

    This workflow should specify where the post is created, who is allowed to create it, what checks happen before submission, and what occurs afterward. Post-submission behavior matters as much as the creation step. A post may need review, publication, synchronization, or archival. If these downstream states are undefined, the process remains incomplete.

    For developers, this is a useful place to think in terms of state transitions. Even without coding the entire path, the workflow should define statuses such as draft, submitted, approved, published, failed, or archived. That model makes the manual process easier to monitor and improve later.

    State-transition diagram of a manual post lifecycle showing nodes: Draft → Submitted → (Review →) Approved → Published; alternate paths to Failed or Archived; include transitions for Edits and Revisions with timestamps and responsible users alongside the arrows.

    Start small, then instrument

    The most effective way to launch a manual post workflow is to keep the first version narrow. Support one use case well, observe where users hesitate, and refine the process based on actual friction. Trying to anticipate every future scenario usually leads to bloated forms and overcomplicated review logic.

    Instrumentation is what transforms manual work into an improvable system. Track submission time, completion rate, validation failures, edits after submission, and downstream error frequency. These signals reveal whether the process is efficient or merely tolerated.

    Once metrics exist, a team can make an informed decision about what to automate next. That is the ideal path. A manual post should become either a stable long-term exception path or a prototype for future automation, not a permanent workaround left unexamined.

    Know when manual should stay manual

    Not every manual post needs to be automated. Some actions are too infrequent, too sensitive, or too context-dependent to justify engineering effort. In those cases, optimization should focus on usability, reviewability, and risk reduction rather than replacement.

    The right question is not, “Can this be automated?” but, “Should this be automated given volume, cost, error rate, and business importance?” A manual post that occurs twice a month with high contextual nuance may be perfectly rational. A manual post repeated 500 times a week is usually a signal that the workflow is overdue for redesign.

    The distinction is important because efficiency is not about removing humans from every path. It is about assigning human attention where it creates the most value.

    Conclusion

    A well-designed workflow for creating a new manual post provides something that many systems still need: controlled flexibility. It allows users to act directly, handle exceptions, and maintain progress when automation is unavailable or inappropriate. At the same time, it must be structured enough to support auditability, consistency, and future optimization.

    The next step is straightforward. Define the purpose of the post, establish the minimum required inputs, and document the submission path clearly. Then measure how it performs in practice. If the process lives inside a unified environment such as Home, that effort becomes easier to standardize and manage. The result is not just a manual task done better, but a workflow that respects both operational reality and long-term efficiency.

  • MP3 to WAV: When to Convert and How It Affects Quality

    MP3 to WAV: When to Convert and How It Affects Quality

    Converting MP3 to WAV sounds simple, but it often becomes confusing the moment audio quality, file size, compatibility, and editing needs enter the picture. Many people assume one format is just as good as the other, or that conversion somehow “restores” lost sound data. It does not. A little clarity saves time, storage, and frustration.

    If you are a small business owner preparing podcast clips, a freelancer editing voice recordings, a developer handling media assets, or someone trying to make an audio file work in the right app, understanding MP3 to WAV conversion matters. The right choice depends on what you need the file to do next, not just on what sounds familiar.

    What is MP3 to WAV?

    At its core, MP3 to WAV means converting an audio file from the MP3 format into the WAV format. MP3 is a compressed audio format designed to reduce file size. WAV is typically an uncompressed audio format that preserves more raw audio data and is widely used in editing, production, and professional workflows.

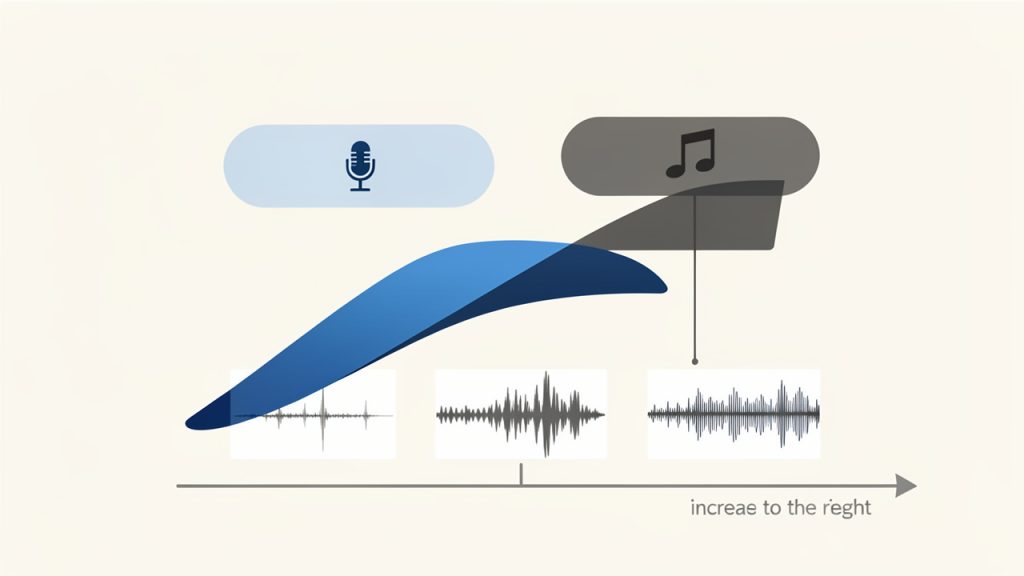
    Side-by-side visual comparing MP3 vs WAV: left panel shows a simplified, 'thinner' waveform with parts faded or missing and a small file-size icon labeled MP3 (lossy/compressed); right panel shows a fuller, detailed waveform and a large file-size icon labeled WAV (uncompressed).

    The key difference is not just the file extension, it is how the audio is stored. An MP3 removes parts of the sound data to make the file much smaller. This is called lossy compression. A WAV file, by contrast, usually stores audio in a much less compressed or uncompressed form, which makes it larger and easier for editing software, recording systems, and some hardware devices to process accurately.

    This leads to an important point that many users miss. Converting an MP3 into WAV does not improve the original audio quality. If the MP3 already lost data during compression, that missing information does not magically come back when you save it as WAV. What conversion does do is make the file more suitable for certain tasks, especially where compatibility and editing stability matter.

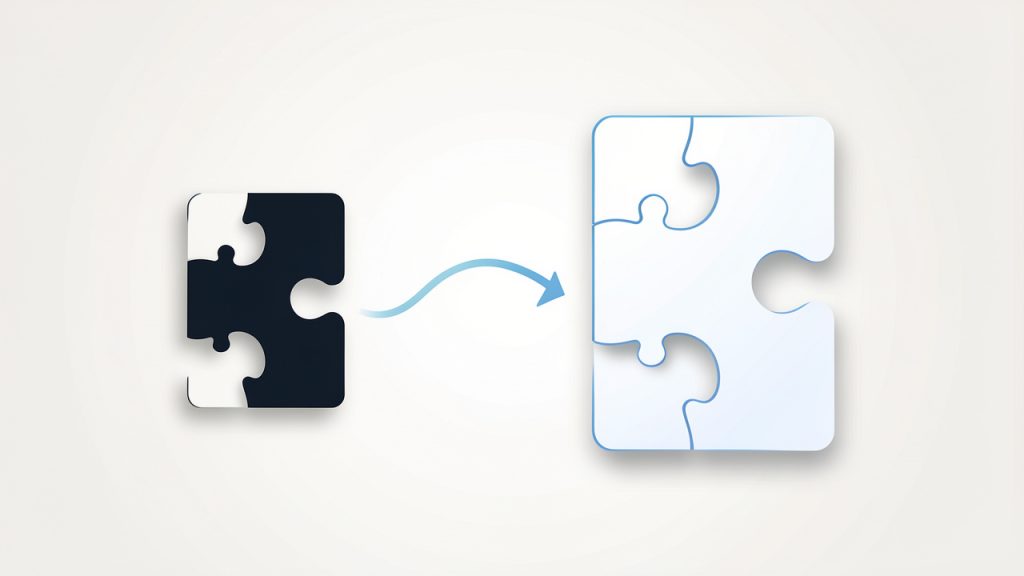
    A metaphorical illustration showing an MP3 file with pieces removed (like missing puzzle pieces) being converted into a larger WAV file where the missing pieces remain absent — emphasizing that conversion does not restore lost audio data.

    A simple way to think about it is this. MP3 is like a highly compressed image sent over messaging apps to save space, WAV is more like the original working file used in design software. Turning the compressed image back into a larger file does not recreate the missing detail, but it may make it easier to use in a professional workflow.

    Key Aspects of MP3 to WAV

    Why people convert MP3 to WAV

    The most common reason for converting MP3 to WAV is workflow compatibility. Audio editors, video production tools, DAWs, transcription systems, and some broadcasting platforms often handle WAV files more predictably than MP3s. WAV files are simpler for software to decode because they usually do not rely on the same compression logic as MP3.

    Another major reason is editing performance. When you edit audio repeatedly, cut sections, apply effects, normalize volume, or mix tracks, working with WAV can reduce the chance of introducing additional compression artifacts. Editors often prefer WAV because it gives them a more stable source format, even if the original audio began as MP3.

    There is also the issue of device and platform requirements. Some systems, including legacy hardware, professional recording devices, call systems, and speech processing tools, specifically request WAV uploads. In those cases, the conversion is not about quality improvement, it is about meeting a technical requirement.

    MP3 vs WAV at a glance

    Feature MP3 WAV
    Compression type Lossy Usually uncompressed
    File size Small Large
    Audio quality Reduced to save space Higher retention of source audio
    Best use case Streaming, sharing, storage Editing, production, archiving workflows
    Compatibility in editors Good, but sometimes less ideal Excellent
    Can conversion restore lost quality? No No

    This comparison highlights the practical trade-off. MP3 is efficient, WAV is flexible. One is built for convenience, the other for production.

    Audio quality misconceptions

    One of the biggest misconceptions around MP3 to WAV is the belief that WAV automatically means “better sound.” That is only true if the source audio was already high quality. If your original file is a 128 kbps MP3, converting it to WAV simply creates a much larger file that contains the same compressed audio quality.

    That does not mean the conversion is pointless, it means the benefit is functional, not magical. For example, if you need to import voice audio into editing software, sync it with video, or deliver it to a platform that rejects MP3 uploads, WAV becomes useful even though it does not improve the sound itself.

    A second misconception is that all WAV files are identical. In reality, WAV files can vary by sample rate, bit depth, and encoding settings. A 44.1 kHz, 16-bit WAV may be perfectly fine for music delivery, while 48 kHz, 24-bit is more common in video and production environments. Understanding those settings matters when precision is important.

    File size and storage implications

    Storage is where the difference becomes obvious fast. An MP3 might be only a few megabytes, while the same audio as WAV can be ten times larger or more. For a solo creator working on a few clips, that may not matter. For a business processing hundreds of recordings, it matters a lot.

    Larger files take longer to upload, download, sync, and archive. If you convert everything by default without a reason, your storage bill and project clutter can grow unnecessarily. That is why MP3 to WAV should be intentional. Use WAV where editing, system compatibility, or delivery standards require it. Keep MP3 where portability and smaller files are the priority.

    For teams and freelancers, this decision affects project management too. WAV files are better as working files, MP3 files are often better as sharing files. Knowing when to use each can keep both quality expectations and storage demands under control.

    How to Get Started with MP3 to WAV

    Start with your actual goal

    Before converting any file, ask a practical question: Why do I need WAV? If the answer is “to improve quality,” you may not get the result you expect. If the answer is “my editor, client, software tool, or system requires WAV,” then the conversion makes sense.

    This small mindset shift prevents wasted time. A lot of users convert files simply because WAV sounds more professional. Sometimes it is the right move. Sometimes it just creates larger files with no real benefit. The best workflow starts with the next step in your process, not the format name alone.

    For example, if you are sending a podcast episode draft to a client for approval, MP3 is often enough. If you are importing spoken word tracks into audio editing software for cleanup and mastering, WAV is usually the better choice.

    Choose the right conversion settings

    When converting MP3 to WAV, pay attention to the export settings if the tool allows it. The most common options include sample rate and bit depth. These settings do not restore lost quality from the MP3, but they can affect compatibility with downstream tools.

    For general use, 44.1 kHz, 16-bit WAV is a safe standard. For video production or professional post-production, 48 kHz is often preferred. If you are delivering files to a client or platform, use their required settings rather than guessing.

    If your conversion tool offers “high quality” presets, be careful not to confuse that label with source recovery. A high-quality WAV export from a low-bitrate MP3 is still limited by the original MP3. The conversion can preserve what remains, but it cannot recreate what was removed during compression.

    Use an online tool carefully

    Online converters are popular because they are fast and convenient. For many users, especially those handling a few files at a time, an online MP3 to WAV tool is the easiest option. You upload the MP3, choose WAV, convert, and download.

    That convenience comes with considerations. If your audio contains private interviews, client calls, unreleased media, legal recordings, or sensitive business material, be cautious. Not every free tool clearly explains how long files are stored or whether uploads are deleted after processing. For public or low-risk files, online conversion is usually fine. For confidential work, a trusted desktop app may be the safer route.

    If you do use a browser-based tool, look for clear file limits, transparent privacy policies, and support for the output settings you need. Ease of use matters, but so does control.

    A simple conversion workflow

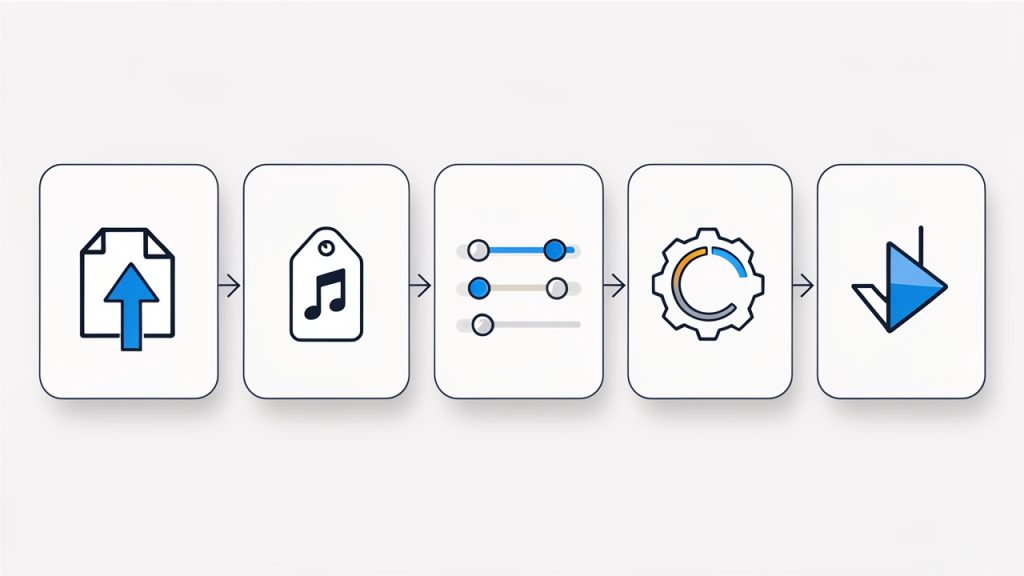
    1. Upload your MP3 file to a trusted converter or open it in a desktop audio tool.
    2. Select WAV as the output format and review any settings like sample rate or bit depth.
    3. Convert and download the file, then test it in the app, editor, or system where you plan to use it.

    That is enough for basic needs. What matters more is checking the output file in the real destination environment. A conversion is only successful if the new WAV file works where you need it.

    Check the result before moving on

    After converting, play the WAV file and verify a few basics. Make sure the audio starts and ends correctly, volume levels are consistent, and the file opens in your target software. If the file is for client work or production, confirm that the sample rate matches project requirements.

    This verification step is often skipped, especially when converting in bulk. That can create avoidable problems later, such as sync issues in video timelines or rejected uploads on third-party systems. A quick check now can save a rework cycle later.

    If you handle audio regularly, it is smart to create a repeatable mini-workflow. Use the same settings, naming conventions, and storage folders each time. That level of consistency helps freelancers, teams, and small businesses stay organized as media files pile up.

    Conclusion

    MP3 to WAV conversion is less about making audio sound better and more about making it usable in the right context. MP3 is great for compact storage and easy sharing, WAV is better for editing, production, and systems that require a less compressed format. The conversion has value, but only when it supports your actual workflow.

    The next step is simple. Look at how you plan to use the file after conversion. If you need cleaner compatibility, easier editing, or a format accepted by professional tools, convert your MP3 to WAV with the right settings and verify the output. If not, keeping the file as MP3 may be the smarter and more efficient choice.

  • Free Productivity Tools That Actually Save Time

    Free Productivity Tools That Actually Save Time

    Time is expensive, but most people do not lose it in dramatic ways. They lose it in tiny fragments, a few minutes spent searching for a file, another ten switching between tabs, another half hour trying to remember what should happen next. That is why free productivity tools matter. The right ones do not just save money, they reduce friction, protect focus, and make work feel lighter.

    A visual metaphor for fragmented time: a clock face broken into many small pieces or lots of tiny clock icons scattered, each labeled with brief distractions (e.g., 'searching for a file', 'tab switching', 'remembering next step'), conveying how minutes add up into lost time.

    For small business owners, freelancers, developers, and anyone trying to do more with limited resources, the appeal is obvious. You want software that is easy to adopt, flexible enough to support real work, and free enough to test without a procurement process or a long commitment. The challenge is not finding tools. It is finding the right tools, using them well, and avoiding a stack so cluttered that your productivity system becomes another source of stress.

    What are free productivity tools?

    Free productivity tools are apps, platforms, and online services designed to help individuals or teams organize work, manage time, communicate, automate routine tasks, and store information, all without an upfront cost. In practical terms, these tools cover everything from task managers and calendar apps to note-taking systems, cloud storage, writing assistants, collaboration platforms, and automation utilities.

    The word free deserves a closer look. Some tools are truly free with generous features for personal use or small teams. Others operate on a freemium model, which means the core product is available at no cost, while advanced features sit behind a paid plan. That distinction matters because a tool that feels perfect today can become restrictive once your client load grows or your business starts collaborating across a larger team.

    Productivity itself is often misunderstood. It is not about cramming more tasks into the day. It is about using your time, attention, and energy with greater intention. A good free productivity tool supports that goal by making priorities visible, reducing repetitive work, and helping you move from idea to execution with less effort.

    For a freelancer, that might mean a simple project board that keeps client work from slipping through the cracks. For a small business owner, it could be a shared document system that prevents version confusion. For a developer, it may be a lightweight automation or note system that keeps context organized across projects. The category is broad, but the purpose is consistent, better output with less wasted motion.

    Key aspects of free productivity tools

    Usability matters more than feature count

    One of the biggest mistakes people make is choosing tools based on long feature lists rather than real-world usability. A productivity app can be powerful on paper and still fail in daily use if it is cluttered, slow, or hard to understand. In most cases, the best free productivity tools are the ones you can start using in minutes, not the ones that require hours of setup before they become useful.

    That is especially true for solo users and small teams. When you are already managing clients, deadlines, or product work, you do not need another system that demands constant administration. A clean interface, fast search, and sensible defaults often create more value than dozens of advanced options you may never touch.

    Free does not always mean fully free

    There is a practical trade-off behind most free plans. Some tools limit storage. Others cap integrations, user seats, project boards, automation runs, or history length. These limits are not necessarily a problem, but they should be understood early. A tool can still be an excellent choice if its free tier aligns with your actual workflow.

    The smartest approach is to evaluate free tools not by what they hide, but by what they genuinely enable. If a task manager gives you enough projects, reminders, and views to run your week smoothly, then it is doing its job. If a note app lets you capture and retrieve information quickly, that may be all you need. The goal is not to get enterprise software for free. The goal is to get meaningful utility without paying before you are ready.

    Integration can make or break your workflow

    A productivity tool rarely works in isolation. Your calendar connects to meetings, your notes connect to tasks, your files connect to client work, and your communication tools connect to everything. That is why integration is one of the most overlooked aspects of choosing free productivity tools.

    When tools work well together, they reduce duplication. You stop copying deadlines from one place to another. You stop hunting for attachments across email, chat, and cloud folders. Even a basic level of integration can save significant time over a month.

    For developers and technical users, this can extend into APIs, webhooks, and lightweight automations. For non-technical users, it might simply mean choosing tools that offer calendar syncing, browser extensions, or cloud file support. Either way, the underlying principle is the same, less manual transfer means fewer mistakes and more focus.

    Collaboration features are increasingly essential

    Even solo professionals collaborate constantly. You may share drafts with clients, exchange feedback with contractors, or coordinate timelines with partners. That is why many of the best free productivity tools now include commenting, shared workspaces, permission controls, and live editing.

    This shift is important because productivity is no longer just personal. It is operational. A tool that works only for you but creates confusion for everyone around you can become a bottleneck. A free plan that supports lightweight collaboration often delivers more value than a more advanced app designed purely for individual use.

    Security and reliability should not be ignored

    When software is free, people sometimes assume the stakes are lower. In reality, if a tool stores client notes, financial drafts, passwords, project plans, or business files, reliability matters a great deal. Look for tools with strong reputations, regular updates, transparent privacy policies, and export options.

    The ability to export your data is especially important. Free tools are useful, but lock-in is not. If your needs change, you should be able to move your notes, tasks, or files without rebuilding everything from scratch. Portability is a quiet feature, but it becomes critical the moment a free plan no longer fits.

    Different categories solve different bottlenecks

    It helps to think of free productivity tools by the problem they solve, not just by their app category. Some reduce cognitive load by giving you a trusted place to capture tasks and ideas. Others reduce administrative work through scheduling, templates, and automation. Some improve execution by keeping projects visible. Others improve communication by centralizing conversations and documents.

    A simple comparison makes this easier to evaluate:

    Category What It Helps With Best For Common Free Plan Limits
    Task Management Tracking to-dos, deadlines, priorities Freelancers, small teams, personal planning Limited projects, automations, or team seats
    Note-Taking Capturing ideas, meeting notes, documentation Writers, developers, consultants Storage caps, restricted collaboration
    Calendar and Scheduling Time blocking, appointments, meeting coordination Service businesses, consultants, remote workers Booking limits, branding, fewer integrations
    Cloud Storage File access, sharing, backup Small businesses, distributed teams Limited storage space
    Communication Tools Messaging, quick coordination, updates Remote teams, client-facing businesses Message history limits, user caps
    Automation Tools Repetitive task reduction, workflow triggers Power users, developers, operations-focused teams Limited runs, fewer app connections

    This is why no single tool can solve productivity by itself. If your bottleneck is poor planning, a note-taking app will not fix it. If your bottleneck is repetitive admin, a calendar app alone will not help much. Good tool selection starts with honest diagnosis.

    How to get started with free productivity tools

    Start with your biggest source of friction

    The best way to adopt free productivity tools is to avoid building a full system all at once. Instead, begin with the part of your work that feels most consistently frustrating. That might be missed deadlines, scattered notes, scheduling chaos, or the feeling that important tasks are living in five different places.

    When you identify that friction clearly, tool selection becomes simpler. You are no longer asking, “What is the best productivity app?” You are asking, “What tool can reduce this specific problem?” That question produces better decisions and faster results.

    For example, if you repeatedly forget follow-ups, choose a task manager with reminders before adding anything else. If meetings consume too much time, adopt a free scheduling tool. If project materials are scattered, implement a shared cloud folder and a simple naming convention. Productivity improves fastest when the solution matches the constraint.

    Keep your first setup intentionally small

    Many people sabotage tool adoption by overbuilding from day one. They create elaborate workspaces, too many tags, deeply nested folders, and complicated rules they cannot maintain. A better approach is to create a minimal structure that supports immediate use.

    A practical starter setup usually includes just a few essentials:

    1. One task hub for what needs to happen next.
    2. One note space for ideas, reference material, and meeting notes.
    3. One calendar for deadlines, appointments, and focused work blocks.
    4. One file location for documents you need to find quickly.

    This is enough to create order without adding complexity. Once the system proves useful, you can refine it gradually. That sequence matters. Stable habits should come before advanced customization.

    Evaluate tools by behavior, not branding

    A tool may be popular and still be wrong for your work style. Some people think visually and prefer boards. Others want simple lists. Some need collaborative editing. Others need offline access and strong search. The only way to judge a tool properly is to use it for actual work over several days.

    Pay attention to your own behavior. Are you returning to the tool naturally, or avoiding it? Does it reduce mental clutter, or add another layer of maintenance? Can you find what you saved last week? Do you trust it enough to stop keeping backup notes in three other places? These questions reveal more than product marketing ever will.

    A short evaluation framework can help:

    Evaluation Factor What to Ask
    Ease of Use Can I understand the interface without training?
    Daily Fit Does this match how I naturally plan and work?
    Scalability Will the free version still work a month from now?
    Collaboration Can clients, teammates, or partners use it easily?
    Portability Can I export data if I need to switch later?

    This kind of review keeps you grounded. It shifts the decision from novelty to usefulness.

    Build habits around the tool, not dependence on it

    A tool helps only when it supports a repeatable habit. A task manager, for instance, becomes valuable when you check it at a consistent time, capture tasks immediately, and review priorities before work starts. Without those behaviors, even excellent software produces weak outcomes.

    That is why getting started with free productivity tools should include a routine. Spend a few minutes each morning reviewing priorities. End the day by clearing inboxes, updating task status, and scheduling the next important action. Keep it short and sustainable. Consistency beats sophistication.

    The most productive users often have surprisingly simple systems. Their edge comes from trust. They know where tasks go. They know where notes live. They know how to recover context quickly. Free tools can absolutely support this level of clarity, as long as the workflow remains disciplined.

    Avoid the trap of tool collecting

    There is a hidden cost to free software: because it is easy to try, it is also easy to accumulate. You install one app for notes, another for tasks, another for bookmarks, another for documents, and soon your system is fragmented. This feels productive at first because setup creates the illusion of progress. But too many tools create decision fatigue and information loss.

    A useful rule is to add a new tool only when it replaces confusion or manual work. If it does not clearly solve a problem, it is probably a distraction. Fewer tools, used consistently, almost always outperform a bloated stack full of overlapping functions.

    Think in workflows, not apps

    The most effective way to use free productivity tools is to see them as part of a workflow. A lead comes in, gets added to your notes or CRM. A task is created. A meeting is scheduled. Documents are stored in one place. Follow-up happens on a defined date. Each tool supports one stage of movement.

    This mindset is especially valuable for small businesses and freelancers. When your process is clear, tools become interchangeable parts rather than sources of dependency. You can test a free tool confidently because you understand what job it is supposed to perform. That makes upgrades, replacements, and simplification much easier over time.

    A clear workflow diagram showing four connected boxes/icons: Tasks → Notes → Calendar → File Storage, with arrows indicating flow between them and small labels like 'create', 'schedule', 'store', 'reference' to show how the tools interact in a simple loop.

    Conclusion

    Free productivity tools are not just budget-friendly alternatives. When chosen carefully, they are powerful systems for reducing friction, improving visibility, and helping work move forward with less effort. The key is not using the most tools. It is using the right ones, in a way that supports your real workflow.

    Start with one bottleneck, choose one or two tools that solve it well, and build simple habits around them. Once your system feels trustworthy, expand only where needed. That approach keeps your stack lean, your processes clear, and your productivity grounded in results rather than software experimentation.

  • MP3 Converter: Fast, Private Audio Conversion for Workflows

    MP3 Converter: Fast, Private Audio Conversion for Workflows

    Audio files have a way of becoming a bottleneck at the worst possible moment. A podcast episode is ready, but it is in the wrong format. A client sends a voice note that will not play on your device. A webinar recording is too large to upload, too awkward to share, or incompatible with the editing tool you actually use. That is where a Mp3 converter becomes one of those simple tools that quietly saves time, money, and frustration.

    For small business owners, freelancers, developers, and productivity-focused users, the appeal is obvious. You want an audio file that works everywhere, opens quickly, and is easy to store, send, publish, or archive. An MP3 converter helps you take audio from one format and turn it into MP3, the most widely recognized and supported format in everyday use. The trick is not just converting files, but doing it in a way that preserves quality, protects privacy, and fits smoothly into your workflow.

    What is an MP3 converter?

    An MP3 converter is a tool that changes audio files from one format into MP3. In practical terms, it takes files such as WAV, AAC, M4A, FLAC, OGG, or even audio extracted from video, and transforms them into a version that is easier to play on nearly any phone, laptop, browser, media app, or car stereo. It is a format translator, but one with real implications for file size, quality, compatibility, and convenience.

    The reason MP3 remains so popular is simple. It balances compression and usability exceptionally well. Uncompressed formats like WAV can sound excellent, but they are often large and cumbersome. Other compressed formats may offer technical advantages, but MP3 still wins on universal support. If your goal is to make audio accessible to clients, team members, listeners, or customers with minimal friction, MP3 is often the safest choice.

    For business and productivity use, this matters more than many people realize. A converted audio file can be easier to attach to emails, upload to a CMS, embed on a website, distribute in an online course, or share in a project management system. Instead of forcing the recipient to troubleshoot playback issues, you provide a file they can use immediately. That is the real value of a good MP3 converter. It removes technical obstacles from communication.

    Why people use MP3 so often

    MP3 became the default for a reason. It is lightweight, familiar, and broadly accepted across devices and software. If you are publishing voiceovers, training clips, interviews, or customer-facing media, there is a good chance MP3 will work without extra instructions or compatibility checks.

    There is also a practical storage benefit. Converting large raw recordings into MP3 can significantly reduce file size, which makes cloud storage less expensive and transfer times shorter. For freelancers and small teams juggling multiple projects, that can add up quickly. A smarter file format is not just a technical preference, it is an operational advantage.

    Common file types an MP3 converter handles

    Most MP3 converters are built to accept a wide range of input formats. A typical tool can work with audio formats like WAV, FLAC, AAC, OGG, and M4A. Some also extract audio from video files such as MP4 or MOV, which is useful when you need the soundtrack, interview audio, or meeting recording without the full video attached.

    The exact support varies by tool, of course. Some online converters focus on speed and simplicity, while desktop tools often support more advanced settings. That difference matters if you need batch conversion, bitrate control, metadata editing, or privacy protections for sensitive files.

    Key aspects of MP3 converters

    Choosing an MP3 converter is not just about whether it works. Most tools can convert a file. What separates a useful converter from a frustrating one is how well it handles quality, speed, control, and security. Those factors affect the final listening experience and the amount of time you spend fixing avoidable issues.

    Audio quality and bitrate

    Bitrate trade-offs: file size vs audio quality

    The most important concept to understand is bitrate. Bitrate determines how much audio data is stored per second in the MP3 file. In simple terms, higher bitrates usually mean better sound quality, but also larger file sizes. Lower bitrates save space, but can make audio sound thin, muffled, or compressed.

    For spoken audio such as interviews, voice notes, or training content, a moderate bitrate is often enough. For music, sound design, or premium branded media, higher bitrate settings are usually worth it. The right choice depends on how the file will be used. If the audio is part of a public-facing product, quality should carry more weight. If it is an internal memo or a rough archive, a smaller file may be more practical.

    File size and storage efficiency

    One of the biggest reasons to use an MP3 converter is compression. Large files create friction. They upload slowly, consume storage, and can fail in low-bandwidth environments. MP3 reduces that burden while keeping the audio usable for most everyday purposes.

    This is especially helpful for businesses that create recurring content. If you record frequent client calls, podcast episodes, tutorials, or training materials, keeping everything in uncompressed formats can become expensive and disorganized. Converting finalized content into MP3 gives you a more manageable media library without making your systems feel overloaded.

    Compatibility across devices and platforms

    Compatibility is where MP3 continues to shine. An MP3 file will usually play with minimal resistance across operating systems, browsers, smartphones, media players, and communication platforms. That broad compatibility is often more valuable than small technical differences in format performance.

    Think of it like sending a PDF instead of a niche document type. You are choosing the format most likely to open successfully for the other person. When you use an MP3 converter, you are often making the file more usable for everyone else, not just for yourself. That matters when your audience includes clients, customers, team members, or students using different devices and apps.

    Speed and ease of use

    For many users, especially those who rely on free online tools, the best MP3 converter is the one that gets the job done quickly. A clean interface, fast uploads, and straightforward export settings can save more time than a long list of advanced features you never touch.

    That said, simplicity should not come at the cost of control. A useful converter should make basic actions easy while still giving you access to options like bitrate selection, trimming, filename handling, and batch processing when needed. The ideal experience is quick for routine work and flexible for more demanding tasks.

    Privacy and security considerations

    Privacy is often overlooked until the audio file contains something sensitive. If you are converting internal calls, customer interviews, confidential meetings, or pre-release content, uploading files to a random online converter may not be a smart move. Some services retain uploads longer than expected or provide limited clarity about data handling.

    This is why it is worth checking how a converter treats your files. Look for clear deletion policies, secure uploads, and transparent terms. If the content is especially sensitive, a desktop or offline MP3 converter may be the better option. Convenience matters, but data control matters more when the audio is business-critical.

    Feature differences between converter types

    Converter TypeBest ForStrengthsTrade-offs
    Online MP3 converterQuick one-off tasksNo installation, easy access, works in browserUpload limits, privacy concerns, fewer advanced controls
    Desktop MP3 converterFrequent or sensitive conversionsBetter performance, offline use, richer settingsRequires installation, may have a learning curve
    Mobile MP3 converter appOn-the-go tasksConvenient from phone or tabletSmaller interface, limited power for larger jobs
    Integrated media editorUsers already editing audio/videoConversion plus trimming, editing, taggingCan be overkill for simple conversions

    How to get started with an MP3 converter

    Getting started with an MP3 converter is usually straightforward, but a little planning helps you avoid quality loss and unnecessary rework. The first step is to define your outcome. Are you converting for playback compatibility, smaller file size, email sharing, publishing, or archiving? That single decision influences the settings you should choose.

    If you are converting speech-based content, focus on clarity and manageable file size. If you are converting music or branded audio assets, preserve more quality. If speed is the main concern, an online tool may be enough. If privacy, batch processing, or repeat use matters, a desktop solution is often the smarter long-term choice.

    A simple way to begin

    MP3 conversion workflow

    You do not need a complicated setup to start using an MP3 converter effectively. In most cases, the process follows the same pattern:

    1. Upload or import your file.
    2. Choose MP3 as the output format.
    3. Select quality or bitrate settings.
    4. Convert and download the new file.
    5. Test playback before sharing or publishing.

    Those five actions are enough for most everyday tasks. The final step is the one people skip most often. Always test the converted file on at least one common device or player. A successful conversion is not just a completed download, it is a file that sounds right and behaves as expected.

    Choosing the right settings

    Settings matter because conversion is not magic. If you choose a very low bitrate, the file may be smaller, but the sound can suffer noticeably. If you choose a very high bitrate for a simple spoken memo, you may be wasting storage and upload time without gaining meaningful quality.

    A useful rule of thumb is to match the setting to the purpose. Voice recordings can often be converted at moderate settings while remaining clear and professional. Music, polished content, and public-facing assets deserve more generous quality settings. This is where testing one or two versions can save trouble later. Compare them briefly and keep the smallest file that still sounds good.

    Avoiding common conversion mistakes

    A common mistake is converting a file repeatedly between compressed formats. Each conversion can degrade quality, especially if the source is already compressed. If possible, start from the highest-quality original file, then create your MP3 from that version. It is similar to making copies of a photocopy. Each generation tends to lose something.

    Another mistake is ignoring metadata and naming conventions. If you are handling dozens of client files, podcast clips, or training modules, a vague filename like “audio-final-new-2.mp3” will create confusion fast. A clean naming structure makes your converted files easier to search, share, and archive. Good organization turns conversion from a one-time fix into a scalable workflow.

    When free online tools are enough

    For occasional use, free online MP3 converters can be perfectly adequate. If you have a non-sensitive file, a stable internet connection, and a basic need, such as turning a WAV file into something easier to email, an online tool can solve the problem in minutes.

    The key is to use them intentionally. Check file size limits, review privacy language, and avoid uploading confidential recordings unless you trust the platform. Free tools are best viewed as convenience tools, not automatic solutions for every type of media workflow.

    When you may need something more advanced

    As your needs grow, the limits of simple converters become more obvious. If you regularly process multiple files, need precise bitrate control, want to trim silence, preserve metadata, normalize audio levels, or automate repetitive tasks, a more advanced MP3 converter or media application can save significant time.

    This is especially true for freelancers and teams working with recurring content pipelines. A podcast producer, course creator, virtual assistant, or developer managing downloadable assets often benefits from a repeatable process rather than one-off browser conversions. At that point, the converter becomes part of your production system, not just a rescue tool.

    Practical use cases for business and productivity

    The value of an MP3 converter becomes clearer when you look at everyday scenarios. A consultant may record client summaries and convert them into lightweight MP3 files for quick delivery. A coach might turn webinar audio into downloadable lessons. A developer building a knowledge base may need standardized audio assets that load reliably across platforms. In each case, conversion supports a smoother user experience.

    There is also a strong internal productivity angle. Teams often work with recordings from meetings, interviews, or brainstorming sessions. Converting those files into MP3 can make them easier to share in cloud folders, messaging tools, or project systems. That sounds small, but repeated across a week or month, it reduces friction in collaboration.

    Typical use cases at a glance

    Use CaseWhy MP3 HelpsWhat to Prioritize
    Podcast publishingEasier distribution and broad playback supportHigher audio quality, metadata
    Client voice deliverablesFast sharing and smaller attachmentsClear speech, consistent naming
    Course and training contentAccessible downloads for students or staffBalance quality and file size
    Meeting archivesEasier storage and playback laterCompression efficiency, organization
    Audio from videoExtracts only what you needAccuracy, format support

    How to choose the best MP3 converter for your needs

    The best MP3 converter is the one that fits your actual workflow, not the one with the longest feature list. If you only convert a file once a month, simplicity should win. If you manage content daily, reliability and control matter more than a polished homepage.

    Start by looking at four things: supported formats, output settings, file limits, and privacy handling. Those basics tell you whether the tool can realistically support your needs. After that, usability becomes the deciding factor. If the process feels clumsy, users tend to make mistakes, skip checks, or postpone tasks.

    For professional use, it is also worth considering whether the tool supports future growth. Today you may only need single-file conversion. Later, you may want batch processing, faster exports, or audio cleanup features. A converter that scales with your workflow often delivers more long-term value than one that solves only the immediate problem.

    Conclusion

    An MP3 converter is a simple tool with outsized practical value. It helps turn awkward, oversized, or incompatible audio files into a format that is easy to play, share, store, and publish. For small businesses, freelancers, developers, and productivity-minded users, that translates into smoother communication, faster workflows, and fewer technical interruptions.

    If you are just getting started, begin with a straightforward file conversion and pay attention to quality, compatibility, and privacy. Test the output, refine your settings, and build a small repeatable process around the kinds of audio files you use most. Once you do, an MP3 converter stops being a utility you only remember in a pinch, and becomes a reliable part of how you work.

  • Productivity Tools for Work: Build a Focused Stack

    Productivity Tools for Work: Build a Focused Stack

    Work rarely becomes difficult because people lack effort. It becomes difficult because attention is fragmented, priorities are unclear, and every task arrives with its own app, alert, and deadline. That is why productivity tools for work matter. They do not create discipline by themselves, but they can reduce friction, compress decision-making, and make focused execution far more realistic.

    A knowledge worker at a desk overwhelmed by many floating app windows and icons

    For developers and knowledge workers, the problem is even sharper. A normal day can involve code editors, issue trackers, documentation systems, chat platforms, cloud consoles, meetings, and personal notes, all competing for context. The right productivity stack does not simply help a person “do more.” It helps them do the right work with less cognitive waste.

    What are productivity tools for work?

    Productivity tools for work are software applications, platforms, and systems designed to improve how tasks are planned, executed, communicated, tracked, and completed. In practical terms, these tools reduce operational overhead. They help people organize work, automate repetitive steps, centralize information, and preserve context across teams and projects.

    This category is broader than many people assume. It includes task managers, calendars, note-taking software, time trackers, project management platforms, collaboration suites, documentation systems, automation tools, password managers, and focus applications. A text editor with strong plugins can be a productivity tool. So can a shared knowledge base or a meeting transcription app. The defining factor is not the label, but the outcome: less time lost to coordination, searching, switching, and repetition.

    For developers, productivity tools often operate at multiple layers. One layer is personal execution, such as task capture, time blocking, and note organization. Another layer is team coordination, including sprint planning, issue assignment, and asynchronous updates. A third layer is workflow automation, where integrations connect systems so that status changes, notifications, builds, and approvals happen with minimal manual intervention.

    A three-layered stack diagram for developers: personal execution, team coordination, workflow automation

    The most effective tools do not just store information. They shape behavior. A well-designed task system encourages prioritization. A shared documentation platform improves reuse and onboarding. A calendar tool with strong scheduling logic protects deep work. In this sense, productivity software is partly technical infrastructure and partly operational design.

    Key aspects of productivity tools for work

    Task management and prioritization

    A large percentage of workplace inefficiency comes from ambiguity. People often know they are busy, but cannot clearly identify what matters now, what can wait, and what is blocked. Task management tools address this by giving work a visible structure. They convert mental clutter into explicit objects: tasks, owners, due dates, dependencies, and status fields.

    The real value is not the checklist itself. It is the ability to define a system of execution. For example, a developer handling multiple tickets can use a task manager to separate urgent production issues from strategic architecture work. Without that separation, the day becomes reactive. With it, work can be sequenced according to impact, urgency, and available focus time.

    Strong prioritization tools also create historical visibility. Teams can inspect where time is actually being spent, identify bottlenecks, and detect recurring work that should be automated. This is where many organizations move from being merely busy to being operationally mature.

    Communication and collaboration

    Communication tools are often treated as simple messaging channels, but they are among the most influential productivity tools for work because they determine how interruptions propagate. A poorly configured chat platform can destroy concentration. A well-managed collaboration environment can accelerate decisions while preserving focus.

    The distinction lies in communication design. Synchronous channels are useful for urgent issues, live debugging, and fast alignment. Asynchronous channels are better for status updates, documentation links, and decision records. Teams that understand this difference usually work more efficiently because they stop forcing every interaction into real-time conversation.

    For distributed teams, collaboration tools also function as memory systems. Message threads, shared documents, comments, and linked tasks preserve context. That context reduces duplicate questions and makes onboarding easier. Instead of repeatedly asking why a decision was made, a team member can inspect the documented trail and proceed with confidence.

    Knowledge management and documentation

    A team without documentation pays a tax on every repeated task. That tax appears in onboarding delays, duplicated troubleshooting, inconsistent processes, and reliance on a few individuals who become informal knowledge bottlenecks. Documentation platforms, internal wikis, and structured note systems are therefore central productivity assets, not administrative extras.

    The best knowledge tools support fast capture and reliable retrieval. Capturing ideas is easy. Finding them three weeks later is the real test. Search quality, tagging, linking, version history, and collaborative editing all matter because workplace productivity depends on accessible knowledge, not merely stored knowledge.

    This is one area where a platform like Home can be useful when teams need a cleaner operational center. If work, notes, and routines are scattered across too many disconnected applications, a more unified environment can reduce switching costs and make core information easier to maintain and act on.

    Time management and focus protection

    Time management software is often misunderstood as surveillance or rigid scheduling. At its best, it is neither. It is a way to align time usage with work type. Deep engineering work requires uninterrupted blocks. Administrative work can often be grouped. Meetings can be constrained. Personal focus patterns can be observed and used intentionally.

    Calendars, time-blocking systems, Pomodoro timers, and time analysis tools all support this process. Their purpose is not to fill every hour. Their purpose is to make invisible patterns visible. If a person discovers that most coding work is being interrupted every 12 minutes, the solution is not motivation. The solution is structural change.

    Focus tools become especially valuable in environments saturated with notifications. A worker who disables non-essential alerts, batches communication windows, and reserves protected work sessions can often outperform someone working longer hours with constant interruptions. Productivity is tightly coupled with attention quality, not just duration.

    Automation and integration

    Repetitive work is one of the clearest signals that a workflow can be improved. Copying data between systems, sending routine reminders, updating statuses manually, or recreating the same report each week are all candidates for automation. This is where productivity tools move from passive support to active operational leverage.

    Automation platforms connect applications through triggers, conditions, and actions. A support ticket can create a task automatically. A merged pull request can update project status. A form submission can populate a database and notify the correct team. Each individual automation may save only a few minutes, but across a team, the cumulative gain is substantial.

    Integrations also reduce context switching. Instead of visiting five tools to understand one project state, workers can centralize critical signals. This lowers mental overhead and decreases the chance of missing updates. For technical teams, integration quality is often more important than the feature list of any single product.

    Security, reliability, and scalability

    A productivity stack that saves time but creates security risk is not a real improvement. Developers and teams should evaluate tools not only for usability, but also for access controls, auditability, backup practices, and compliance alignment. Sensitive information flows through productivity systems constantly, including credentials, roadmaps, client data, and internal discussions.

    Reliability matters just as much. If a task platform is slow, a documentation tool loses edits, or a sync process fails unpredictably, users stop trusting the system. Once trust erodes, people build shadow workflows in spreadsheets, local notes, or personal chat messages, and the organization loses consistency.

    Scalability is the longer-term consideration. A tool that works for a solo freelancer may fail for a 50-person engineering team. Permission models, template systems, reporting features, and integration support become more important as work grows in complexity. Choosing tools with a view toward future workflows prevents painful migrations later.

    Choosing tool categories and team balance

    Categories that matter most in day-to-day operations

    When people search for the best productivity tools for work, they often compare products before they define requirements. That reverses the correct sequence. The better approach is to identify workflow categories first, then evaluate products inside each category. Most work environments rely on some combination of task management, communication, documentation, scheduling, file storage, and automation.

    A developer, for instance, may need an issue tracker for engineering tasks, a personal note system for design ideas, a team documentation platform for architecture records, and a calendar system that can protect coding blocks from meeting sprawl. If all four categories are covered well, productivity improves substantially even without a large software budget.

    The table below shows how common tool categories map to workplace outcomes.

    Tool Category Primary Function Typical Benefit Common Risk
    Task Management Track work items and priorities Better execution clarity Over-engineering workflows
    Team Chat Fast communication and coordination Faster response times Constant interruption
    Documentation Store and retrieve shared knowledge Reduced duplication Stale or unmaintained content
    Calendar and Scheduling Allocate time and meetings Better focus planning Overscheduled days
    Automation Platforms Remove manual repetitive work Higher operational efficiency Fragile or opaque automations
    Time Tracking Measure effort and patterns Better planning accuracy Micromanagement if misused

    The pattern is consistent. Every category has upside and trade-offs. A tool becomes productive only when its implementation aligns with actual work behavior. Adding software without process discipline often increases complexity instead of reducing it.

    Personal productivity versus team productivity

    A common mistake is optimizing only for the individual. A person may have a beautifully organized personal system while the team around them operates in fragmented ways. In that case, the personal gain remains limited because collaboration still creates delays, duplicate effort, and confusion.

    Personal productivity tools help with capture, planning, focus, and recall. Team productivity tools help with visibility, alignment, handoffs, and accountability. Both are necessary. A developer can maintain excellent private notes, but if architectural decisions live only there, the team gains little value. Conversely, a team can have a robust project board, but if individuals lack a method for handling daily priorities, execution still degrades.

    The strongest setups connect the two levels cleanly. Personal tasks should map to team goals. Team documentation should support individual execution. Meeting decisions should create trackable actions. This is the difference between a collection of apps and a real productivity system.

    The hidden cost of tool sprawl

    Many organizations do not suffer from too few tools. They suffer from too many. Tool sprawl occurs when each new problem is addressed with another platform, often without integration, governance, or retirement of the old system. Over time, the stack becomes noisy and expensive, and people stop knowing where truth lives.

    This issue is especially common in technical environments because teams adopt specialized software rapidly. One tool handles project planning, another handles docs, another stores snippets, another captures retrospectives, and another sends alerts. Each may be good individually, but together they can create a high-friction environment.

    Reducing tool sprawl does not mean collapsing everything into one product at any cost. It means being deliberate. Teams should identify core systems of record, define where certain information belongs, and retire redundant workflows. In many cases, a platform like Home is most valuable not because it adds another feature, but because it consolidates routine work patterns into a more coherent operating space.

    How to get started with productivity tools for work

    Choosing productivity tools should begin with observation, not shopping. Before selecting software, it is necessary to understand where work is actually slowing down. That may be task overload, constant interruptions, poor handoffs, missing documentation, or too much manual updating between systems. Tools are effective only when they are matched to a real constraint.

    A simple starting framework is to audit one normal workweek. Track where delays occur, where information gets lost, and which repeated actions feel unnecessary. If meetings generate unclear follow-up, a task and note system may be the priority. If project knowledge is trapped in chat, documentation should come first. If status reporting consumes too much time, automation may produce the fastest return.

    A practical setup sequence

    For most individuals and teams, implementation is easier when done in a stable order. The sequence below reduces confusion and prevents premature complexity.

    1. Define the workflow problem, identify whether the main issue is planning, communication, documentation, focus, or repetitive admin work.
    2. Select one primary tool per category, and avoid testing multiple overlapping platforms at the same time.
    3. Create minimal structure, using a small number of projects, tags, statuses, or folders rather than an elaborate taxonomy.
    4. Establish team rules that decide where tasks live, where decisions are documented, and what belongs in chat versus project systems.
    5. Review after two weeks, remove friction, simplify fields, and automate only the steps that repeat consistently.

    This order matters because most tool rollouts fail from overconfiguration. People build complex boards, labels, templates, and automations before they have validated basic usage. A lightweight system that people actually use is more productive than a sophisticated one nobody trusts.

    Start small, then standardize

    The first version of a productivity system should be intentionally modest. For a solo professional, that may mean one task manager, one note system, and a disciplined calendar. For a team, it may mean one project board, one documentation repository, and one communication standard for decisions and updates.

    Once basic adoption is stable, the next step is standardization. Naming conventions, task templates, document formats, and recurring meeting notes all reduce variability. This may sound bureaucratic, but in practice it removes decision fatigue. When every sprint ticket follows a known format and every project page contains the same key sections, people spend less time interpreting structure and more time doing work.

    Standardization is particularly valuable for developers, who often move between implementation and coordination. Structured workflows reduce the amount of mental decompression required when switching contexts.

    Evaluate tools by workflow fit, not hype

    Software selection is often distorted by popularity. A tool may be widely recommended and still be wrong for a given team. The better evaluation method is to test workflow fit. Does the software support how work actually moves? Does it integrate with existing systems? Can it scale without becoming administratively heavy? Is the interface fast enough for daily use?

    This is also where teams should assess hidden costs. A feature-rich platform can require significant maintenance. A simpler product may produce better results if it lowers setup time and training overhead. Productivity is not gained from having more toggles. It is gained from reducing friction at decision points.

    A useful comparison lens is shown below.

    Evaluation Factor What to Ask Why It Matters
    Ease of Adoption Can a new user become productive quickly? Lowers rollout friction
    Integration Support Does it connect to core tools already in use? Reduces manual transfer work
    Flexibility Can it support current and future workflows? Prevents early replacement
    Search and Retrieval Can information be found fast? Preserves context and knowledge
    Governance Are permissions and visibility controllable? Supports security and scale
    Maintenance Load How much admin work does the tool create? Prevents system fatigue

    If a team is already overwhelmed, low-maintenance tools usually outperform highly customizable ones. Precision matters, but so does operational simplicity.

    Build habits around the tools

    Even excellent productivity tools fail when they are treated as passive containers. They need rituals. A task system needs a daily review. A documentation tool needs ownership and update rules. A calendar needs explicit focus blocks. Automation needs monitoring so failures are visible and fixable.

    Habits are what transform software into process. A weekly review, for example, can surface stale tasks, blocked dependencies, and mismatched priorities. A post-project documentation pass can preserve lessons before context fades. A shared protocol for meeting outcomes can ensure that discussion becomes action rather than disappearing into chat history.

    This is why adoption strategy is as important as selection strategy. The tool itself rarely solves the problem alone. The combination of tool, workflow, and habit is what drives measurable gains.

    Conclusion

    The best productivity tools for work do not simply help people move faster. They help them work with greater clarity, lower friction, and stronger alignment. Task systems improve prioritization. Documentation tools preserve knowledge. Communication platforms shape collaboration. Automation removes repetitive effort. When these elements are chosen deliberately and used consistently, productivity becomes a property of the system, not just an individual struggle.

    The next step is practical. Identify the single biggest source of friction in your current workflow, then choose one tool category that directly addresses it. Implement a minimal version, use it for two weeks, and refine based on real behavior. If the goal is a cleaner, more centralized working environment, a solution like Home may be worth considering as part of that simplification. The objective is not more software. It is better work, with less waste.