If your website looks good but still struggles to attract traffic, the problem is rarely just the design. More often, it is discoverability. A well-built WordPress site can still remain invisible in search results if the underlying SEO basics are weak, inconsistent, or missing entirely.
That is why understanding SEO for WordPress matters so much. WordPress gives you a strong foundation, but it does not automatically make your site rank. You still need the right structure, content strategy, technical setup, and ongoing optimization. The good news is that WordPress is one of the most SEO-friendly platforms available, which makes it ideal for small business owners, freelancers, developers, and anyone who wants practical results without unnecessary complexity.
This guide breaks down what WordPress SEO really means, which elements have the biggest impact, and how to get started in a way that is manageable and effective. Whether you are launching a new site or trying to improve an existing one, the goal is simple: help search engines understand your content, and help the right people find it.
What Is WordPress SEO?
WordPress SEO is the process of improving a WordPress website so it performs better in search engines like Google. That includes making your site easier to crawl, easier to understand, faster to load, and more useful to human visitors. Good SEO is not about gaming an algorithm. It is about aligning your site with what search engines are trying to reward, which is relevance, clarity, and quality.
Many people assume WordPress handles SEO automatically. That idea is only partly true. WordPress does provide a cleaner starting point than many other website platforms. It supports customizable permalinks, responsive themes, blogging functionality, and a flexible ecosystem of plugins. Those features make optimization easier, but they do not replace strategy.
A useful way to think about SEO for WordPress is to separate the platform from the practice. WordPress is the vehicle, SEO is how you drive it. You can have a powerful platform and still make poor decisions about site structure, content, or page speed. On the other hand, a modest WordPress site with focused content and solid technical setup can outperform larger competitors.
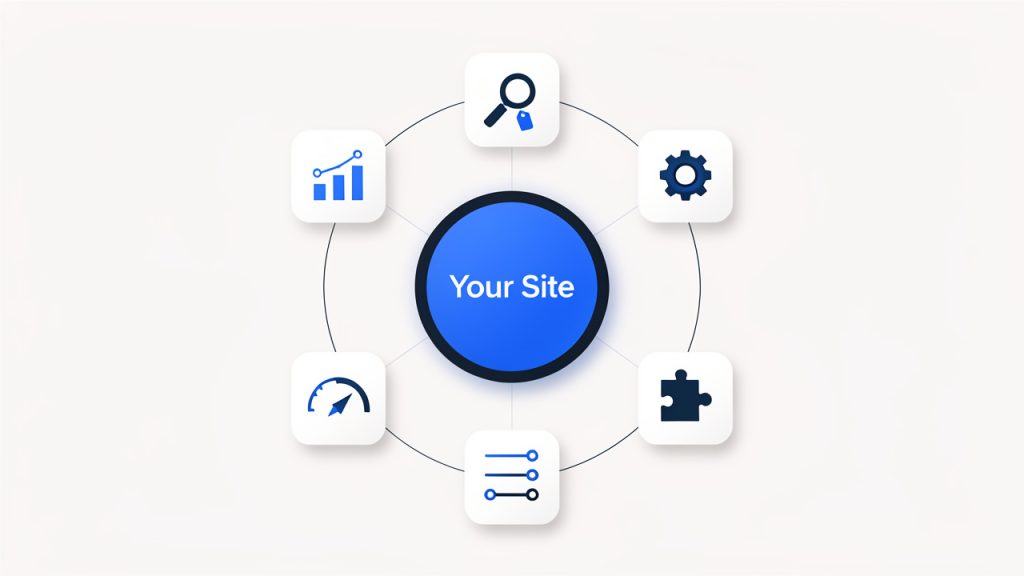
Search engine optimization on WordPress typically touches four areas: technical SEO, on-page SEO, content quality, and user experience. These areas overlap more than most beginners expect. For example, a fast mobile page improves user satisfaction, and it also helps search visibility. Clear headings help readers scan a page, and they also help search engines interpret topical relevance.
Key Aspects of WordPress SEO
Site Structure and Crawlability
One of the most important foundations of WordPress SEO is a clean site structure. Search engines need to discover your pages, understand how they relate to each other, and determine which ones matter most. If your site is cluttered with unnecessary archives, duplicate pages, broken links, or confusing navigation, you make that job harder.
A strong WordPress structure starts with logical page organization. Your main services, categories, and important resources should be easy to reach in just a few clicks. Internal linking also plays a major role here. When one page naturally links to another related page, you create pathways for both users and search engines. That improves context and can distribute authority across your site.
Permalinks deserve attention too. WordPress lets you customize your URL format, and this is more important than it sounds. A short, descriptive URL is easier to trust, easier to share, and easier for search engines to interpret. A page called /local-seo-services/ communicates far more clearly than a URL filled with dates or random parameters.
Content Optimization
Content is where most SEO gains are won or lost. A WordPress site can be technically polished and still underperform if the content is thin, vague, or built around the wrong topics. Strong content optimization starts with understanding what your audience is actually searching for, then creating pages that answer those needs clearly and completely.
That means every important page should have a distinct purpose. A homepage targets broad brand intent. A service page targets a specific solution. A blog post might answer a question, compare options, or explain a process. When pages overlap too much, they compete with one another. When they are focused, they become easier to rank.
Titles, headings, and meta descriptions also matter. They help frame the page for both search engines and users. Your target phrase should appear naturally in the title and supporting headings, but stuffing keywords into every line is counterproductive. Modern SEO rewards topical depth and readability, not repetition.
Good content also means updating pages over time. Search intent changes, competitors improve, and statistics go out of date. Pages that once ranked well can slowly slide if they are not maintained. Treat content as an asset that needs refinement, not as a one-time task.
Technical Performance
Technical SEO can sound intimidating, but for most WordPress site owners, it comes down to a few practical areas. Speed, mobile usability, indexing, and clean code output are the big ones. If a page loads slowly, shifts around while loading, or works poorly on a phone, that weakens both user trust and search performance.
Themes and plugins often have a direct impact here. A visually impressive theme that loads excessive scripts may hurt performance more than it helps conversions. The same goes for installing too many plugins without a clear purpose. Every addition should earn its place.
Caching, image compression, lazy loading, and reliable hosting make a major difference. So does keeping WordPress core, themes, and plugins updated. A neglected site can develop errors, security issues, and performance problems that quietly undermine SEO. Technical health is not glamorous, but it is often the reason one site outranks another with similar content quality.
User Experience and Engagement
Search engines increasingly reward pages that satisfy users. That does not mean Google can read minds, but it can detect useful signals. If visitors land on your page and immediately leave because it is slow, confusing, or unhelpful, that is a problem. If they stay, explore, and engage, that usually indicates stronger relevance.
This is why user experience belongs in any serious conversation about WordPress SEO. Readable formatting, clear navigation, strong calls to action, and mobile-friendly layouts all contribute to performance. Even simple changes such as shorter paragraphs, clearer subheadings, and better spacing can improve how people interact with your content.
There is also a branding dimension here. A polished, trustworthy site tends to earn more backlinks, more shares, and more conversions. SEO does not exist in isolation. It is connected to how credible your business appears online. In that sense, optimization is not just about rankings. It is about making your website more effective overall.
Plugins and SEO Tools
WordPress plugins can simplify many SEO tasks, but they should support your strategy, not define it. An SEO plugin can help you edit title tags, generate XML sitemaps, set canonical URLs, and manage indexing settings. Those are real advantages, especially for small teams without technical staff.
Still, no plugin can compensate for weak content or a poor site structure. Some site owners become overly dependent on traffic-light scores or plugin recommendations without understanding the bigger picture. A green indicator is not a ranking guarantee. It is just a prompt based on limited rules.
The smartest approach is to use plugins to handle repetitive technical details while keeping your attention on content quality, user intent, and business goals. In other words, let tools assist the work, not replace judgment.
How to Get Started With WordPress SEO
Begin With the Essentials
If you are starting from scratch, the first priority is to make sure your WordPress site is technically visible to search engines. That includes checking that your site is not set to discourage indexing, choosing a clean permalink structure, installing a reputable SEO plugin, and submitting your sitemap through Google Search Console.
At the same time, review your theme and hosting setup. A slow host or bloated theme can create SEO problems before you publish a single page. It is easier to build on a solid foundation than to repair one later. Think of it like opening a physical store. Location, signage, and accessibility matter before foot traffic ever arrives.
A simple starting checklist can help:
Set clean permalinks that use readable page names.
Install an SEO plugin to manage metadata and sitemaps.
Connect Google Search Console to monitor indexing and performance.
Check mobile usability and speed before expanding your content.
Create core pages first, such as homepage, services, about, and contact.
Build Content Around Search Intent
Once the basics are in place, focus on content that matches what your audience is searching for. This is where many WordPress sites either gain traction or stall. Writing random blog posts may fill your site with pages, but traffic grows faster when each piece serves a real purpose.
If you are a freelancer, that might mean service pages for each offering plus articles that answer common client questions. If you run a small business, it may mean local landing pages, product explanations, or guides that support your sales process. Developers might create tutorials, comparisons, or technical explainers that attract highly targeted visitors.
Search intent should shape both the topic and the format. A person searching for “best accounting software for freelancers” expects comparison content. Someone searching for “bookkeeping services near me” has transactional intent. When your page matches that expectation, it performs better.
Strengthen On-Page SEO Without Overdoing It
On-page optimization is where you help search engines understand the topic of each page. In WordPress, that usually means refining the title tag, heading structure, image alt text, internal links, and meta description. These are small elements individually, but together they create clarity.
The key is natural optimization. Use your main keyword in a way that sounds human. Include related terms where relevant. Organize the page with meaningful headings. Add internal links to related posts or service pages. Avoid the outdated habit of forcing the same phrase into every paragraph.
This is especially important for SEO on WordPress because plugins can sometimes encourage checkbox behavior. Readers do not care whether a plugin score says 92 out of 100. They care whether the page answers their question quickly and convincingly. Search engines increasingly reward the same thing.
Prioritize Performance and Maintenance
SEO is not a one-time project. WordPress sites need ongoing care. Broken links appear. Plugins conflict. Pages slow down over time. Content ages. Rankings shift. The sites that maintain visibility are usually the ones that treat SEO as an operating habit rather than a launch task.
That does not mean you need to obsess daily. It means setting a rhythm. Review Search Console data, update old content, improve pages with high impressions but low clicks, and audit site speed periodically. Small consistent improvements often outperform occasional major overhauls.
The table below highlights where beginners should focus first and what tends to have the biggest practical impact.
SEO Area
Why It Matters
Best First Action
Common Mistake
Site Structure
Helps search engines crawl and understand your pages
Create simple navigation and logical page hierarchy
Publishing too many overlapping pages
Content Quality
Drives relevance and rankings
Write pages around real user questions and needs
Targeting keywords without matching intent
On-Page SEO
Clarifies page topics
Optimize titles, headings, and internal links
Keyword stuffing
Technical Performance
Affects speed, mobile usability, and indexing
Choose quality hosting and optimize images
Using a heavy theme and too many plugins
Tracking and Maintenance
Helps you improve over time
Use Search Console and update content regularly
Setting everything up once and ignoring it
Think Long Term, Not Just Quick Wins
It is tempting to approach WordPress SEO as a hunt for hacks. Most shortcuts either do not work or do not last. Sustainable results usually come from doing ordinary things consistently well: publishing useful content, improving site speed, clarifying page topics, and building a trustworthy brand.
This matters especially for small businesses and independent creators. You may not have the authority of a massive publisher, but you can be more specific, more helpful, and more aligned with your audience. In many niches, that is exactly what earns rankings.
If your site is new, expect momentum to build gradually. Search visibility often compounds. One strong page leads to a few rankings. Those rankings bring data, links, and confidence. That helps the next pages perform better. WordPress is a strong platform for this kind of growth because it is flexible enough to scale as your content strategy matures.
Conclusion
WordPress gives you an excellent foundation for search visibility, but the platform alone is not the strategy. Effective SEO for WordPress comes from combining technical reliability, clear structure, useful content, and a strong user experience. When those pieces work together, your site becomes easier to find and more persuasive once people arrive.
Your next step is simple. Audit what you already have. Check your structure, improve a few key pages, fix obvious technical issues, and build new content around real search intent. You do not need to perfect everything at once. In WordPress SEO, steady improvement is often what creates the biggest long-term gains.
Backlink research is where many SEO strategies either sharpen into something effective or collapse into guesswork. A site can publish excellent content, improve technical performance, and still struggle to rank if it does not understand who links to whom, why those links exist, and which links actually move authority.
For developers and efficiency-focused operators, backlink research is not just a marketing task. It is a data analysis problem. The objective is to reduce noise, identify patterns, and make better decisions faster. The best backlink strategies come from structured observation, not from collecting random link metrics or copying competitor lists without context.
This guide breaks down the top five tips for backlink research in a way that is practical, systematic, and useful for teams that prefer signal over hype. The focus is not on vanity numbers. It is on building a repeatable process that improves link acquisition, competitive analysis, and long-term search visibility.
What Backlink Research Actually Means
Backlink research is the process of evaluating inbound links to a website, a page, or a competitor’s content in order to understand authority, relevance, risk, and opportunity. It sits at the intersection of SEO, digital PR, content strategy, and competitive intelligence.
A backlink is not simply a vote. That metaphor is too simplistic for modern search. A link can pass authority, reinforce topical relevance, expose a brand to a new audience, or do almost nothing at all. In some cases, it can even create risk if the source is manipulative or low quality. Good research separates these outcomes instead of treating all links as equal.
For teams with a technical mindset, it helps to think of backlinks as a graph with weighted edges. Each connection has attributes such as source trust, topical alignment, placement context, anchor text, follow status, and indexability. The purpose of research is to interpret those attributes well enough to support action.
Key Aspects of Effective Backlink Research
Tip 1: Prioritize Relevance Before Raw Authority
A common mistake in backlink analysis is overvaluing authority metrics while underestimating topical fit. High-authority domains look impressive in reports, but a link from an irrelevant site often carries less strategic value than a link from a smaller publication deeply embedded in the same subject area.
Relevance should be evaluated at multiple levels. Start with the domain. Then move to the section of the site, the linking page, and the paragraph where the link appears. A homepage mention on a broad site is not automatically more useful than an in-content reference on a niche resource page. Context matters because search engines evaluate relationships between topics, entities, and documents.
If a cybersecurity SaaS product receives a backlink from a respected developer blog discussing authentication workflows, that link often has stronger practical value than a generic mention on a high-metric lifestyle site. The second link may look better in a dashboard. The first one is usually better aligned with real search and audience signals.
Tip 2: Analyze Link Intent, Not Just Link Presence
The strongest backlink researchers ask a more useful question than “Does this page link to a competitor?” They ask, “Why did the editor decide this link belonged here?” That shift changes the entire quality of the analysis.
Some links exist because the target published original data. Others exist because the page provides a tool, a tutorial, a definition, a product category page, or a strong brand reference. When the intent behind the link is clear, replication becomes realistic. Without that context, outreach becomes random and inefficient.
This is where pattern recognition becomes valuable. If a competitor earns repeated links because it publishes benchmark reports, then the opportunity is not just “get those same links.” The opportunity is to produce a better data asset. If links appear mostly in integration roundups, then the path may involve partnerships or product documentation rather than editorial pitching.
Backlink research becomes much more powerful when each discovered link is classified by function. Editorial citation, resource inclusion, tool recommendation, news mention, partnership attribution, and community reference all imply different acquisition tactics. The research phase should surface these categories before any outreach begins.
Tip 3: Study Competitor Gaps Instead of Competitor Totals
Many teams become distracted by aggregate backlink counts. A competitor may have ten times more links, but that number alone says very little about what can be done next. Large totals often include historical links, brand mentions, syndicated content, and low-impact references that are difficult or unnecessary to replicate.
Gap analysis is more actionable. The goal is to identify links or linking domains that appear across several competitors but not on your site, or to find high-value pages in your niche that consistently cite certain content types. This reveals recurring trust sources in the market.
A useful comparison framework looks like this:
Research Focus
Weak Interpretation
Strong Interpretation
Total backlink count
“They have more links than we do”
“Their growth is concentrated in a few linkable assets”
Referring domains
“We need more domains”
“We need more relevant domains in specific topical clusters”
Anchor text
“They rank because of anchors”
“Their links reflect stronger topic association and brand mention consistency”
Top linked pages
“Their blog performs better”
“Their tools, studies, and guides attract different link intents”
Link velocity
“They are getting links faster”
“Their recent campaign or product launch created a temporary acquisition spike”
This gap-based method is more efficient because it narrows the field. Instead of staring at a giant export of backlinks, the team can focus on patterns with strategic value. Developers and operators often prefer this because it turns backlink research into a prioritization problem rather than an endless audit.
Tip 4: Evaluate Page-Level Quality, Not Just Domain-Level Scores
Domain authority metrics are useful shortcuts, but they are still shortcuts. A strong domain can host weak pages, and a modest domain can host exceptionally valuable pages. Page-level review is what separates surface analysis from expert analysis.
A backlink from an indexed, frequently updated, contextually relevant page with real traffic and strong internal linking can be far more valuable than a link from an orphaned page on a famous site. This is particularly true when the link appears naturally in the main content and supports the subject being discussed.
The page itself should be reviewed for several signals. Is the content original or thin? Does it rank for relevant terms? Is it accessible to users and search engines? Is the link surrounded by meaningful context, or buried in a template area with dozens of unrelated outbound links? These details affect the real value of the backlink more than a single third-party metric ever will.
This is also where risk assessment enters the process. Pages that exist only to host outbound links, pages with visibly spun content, and networks of sites with repeating layouts can create misleading opportunities. They may appear numerically acceptable in a tool, but a manual review often exposes them as low-trust environments.
Tip 5: Build a Repeatable Research Workflow
Backlink research becomes expensive when it depends on memory and ad hoc decisions. It becomes efficient when it follows a clear workflow. The best teams reduce repetitive evaluation by standardizing how they collect, classify, and score opportunities.
A basic workflow often starts with competitor selection, followed by exporting top linked pages, filtering by relevance, grouping links by intent, and then assigning outreach or content actions. This process does not need to be complex, but it does need to be consistent. Otherwise, two analysts may review the same data and produce completely different conclusions.
For efficiency-focused teams, a lightweight operating model is usually enough:
Define the comparison set: Select direct search competitors, not just business competitors.
Export and segment: Separate homepage links, content links, tool links, and resource links.
Classify intent: Record why the link exists and what asset type earned it.
Score opportunity: Evaluate relevance, replicability, authority, and effort.
Assign action: Decide whether the next move is outreach, content creation, partnership, or no action.
This kind of system makes backlink research easier to scale across campaigns. It also makes reporting cleaner, because decisions can be tied to observed patterns rather than instinct.
How to Get Started with Backlink Research
Start with the Right Competitors
The first step is choosing the correct comparison targets. This sounds obvious, but it is often done poorly. A business competitor is not always an SEO competitor. Search results frequently include publishers, documentation hubs, niche blogs, marketplaces, and community pages that compete for the same queries without selling the same product.
A smarter approach is to map competitors by keyword overlap and page type. If the site is trying to rank product-led landing pages, then comparing against informational publishers may distort the research. If the goal is to rank technical tutorials, then those publishers may actually be the right benchmark.
This distinction matters because backlink patterns are shaped by content format. A free tool earns different links than a long-form guide. An API documentation page attracts different citations than a thought leadership article. Strong research starts with alignment between the ranking target and the competitor set.
Audit the Pages That Attract Links
Many teams review backlink profiles at the domain level and stop there. That creates a blind spot. The real insight often lives inside the specific pages that attract links consistently.
Identify which competitor pages receive the most referring domains, then inspect what those pages are doing structurally. Are they solving a narrow technical problem? Are they publishing original statistics? Are they acting as canonical explainers for a topic? In many cases, the page succeeds not because of brand strength alone, but because it is the most useful citation target in its category.
This is one of the most practical ways to improve strategy. Instead of chasing links directly, the team can improve the asset that would deserve those links. That is a more durable approach, especially in competitive spaces where editors are selective.
Use Tools, But Do Not Outsource Judgment
Backlink tools are essential, but they are not definitive. Different platforms index links differently, score domains differently, and expose different filters. That means no single number should be treated as a fact. Tool output is an input, not a conclusion.
For technical users, this should feel familiar. Observability data is helpful, but interpretation still matters. A dashboard can show anomalies. It cannot explain intent on its own. The same applies here. A referring domain count may suggest an opportunity, yet only manual review can confirm whether the source is relevant, active, and worth pursuing.
This is also where operational tools can improve efficiency. A centralized workspace such as Home can help teams organize research notes, content opportunities, outreach status, and competitor observations in one place. That matters because backlink research quickly becomes fragmented when data exports, editorial notes, and campaign plans live in separate systems.
Separate Quick Wins from Strategic Wins
Not every link opportunity deserves the same response time. Some are quick wins, such as resource pages, unlinked brand mentions, or industry directories with real editorial standards. Others are strategic wins that require content investment, original research, or product-led assets.
This distinction helps teams allocate effort correctly. If a site needs incremental authority in the short term, quick wins can support momentum. If the goal is category leadership, then strategic assets matter more. Both can be valid, but they should not be mixed into one backlog without prioritization.
A useful way to think about this is to compare backlinks with software tasks. Some tasks fix small bugs. Others improve architecture. Both are valuable, but the planning process changes depending on impact and cost. Backlink research should work the same way.
Common Errors That Weaken Backlink Research
Chasing Metrics Without Context
One of the fastest ways to waste time is to sort a backlink export by authority score and start prospecting from the top. This approach feels efficient, but it often produces low-relevance targets and weak conversion rates in outreach.
Metrics should support qualification, not replace it. A strong-looking domain is only useful if the actual page, audience, and editorial context fit the site’s goals. Without that filter, research volume increases while strategic value drops.
Ignoring Linkability at the Content Level
Sometimes a site struggles with link acquisition not because research is poor, but because the target pages are not naturally linkable. Commercial pages often need supporting assets such as tools, studies, glossaries, integration pages, or technical guides.
Backlink research should therefore feed content strategy. If competitors earn links through assets your site does not yet have, the solution is not more outreach alone. The solution is to create something editors and site owners can justify linking to.
Treating All Competitor Links as Replicable
Some links are earned through founder reputation, news timing, proprietary data, or established partnerships. These links are informative, but not always actionable. Good researchers separate interesting links from obtainable links.
This saves time and improves planning quality. It also prevents discouragement that comes from chasing opportunities that were never realistically open to the site in the first place.
Conclusion
The most effective approach to backlink research is structured, selective, and grounded in context. Relevance matters more than vanity metrics. Link intent matters more than simple presence. Competitor gaps reveal more than competitor totals. Page-level quality beats domain-level assumptions, and a repeatable workflow beats scattered analysis every time.
The next step is simple. Pick three real search competitors, review the pages attracting their best links, and classify those links by intent. From there, decide whether the opportunity is best addressed through outreach, a better content asset, or a stronger internal process. Backlink research becomes far more useful when it stops being a report and starts becoming a system.
Backlink research looks deceptively simple until the data starts contradicting itself. One tool shows a domain as authoritative, another flags it as mediocre, and a third reveals that the “valuable” link is hidden behind JavaScript, canonicals, or a redirect chain that strips most of its practical value.
That is why effective backlink analysis cannot rely on vanity metrics or isolated screenshots from SEO tools. It requires a repeatable model, a validation layer, and a workflow that turns link data into outreach decisions with measurable upside. For teams trying to improve rankings, strengthen link equity, and prioritize scalable opportunities, the difference between casual review and technical research is substantial.
This guide is written for developers, technical marketers, SEO operators, and anyone building efficient link research systems. It covers the six most important backlink research tips in a structured format: how to assess quality, compute relevance, audit anchor text, identify competitor gaps, analyze link velocity, and validate whether links are actually crawlable and indexable. In other words, it covers the most practical ways to apply the top six tips for backlink research without reducing the work to guesswork.
Introduction: Purpose, Scope, and Terminology
Purpose and target outcomes
The purpose of backlink research is not merely to count links. It is to improve the quality of the link profile, identify high-probability acquisition opportunities, and reduce the risk associated with poor anchor patterns, irrelevant placements, or suspicious velocity spikes.
The target outcomes are operational. A solid research process should help a team answer three questions with confidence: which backlinks are worth replicating, which risks need remediation, and which outreach targets offer the highest return relative to effort.
Scope: what this guide will and will not cover
This guide focuses on the analytical and technical side of backlink research. It includes scoring models, semantic relevance methods, temporal analysis, link rendering validation, and workflow design. It does not attempt to cover broad brand PR, full digital PR campaign strategy, or advanced legal review beyond practical compliance considerations.
A baseline understanding of SEO, HTTP behavior, HTML link attributes, and spreadsheet or scripting workflows is assumed. The material is intended to be actionable for practitioners who already work with crawlers, APIs, or structured datasets.
Definitions and core terms
A backlink is any hyperlink from an external page to a target page on a different domain. A referring domain is the root domain from which one or more backlinks originate. These are distinct metrics, because 100 links from one domain rarely equal 100 links from 100 domains.
DA (Domain Authority), DR (Domain Rating), Trust Flow (Trust Flow), and Citation Flow are third-party proxy metrics used to estimate authority or influence. They are useful, but they are not Google metrics and should not be treated as ground truth.
Anchor text is the visible clickable text of the link. Link velocity is the rate at which links are gained or lost over time. Link equity refers to the ranking value that may pass through a link, influenced by authority, relevance, position, crawlability, and page-level conditions.
Overview: The Six Foundational Principles of Backlink Research
The six principles below form the technical backbone of strong backlink analysis. Each one is simple in definition, but meaningful only when translated into measurable signals.
Principle
Technical definition
Why it matters
KPI
Quality over quantity
Prioritize links from authoritative, editorially sound pages over raw backlink volume
Low-value link volume often inflates reports without improving rankings
Average quality score per referring domain
Relevance and topical alignment
Measure how closely the linking page matches the target page’s topic and search intent
Irrelevant links are less likely to transfer meaningful ranking signals
Relevance score, topic-cluster match rate
Link diversity and naturalness
Maintain distribution across domains, IPs, anchor types, and acquisition sources
Homogeneous patterns can look manipulative and underperform
Referring domain diversity, anchor mix ratio
Historical link velocity and trends
Track link acquisition and loss over time using rolling baselines
Sudden spikes may signal campaigns, negative SEO, or unnatural patterns
Monthly net new links, churn rate, z-score anomalies
Anchor-text distribution and risk signals
Audit anchor categories and abrupt shifts in keyword concentration
Over-optimized anchors remain a common risk marker
Exact-match anchor share, anchor entropy
Actionability
Convert analysis into prioritized outreach tasks with effort-impact scoring
Research without execution has no business value
Outreach-ready opportunities per cycle
Tip 1: Assess Link Quality, Metrics, Signals, and Weighting
Authoritative metrics explained
Third-party link metrics are useful only when normalized and interpreted comparatively. DR (Domain Rating) and DA (Domain Authority) estimate domain-level authority from link graph characteristics. Trust Flow (Trust Flow) attempts to measure trust proximity to a curated seed set, while Citation Flow emphasizes raw influence from link quantity.
None of these metrics should be consumed in isolation. A DR 70 domain with poor topical relevance, thin content, and excessive outbound linking may be less valuable than a DR 45 domain with strong editorial alignment and stable organic visibility.
On-page and off-page quality signals
On-page signals include content depth, editorial placement, outbound link patterns, and the semantic prominence of the link. A contextual link within the core body of a well-maintained article is typically stronger than a footer link on a low-context directory page.
Off-page signals expand the evaluation. These include referring domain count, IP diversity, TLD distribution, and whether the domain attracts links from trusted ecosystems such as respected educational, government, or established industry sites. Again, these are directional signals, not guarantees.
Composite scoring model
A reproducible model should harmonize metrics from multiple tools into a single score from 0 to 100. One practical approach is to normalize each metric, weight it, then subtract risk penalties.
A weighted model is better than a single-metric filter because it reduces bias from tool-specific scoring. In practice, many teams store these inputs in a central sheet or database, then re-score domains weekly as fresh data arrives.
Tip 2: Evaluate Relevance, Topical, Semantic, and Intent Alignment
Topical match versus semantic relevance
Authority without relevance is incomplete. A strong link from a high-metric site in an unrelated niche may still have limited ranking impact compared with a modest but tightly aligned publication.
Topical relevance can be evaluated through taxonomy mapping and semantic similarity. Taxonomy mapping classifies the linking page and target page into shared topic clusters. Semantic similarity measures how close the actual text content is using TF-IDF, embeddings, or document vectors.
Using topical clusters and SERP intent
A practical workflow starts with seed keywords, which map into topic clusters. For example, a page about container security may belong to a cloud infrastructure cluster, while a link from a general startup funding article may be semantically distant even if both are “tech.”
Intent matters as much as vocabulary. If the linking page satisfies informational intent and the target page is a transactional landing page, alignment may be weaker. One efficient check is to compare the dominant SERP type for both keyword sets. If both return guides, documentation, or resource pages, fit is usually stronger.
Automation with cosine similarity
For scale, teams often compute vector similarity between page content. The concept is straightforward: extract text, generate vectors, then calculate cosine similarity between the linking page and target page. Higher scores indicate stronger semantic proximity.
A practical pseudo-workflow is:
Extract visible main content from linking pages and target pages.
Clean boilerplate, navigation, and repeated template content.
Convert text to vectors using TF-IDF or embeddings.
Compute cosine similarity.
Blend similarity score with topic-cluster and intent match flags.
A practical interpretation might be:
0.75 and above, strong semantic match.
0.55 to 0.74, acceptable relevance.
Below 0.55, weak or questionable alignment.
For organizations using internal tooling, this is one area where a centralized analytics workspace is useful to store normalized topic labels, similarity scores, and outreach status rather than scattering research across disconnected exports.
Tip 3: Audit Anchor Text and Link Attributes for Risk and Value
Anchor-text profiles and distribution
Anchor text should look natural across the domain profile. A healthy distribution usually includes branded, partial-match, generic, and naked URL anchors, with exact-match commercial phrases forming only a controlled percentage.
If a site’s new links suddenly shift from branded mentions to aggressive exact-match anchors, that is a risk signal. It may indicate overly coordinated outreach, manipulative placements, or a campaign drifting into unsafe territory.
Link attributes and rendering behavior
Not all links pass the same practical value. Attributes such as nofollow, sponsored, and ugc provide signals about how the link should be interpreted. They do not necessarily eliminate all value, but they change how the opportunity should be prioritized.
JavaScript-rendered links add another complication. If the link exists only after client-side rendering and is absent from the server response, validation becomes necessary. Some links seen in browser inspection never meaningfully contribute because crawlers do not process the page as expected, or because the rendered element differs from what indexing systems retain.
Pattern detection and mitigation
Common red flags include repetitive commercial anchors, anchors containing coupon or gambling language unrelated to the site, and identical anchor strings repeated across many unrelated domains.
A simple regex pattern for suspicious anchors might target terms such as casino, payday, crypto bonus, bet now, free download, or exact commercial phrases repeated at scale. In a spreadsheet, anchor categorization can be handled with nested pattern rules, then aggregated by count and percentage. In SQL-like logic, the audit usually groups by anchor category and compares current-period share against historical share.
Anchor strategy should be diversified deliberately. Branded anchors often form the base, partial matches support topical relevance, and generic anchors preserve naturalness. The goal is not randomness, but a distribution that resembles real citation behavior.
Tip 4: Map Link Acquisition Pathways and Competitor Gap Analysis
Acquisition models and inventory normalization
Competitor research is most valuable when it explains how links were earned, not just where they came from. Backlinks generally fall into recognizable acquisition pathways such as editorial mentions, resource pages, HARO-style contributions, broken-link replacements, and partnership references.
The first technical step is to export competitor backlink inventories, normalize URLs to canonical domains, deduplicate referring domains, and classify linking pages by pattern. This may involve path analysis, content heuristics, or page-title clustering.
Gap detection and opportunity scoring
A backlink gap is not simply “domains competitors have and you do not.” It is the intersection of quality, relevance, and attainability. A domain linking to three competitors in the same topic cluster is often a stronger prospect than a larger site with no obvious editorial pathway.
This creates a ranked queue rather than a flat export. That matters because outreach teams rarely fail from lack of prospects. They fail from poor prioritization.
Opportunity type
Typical effort
Typical impact
Best use case
Editorial mention
Medium
High
Unique data, expert commentary
Resource page
Low to medium
Medium
Tools, guides, documentation
Broken link replacement
Medium
Medium to high
Comparable replacement content
HARO / expert quote
Medium
High
Fast expert responses
Partnership / integration
High
High
SaaS, platforms, ecosystems
Tip 5: Temporal Analysis, Link Velocity, Recency, and Historical Context
Link acquisition rate, churn, and decay
Backlink profiles are time series, not static snapshots. A domain that gained 200 links last month may be healthy, inflated by a campaign, or under risk depending on historical baseline, source distribution, and retention rate.
Three core temporal metrics matter: acquisition rate, churn rate, and net growth. Acquisition rate measures new links per period. Churn rate measures lost links. Net growth is the difference between the two. Decay modeling helps estimate how quickly earned links disappear, which is especially important for news mentions and syndicated content.
Detecting spikes and contextualizing history
A practical way to detect abnormal activity is to compute a rolling mean and standard deviation, then calculate a z-score for the current month’s new-link volume. If the z-score exceeds a threshold such as 2.5 or 3.0, further review is warranted.
Interpretation depends on context. A product launch, original research publication, or seasonal campaign may explain a spike. That is why historical archives and tool snapshots are useful. If a linking page previously contained the link but later removed or changed it, the volatility may be normal rather than suspicious.
Controlled velocity strategy
The goal is not to maintain perfectly linear growth. That would be artificial. The goal is to avoid patterns that are both abrupt and low-quality. Healthy campaigns usually produce link gains that correlate with content launches, PR activity, partnerships, or product news, followed by a taper rather than a cliff.
For most teams, controlled velocity means setting campaign expectations per quarter, aligning content releases with outreach windows, and monitoring whether new links come from diverse domains and anchor types.
Tip 6: Technical Validation and Indexation, Crawlability and Real Impact
Verifying link render and crawlability
A link cannot provide consistent value if it is not actually visible to crawlers in a usable form. Technical validation starts by checking whether the link exists in the raw HTML response, appears only after rendering, or is blocked behind scripts, widgets, or iframes.
Command-line checks are useful here. A simple curl request can confirm whether the anchor and URL appear in the server-rendered HTML. For JavaScript-heavy pages, a headless browser can verify rendered DOM output. This distinction is critical for modern web stacks. See the guide on link rendering validation for quick tooling references.
Indexation, redirects, and canonicals
Even when the link exists, the source page may not be indexed, or the target page may resolve through redirects, canonical mismatches, or parameterized duplicates. Each of these conditions can dilute or alter link value.
The validation sequence is straightforward: confirm the source page is indexable, confirm the source page itself appears indexed, inspect the target status code, inspect any redirect chain, and confirm the final canonical points to the intended destination. If the target canonical points elsewhere, the expected equity may consolidate to a different URL.
Measuring downstream impact
The only defensible proof of backlink value is downstream performance. That includes organic ranking movement, referral sessions, assisted conversions, and changes in impression and click trends for pages receiving new links.
This is where many backlink programs fail. They report acquired links but never connect them to business outcome. A proper validation layer links acquisition data to analytics, Search Console, and ranking datasets so the team can distinguish symbolic wins from effective wins.
Tools, Scripts, and Data Sources
Commercial tools such as Ahrefs, Majestic, Moz, and Semrush remain the fastest way to source link data, authority metrics, and historical deltas. Each has slightly different strengths, so cross-tool normalization is usually better than single-platform dependence.
For technical teams, open-source tooling expands capability. Screaming Frog is useful for validating on-page links and canonicals. Python libraries such as requests, BeautifulSoup, and sentence-transformers support fetching, parsing, and semantic scoring. A clean dataset should minimally store source URL, target URL, referring domain, anchor, rel attributes, first seen date, last seen date, status code, canonical target, and normalized quality score.
The important architectural decision is not which tool looks best in screenshots. It is whether the data can be extracted, normalized, re-scored, and operationalized consistently.
Operationalizing Research: From Data to Outreach Workflows
Backlink research becomes valuable only when it feeds a disciplined execution pipeline. The best setup is an opportunity queue with status fields, SLA deadlines, acquisition model tags, and owner assignments. Domains with high quality and high relevance scores should be routed first, while high-effort, low-certainty prospects are deferred.
Outreach also benefits from taxonomy. A resource-page ask should not use the same template as a broken-link pitch or a partnership request. Teams that centralize this in a shared system, whether a CRM or a structured analytics workspace, usually move faster because the research context remains attached to each prospect.
Core KPIs should include new referring domains, average quality score of acquired links, response rate, placement rate, referral traffic, and ranking improvement on target URLs. Measuring only link count encourages bad behavior.
Risk Management and Compliance
Risk control in link building is mostly about pattern avoidance. Paid placements without disclosure, coordinated exact-match anchors, irrelevant guest posting at scale, and low-quality network behavior all increase long-term downside.
Sponsored relationships should be labeled appropriately, and outreach teams should maintain pre-send validation rules. These rules typically screen out suspect domains, check anchor overuse, and cap campaign-level concentration from any single acquisition source. A strong compliance posture is not restrictive. It protects the asset being built.
If a site experiences a manual action or suspicious link spike, the response should be procedural. Freeze risky outreach, isolate source patterns, validate unnatural anchors, document recent campaigns, and prepare remediation steps. Chaos usually makes the problem worse.
Case Study: End-to-End Backlink Research to Campaign Execution
A B2B SaaS site in the infrastructure monitoring space exported 18,400 backlinks and 1,920 referring domains. After deduplication and scoring, only 312 domains met the threshold of quality score above 70 and relevance score above 0.68.
Competitor gap analysis across three competing domains found 146 high-overlap prospects. These were clustered into editorial mentions, tooling directories, DevOps resource pages, and integration partner pages. Opportunity scoring reduced that to a priority set of 58 domains.
Anchor auditing revealed a healthy branded profile overall, but one recent campaign had pushed exact-match anchors to 19 percent of new monthly links, well above the site’s normal 7 to 9 percent range. That campaign was adjusted immediately.
Temporal analysis showed an acquisition spike of 63 new referring domains in one month, with a z-score above 3.1. Historical review confirmed the cause was a benchmark report launch, supported by diverse editorial links, so the spike was deemed natural.
After technical validation, 11 of the 58 priority prospects were downgraded because the linking pages were non-indexed, canonicalized elsewhere, or passed through diluted redirect chains. Outreach went live for the remaining 47.
Within 10 weeks, the campaign secured 14 new referring domains, generated a 29 percent increase in referral sessions to the target resource hub, and improved average ranking position across six target keywords from 14.2 to 9.8. The largest gain came not from the highest-DR domain, but from a mid-authority niche publication with excellent semantic relevance and strong editorial placement. That is the clearest lesson in advanced backlink research, context often beats raw authority.
Conclusion and Actionable Checklist
The best backlink programs are built on disciplined evaluation, not optimism. Assess link quality with a weighted model, measure topical and intent relevance, audit anchors for risk, map competitor pathways, analyze velocity over time, and validate that links are technically real, indexable, and capable of producing impact.
To act on these six backlink research tips, start with one target page, score existing and competitor links, build a ranked opportunity queue, and connect outreach activity to outcome metrics. Once that loop is stable, scale it. Precision first, volume second.
Choosing the right SEO software can save months of wasted effort. Choosing the wrong stack can do the opposite, flooding you with dashboards, noisy metrics, and expensive subscriptions that never turn into rankings, leads, or sales.
The best SEO tools are not always the most expensive ones. They are the tools that match your goals, your team size, and your workflow, a solo consultant usually needs a lean setup with strong keyword research and rank tracking, a local business may get most of its value from Google Search Console, a local listing platform, and a simple on-page plugin, and an agency often needs collaboration, reporting, crawling, and backlink intelligence at scale.
This guide covers both free and paid SEO tools, with ranked recommendations, side-by-side comparisons, practical workflows, and advice on how to build a stack that actually works. If you want a quick shortcut, start with your primary need: keyword research, technical SEO, backlinks, content optimization, local SEO, or reporting. Then choose one core tool, one validation source from Google, and only add specialized tools when you hit a real limitation.
Why Choosing the Right SEO Tools Matters
SEO tools now cover far more than keyword ideas. A modern toolkit may include keyword research, rank tracking, backlink analysis, technical crawling, on-page optimization, content planning, page speed testing, local listing management, and reporting. That breadth is useful, but it also makes tool selection harder because many platforms overlap.
The good news is that most people do not need everything at once. Small businesses usually need visibility into search queries, page performance, and local presence. Freelancers often need fast audits, competitor research, and lightweight reporting. In-house teams may need deeper integrations, API access, and clearer collaboration features. The best setup depends less on industry hype and more on what work you need to do every week.
This article is structured to help you move from confusion to a practical decision. First, you will learn how to choose SEO tools based on goals and budget. Then you will see the top tools by category, followed by ranked short reviews, a comparison table, and step-by-step workflows for using multiple tools together.
How to Choose the Right SEO Tools for Your Needs
Start with the outcome you care about most. If your goal is traffic growth, prioritize keyword research, content planning, and rank tracking. If your goal is technical stability, put more weight on crawling, page speed testing, and Search Console diagnostics. If you run a local business, local listings, reviews, and map visibility matter more than a huge backlink database.
Match tasks to features. Keyword research tools help you find topics, estimate search demand, and assess competition. Site audit tools uncover crawl errors, redirects, duplicate content, missing metadata, and indexation issues. Backlink tools help with link prospecting, competitor analysis, and toxicity review. Content optimization platforms help turn a target keyword into a stronger brief and more complete page.
Budget matters, but so does team fit. A free stack can go surprisingly far when combined well. Entry-level plans are often enough for a freelancer or early-stage business. Enterprise plans only make sense when you need larger data allowances, more seats, API access, and formal reporting.
Before committing, test three things during a free trial: data quality, usability, and exportability. You should be able to answer simple questions quickly, such as which pages lost traffic, which keywords a competitor ranks for, what technical issues matter first, and how easily you can export data into a spreadsheet or dashboard.
Top SEO Tools by Category
If you want a quick map of the market, it helps to think in categories. Ahrefs, SEMrush, and Moz Pro are broad suites. Screaming Frog is a technical crawler. Google Search Console and Google Analytics are foundational free data sources. Surfer SEO and Clearscope focus on content optimization. AccuRanker and SERPWatcher are rank trackers. GTmetrix, PageSpeed Insights, and WebPageTest handle performance testing. Yoast and Rank Math support WordPress on-page SEO.
For keyword research, the strongest choices are usually Ahrefs, SEMrush, and Google’s own search data via Search Console. For technical audits, Screaming Frog remains one of the most trusted options because it shows what a crawler sees, not just what a marketing dashboard summarizes.
For backlinks, Ahrefs and Majestic are widely respected. For local SEO, Moz Local and Google Business Profile-related workflows are often enough for many small businesses.
What matters most is not finding one perfect tool. It is building a complementary stack. A strong stack often includes one discovery tool, one technical tool, and one source of truth from Google.
1. Ahrefs
Ahrefs is one of the most respected SEO platforms for backlink analysis, keyword research, competitor discovery, and content gap analysis. It is especially useful when you want to understand why a competing page ranks, where its links come from, and which topics are driving growth in a niche.
Key features include Site Explorer for backlink and organic traffic analysis, Keywords Explorer for keyword ideas, difficulty, and SERP review, a Site Audit tool for technical SEO monitoring, and Content Gap and competitor comparison tools. Its strengths are strong backlink intelligence, excellent competitor research workflows, and useful keyword and content gap features. Pricing can be steep for small teams, some users find usage limits restrictive, and it is not the cheapest option for occasional use. Ahrefs typically fits best when SEO is a consistent growth channel rather than an occasional task.
SEMrush is a broad digital marketing suite with strong SEO functionality, especially in keyword research, site audits, rank tracking, competitor analysis, and advertising research. It is often the best fit for teams that want one platform to cover both organic and paid search visibility.
Its advantage is breadth, enabling keyword research, site audits, position monitoring, competitor examination, and report generation without switching systems constantly. That makes it attractive for agencies and marketing managers who need all-in-one convenience more than specialist depth in one narrow area. SEMrush offers a wide feature set beyond pure SEO, strong reporting and project organization, and a good fit for agencies and multi-channel teams. The interface can feel busy at first, cost rises quickly with add-ons and limits, and heavy overlap of features can overwhelm new users.
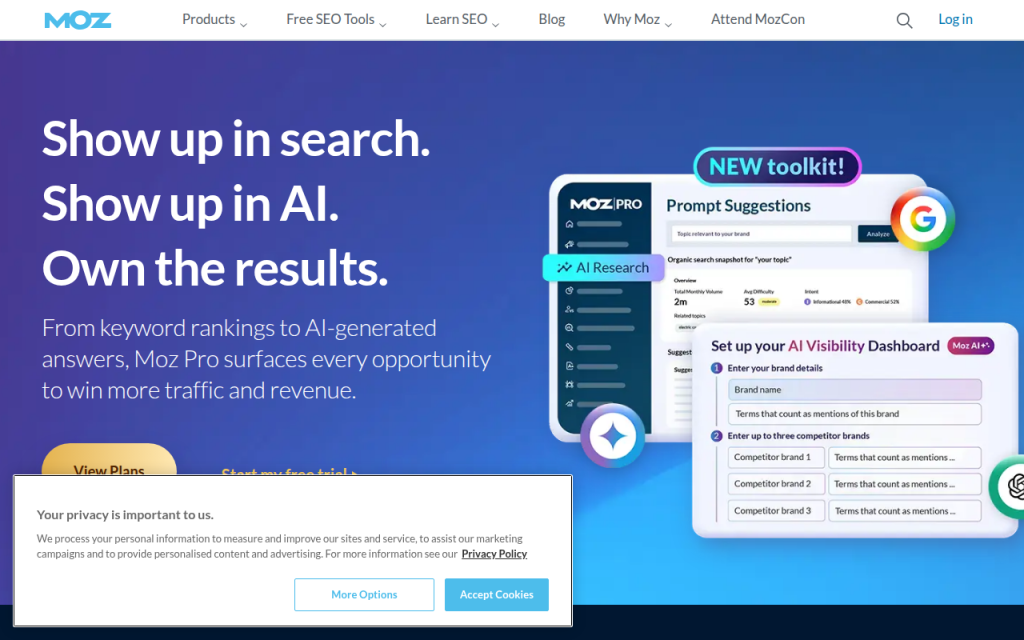
Moz Pro remains a solid choice for users who want a more approachable SEO suite. It is often recommended for beginners, small businesses, and teams that want straightforward workflows without too much clutter.
Moz’s strengths include keyword tracking, site audits, and recognizable authority metrics. It may not feel as expansive as Ahrefs or SEMrush in every area, but that simplicity can be an advantage when adoption matters more than power-user depth. Moz is beginner-friendly, backed by a good educational ecosystem, and useful for small teams and local visibility work. Some datasets feel less expansive than top-tier rivals, power users may outgrow it, and advanced workflows are not its strongest angle.
Screaming Frog is the technical SEO specialist on this list. It crawls websites the way a search engine bot might, revealing status codes, redirect chains, duplicate tags, missing metadata, canonicals, orphan pages, and indexation problems.
This is the tool to use when rankings are blocked by technical issues rather than weak content. It gives raw, actionable data and is beloved by consultants, developers, and technical SEOs. Features include deep site crawling, custom extraction, technical filtering, and integrations with analytics and Search Console for richer audits. Screaming Frog is one of the best technical crawlers available, excellent for audits and migrations, and useful for large sites and detailed QA work. It has a learning curve for non-technical users, a desktop-software feel that may not suit everyone, and it is less useful for keyword discovery than all-in-one suites. There is a free version with crawl limits and a paid version that unlocks larger-scale and advanced functionality.
Google Search Console is not optional. It shows how your site actually performs in Google Search, including queries, clicks, impressions, average position, indexing status, and coverage issues.
For small businesses and experienced SEOs alike, this is your validation layer. Third-party tools estimate, Search Console reports what Google is willing to tell you directly. It is essential for identifying pages that rank without getting clicks, queries with growing impressions, and indexing problems that can quietly suppress performance. It is free and authoritative, essential for indexing and performance diagnostics, and valuable for validating third-party data. Limitations include less historical granularity compared with some paid tools and an interface built more for function than polish.
Google Analytics complements Search Console by showing what happens after the click, helping you understand traffic sources, engagement, conversions, landing-page performance, and user behavior.
Analytics is critical because ranking alone is not the goal. If a page attracts traffic but drives no leads, purchases, or signups, it may need a different keyword target or a stronger page experience. Used with Search Console, Analytics helps connect visibility to business outcomes. Setup can be confusing for beginners, and event tracking requires care, but it remains free and powerful when implemented well.
Majestic is a specialized link intelligence platform focusing on backlink profiles, trust metrics, citation metrics, and link neighborhood analysis. It is not trying to be an all-in-one SEO suite, and that focus is why many link builders still value it.
If your work revolves around authority analysis, competitor link comparisons, and prospect qualification, Majestic provides a link-centric lens rather than an everything dashboard. Its strengths are backlink-focused workflows and proprietary trust metrics. It can feel narrow compared with broader suites, the interface may seem dated to some users, and it is usually justified for teams doing regular backlink work.
Surfer SEO focuses on content optimization, SERP-based content structure, on-page recommendations, and workflow support for writers and editors. It helps teams build pages that better match search intent and topical coverage by suggesting subtopics and relevant terms based on ranking pages.
Its real value is speed and structured briefs. Surfer is excellent for content briefs and optimization, aligning pages to SERP patterns, and supporting writers and editors. It can encourage formulaic writing if used too rigidly, and it is best combined with editorial judgment rather than used as an optimization score alone. You will need a separate tool for technical and backlink work.
Clearscope is a leading content optimization platform, praised for a clean editorial workflow and strong relevance guidance. It helps teams produce content that is more complete, aligned with search intent, and easier to brief across stakeholders.
Clearscope feels polished for larger content teams and publishers that want consistency across many writers. It is premium priced and more narrowly focused than all-in-one suites, making it better for mature content workflows than for early experimentation.
AccuRanker is a specialist rank tracking tool designed for accurate, frequent keyword position monitoring. If daily ranking movements matter, especially across many terms, locations, or devices, a dedicated tracker like AccuRanker is often more reliable and flexible than bundled trackers inside general SEO suites.
It is best for agencies and larger teams where reporting precision matters. AccuRanker offers strong rank tracking accuracy, frequent reporting options, and useful filters for segmentation. It is a specialized subscription that adds another cost to the stack and is overkill for very small sites. Pricing typically scales with the number of tracked keywords.
GTmetrix is a practical tool for testing page speed, loading behavior, and performance bottlenecks. It translates site speed into visible issues such as oversized assets, script delays, and render-blocking resources.
For many businesses, GTmetrix is easier to interpret than raw developer diagnostics alone. It is especially useful during redesigns, template changes, and troubleshooting drops in page experience.
WebPageTest is a deeper performance testing platform favored by developers and technical specialists. It allows more detailed test conditions and waterfall analysis than many beginner tools.
If GTmetrix gives you the headline, WebPageTest gives you the engineering detail. It is ideal when SEO and performance work overlap heavily.
Yoast SEO is a well-known WordPress plugin that handles titles, meta descriptions, XML sitemaps, schema basics, and on-page optimization guidance. It helps site owners manage important SEO settings without editing code.
For small business sites on WordPress, Yoast is often enough to establish a strong on-page foundation, especially when combined with Search Console and a basic keyword workflow.
Rank Math is another popular WordPress SEO plugin with a broad feature set and a modern interface. Many users like it because it packs schema options, on-page checks, redirects, and integrations into a single plugin.
It appeals to site owners who want more built-in functionality from their WordPress SEO plugin without adding several separate extensions.
Side-by-Side Comparison: Features, Pricing, and Best Use Cases
Here is a practical comparison of leading options.
Tool
Best For
Strength Area
Free Option
Typical Pricing Level
Best User
Ahrefs
Competitor SEO research
Backlinks, keywords
Limited tools
Premium
Agencies, in-house teams
SEMrush
All-in-one marketing SEO
Keywords, audits, reporting
Limited trials/tools
Premium
Agencies, multi-channel teams
Moz Pro
Simpler SEO suite
Usability, tracking
Limited free tools
Mid to premium
Small teams, beginners
Screaming Frog
Technical SEO
Crawling, audits
Yes, limited crawl
Low to mid
Consultants, developers
Google Search Console
Search performance
Queries, indexing
Yes
Free
Everyone
Google Analytics
User behavior
Engagement, conversion
Yes
Free
Everyone
Majestic
Link analysis
Trust and backlink data
Limited
Mid
Link-focused SEOs
Surfer SEO
On-page content
Optimization, briefs
No meaningful free tier
Mid
Content teams
Clearscope
Editorial SEO
Content relevance
No
Premium
Publishers, large teams
AccuRanker
Rank tracking
Position accuracy
No
Mid to premium
Agencies, reporting-heavy teams
GTmetrix
Speed testing
Performance diagnostics
Yes
Free to mid
Site owners, developers
Yoast SEO
WordPress on-page SEO
Metadata, sitemaps
Yes
Low
WordPress site owners
Rank Math
WordPress SEO plugin
On-page, schema, redirects
Yes
Low
WordPress site owners
A smart stack avoids too much overlap. For many teams, Ahrefs plus Screaming Frog plus Search Console is a strong research and technical combination. SEMrush plus GA4 plus a WordPress plugin suits many small marketing teams. Search Console plus Analytics plus Screaming Frog free plus Yoast or Rank Math is an excellent low-cost starting point.
Practical Workflows: How to Use Tools Together
For a new site launch, start in Search Console and your CMS. Set up verification, submit the sitemap, and confirm indexing access. Then run Screaming Frog to check titles, canonicals, redirects, and noindex issues. Use Ahrefs or SEMrush to build a keyword map by assigning one primary intent to each core page. Finally, use Yoast or Rank Math to implement on-page basics and monitor impressions in Search Console during the first few weeks.
For a content workflow, begin with topic discovery in Ahrefs or SEMrush and pick a keyword cluster based on realistic competition and business relevance. Then use Surfer SEO or Clearscope to create a brief with subtopics, headings, and coverage guidance. After publishing, track early impressions and query variations in Search Console, then refine the page based on actual search behavior rather than only optimization scores.
For a backlink workflow, use Ahrefs or Majestic to review competitor links and identify realistic prospects. Evaluate link quality by relevance, authority patterns, and traffic signals rather than one metric alone. After outreach and link acquisition, monitor the impact on target pages in Search Console and rankings in AccuRanker or your suite’s tracker.
For a technical SEO workflow, crawl the site with Screaming Frog, sort issues by impact, then hand off priority fixes to development. Re-crawl after deployment to verify changes. Use Search Console to confirm that indexing and coverage trends improve over time. Technical SEO is not just about finding errors, it is about verifying that search engines respond positively after the fix.
Free and Low-Cost Alternatives
If budget is tight, start with Google Search Console, Google Analytics, PageSpeed Insights, Screaming Frog free, and a WordPress plugin like Yoast or Rank Math. That stack will not replace a premium suite for competitor intelligence, but it covers the essentials surprisingly well.
Low-cost tools become attractive when you need one extra capability without buying a giant platform. A smaller rank tracker, a limited content optimization subscription, or a standalone crawler license can often produce better ROI than paying for a large suite you barely use.
A simple way to extend free tools is to export data into spreadsheets. Search Console query exports can reveal pages with high impressions but low click-through rates, which often surfaces quick wins faster than broad keyword databases. CSV exports from crawlers can also be filtered to uncover missing metadata, redirect chains, and thin category pages.
Advanced Topics and Emerging Trends in SEO Tools
AI is changing how SEO tools assist with content briefs, topical clustering, internal linking suggestions, and intent modeling. The best use of AI in SEO is acceleration, not blind content generation. AI helps teams analyze SERPs faster, organize information, and identify missing angles, while human judgment protects quality and originality.
Privacy changes and reduced data transparency also affect tool choice. Third-party estimates remain useful, but they are still estimates. That makes first-party sources like Search Console, Analytics, CRM data, and server logs more important. Future-proof SEO stacks will combine external intelligence with internal evidence.
Another growing area is SERP feature tracking. Ranking number three means less if the page is pushed down by ads, video packs, local packs, and AI-generated search features. Modern SEO tools need to help you see not just rank, but visibility context.
Common Mistakes When Choosing or Using SEO Tools
One of the biggest mistakes is relying too heavily on a single metric such as Domain Authority, Domain Rating, or Trust Flow. These numbers are helpful shorthand, not business truth. A lower-metric site can still outrank stronger domains with better relevance, structure, and intent match.
Another common mistake is buying overlapping subscriptions too early. Many teams pay for two large suites when one suite plus Search Console would cover most tasks. Complexity rises, adoption drops, and reporting becomes inconsistent.
Misconfiguration is another silent failure point. If Analytics events are wrong, Search Console is not verified properly, or crawlers are blocked, your tool stack will produce false confidence. Always validate setup before trusting output.
Tool Evaluation Checklist and Quick Decision Guide
Use this simple framework when comparing three candidate tools: core feature fit, data trust, ease of use, integrations, export options, support, and total monthly cost. Score each category from 1 to 5. The highest score should not automatically win, but patterns become obvious quickly.
For a small business, prioritize ease of use, essential audits, Google integration, and affordable pricing. For a freelancer, prioritize research depth, exportability, and technical troubleshooting. For an agency, prioritize collaboration, reporting, crawl capacity, and keyword-tracking scale. For an enterprise team, API access, governance, and integration flexibility become much more important.
Conclusion and Next Steps
The best SEO software is rarely one tool. It is usually a stack built around a clear job. For many users, a practical starting point is Google Search Console plus Google Analytics, one core SEO platform, and one technical or content specialist tool as needed. That combination keeps costs controlled while giving you enough data to make better decisions.
If you are evaluating options now, run a two-week trial with one real objective. Audit your site, research one competitor, optimize one page, and track one set of target keywords. If the tool helps you make faster, better decisions in that short window, it has probably earned a place in your stack.
Ranking in search is rarely about luck. Most pages that win organic traffic do so because they send clear, useful, and technically sound signals to search engines and to people. If your content is good but invisible, or your pages get impressions but few clicks, the problem is often on the page itself.
That is why on-page SEO matters so much. It is the part of search optimization you can directly control, from the title tag, headings, and content depth, to internal links, structured data, and page experience. When these elements work together, your pages become easier to understand, easier to rank, and easier to convert.
This guide shows you how to optimize pages for search in a practical, prioritized way. You will learn what matters most, how to implement it, how to measure results, and how to build a repeatable workflow that works whether you run a small business site, a blog, a SaaS product, or a large e-commerce catalog.
What On-Page SEO Is and Why It Matters
Definition: On-page vs. off-page vs. technical SEO
On-page SEO is the practice of optimizing the elements on a webpage so search engines can understand it and users can get value from it quickly. That includes your title tag, meta description, URL, headings, copy, images, internal links, and structured data.
A simple metaphor helps. Think of your webpage as a product shelf in a store. Your content is the product. Your title tag is the shelf label. Your headings are the section dividers. Your internal links are the signs pointing shoppers to related aisles. Your technical setup is the lighting and store layout that makes the shelf easy to find and navigate. If any of those pieces are weak, the product may still be great, but fewer people will discover it.
Off-page SEO is different. It covers signals that happen away from your site, such as backlinks, brand mentions, and reputation. Technical SEO sits beneath both, focusing on crawlability, indexation, site architecture, page speed, and other infrastructure. On-page SEO lives at the intersection of content quality and discoverability, which is why it has such a direct impact on performance.
How search engines use on-page signals
Search engines read on-page elements to understand topic, intent, quality, and context. Your title tag and headings help define the page’s primary subject. The body copy explains depth and relevance. Internal links show how the page connects to the rest of the site. Image alt text and schema add more meaning.
Google does not rank pages because they contain a certain number of keywords. It ranks pages because they appear to satisfy a searcher’s need better than alternatives. On-page signals help it make that judgment.
Industry studies have consistently shown that optimized titles and compelling meta descriptions can improve click-through rate, and higher-quality content aligned with search intent tends to correlate with stronger rankings. Google’s own documentation also emphasizes helpful content, page experience, and clear structure, all of which are central to strong on-page optimization.
Business impact: traffic, conversions, and UX
Good on-page SEO does more than improve rankings. It improves click-through rate from search results, engagement on the page, and conversion performance once users arrive.
A better title tag can increase clicks without any ranking change. A clearer introduction can reduce bounces. Stronger internal links can move visitors from an article to a service page or product page. Faster image loading can improve both mobile usability and revenue.
This is why on-page SEO is not just an SEO task. It is a content, UX, and conversion task too.
Core On-Page Ranking Factors (What to Optimize)
Title tags: best practices and examples
The title tag is still one of the most important on-page elements because it helps search engines understand page topic and heavily influences SERP clicks. A strong title should be specific, relevant, and aligned with search intent.
A good title usually places the primary topic near the beginning, stays readable, and gives a clear reason to click. For example, “On-Page SEO Checklist for Beginners | 15 Quick Fixes” is stronger than “SEO Tips” because it communicates topic, audience, and benefit.
Common mistakes include stuffing too many keywords, writing titles that are too vague, and duplicating the same title across multiple pages. In terms of prioritization, title optimization is high impact and low effort, which makes it one of the fastest wins.
Here is a simple example:
<title>Complete On-Page SEO Guide: How to Optimize Your Pages for Search</title>
Meta descriptions and SERP CTR optimization
Meta descriptions are not direct ranking factors in the classic sense, but they strongly influence whether users click your result. Think of them as your ad copy in organic search.
The best meta descriptions match the query’s intent and promise a useful outcome. For an informational query, clarity works better than hype. For a transactional page, benefits and urgency matter more.
A solid example would be: Learn how to improve title tags, headings, content, internal links, schema, and page speed with this complete on-page SEO guide.
Avoid generic descriptions, missing descriptions, or descriptions that simply repeat the title. Optimizing them is usually medium impact and low effort, especially for pages already receiving impressions.
URL structure and canonicalization
URLs should be short, descriptive, and readable. They help reinforce page topic and improve usability. A page like /on-page-seo-guide/ is easier to understand than /blog/post?id=4839.
Canonicalization matters when similar or duplicate pages exist. A canonical tag tells search engines which version is preferred. This is especially important for e-commerce filters, tracking parameters, and republished content.
Common errors include pointing canonicals to the wrong page, canonicalizing paginated pages incorrectly, or leaving duplicate pages fully indexable. Canonicals are high impact where duplication exists, but lower priority on small, simple sites.
Heading tags (H1 to H3): structure and keyword usage
Headings help users scan and help search engines understand content hierarchy. Your H1 should state the page’s main topic clearly. H2s and H3s should break the subject into logical sections.
Good heading structure feels natural. It guides the reader through the page instead of acting like a list of keywords. For instance, “How Search Engines Use On-Page Signals” is better than “On Page SEO Search Engine Ranking Keyword Guide”.
The biggest mistake is using headings only for styling instead of structure. Another is having no H1 or several competing H1s. Heading optimization is high impact and low effort, especially for pages with weak structure.
Content quality, depth, and topical relevance
Content remains the center of on-page SEO. Search engines want to rank content that is useful, reliable, and aligned with the user’s intent. That does not always mean longer content. It means content that answers the query well.
An informational query often benefits from depth, examples, and context. A transactional query may need concise copy, trust signals, comparison details, and clear calls to action. The right content is the one that helps the user complete their task.
Thin content, filler text, and shallow rewrites are common failures. Improving core content is usually very high impact but medium to high effort, which is why it deserves prioritization on pages with strong business value.
Keyword usage and placement (intent-driven optimization)
Keyword optimization is about relevance, not repetition. Your primary topic should appear naturally in the title, H1, opening paragraph, key subheadings, and body copy where it makes sense. But intent matters more than exact phrasing.
For a query around on-page SEO, related concepts such as title tags, internal links, search intent, and schema help strengthen the page. Search engines increasingly evaluate meaning and coverage, not just string matching.
The most common error is forcing awkward wording. Another is targeting one keyword while writing a page that serves a different intent. This is high impact and low to medium effort when mapped properly.
LSI, related keywords, and semantic optimization
“LSI keywords” is an outdated phrase, but the underlying idea still matters. Search engines look for semantically related terms and entities that help confirm topic depth.
If you are writing about on-page SEO, you would naturally discuss CTR, meta tags, Core Web Vitals, schema markup, indexation, and content relevance. Those related terms signal breadth and expertise.
A simple way to find these terms is to review People Also Ask results, related searches, competitor headings, and Search Console query data. Semantic optimization is generally medium impact and low effort once you understand the topic.
Internal linking and anchor text strategy
Internal links help search engines discover pages, understand site structure, and distribute authority across your site. They also help users move from awareness to action.
A strong internal link strategy connects related pages with descriptive anchor text. For example, from a blog post on page speed, you might link to a service page about technical SEO or an article on image optimization.
Avoid vague anchors like “click here” and avoid over-optimizing every anchor with the exact same phrase. Internal linking is one of the most underused high-impact, low-effort tactics in SEO.
Images: file names, alt text, compression, and captions
Images support comprehension, improve engagement, and can drive traffic from image search. But they can also slow a page down if handled poorly.
Descriptive file names and useful alt text help search engines understand image content. Compression and proper dimensions improve load time. Captions can increase user attention when relevant.
A helpful alt text example is “On-page SEO checklist shown in a website audit dashboard”. A poor one is “image123” or keyword-stuffed text. Image optimization is medium impact and low effort, with strong UX upside.
Schema and structured data: types and quick wins
Structured data helps search engines understand your content more precisely and can unlock rich results in some cases. Article, FAQ, Product, HowTo, and LocalBusiness schema are among the most useful types.
For example, a local business page can benefit from LocalBusiness schema, while a product page can use Product schema with price, availability, and review information. Structured data does not guarantee a richer search result, but it improves eligibility.
Quick wins often include adding Article schema to editorial content, Product schema to e-commerce pages, and FAQ schema where it genuinely reflects page content. Impact is medium, but implementation effort can range from low to medium depending on the CMS.
Mobile friendliness and Core Web Vitals (page speed)
Most searches now happen on mobile devices, so on-page performance is inseparable from mobile usability. Slow pages, shifting layouts, and poor responsiveness hurt engagement and can limit search visibility.
Core Web Vitals focus on loading, interactivity, and visual stability. Heavy images, bloated scripts, poor font handling, and intrusive elements often create problems at the page level.
This area can range from high impact and medium effort to high effort, depending on the site. Start with image optimization, lazy loading, and removing avoidable page bloat before moving into deeper development tasks.
Step-by-Step On-Page SEO Optimization Workflow
A good workflow turns SEO from a one-time cleanup into a repeatable system. The most effective process starts with intent and ends with measurement.
Step 1: Keyword intent mapping and prioritization
Start by choosing pages and queries that matter. Look at Search Console impressions, current ranking positions, conversion value, and business importance. Pages sitting in positions 5 through 20 are often the best candidates because they already show search potential.
Map each page to one primary intent: informational, commercial, transactional, or navigational. If the page’s current format does not match the query’s intent, fix that first.
Estimated time is 30 to 60 minutes per priority page. Ownership usually sits with SEO or content strategy.
Step 2: Content brief creation
A content brief prevents random optimization. It aligns topic, intent, structure, sources, and conversion goals before editing starts.
A practical brief should include the target query, search intent, working title, suggested H2s and H3s, related questions, internal link targets, source references, and desired CTA. For content teams, this is where consistency begins.
Here is a simple template:
Field
Example
Primary Topic
On-page SEO
Intent
Informational
Audience
Small business owners, marketers
Suggested Title
Complete On-Page SEO Guide: How to Optimize Your Pages for Search
Primary H2s
What It Is, Ranking Factors, Workflow, Measurement
Related Terms
title tags, internal links, schema, search intent
Internal Links
Technical SEO guide, keyword research guide
CTA
Download on-page checklist
Sources
Search Console, competitor analysis, Google documentation
Estimated time is 20 to 45 minutes. Ownership belongs to SEO and content.
Step 3: On-page implementation checklist
This is where the edits happen. Update the title tag, refine the meta description, improve the H1 and heading hierarchy, strengthen the introduction, add related terms naturally, improve internal links, compress images, and add relevant schema.
For small teams, standardizing this step with a checklist saves time and reduces missed details. If your site uses templates, some elements like schema or canonical tags can be rolled out across many pages at once.
Estimated time is 45 minutes to 3 hours per page, depending on depth. Ownership is shared across content, SEO, and sometimes design.
Step 4: Technical validation
Before publishing, verify that the page is indexable, mobile friendly, fast enough, and correctly canonicalized. Also confirm that robots directives, hreflang tags, and structured data are correct where relevant.
Developers can use a short command list during review: check canonical, inspect robots meta, validate structured data, test mobile rendering, and confirm no important resources are blocked. Search Console URL Inspection is especially useful here.
Estimated time is 15 to 45 minutes. Ownership is usually developer or technical SEO.
Step 5: Publish, monitor, and iterate
After publication, track impressions, clicks, CTR, average position, organic sessions, and conversions over time. Review early movement after two to four weeks, but expect more meaningful patterns after four to twelve weeks depending on crawl frequency and competition.
On-page SEO is rarely a one-and-done task. The best teams treat it like product optimization. They ship, measure, learn, and improve.
Practical Content Optimization Techniques
Structuring content for scanners
Most visitors do not read a page line by line. They scan. That means your content should be easy to navigate with short paragraphs, meaningful subheadings, and occasional visual breaks.
Good structure improves both UX and SEO because it makes the page easier to interpret. It also increases the chances that users find the answer they came for without friction.
Optimizing introductions and on-page CTAs for search intent
The introduction should confirm immediately that the visitor is in the right place. For an informational query, state the problem and promise the outcome. For a product or service page, lead with value, differentiation, and trust.
The CTA should match intent too. An early CTA on an informational guide might be Download the checklist. On a transactional page, it might be Start your free trial or Request pricing. Matching CTA to search intent improves conversion without fighting the user journey.
Balancing depth and readability
Content length should follow intent. A local service page may only need 600 to 1,000 strong words plus trust elements, FAQs, and location relevance. A competitive informational guide may need 1,500 to 3,000 words to fully cover the topic. Product category pages often sit somewhere between, depending on market complexity.
The goal is not to hit a number. The goal is to satisfy the query with the least friction. If a page is long but repetitive, it loses. If it is short but complete, it can still win.
Using internal links to spread authority and support conversion
Internal links should do two jobs at once. They should strengthen topic relationships for SEO and create natural next steps for users.
For example, a blog post about page speed can link to a technical audit service, a guide to image compression, and a case study on Core Web Vitals. That turns content into a pathway instead of a dead end.
Multimedia: when to use images, video, charts, and transcripts
Multimedia helps when the topic benefits from demonstration or visual explanation. Screenshots are useful for tutorials. Charts help with comparisons. Video is effective for walkthroughs and product pages. Transcripts add accessibility and text relevance.
Use media with purpose. Do not add video just because it looks modern. Add it when it makes the page clearer, more useful, or more persuasive.
Technical On-Page Elements That Support SEO
Canonical tags and duplicate content strategies
Canonical tags are essential when multiple URLs contain substantially similar content. Common cases include filtered category pages, campaign parameters, print versions, and duplicate CMS paths.
A self-referencing canonical is usually a safe default on indexable pages, but problems arise when canonicals point to irrelevant URLs or conflict with internal linking. Always make sure the canonical reflects the preferred, live version of the page.
Robots meta tags and indexation controls
Robots meta tags help control whether a page can be indexed and whether its links can be followed. A page accidentally marked noindex can wipe out visibility even if the content is excellent.
Use indexation controls carefully. Admin pages, search result pages, and duplicate utility pages often deserve restrictions. Revenue-driving pages usually do not.
hreflang and international content considerations
If your site targets multiple languages or regions, hreflang helps search engines serve the right version to the right audience. This matters for both user experience and international SEO accuracy.
Common pitfalls include incorrect language-region codes, missing return tags, and pointing all country pages to one global canonical. International setups need extra validation because small tag errors can create large visibility issues.
Pagination, faceted navigation, and parameter handling
Large content sites and e-commerce stores often generate many URL variations through pagination and filters. Without control, these can dilute crawl budget and create duplication.
The right approach depends on the site, but the principle is simple. Important category and product pages should be indexable and clearly linked. Low-value filtered combinations often should not compete for indexation unless they serve meaningful search demand.
Speed optimizations tied to on-page elements
Many speed issues come directly from page-level decisions. Oversized images, unnecessary embeds, bulky sliders, and unoptimized third-party scripts can slow a page before any deep engineering work begins.
Start with what is visible and controllable. Compress images, use modern formats, lazy-load below-the-fold media, and reduce nonessential page elements. Then use browser devtools and PageSpeed Insights to inspect remaining bottlenecks.
Schema and Structured Data: On-Page SEO Boosters
Which schema types matter most
The most useful schema types depend on the page type. Editorial pages often benefit from Article. Product pages benefit from Product and sometimes Review. Local landing pages benefit from LocalBusiness. FAQ and HowTo can help when the content genuinely follows those formats.
Schema is not magic. It is a clarity layer. It helps search engines interpret your content, but it cannot rescue weak content or poor intent alignment.
How to add JSON-LD and validate it
JSON-LD is the preferred structured data format for most implementations because it is easy to manage and less likely to break page markup. It can be hardcoded, template-driven, or inserted through a tag manager depending on the setup.
After adding it, test with Google Rich Results Test and inspect the page in Search Console. Validation matters because syntax errors, missing required fields, and mismatched content can prevent eligibility.
Examples: FAQ schema, product schema, and review markup
Here is a simple FAQ example:
<script type="application/ld+json">
{
  "@context":"https://schema.org",
  "@type":"FAQPage",
  "mainEntity":[
    {
      "@type":"Question",
      "name":"How long does on-page SEO take to work?",
      "acceptedAnswer":{
        "@type":"Answer",
        "text":"Small improvements can appear within weeks, but competitive pages often take one to three months to show clearer movement."
      }
    }
  ]
}
</script>
A product page would include fields such as name, image, description, offers, price, availability, and review data where applicable. The key rule is that the markup must reflect what is actually visible on the page.
Measuring the impact of structured data
Measure structured data by looking for changes in impressions, CTR, and rich result visibility in Search Console. Sometimes rankings do not change much, but click-through rate improves because the result becomes more informative.
Keep expectations realistic. Schema can improve eligibility and presentation, but it does not guarantee visual enhancements in the SERP.
Measuring On-Page SEO Success
Key KPIs that matter
The most useful KPIs for on-page SEO are impressions, clicks, CTR, average position, organic sessions, and conversions. Impressions show visibility. CTR shows listing appeal. Sessions show traffic impact. Conversions show business value.
Track at both page level and template level. A single page may improve due to a unique rewrite, while a whole template may improve due to shared technical or structural changes.
Tools to use
Google Search Console is the foundation because it shows queries, pages, clicks, impressions, and average positions. GA4 adds engagement and conversion data. Screaming Frog helps audit titles, metas, canonicals, headers, and broken links at scale. Ahrefs and Semrush help with competitor visibility, keyword gaps, and SERP tracking.
A simple 6-month dashboard can look like this:
KPI
6-Month View
Why It Matters
Impressions
Trend by page group
Measures search visibility
Clicks
Trend by page group
Shows traffic from search
CTR
Query and page level
Indicates title/meta effectiveness
Average Position
Top queries
Reveals ranking movement
Organic Sessions
Landing pages
Connects search to analytics
Conversions
Form fills, sales, signups
Ties SEO to revenue
Setting up tracking and alerting for drops
Set alerts for sudden drops in clicks, impressions, and indexed pages. These can signal technical errors, title rewrites, deindexation issues, or lost rankings. Weekly page group reviews are often enough for small sites, while larger sites may need daily monitoring.
When measuring impact, try to isolate changes. If you update title tags, content, schema, and internal links all at once, you may improve performance but learn less. Controlled changes help build better SEO judgment over time.
How to run A/B tests for titles and meta descriptions
True SEO A/B testing is easier on large sites with many similar pages, but smaller sites can still run structured comparisons. Update titles or meta descriptions on a set of similar pages, keep other variables stable, and compare CTR and ranking movement against a control group or historical baseline.
For example, a publisher might test benefit-led titles versus question-led titles across 30 similar articles. An e-commerce site might test including price language or shipping value in meta descriptions for category pages.
Common On-Page SEO Mistakes and How to Fix Them
Keyword stuffing is still common, especially on older pages. It makes copy hard to read and often signals low quality. The fix is simple. Rewrite for clarity, remove repetition, and replace forced phrases with natural semantic coverage.
Duplicate or thin content often appears on category pages, location pages, and blog archives. Detect it with crawlers and manual reviews, then consolidate, expand, or noindex low-value pages where appropriate. If two pages target the same intent, one stronger page usually performs better than two weak ones.
Missing meta tags and H1s are basic but costly problems. Crawl your site, identify blanks and duplicates, and fix priority pages first. Broken internal links and orphan pages also deserve attention because they damage both UX and crawlability. Use your crawler and Search Console coverage reports to find them.
Ignoring mobile and UX issues is the mistake that ties everything together. A page can be well-written and still underperform if it is frustrating on a phone. If resources are limited, fix this order first: indexation issues, title/H1 problems, content-intent mismatch, internal linking, then speed and media optimization.
Advanced On-Page Tactics
Content clustering and topic modeling
Topic clusters help larger sites build authority around a subject. A pillar page targets a broad topic, while cluster pages cover related subtopics in depth and link back to the pillar and to each other.
For example, a pillar page on on-page SEO might connect to cluster pages on title tags, schema markup, internal linking, content optimization, and Core Web Vitals. This structure helps users explore the topic and helps search engines see subject depth.
A simple mini case is common on publisher sites. After reorganizing standalone articles into a cluster with stronger internal links and clearer parent-child relationships, rankings often improve across the entire group because topical relevance becomes easier to interpret.
Entity-based optimization and Knowledge Graph signals
Entity optimization means writing in a way that clearly reflects real concepts, relationships, brands, people, products, and places. Instead of focusing only on phrases, you strengthen the page with relevant entities and context.
If you cover local SEO for restaurants, mentioning menus, reservations, reviews, maps, and local business schema creates a richer understanding than repeating the main term. This is especially useful for competitive or ambiguous topics.
Using internal testing to improve CTR and dwell time
Larger sites can test page intros, title formats, CTA placement, and media choices to improve engagement. Better engagement is not a direct ranking factor in a simplistic sense, but improved user satisfaction often supports stronger search performance over time.
A useful approach is to test one element class at a time across similar pages. That creates patterns you can scale.
Personalization and dynamic content
Dynamic content can help when it improves relevance without harming crawlability. Localized examples, recently updated stats, or geo-specific trust signals can strengthen pages. The danger comes when personalization hides critical content from search engines or creates bloated, inconsistent experiences.
Use it carefully. The base page should still be fully understandable and valuable without user-specific variation.
Templates, Checklists, and Resources
A strong on-page SEO system gets easier when you use templates. They reduce missed steps and help teams maintain quality across many pages.
Here is a compact checklist you can apply before publishing:
Confirm intent matches the target query.
Write a clear title tag with the primary topic near the front.
Create a compelling meta description focused on click value.
Use one strong H1 and logical H2-H3 structure.
Improve the introduction so it answers the user’s first question fast.
Add internal links to related and conversion-focused pages.
Optimize images with compression, alt text, and descriptive names.
Add relevant schema and validate it.
Check canonical and indexation status.
Test mobile rendering and page speed.
Title and meta templates also help. For informational pages, a strong pattern is [Primary Topic]: [Specific Benefit or Outcome]. For example, On-Page SEO: 15 Fixes to Improve Rankings and CTR. For service pages, a useful pattern is [Service] for [Audience] | [Key Value].
Tooling can stay simple. Free essentials include Google Search Console, GA4, PageSpeed Insights, Rich Results Test, and browser devtools. Paid tools like Screaming Frog, Ahrefs, and Semrush become valuable when you need scale, crawling depth, and competitive intelligence.
Frequently Asked Questions about On-Page SEO
How often should I update on-page elements?
Review high-value pages at least every 3 to 6 months. Update sooner if rankings drop, search intent shifts, competitors improve, or the content becomes outdated.
Does keyword density still matter?
Not in the old formula-driven way. Relevance, coverage, and clarity matter far more than any percentage. Use your target topic naturally and focus on satisfying intent.
How long until I see results from on-page changes?
Small changes can show early movement in a few weeks. More competitive pages often take 1 to 3 months for clearer results, and sometimes longer on low-crawl or low-authority sites.
Can on-page SEO fix a site with bad backlinks?
It can improve performance significantly, but it cannot solve every authority problem. Strong on-page SEO gives your content the best chance to rank. Weak off-page signals may still limit how far it can go in very competitive spaces.
90-Day Action Plan: What to Do First
The first 30 days should focus on audit work and quick wins. Identify pages with high impressions and low CTR, pages ranking just outside the top results, duplicate titles, missing H1s, broken internal links, and uncompressed images. Most of this work belongs to SEO and content, with light developer support.
Days 31 through 60 should center on content refreshes and technical fixes. Rewrite weak titles and intros, improve internal links, expand thin sections, add missing schema, fix canonical problems, and improve mobile rendering on top landing pages. This phase usually produces the most visible gains because it combines intent alignment with structural cleanup.
Days 61 through 90 are where you scale and refine. Build topic clusters, add richer structured data where it fits, test title formats, improve conversion paths, and document winning patterns so they can be reused sitewide. By this point, your work shifts from repair to system building.
If you want a simple weekly rhythm, use week one for crawling and prioritization, weeks two through four for quick fixes, weeks five through eight for deeper page rewrites, and weeks nine through twelve for structured testing and scaling.
Conclusion and Next Steps
The highest-impact parts of on-page SEO are usually the least glamorous. Match the page to search intent. Write a better title. Improve the structure. Strengthen the content. Add smart internal links. Fix duplicate and indexation issues. Improve mobile experience. Then measure what changed.
If you manage a larger site, the long-term advantage comes from turning these actions into templates, workflows, and recurring reviews. That is how on-page SEO scales without becoming chaotic.
Your next step is simple. Pick five high-impression pages from Search Console and audit them today. Update the titles, intros, headings, internal links, and technical basics first. Then monitor CTR, rankings, and conversions over the next month. Small page-level improvements often create the fastest organic wins.
Technical SEO is often the difference between a website that could rank and a website that actually does. You can publish great content, write compelling sales copy, and build a strong brand, but if search engines struggle to crawl, understand, or index your pages, your visibility will stall before your strategy even has a chance to work.
For small business owners, freelancers, and developers, that reality can feel frustrating. Technical SEO sounds intimidating, and many guides make it seem like you need an engineering team to fix anything. In practice, the foundation is simpler than it looks. Once you understand how your site is discovered, rendered, indexed, and measured, technical search optimization becomes much more manageable.
What Is Technical SEO?
Technical SEO is the part of search engine optimization that focuses on how well a website is built for search engines to access and process. It is less about writing keywords into page copy and more about making sure your site can be crawled efficiently, loaded quickly, understood clearly, and served securely.
A useful way to think about technical SEO is to compare it to a storefront. Your branding, products, and sales messaging are what customers see when they walk in. Technical SEO is the lighting, the door, the floor plan, and the signage outside. If the entrance is blocked, the lights flicker, and no one can find the address, even a great business inside will underperform.
At its core, technical search optimization helps search engines answer four essential questions about your site. Can they find your pages? Can they access them reliably? Can they understand what those pages are about? And can they trust the experience enough to show them to users? When the answer is yes, your content has a much better chance of ranking.
This is why technical SEO matters for more than large enterprises. A local service business, a portfolio site, an online store, or a blog can all gain from better site structure, faster load times, clean indexing signals, and mobile-friendly design. These are not abstract improvements. They influence visibility, user experience, and ultimately conversions.
Key Aspects of Technical SEO
Technical SEO covers several moving parts, but they work toward the same goal: making your website easy for search engines and users to navigate. Some factors matter more than others depending on your site size and platform, but the main pillars are consistent across almost every project.
Before a page can rank, a search engine needs to crawl it and then decide whether to index it. Crawlability refers to whether bots can reach your content. Indexability refers to whether that content is eligible to appear in search results.
Problems often happen when important pages are buried deep in the site structure, blocked by robots instructions, redirected unnecessarily, or marked with tags that tell search engines not to index them. Even a beautifully designed page becomes invisible if search engines cannot reach it properly.
This is where internal linking plays a big role. A page that is linked naturally from navigation, category pages, and relevant content is easier to discover than a page that only exists in a forgotten corner of the site. In technical SEO, structure is not decoration. It is infrastructure.
Site Speed and Performance
A slow website hurts both rankings and conversions. Users are impatient, especially on mobile devices, and search engines know that page experience affects satisfaction. Technical SEO therefore includes performance optimization, not as a vanity metric but as a core usability issue.
Fast websites usually have cleaner code, optimized images, efficient caching, fewer render-blocking resources, and better hosting. Even small gains can matter. If your pages load a second or two faster, bounce rates often improve, and visitors are more likely to stay long enough to take action.
Performance also connects to technical stability. A site that loads inconsistently, shifts content while rendering, or becomes unusable during script execution creates friction. Search engines increasingly evaluate these experience signals because they reflect real-world quality, not just backend neatness.
Mobile Friendliness
Most websites now live in a mobile-first world. Search engines primarily evaluate the mobile version of a site when determining how content should be indexed and ranked. That means your mobile layout cannot be treated as a secondary experience.
Technical SEO includes responsive design, readable text sizing, tappable navigation, usable forms, and layouts that do not break on smaller screens. It also means ensuring that the mobile version contains the same essential content and metadata as the desktop version.
For small businesses, this is especially important because many high-intent searches happen on phones. A person looking for a nearby service, comparing prices, or reading reviews is often doing it on mobile. If the site is technically clumsy on that device, search visibility and lead quality both suffer.
URL Structure and Site Architecture
Good technical SEO makes a website easier to understand at a glance. Clear URLs, logical navigation, and sensible page hierarchy help both users and search engines interpret how your content is organized.
A strong site architecture usually keeps important pages close to the homepage, groups related topics together, and avoids creating too many thin or duplicative paths. This matters because search engines use internal relationships to understand topical relevance and page importance.
Clean URL structures also reduce confusion. A concise address that reflects the page topic is easier to crawl, easier to share, and easier to trust. It will not magically improve rankings on its own, but it supports clarity across the whole site.
XML Sitemaps and Robots Directives
An XML sitemap acts like a roadmap for search engines. It helps highlight the pages you want crawled and indexed, especially on larger sites or sites with pages that are not easily discovered through links alone.
Robots directives serve a different purpose. They help control crawler access and page-level indexing behavior. Used correctly, they keep search engines focused on valuable content. Used carelessly, they can hide critical pages from search entirely.
This is one of the most common technical SEO trouble spots. A site redesign, plugin conflict, or staging setup can accidentally leave noindex tags or disallow rules in place. That kind of simple mistake can wipe out organic traffic quickly, which is why regular checks matter.
Duplicate Content and Canonicalization
Duplicate or near-duplicate content is common, especially on ecommerce sites, blogs with tag archives, filtered category pages, or CMS platforms that generate multiple URL versions for the same content. Search engines can usually handle some duplication, but too much ambiguity weakens signals.
Canonical tags help indicate which version of a page should be treated as the preferred one. They do not force search engines to obey, but they provide an important signal when multiple URLs contain substantially similar content.
This is not only about avoiding penalties, because the issue is usually not punitive. It is about preventing dilution. If backlinks, internal links, and crawl attention are spread across several versions of the same page, ranking potential becomes fragmented.
Structured Data and Search Understanding
Structured data helps search engines interpret page content more precisely. It adds context to elements like products, reviews, articles, FAQs, organizations, and local business details. In some cases, it can also support enhanced search result displays.
Think of structured data as labeling the parts of your site in a language machines understand clearly. A human visitor can infer that a line of text is a product price or review rating. Search engines benefit when that information is explicitly marked up.
For businesses, this can improve how pages are understood and occasionally how they appear in search. It does not replace strong content or site quality, but it strengthens clarity, which is a recurring theme across technical SEO.
HTTPS and Site Security
Security is a baseline expectation now. HTTPS encrypts data between the user and the site, helps build trust, and supports a safer browsing experience. Search engines have long treated HTTPS as an important standard.
A site that still mixes secure and non-secure elements can trigger browser warnings, broken assets, or trust issues. That creates a technical and business problem at the same time. People are less likely to submit a form, make a purchase, or stay on a site that looks unsafe.
Security also extends beyond certificates. A technically healthy site is updated, monitored, and protected from preventable vulnerabilities that can lead to spam, malware, or indexing problems.
Broken Links, Redirects, and Status Codes
Every website changes over time. Pages are removed, product lines shift, URLs are updated, and old content gets retired. Technical SEO ensures those changes do not leave behind broken paths.
Broken internal links create a poor user experience and waste crawl attention. Poorly handled redirects can slow navigation, confuse search engines, and weaken page equity. Understanding status codes such as 200, 301, 404, and 500 helps you diagnose whether pages are working, moved, missing, or failing.
This is one of the most practical areas to audit because the fixes are often straightforward. Updating links, removing redirect chains, and restoring key pages can produce quick gains in both usability and crawl efficiency.
Core Web Vitals and Real User Experience
Core Web Vitals measure aspects of speed, responsiveness, and visual stability. While they are only one part of the larger ranking picture, they are useful because they tie technical quality to actual user experience.
A page that appears quickly, responds promptly, and does not jump around while loading feels trustworthy and polished. That matters to users, and it matters to search engines because their job is to recommend satisfying results.
For many site owners, Core Web Vitals are best seen as a prioritization tool rather than an obsession. You do not need perfection on every metric to benefit from technical SEO. You need a site that performs reliably well enough to remove friction.
A Simple View of the Main Areas
Area
What It Affects
Common Problems
Why It Matters
Crawling
Discovery of pages
Blocked resources, poor internal links
Search engines cannot rank what they cannot find
Indexing
Eligibility for search results
Noindex tags, duplicate URLs
Valuable pages may never appear in search
Performance
Speed and user experience
Heavy images, slow hosting, excess scripts
Slow sites lose traffic and conversions
Mobile usability
Accessibility on phones and tablets
Broken layouts, tiny text, hard-to-use forms
Mobile-first indexing makes this essential
Architecture
Site understanding and navigation
Deep page structure, messy URLs
Better structure improves discoverability
Structured data
Content interpretation
Missing or invalid markup
Helps search engines understand page meaning
Security
Trust and safe access
Missing HTTPS, mixed content
Users and search engines expect secure browsing
How to Get Started With Technical SEO
The biggest mistake beginners make is assuming technical SEO begins with advanced tools and complicated fixes. It usually begins with observation. You need to understand how your website behaves before you try to optimize it.
Start by looking at your site the way a search engine might. Can your important pages be reached through clear navigation? Do they load quickly on mobile? Are there duplicate versions of the same page? Are there obvious broken links or strange redirects? This first pass often reveals more than people expect.
Begin With a Technical Audit
A technical SEO audit is simply a structured review of your website’s health. The goal is not to create a giant report for its own sake. It is to identify the issues most likely to hold back visibility and prioritize them by impact.
For a small business site or portfolio, the first audit should focus on the essentials. Check whether the site is indexable, whether there are crawl errors, whether HTTPS is working correctly, and whether key pages can be found within a few clicks. Then review speed, mobile usability, and obvious duplicate content issues.
If you run a larger site, the audit becomes more layered. You may need to evaluate faceted navigation, pagination, orphan pages, log files, JavaScript rendering, or parameter handling. But the principle remains the same. Fix what prevents search engines from accessing and understanding your best content first.
Focus on High-Impact Fixes First
Not every technical issue deserves immediate attention. Some warnings are minor. Others can quietly suppress an entire site. Good technical SEO is as much about prioritization as diagnosis.
If your site accidentally blocks search engines, that is urgent. If your product pages load slowly because of oversized images, that is also high value to fix. If a small markup field is missing on a low-traffic page, it probably matters less in the short term.
A practical sequence often looks like this:
Fix indexing blockers, so important pages can appear in search.
Improve crawl paths, through stronger internal linking and cleaner architecture.
Resolve major speed and mobile issues, that hurt user experience.
Clean up duplicates, redirects, and metadata signals, to improve clarity.
This order works because it aligns effort with business results. A perfectly marked-up page means little if it is not indexable in the first place.
Use Tools Without Becoming Tool-Dependent
Technical SEO tools are helpful, but they should support judgment, not replace it. A crawler can flag duplicate titles. A performance tool can identify heavy assets. A search console can surface indexing issues. These are valuable signals, but they still need interpretation.
For example, a tool may report dozens of redirected URLs. That is not automatically a crisis. Some redirects are necessary and healthy. The real question is whether they create chains, loops, or unnecessary delays on important pages.
The most effective site owners use tools to validate what they suspect, uncover what they missed, and track progress over time. They do not chase every red warning symbol as if it carries equal weight.
Match Technical Work to Your Platform
A WordPress site, a Shopify store, a custom web app, and a static portfolio site all present different technical SEO realities. Your platform determines how much control you have over URLs, metadata, structured data, performance, and rendering behavior.
This matters because the best advice is always contextual. On one platform, image compression and plugin cleanup might deliver the biggest gains. On another, the priority may be JavaScript rendering or template-driven duplicate content. Technical SEO is not one-size-fits-all, even when the underlying principles stay the same.
If you are a developer, this is an advantage. You can often solve structural problems at the template or framework level instead of patching them page by page. If you are a business owner using a website builder, your focus should be on the settings and content architecture you can control consistently.
Build Good Habits Into Ongoing Maintenance
Technical SEO is not a one-time repair job. Sites evolve, content changes, plugins update, and redesigns introduce risk. The healthiest websites treat technical maintenance as a recurring process rather than an emergency response.
That does not mean constant tinkering. It means checking key signals regularly. Monitor indexing trends, crawl errors, page speed, broken links, and mobile usability after meaningful site changes. If traffic drops unexpectedly, technical causes should be one of the first places you investigate.
A simple monthly review can prevent much larger problems later. This is especially important for small teams that do not have a dedicated SEO specialist watching every deployment.
Technical SEO is not glamorous, but it is foundational. It ensures that the work you put into content, branding, and marketing is not wasted by preventable technical friction. When your site is fast, crawlable, secure, mobile-friendly, and logically structured, search engines can do their job more effectively, and users can too.
The best next step is to audit your site with fresh eyes and fix the biggest blockers first. Focus on accessibility, indexing, performance, and structure before chasing smaller refinements. Once the technical foundation is solid, every other SEO effort becomes more likely to pay off.
SEO services can be the difference between a website that quietly exists and one that consistently brings in leads, sales, and qualified traffic. Many small business owners invest in a website, publish a few pages, and then wonder why nothing happens. The problem usually is not the business itself. It is that potential customers cannot easily find it.
That is where professional search engine optimization services become valuable. Good SEO is not about tricks, shortcuts, or stuffing pages with keywords. It is about making your site easier for search engines to understand and easier for real people to trust, navigate, and use. When done well, SEO supports long-term growth, lowers dependence on paid ads, and helps the right audience discover your business at the moment they are already searching for what you offer.
What Are SEO Services?
SEO services are professional activities designed to improve a website’s visibility in search engine results. The goal is simple: help your business appear when people search for relevant topics, products, or services. The work behind that goal, however, is broad and strategic.
In practice, search engine optimization services often include technical site improvements, keyword research, content optimization, on-page SEO, link building, and performance tracking. Some providers also include local SEO, e-commerce SEO, or SEO consulting for teams that want guidance without full implementation support.
Think of SEO like improving both the location and presentation of a physical store. If your store is hidden down an unmarked alley, few people will find it. If customers walk in and the shelves are confusing, they may leave without buying. SEO addresses both problems. It helps search engines locate, interpret, and rank your content, while also improving the user experience once visitors arrive.
Why SEO Services Matter for Small Businesses
For small businesses, SEO can be one of the most cost-effective digital marketing investments available. Paid advertising stops the moment the budget runs out. Organic search traffic, by contrast, can continue generating visibility and leads long after the initial work is done.
This matters even more in competitive local and niche markets. A freelance designer, local law firm, home repair company, or online tool creator may not have the ad budget of larger competitors. But with the right SEO service strategy, they can still earn visibility by targeting specific search intent, creating useful content, and optimizing pages better than businesses with bigger budgets but weaker execution.
SEO Services vs. Doing It Yourself
A do-it-yourself approach can work for very small websites or founders willing to learn the basics. Many entrepreneurs start by updating titles, writing blog posts, and improving page speed on their own. That can be a smart beginning.
Still, professional SEO services become especially helpful when growth stalls, rankings drop, or the site becomes more complex. An experienced provider can spot technical issues, identify content gaps, and prioritize the work that creates the best return. That saves time and often prevents expensive mistakes.
Key Aspects of SEO Services
Not all SEO work is the same. The phrase often gets used broadly, but quality services usually combine several disciplines. Understanding those areas helps you evaluate providers and make better decisions about what your business actually needs.
Technical SEO
Technical SEO focuses on the foundation of your website. Search engines need to crawl and index your pages efficiently. If your site has broken links, slow loading times, duplicate pages, poor mobile usability, or confusing structure, your rankings may suffer even if the content is strong.
A good SEO service provider will assess issues such as site speed, crawlability, indexing, XML sitemaps, redirects, canonical tags, and mobile performance. These details may seem invisible to customers, but they shape how search engines interpret your website. Strong technical SEO is like good plumbing, you do not always see it, but problems there affect everything else.
Keyword Research and Search Intent
Keyword research is not just about finding high-volume phrases. It is about understanding what your audience wants and how they phrase that need. Effective SEO services look beyond vanity metrics and focus on search intent.
For example, someone searching “best accounting software for freelancers” is in a different stage of decision-making than someone searching “what is double-entry bookkeeping.” One query suggests buying intent, while the other suggests early research. Good SEO strategy aligns content with both types of searches, depending on business goals.
On-Page SEO
On-page SEO refers to optimizing the visible elements of a page so both users and search engines understand its topic and value. This includes titles, headings, internal links, image alt text, URL structure, and content clarity.
What separates average work from strong work is precision. It is not enough to mention a phrase a few times. The content has to answer the searcher’s question better than competing pages. That means clean structure, helpful explanations, relevant examples, and a natural use of keywords that supports readability rather than distracting from it.
Content Strategy
Content is one of the strongest long-term assets in SEO. A well-planned content strategy helps your site rank for informational, commercial, and transactional searches. It also builds trust with readers before they are ready to buy.
Professional SEO services often include content audits, topic planning, optimization of existing pages, and recommendations for new articles or landing pages. This matters because many sites already have content, but it is often unfocused, outdated, or poorly aligned with search demand. Improving existing content can be just as valuable as creating new pieces from scratch.
Link Building and Authority
Search engines view links from other reputable websites as signals of trust and authority. That does not mean every link helps. Poor-quality links, irrelevant directories, and manipulative tactics can hurt more than help.
Strong SEO services treat link building as a credibility strategy, not a numbers game. This may involve digital PR, outreach, partnerships, resource pages, local citations, or creating useful content that naturally earns references. The emphasis should be on quality, relevance, and legitimacy.
Local SEO
For businesses that serve a geographic area, local SEO is essential. Ranking in standard search results matters, but showing up in map listings and local queries is often even more valuable. A person searching for a plumber, dentist, or coworking space usually wants a nearby option.
Local SEO services typically focus on Google Business Profile optimization, local citations, review signals, localized content, and location-specific landing pages. For many small businesses, these efforts generate some of the highest-intent traffic available because the searcher is already close to making a decision.
Reporting and Performance Measurement
SEO without measurement quickly turns into guesswork. Good providers track rankings, organic traffic, click-through rates, technical issues, conversions, and engagement metrics. More importantly, they explain what those numbers mean in business terms.
A traffic increase sounds impressive, but it means little if the visitors are not converting. On the other hand, a modest rise in highly qualified traffic can significantly improve revenue. The best SEO service reports tie visibility improvements to outcomes such as leads, calls, sign-ups, or sales.
Common SEO Service Areas at a Glance
Service Area
What It Focuses On
Why It Matters
Technical SEO
Site speed, indexing, mobile usability, crawl issues
Getting started with SEO is easier when you begin with clarity. Many businesses make the mistake of shopping for services before defining goals. That often leads to vague deliverables, mismatched expectations, and disappointing results.
Start by identifying what success actually looks like. For one business, success may mean more phone calls from local search. For another, it may mean growing newsletter sign-ups or increasing product page traffic. SEO strategy should follow business priorities, not the other way around.
Audit Your Current Website
Before investing in any optimization work, understand where your site stands today. A basic audit should examine technical health, existing rankings, page quality, content depth, backlink profile, and conversion paths. This creates a baseline and reveals what is blocking growth.
Sometimes the issue is obvious, such as pages that load too slowly or missing metadata. Other times the problem is strategic, such as targeting keywords that are too competitive or publishing content that does not match user intent. An audit keeps you from guessing.
Decide What Type of SEO Help You Need
Not every business needs a full-service agency. Some need a consultant for strategy. Others need a freelancer to fix technical issues or optimize content. Businesses with in-house marketers may simply need periodic guidance and reporting support.
The right choice depends on budget, complexity, and internal capacity. If you run a small local business with a simple website, a focused local SEO package may be enough. If you operate an e-commerce store or SaaS platform, you may need more advanced technical and content support.
Ask Better Questions Before Hiring
Choosing a provider based only on price is risky. Cheap SEO can become expensive if it leads to poor practices, weak content, or penalties from spammy tactics. It is better to understand how a provider works, what they prioritize, and how they define results.
Ask about their process, reporting style, timeline expectations, and how they approach content, links, and technical fixes. A trustworthy provider will be realistic. SEO takes time. Anyone promising instant rankings or guaranteed #1 positions is usually selling certainty they cannot truly control.
Set Realistic Expectations
One of the biggest frustrations in SEO comes from misaligned timelines. Search optimization is not usually a same-week or same-month channel. Improvements may start appearing in a few weeks for technical fixes or low-competition terms, but larger gains often take several months.
That does not mean SEO is slow in a negative sense. It means it compounds. A well-optimized article, landing page, or local listing can continue producing value long after the original work is complete. This is why patient, consistent execution tends to outperform rushed campaigns.
Focus on Business Outcomes, Not Just Rankings
Rankings matter, but they are only part of the picture. A business does not grow because it ranked for a term. It grows because the ranking brought qualified visitors who took meaningful action.
This is especially important for productivity-minded users, freelancers, and developers promoting online tools. Broad traffic may look good in analytics, but niche traffic with strong intent is often far more valuable. A focused SEO strategy should improve discoverability and conversions together.
A Simple Starting Path
If you are unsure where to begin, this sequence keeps the process manageable:
Clarify goals: Define whether you want leads, sales, sign-ups, or local inquiries.
Run an audit: Identify technical, content, and visibility issues.
Prioritize fixes: Address the highest-impact problems first.
Build content around intent: Create or improve pages that match what users are searching for.
Track results: Measure traffic quality, rankings, and conversions over time.
What Good SEO Services Look Like in Practice
The best SEO services are rarely flashy. They are methodical, data-informed, and rooted in user experience. They improve the structure of your site, strengthen your content, and make it easier for search engines to trust what you publish.
In real-world terms, that may look like cleaning up a messy site architecture, rewriting weak service pages, optimizing a Google Business Profile, or building topical authority through helpful content. None of that sounds magical, but that is the point. Effective SEO is usually the result of disciplined fundamentals executed consistently.
It is also adaptive. Search behavior changes. Competitors publish new content. Algorithms evolve. Quality SEO services respond to those shifts without abandoning the core principle that matters most, create a website that deserves to rank because it is genuinely useful, relevant, and easy to understand.
Conclusion
SEO services are not just a marketing add-on. They are a structured way to make your website more visible, more trustworthy, and more effective at turning search demand into real business results. Whether you run a small local company, a freelance business, or an online platform, the right SEO approach can help you compete more intelligently, even in crowded markets.
The next step is simple. Review your current site, define one clear outcome you want from search, and identify the biggest gap between where you are and where you want to be. Once that gap is visible, choosing the right SEO service becomes much easier, and the results become far more meaningful.
AI search has changed the definition of visibility. A page can rank well in traditional search, earn steady traffic, and still be almost invisible inside generative answers, AI overviews, coding assistants, and answer engines. That gap matters, because users increasingly stop at the first synthesized response instead of clicking through ten blue links.
For developers and efficiency-focused teams, this creates a new measurement problem. Standard SEO dashboards tell only part of the story. What matters now is whether an AI system can find, interpret, trust, and reuse your content in the right context. Effective AI visibility tracking is the operational layer that makes those signals observable.
This guide breaks down the six most practical tips for tracking AI visibility in a way that is usable, measurable, and scalable. It focuses on systems, not hype, so teams can move from vague concern to a repeatable monitoring workflow.
What AI Visibility Tracking Actually Means
AI visibility tracking is the process of measuring how often, how accurately, and in what context a brand, product, document, or webpage appears in AI-generated responses. That includes large language model interfaces, AI search summaries, coding assistants, chat-based discovery tools, and retrieval-augmented systems that synthesize content from multiple sources.
Unlike traditional ranking analysis, this is not just about position. It is about presence, citation behavior, answer framing, and source selection. A page may never appear as a top clickable result and still heavily influence the final AI answer. The reverse is also true. A high-ranking page may be ignored if its structure is ambiguous, its authority signals are weak, or its content is difficult for retrieval systems to parse.
That is why the best approach to the top six tips for tracking AI visibility starts with a broader model of discoverability. Teams need to observe not only where they rank, but whether AI systems choose them as a trusted source and whether the resulting answer represents their information correctly.
Key Aspects of Tracking Visibility in AI Systems
The mechanics of AI visibility differ from classic search analytics because the output is probabilistic. The same prompt can produce different results across platforms, regions, devices, and time windows. A useful tracking framework must therefore account for variation, not treat every answer as fixed.
A second key aspect is entity resolution. AI systems frequently reason at the brand, product, feature, author, or domain level. If those entities are inconsistently named across your website, documentation, knowledge base, and third-party mentions, visibility becomes fragmented. Tracking then produces noisy results because the system is not certain what belongs together.
The third aspect is intent segmentation. Visibility for branded prompts is only a baseline. The more valuable signals often come from non-branded, problem-based prompts such as comparative queries, technical troubleshooting requests, and purchase-adjacent discovery terms. These are the prompts where AI systems decide which sources deserve to shape the answer.
Tip 1, Define Visibility by Prompt Clusters, Not Single Keywords
The first mistake most teams make is copying keyword rank tracking directly into AI monitoring. That approach is too narrow. AI systems respond to tasks and intents, not only keywords. If a user asks a long-form question, requests a comparison, or pastes a technical error, the model evaluates context well beyond a single query phrase.
A better method is to organize prompts into clusters. One cluster might target brand discovery, another feature comparison, another troubleshooting, and another best-practice education. This gives visibility tracking a functional structure. Instead of asking whether one phrase appears, the team can ask whether the brand is visible across the moments that matter in the user journey.
This is especially important when evaluating the best practices behind the top six tips for tracking AI visibility. AI responses vary semantically, so prompt families provide a more reliable benchmark than exact-match terms. For a developer tool, for example, the meaningful cluster is rarely just the product name. It is more likely to be prompts such as “best tool for monitoring AI search mentions,” “how to track citations in AI answers,” or “tools for prompt-level visibility analytics.”
Why prompt clustering improves signal quality
Prompt clusters reduce false confidence. A single strong result can create the illusion of broad visibility, while ten related prompts may show weak representation. That wider view reveals whether the content is truly discoverable or only incidentally surfaced.
Prompt clusters also support prioritization. If AI systems frequently mention your brand during educational prompts but not during comparison prompts, the content gap is strategic, not random. That tells the team where to improve structure, authority, and landing page alignment.
Tip 2, Track Citations, Mentions, and Sentiment Separately
Many teams collapse all AI visibility into one metric. That makes reporting simpler, but it hides the pattern that matters. An AI answer can mention a brand without linking to it. It can cite a domain without using the brand name. It can summarize the company accurately, or distort its positioning. These are distinct outcomes and should be measured separately.
The three core dimensions are citation, mention frequency, and answer sentiment or framing. Citation shows whether your source is selected. Mention frequency shows whether your entity is recognized and included. Sentiment and framing show whether the AI system presents your solution as authoritative, optional, limited, or inferior.
The difference is not trivial. A product that appears often but is described as niche or incomplete has a different market problem than a product that is technically strong but rarely selected as a source. When teams separate these signals, they can connect visibility patterns to content actions.
A simple framework for interpretation
Signal
What it measures
Common failure mode
Likely fix
Citation
Whether the AI system uses your page or domain as a source
Good content exists but is not selected
Improve structure, trust signals, topic focus
Mention
Whether your brand or product appears in the answer
Entity not well established
Strengthen naming consistency and brand associations
Framing
How the AI system describes you
Incorrect or weak positioning
Refine comparative content and authoritative explanation
Sentiment
Positive, neutral, or negative answer tone
Negative associations dominate retrieval
Address review, support, and reputation issues
This separation also makes internal reporting more credible. Engineers, content teams, and leadership can each see where the issue originates instead of arguing over one blended score.
Tip 3, Measure Across Multiple AI Surfaces
There is no single “AI search” environment. Visibility in one interface does not guarantee visibility in another. Search-integrated AI summaries, standalone chat assistants, enterprise copilots, coding assistants, and embedded retrieval layers all behave differently because they rely on different models, indexes, and ranking logic.
A developer-focused brand may appear strongly in code assistants but weakly in general answer engines. A consumer tool may perform well in broad AI overviews but disappear in technical prompt environments. If the team tracks only one platform, the result is a distorted picture of market presence.
The practical answer is to create a cross-surface baseline. That baseline does not need to cover every AI product immediately, but it should include the environments where your users actually make decisions. For many teams, that means one search-centric AI surface, one general conversational model, and one task-specific assistant relevant to the product category.
Platform variance is a real reporting risk
Platform variance is not noise to ignore. It is a clue. If one AI system consistently surfaces your documentation while another prefers third-party reviews, that difference reveals how each system evaluates trust and readability. Over time, those patterns become a roadmap for optimization.
This is where a tool such as Home can become useful if the team wants a centralized way to observe mentions and visibility across fragmented AI surfaces without assembling a patchwork of spreadsheets and manual prompt logs. The value is not just convenience. It is consistency of collection and comparison over time.
Tip 4, Build a Repeatable Testing Environment
Ad hoc prompting produces anecdotal insights, not decision-grade data. A reliable visibility program needs a testing environment with controlled prompts, defined review intervals, standardized answer capture, and a clear method for handling variation.
The baseline process should specify who runs the prompts, on which platforms, at what cadence, using what account state and region if possible. Even small differences can alter results. Personalized history, logged-in context, and prompt wording all influence what the system returns.
A repeatable environment does not eliminate variability, but it makes changes interpretable. If a brand’s visibility drops after a documentation restructure, the team can evaluate whether the decline is real because the testing framework itself stayed stable.
What to standardize first
The most important variables to standardize are relatively simple:
Prompt set: Use the same intent-grouped queries for each testing cycle.
Platform list: Review the same AI surfaces each round.
Capture format: Record answer text, citation source, mention order, and framing.
Time interval: Run checks on a fixed schedule, such as weekly or biweekly.
Without those controls, teams often confuse random output fluctuation with meaningful visibility change.
Tip 5, Optimize for Retrieval, Not Just Readability
Many visibility problems begin upstream in the content itself. AI systems need content that is not only useful to humans, but also easy to parse, segment, attribute, and reuse. Pages that bury key definitions, scatter terminology, or overload context can be readable enough for a person and still underperform in retrieval pipelines.
Retrieval-friendly content tends to share several traits. It uses clear headings, explicit entity naming, concise definitions, strong internal consistency, and direct answers near the top of relevant sections. It also avoids forcing the system to infer too much. If your page explains a feature well but never clearly states what it does in one extractable sentence, an AI system may choose another source that does.
This is a critical part of any serious approach to the top six tips for tracking AI visibility. Measurement without content adaptation creates a dashboard that reports problems but does not solve them. Tracking should expose which pages are repeatedly ignored, and those pages should then be rewritten for machine-readable clarity.
Retrieval-friendly content characteristics
Content characteristic
Why it helps AI visibility
What weak implementation looks like
Explicit definitions
Improves extractability for direct answers
Vague introductions and delayed explanations
Consistent entity naming
Helps models link brand, product, and feature references
Multiple names for the same feature or tool
Structured headings
Supports chunking and retrieval relevance
Flat text blocks with minimal hierarchy
Source-worthy claims
Makes citations more likely
Generic claims without specificity
Focused sections
Reduces ambiguity in synthesized answers
One page trying to cover too many unrelated intents
A useful test is simple. If a section were extracted on its own, would it still make sense as a standalone answer fragment? If not, it is harder for an AI system to use confidently.
Tip 6, Connect Visibility Metrics to Business Outcomes
AI visibility tracking becomes strategically valuable only when linked to outcomes that matter. A rising mention count is interesting, but not enough. Teams should ask whether improved visibility correlates with branded search growth, referral traffic from AI surfaces, trial starts, sign-ups, documentation visits, or support deflection.
This connection matters, because not all visibility is equally valuable. Being surfaced for broad educational prompts may build awareness. Being cited in solution comparison prompts may drive conversion. Being referenced inside technical troubleshooting prompts may reduce churn and improve user retention. The business impact depends on where in the journey the visibility occurs.
For developers and efficiency-oriented teams, this is where instrumentation becomes essential. If AI visibility is improving but downstream actions remain flat, the issue may be weak call-to-action alignment, poor landing page matching, or insufficient trust once the user arrives. Tracking should therefore sit close to product analytics, not in a separate reporting silo.
Visibility without outcome mapping is incomplete
A mature dashboard should show not only that the brand appears, but what happened next. That is the difference between a curiosity metric and an operational one. When visibility shifts can be tied to pipeline influence or product engagement, teams gain a stronger basis for content prioritization and budget decisions.
How to Get Started With AI Visibility Tracking
The fastest way to start is not to chase full automation on day one. Begin with a narrow and disciplined scope. Select a small set of prompts that represent high-value user intent, identify the AI surfaces your audience actually uses, and capture results consistently for several weeks. The objective in the first phase is to establish a baseline, not to build a perfect system.
Once the baseline is visible, patterns emerge quickly. You may find that documentation pages are cited but marketing pages are ignored. You may see that your brand appears in educational queries but loses presence in comparisons. You may discover that third-party review sites define your product more often than your own site does. Those findings are actionable even before the tooling is fully mature.
A practical early-stage workflow usually includes a short prompt library, a spreadsheet or dashboard for answer capture, and a review loop connecting content, SEO, product marketing, and analytics. Teams that need efficiency at scale often move this process into a dedicated platform like Home, especially once prompt volume and platform coverage exceed what manual review can support reliably.
A lean starting checklist
Step
Purpose
Output
Select prompt clusters
Focus on real user intent
A small test library
Choose AI surfaces
Match where users discover solutions
A platform tracking list
Record baseline answers
Establish current visibility
Initial mention and citation map
Review content gaps
Find why AI systems ignore or misframe content
Prioritized optimization backlog
Measure outcomes
Link visibility to business value
Basic performance correlation
Common Mistakes That Undermine Tracking
One common mistake is over-relying on exact brand prompts. That inflates visibility because the system is already pointed toward your entity. Non-branded and problem-based prompts provide a truer picture of competitive discoverability.
Another mistake is treating every AI answer as deterministic. Variability is normal. The goal is not to force identical outputs, but to identify repeatable patterns across enough tests to make confident decisions.
A third mistake is separating AI visibility from content governance. If teams do not update definitions, feature pages, comparison content, and documentation architecture in response to the findings, tracking becomes passive observation. The workflow must close the loop between measurement and revision.
Conclusion
Tracking visibility in AI systems requires a different mindset from classic SEO. The real question is not only whether a page ranks, but whether an AI engine can retrieve it, trust it, cite it, and represent it accurately in the moments that influence decisions. That is why the strongest approach combines prompt clustering, citation analysis, cross-platform review, standardized testing, retrieval-oriented content design, and outcome mapping.
The next step is simple. Pick a small set of high-intent prompts and start measuring how your brand appears today. Once that baseline exists, the path forward becomes much clearer. Visibility in AI is no longer abstract. It is measurable, improvable, and increasingly too important to leave untracked.
If you run a small business, work as a freelancer, or manage your own website, SEO can feel expensive before it feels useful. Premium platforms are powerful, but many people do not need an enterprise subscription to make meaningful progress. What they need is clarity, consistency, and a practical set of free SEO tools that solve real problems.
The good news is that you can do a surprising amount without paying upfront. You can research keywords, inspect technical issues, improve page structure, track visibility, and learn what your audience is searching for by using free tools for SEO in a smart way. The key is not finding one perfect platform, it is building a simple toolkit that matches your goals and your workflow.
What Are Free SEO Tools?
Free SEO tools are online resources, browser-based utilities, and platform features that help you improve how your website appears in search engines without requiring a paid subscription. Some are fully free. Others offer limited free plans or specific no-cost features that are still highly valuable for day-to-day SEO work.
At their core, these tools help answer the questions that matter most. What are people searching for? Which pages are getting traffic? Where is your site technically weak? How does your content compare with competing pages? Which search queries are creating impressions but not clicks? Those are not abstract marketing questions. They are the operating system of search visibility.
For small business owners, the appeal is obvious. You may not have a dedicated SEO specialist, a large ad budget, or hours each week to spend inside a complicated dashboard. A good free SEO tool reduces friction. It turns guesswork into data and helps you focus on changes that actually move the needle.
For developers and productivity-minded users, free tools are often even more useful because they make SEO measurable. Instead of treating optimization like a vague checklist, you can evaluate crawlability, performance signals, indexing, metadata, internal links, and search demand in a structured way. That makes SEO easier to integrate into content publishing, site maintenance, and product workflows.
Key Aspects of Free SEO Tools
Not all free SEO tools do the same job. Some are excellent for keyword discovery. Others are built for technical diagnostics, analytics, or on-page optimization. Understanding the categories matters more than memorizing brand names, because once you know the job a tool should do, you can choose the right one quickly.
Keyword Research and Search Intent
Keyword research is usually the first thing people think of when they hear SEO, and for good reason. If you do not know what your audience is searching for, even strong content can miss the mark. Free tools in this category help you find search terms, related questions, autocomplete suggestions, and topical variations.
What makes this especially valuable is not the raw keyword list. It is the intent behind the query. A person searching for “best invoicing software for freelancers” is closer to making a decision than someone searching for “what is invoicing software.” Good SEO starts when you recognize that difference and build content that matches it.
Many free keyword tools are limited compared with paid suites, but they can still uncover patterns. You may find that your audience uses simpler language than your industry does. You may discover local modifiers, problem-based phrases, or question-style searches that are easier to rank for. That insight often matters more than having a giant spreadsheet of thousands of terms.
Technical SEO and Site Health
Technical SEO sounds intimidating, but the basic goal is simple: search engines need to crawl, understand, and index your site efficiently. Free technical SEO tools help you spot barriers that get in the way, such as broken links, missing metadata, duplicate pages, indexing issues, slow-loading assets, and mobile usability problems.
This matters because content quality alone is not enough if the site structure is working against you. Think of it like opening a great retail store in a building with a jammed front door. The product may be good, but access is the problem. Technical tools reveal these hidden bottlenecks.
For developers, this category is particularly useful because many SEO issues overlap with clean engineering practices. Proper redirects, structured headings, canonical tags, image optimization, and page speed all improve both user experience and search performance. A free tool that flags these issues can save hours of manual checking.
Replace “slow-loading assets” with a reference to a performance tool like PageSpeed Insights where relevant, for example when testing images, scripts, and server response times: https://developers.google.com/speed/pagespeed/insights
Performance Tracking and Search Visibility
You cannot improve what you do not measure. Free tools for SEO often shine brightest when it comes to tracking, especially if they connect directly to search engine data. They can show which pages earn impressions, which queries generate clicks, how average positions change over time, and where opportunities are hiding.
This is where SEO becomes less theoretical. A page might be appearing in search results for dozens of queries you never intentionally targeted. That is not a problem. It is an opportunity. With a few content edits, stronger headings, or clearer internal links, you may be able to improve relevance and lift traffic without creating a new page from scratch.
Visibility data also helps you avoid common mistakes. If a page has high impressions but low clicks, the issue may be your title tag or meta description. If a page gets indexed but never ranks, the content may not match intent or may be too weak compared with competitors. Free tracking tools help you diagnose which problem you are actually dealing with.
On-Page Optimization
On-page SEO is the practice of making each page easier for search engines and users to understand. Free tools in this area often review title tags, headings, content structure, keyword usage, image alt text, internal links, and readability. Some even highlight missing elements or suggest improvements.
The value here is not in blindly following a score. It is in creating pages with stronger alignment between topic, structure, and search intent. A well-optimized page is easier to scan, clearer in its purpose, and more likely to satisfy the visitor. Search engines tend to reward that because users tend to reward it first.
Writers and freelancers benefit a lot from this category. You do not need advanced technical knowledge to improve title clarity, tighten section hierarchy, remove vague phrasing, or ensure that your main topic is obvious from the start. Often, these are editorial improvements as much as SEO improvements.
Competitor and Content Gap Analysis
Some free SEO tools help you learn indirectly by examining the pages already winning in search. This can reveal how competitors structure content, which subtopics they cover, what keywords appear repeatedly, and where your own page may be too thin.
This is not about copying. It is about understanding expectations. If every top-ranking page for a query explains pricing, use cases, and setup steps, and your article only offers a general overview, your content may feel incomplete. Free competitor research tools can help you spot those gaps before you waste effort promoting underdeveloped pages.
For small teams, this is one of the most efficient uses of SEO time. Instead of publishing more and more content, you improve what already exists by making it more complete, more useful, and more competitive.
Types of Free SEO Tools Worth Using
The best free SEO tools usually fall into a few practical groups. You do not need one of everything. You need enough coverage to research, diagnose, optimize, and measure.
A balanced toolkit often combines one tool from each major area instead of relying on a single all-in-one platform. That approach is usually more realistic for people who want useful SEO without a steep cost curve.
How to Get Started With Free SEO Tools
Starting with free SEO tools is less about collecting accounts and more about building a repeatable routine. The biggest mistake beginners make is opening ten tools, looking at twenty metrics, and changing nothing. SEO improves when data leads to action.
Begin With Your Site’s Real Search Data
The smartest first step is to connect your website to a tool that shows how it performs in search results. This gives you direct evidence of what is happening now. You can see which pages are being discovered, which queries drive impressions, and where click-through rates are weak.
That baseline is incredibly important. Without it, you end up optimizing based on assumptions. With it, you can prioritize pages that already have traction. A page ranking on the second page of results is usually a better short-term opportunity than a page with no visibility at all.
Audit a Small Set of Important Pages
Do not try to optimize your entire site in one weekend. Pick five to ten pages that matter most. For a small business, that might include your home page, core service pages, key location pages, and two or three blog posts. For a freelancer, it may be your portfolio, service descriptions, and lead-generating articles.
Run those pages through a few free tools and look for patterns. Are titles too generic? Are headings inconsistent? Are pages slow on mobile? Is important content buried too far down? A page-level review is manageable and usually reveals the highest-impact fixes quickly.
Match Content to Search Intent
Once you have keyword and visibility data, compare it with what your page actually delivers. If searchers want a tutorial and your page is mostly promotional copy, rankings may stay weak no matter how many keywords you add. If users want pricing clarity and your page avoids specifics, they may bounce even if they click.
This is where free tools become decision aids rather than score generators. Use them to understand demand, then reshape content so the page genuinely answers the query better. SEO success often comes from better alignment, not just better optimization.
Fix Technical Friction Early
Some SEO issues quietly suppress performance. Broken internal links, duplicate title tags, non-indexed pages, missing canonicals, or very slow load times can limit your progress even when content quality is solid. Free technical SEO tools are useful because they surface these structural issues before they become expensive.
For developers, this is low-hanging fruit with long-term benefits. Technical fixes often improve usability, accessibility, and maintainability at the same time. For non-technical site owners, even basic checks can help you know when to involve a developer and what to ask them to fix.
Build a Weekly SEO Habit
SEO rewards consistency more than intensity. One focused hour each week using free tools is often more effective than a rushed monthly audit. In practice, that could mean reviewing search queries on Monday, updating one page on Tuesday, checking technical warnings on Wednesday, and measuring changes at the end of the month.
That habit turns SEO into an operating rhythm instead of a one-time project. It also reduces overwhelm. You stop chasing every metric and start improving the pages and issues most likely to generate results.
A simple starting routine looks like this:
Review search performance for your top pages.
Choose one page with visible opportunity.
Improve content alignment based on search intent and query data.
Check technical issues that may block indexing or usability.
Track the result over the next few weeks.
How to Choose the Right Free SEO Tools
The best free SEO tool is not the one with the longest feature list. It is the one you will actually use. That usually depends on your role, your website size, and the kind of decisions you need to make.
For Small Business Owners
If you wear multiple hats, simplicity matters. You want tools that quickly show what pages people find, what problems need attention, and where you can make practical improvements without becoming an SEO specialist. A clean dashboard and clear recommendations are often more valuable than advanced exports.
The most useful combination is usually one search analytics tool, one page speed or technical checker, and one keyword discovery tool. That gives you enough visibility to make informed updates without drowning in data.
For Freelancers and Content Creators
Freelancers often need SEO tools that support both strategy and execution. You may be writing content, auditing client sites, and reporting progress, sometimes all in the same week. In that case, free tools that help with on-page optimization, keyword mapping, and SERP analysis tend to provide the most value.
The ideal setup helps you move from idea to publishable content efficiently. You want to know what people search for, what top-ranking content includes, and how to improve your own page structure without adding unnecessary complexity.
For Developers and Technical Users
Developers usually benefit most from crawling tools, performance analyzers, structured data validators, and browser extensions that expose page-level signals. These tools support a more diagnostic workflow. Instead of asking “What keyword should I target?” you may be asking “Why is this page not indexable?” or “What template issue is affecting all category pages?”
That is where free SEO tools become operational infrastructure. They help you catch technical regressions, test changes, and maintain healthy site architecture over time.
Common Mistakes When Using Free SEO Tools
Free tools are useful, but they can be misused. The most common mistake is treating incomplete data as definitive truth. Many free keyword tools offer estimates, ranges, or limited datasets. They are directionally helpful, not perfect forecasts.
Another mistake is chasing tool scores instead of user value. If a page becomes awkward because you forced too many terms into headings, the tool may be satisfied while the reader is not. Search engines have become much better at detecting usefulness, relevance, and quality beyond mechanical optimization.
Many users also jump between tools without creating a process. They collect screenshots, export reports, and never translate findings into edits. A tool is only helpful when it changes what you publish, fix, or prioritize.
The final trap is expecting immediate results. SEO usually compounds over time. A free tool can show you the right move today, but rankings and traffic often respond gradually. Patience is part of the strategy.
What a Practical Free SEO Stack Can Look Like
You do not need a complicated system to get value from free SEO tools. For many websites, a lean setup is enough.
Need
Practical Free Tool Type
Why It Matters
Understand current visibility
Search performance dashboard
Shows queries, clicks, impressions, and indexing signals
Find topic opportunities
Keyword and question research tool
Helps shape content around real search demand
Check page quality
On-page analyzer or browser extension
Reveals obvious optimization gaps
Catch technical issues
Site audit or crawl tool
Identifies structural problems that limit performance
Improve speed and UX
Performance testing tool
Supports rankings and user satisfaction
This kind of stack works because it reflects how SEO actually happens. First you learn what is visible. Then you identify opportunities. Then you improve pages. Then you remove technical obstacles. Then you measure again.
Conclusion
Free tools for SEO are not just entry-level substitutes for paid platforms. When used well, they are a practical foundation for better content, stronger technical health, and more informed decisions. For small business owners, freelancers, developers, and productivity-focused users, they can make SEO more accessible, less mysterious, and far more actionable.
The best next step is simple. Pick one important page, review its search data, run a basic audit, and improve it based on real intent and real issues. Then repeat. A small, consistent workflow with the right free SEO tools can outperform a much bigger toolkit that never gets used.
If your website feels invisible, the problem is often not your product, your design, or even your writing. Search engines need signals that your pages deserve attention, and one of the strongest signals still comes from links on other websites pointing to yours.
This is where backlinks play an important role. They help search engines understand trust, relevance, and reputation across the web. For small business owners, freelancers, developers, and anyone building an online presence, understanding how links work can make the difference between slow, frustrating growth and steady organic traffic that compounds over time.
The good news is that earning strong links is not reserved for giant brands. You do not need a massive PR team or an endless marketing budget. You need a clear strategy, realistic expectations, and a solid understanding of what makes a link valuable in the first place.
What Are Backlinks?
A backlink is simply a link from one website to another. If another site mentions your page and includes a clickable URL, that is a backlink for you. In SEO, these links act like signals of endorsement, although not all endorsements carry the same weight.
Search engines use links to discover pages, understand relationships between topics, and estimate how trustworthy a website may be. If respected sites in your industry link to one of your articles, product pages, or tools, that can strengthen your visibility in search results. It does not mean you automatically rank at the top, but it improves your chances.
Think of backlinks like professional references. One recommendation from a highly respected expert can matter far more than ten vague recommendations from people with no real credibility. The same logic applies online. A single relevant link from a trusted publication can be more valuable than dozens of weak links from unrelated or low-quality sites.
Think of backlinks as more than a metric for ranking. They can send direct referral traffic, expose your brand to new audiences, and help you build industry relationships. In many cases, the best links do more than influence search engines. They put your business in front of real people who may actually become customers.
Why Search Engines Care About Links
Search engines are trying to answer a simple question: Which page best deserves to rank for this query? Content quality matters, page speed matters, and user experience matters. But links help answer whether the rest of the web sees your content as worth referencing.
When many credible websites link to a page, it can suggest that the page offers something useful, original, or authoritative. That does not guarantee rankings, because search algorithms are much more sophisticated than they were years ago. Still, links remain one of the clearest off-page signals available.
This is why link building continues to be a major part of SEO strategy, not because search engines reward manipulation, but because the web naturally uses links as pathways of trust and discovery.
Not All Links Are Equal
A common mistake is treating all links as interchangeable. They are not. The value of a backlink depends on context. A link from a relevant industry blog usually carries more meaning than a random link from an unrelated directory page.
Authority also matters. A well-established website with editorial standards generally passes stronger trust signals than a thin site built only to publish low-quality content. Placement matters too. A link naturally included within the body of an article often has more value than one buried in a footer or sidebar.
There is also relevance. If you run a web design business, a link from a respected marketing, development, or business resource makes sense. A link from an unrelated gambling or coupon site does not. Search engines pay attention to those patterns, and so should you.
Key Aspects of Backlinks
The first key aspect to understand is quality over quantity. Many site owners still chase raw link counts because it feels easy to measure. But a large number of weak or suspicious links can do little for your site, and in some cases can create risk. Fewer high-quality backlinks are usually better than many low-value ones.
The second key aspect is relevance. Strong links usually come from pages that are topically connected to what you do. If your website offers productivity tools, links from SaaS blogs, digital marketing resources, business publications, and developer communities are far more meaningful than links from unrelated websites. Relevance creates a logical relationship between the referring page and your content.
A third aspect is editorial intent. The best backlinks are earned because someone chose to reference your page. That editorial choice matters. It signals that your content was useful enough to cite. Links that are inserted unnaturally, traded excessively, or placed on low-quality sites just to influence rankings are much less valuable.
The Main Types of Backlinks
Some backlinks are earned naturally when your content gets discovered and cited. These are often the most valuable because they reflect genuine interest. If you publish a useful guide, original data, or a free online tool, people may link to it without you asking.
Other backlinks are built through outreach. This happens when you contact website owners, editors, bloggers, or creators and show them a page that may be worth mentioning. Outreach is common, but its effectiveness depends heavily on quality. Generic mass emails rarely work well. Thoughtful, targeted outreach can.
There are also backlinks from guest posting, partnerships, business profiles, directories, interviews, podcasts, and digital PR. Each can play a role, but the underlying principle remains the same. The link should make sense for users first. If it only exists to manipulate search visibility, it is usually a weak long-term strategy.
Dofollow, Nofollow, and Other Link Attributes
Not every link passes the same SEO value. Some links include attributes that tell search engines how to treat them. You may hear terms like nofollow, sponsored, or ugc. These do not make a link worthless, but they can change how much ranking influence that link may pass.
A nofollow link often appears in comments, sponsored placements, or places where the linking site does not want to fully endorse the destination. Sponsored links are meant for paid placements. UGC stands for user-generated content, such as forum posts or community submissions.
From a practical perspective, you should not obsess over chasing only one type. A natural backlink profile often includes a mix. Some links help with rankings more directly, while others still drive exposure, traffic, and credibility. Real marketing value goes beyond a single technical label.
What Makes a Backlink Valuable?
The strongest backlinks usually combine several qualities at once. They come from trusted websites, appear on relevant pages, sit naturally within useful content, and point to pages that deserve attention. If the linking page itself gets traffic and engagement, that can make the backlink even more valuable.
Anchor text also matters, but it should look natural. Anchor text is the clickable text used in a link. If every link pointing to your site uses the exact same keyword-rich phrase, that can look manipulative. Healthy link profiles usually include branded anchors, plain URLs, natural phrases, and occasional keyword-related variations.
Here is a simple comparison of weak and strong link characteristics:
Factor
Strong Backlink
Weak Backlink
Relevance
Comes from a page related to your niche
Comes from an unrelated page
Authority
Published on a trusted, established site
Published on a thin or spammy site
Placement
Embedded naturally in article content
Hidden in footers, sidebars, or cluttered pages
Intent
Added because your content is useful
Added only to manipulate rankings
Traffic Potential
Can send real referral visitors
Unlikely to generate any clicks
Anchor Text
Natural, varied, and contextual
Over-optimized and repetitive
Common Misunderstandings About Links
One of the biggest myths is that more backlinks always mean better rankings. That is not how modern SEO works. Search engines evaluate patterns, trust, context, and intent. A bloated backlink profile with poor-quality sources can be much less helpful than a smaller profile built on genuinely useful mentions.
Another misunderstanding is that backlinks work instantly. In reality, SEO is cumulative. It can take time for search engines to crawl links, process authority signals, and reflect them in rankings. Even then, links usually work best when paired with strong on-page SEO, useful content, and a technically healthy website.
There is also a persistent belief that buying links is an easy shortcut. It can be a tempting idea, especially for businesses under pressure to grow quickly. But paid link schemes often produce low-quality placements and create long-term risk. What looks like fast progress can become a cleanup project later.
How to Get Started With Backlinks
The smartest starting point is not outreach. It is asset creation. Before asking anyone to link to your site, make sure you have something worth linking to. That could be a practical guide, an original case study, a free template, a helpful comparison page, a glossary, a calculator, or a simple online tool that solves a real problem.
This is especially important for small businesses and freelancers. You may not have the brand recognition of larger competitors, but you can still win links by being more useful. A niche-specific resource that solves one problem clearly can outperform broad, generic content every time.
Build Link-Worthy Pages First
Ask yourself a blunt question: why would someone link to this page? If the answer is unclear, the page probably needs more value. Product and service pages can earn backlinks, but informational resources tend to attract them more naturally.
Useful link-worthy pages often include original insights, clean explanations, updated statistics, visual clarity, or practical tools. If you serve developers, a free checker or generator may attract links. If you serve local businesses, a well-researched guide on a specific operational problem may do the same.
The goal is to create pages that editors, bloggers, and creators feel comfortable citing. That means the content should be accurate, easy to scan, and genuinely helpful rather than obviously promotional.
Start With Easy, Legitimate Opportunities
You do not need to begin with ambitious media outreach. Many early backlinks come from straightforward opportunities that are already within reach. These tend to be lower-risk and easier to secure, especially for newer websites.
Business profiles: Create or improve listings on reputable business platforms and industry-specific directories.
Partners and suppliers: Ask relevant partners, vendors, or clients whether they feature collaborators on their websites.
Guest contributions: Offer useful articles or expert commentary to relevant websites in your field.
Resource pages: Find curated pages that list helpful tools, guides, or services and suggest your best-fit content.
These are practical starting points, not the entire strategy. They help establish a foundation while you work on earning stronger editorial links over time.
Use Outreach Without Sounding Like Outreach
Most link outreach fails because it is self-centered. It asks for a favor without offering a compelling reason. Good outreach starts by understanding the other site’s audience and identifying a genuine fit.
If you find an article that references outdated data, a broken resource, or a missing tool, and your page improves the reader experience, then your message has a purpose. That is far more persuasive than sending a generic note that says you have “great content” they should link to.
Keep outreach brief, specific, and respectful. Mention the exact page, explain why your content is relevant, and make it easy for the recipient to evaluate. Editors are busy. Clarity beats cleverness.
Create Content That Naturally Earns Links
Some content formats are more likely to attract backlinks than others. Original research tends to perform well because people cite data. Detailed how-to guides perform well because they solve practical problems. Tool pages perform well because they offer utility. Strong opinion pieces can also attract links when they add real insight instead of noise.
For your audience, one of the best approaches is creating free, easy-to-use resources. A calculator, checklist, template, benchmark article, or troubleshooting guide can become a natural reference point within a niche. Over time, these pages can attract links repeatedly without constant promotion.
A useful test is whether the page remains valuable even if search engines did not exist. If people would still bookmark it, share it, or send it to a colleague, it has real link potential.
Monitor and Improve Your Link Profile
As you begin building backlinks, you also need to track what is happening. SEO tools can show which sites link to you, which pages attract the most links, and where competitors are getting mentions. That information helps you spot patterns rather than guessing.
If one content format consistently earns links, create more of it. If one page gets attention but does not convert visitors, improve the call to action. If low-quality links begin appearing unexpectedly, review them calmly rather than panicking. Not every odd link is harmful, but your profile should be monitored over time.
Approach
Effort Level
Typical Quality
Long-Term Value
Business directories
Low
Low to medium
Foundational
Partner mentions
Low to medium
Medium
Good early win
Guest posting
Medium
Medium to high
Strong when relevant
Resource page outreach
Medium
Medium to high
Very useful when well targeted
Original research
High
High
Excellent
Free tools or templates
Medium to high
High
Excellent
Digital PR
High
High
Excellent but less predictable
Avoid Shortcuts That Create Problems
If a backlink offer sounds too easy, it usually is. Packages promising hundreds of links for a small fee are almost always built on weak networks, irrelevant placements, or spammy tactics. They may create a temporary illusion of progress, but they rarely build durable authority.
The same goes for excessive link exchanges, automated submissions, and keyword-stuffed anchor text campaigns. These approaches are based on old assumptions about SEO and often ignore the bigger picture. Search engines have become much better at evaluating patterns that do not look natural.
A safer mindset is to build links the way you build reputation offline. You earn trust by being useful, visible, and worth recommending. That principle scales much better than any shortcut.
Conclusion
Backlinks remain one of the clearest ways search engines evaluate authority, but their real value goes beyond rankings. The right links can bring credibility, referral traffic, and meaningful visibility for your brand. What matters most is not how many links you collect, but whether those links come from relevant, trusted sources and point to content that deserves attention.
If you are getting started, focus first on creating something useful enough to reference. Then build from there with smart outreach, legitimate mentions, and steady monitoring. Your next step is simple: review your site today and identify one page that could become truly link-worthy, then improve it until another website would be glad to cite it.