JNTZN

Category: Uncategorized

  • How to Convert M4A to MP3 Quickly and Safely

    How to Convert M4A to MP3 Quickly and Safely

    Converting an audio file should not feel like a technical chore, yet many people still get stuck when they need to turn an M4A file into MP3 quickly. You download a voice note, podcast clip, interview recording, or product demo, and suddenly the file will not play nicely in your preferred app, browser, car stereo, or editing workflow.

    That is why interest in converting an M4A file to MP3 remains high. People want a format that is easy to share, widely supported, and simple to use across devices. If you are a freelancer sending audio to clients, a small business owner repurposing recordings, or a developer organizing media assets, understanding how this conversion works can save time and reduce friction.

    What does converting an M4A file to MP3 mean?

    At its core, converting an M4A file to MP3 means changing one audio file format into another. M4A is commonly associated with Apple ecosystems and AAC audio encoding, though it can also contain other codecs. MP3, by contrast, is the long-standing universal standard that almost every device, app, and platform understands.

    The reason this matters is compatibility. An M4A file may sound perfectly fine, but it is not always the most convenient format for playback, upload, archiving, or client delivery. MP3 is often the practical fallback because it works almost everywhere, from older hardware to web upload tools and lightweight editing software.

    It also helps to understand that format conversion is not just a filename change. You are typically re-encoding the audio. That means the software reads the source file and creates a new version in MP3 format. In many cases, this is straightforward, but the output quality depends on the settings you choose and the quality of the original file.

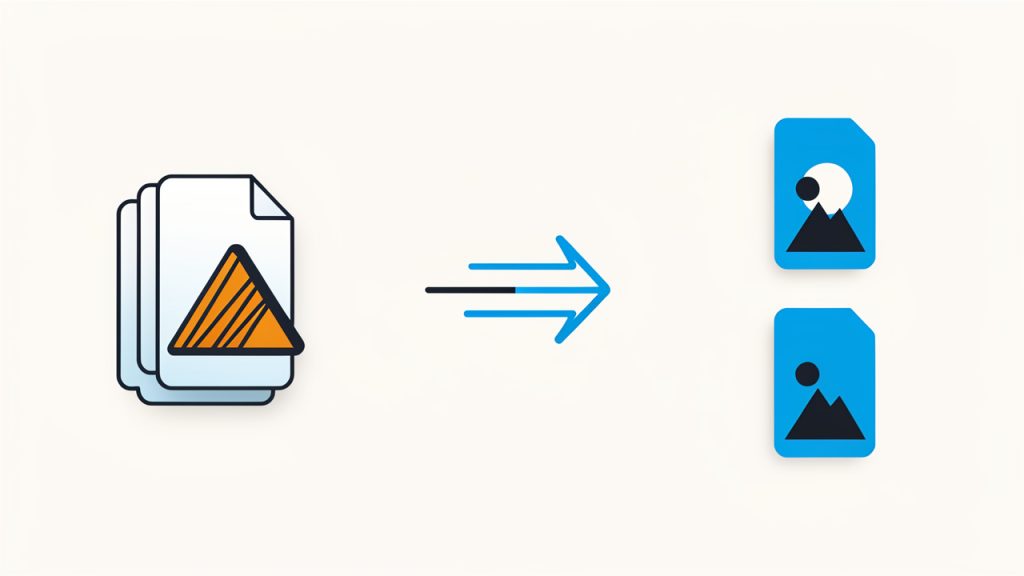
    A simple diagram showing an M4A file icon feeding into a converter process labeled “re-encode (not rename)”, producing an MP3 file icon. Include arrows, a note that codec/encoding changes occur, and a small warning about potential quality loss if re-encoding compressed sources.

    Why M4A exists in the first place

    M4A became popular because it can deliver good audio quality with efficient compression. For many users, especially those working in Apple-centric environments, it is a practical format for music, voice recordings, and exported media. It is smaller than uncompressed formats and often sounds excellent at modest file sizes.

    The issue is not that M4A is bad. The issue is that MP3 is more universally accepted. If your goal is broad compatibility rather than format efficiency, converting an M4A file to MP3 is often the easiest way to avoid playback issues later.

    Why people still prefer MP3

    MP3 survives because it solves a real problem. It plays in legacy systems, embedded devices, online tools, and countless media players with little drama. When someone asks for an audio file “that just works,” they usually mean MP3.

    For business and productivity-focused users, that reliability matters. If you are sending audio to a client, uploading media to a platform with unclear format support, or preparing files for a team with mixed devices, MP3 is often the safest option.

    Key aspects of converting M4A files to MP3

    Before converting audio, it helps to know what actually changes, what does not, and where mistakes happen. This is where a lot of users lose quality unnecessarily or choose settings that are larger than needed.

    Audio quality and compression

    One of the biggest concerns when converting from M4A to MP3 is quality loss. Both formats are usually compressed, and MP3 conversion often introduces another round of lossy compression. If the original M4A was already compressed, the new MP3 will not improve the sound. At best, it preserves most of what is there. At worst, poor settings make the result noticeably worse.

    That said, quality loss is often negligible for everyday use if you choose sensible bitrates. For voice recordings, meetings, webinars, and spoken content, a moderate bitrate is usually more than enough. For music or polished branded audio, you may want higher settings to avoid artifacts.

    A simple way to think about it is this, you are trading some efficiency for compatibility. If compatibility is your priority, that trade often makes perfect sense.

    File size and bitrate

    Bitrate determines how much data is used per second of audio, which affects both sound quality and file size. Higher bitrate usually means better quality and bigger files. Lower bitrate means smaller files but more aggressive compression.

    For many practical use cases, the best bitrate depends on the content:

    Use Case Recommended MP3 Bitrate Why It Works
    Voice notes, calls, meetings 64 to 128 kbps Keeps files small while preserving clear speech
    Podcasts, interviews, webinars 96 to 160 kbps Balances spoken-word clarity and manageable size
    Music, brand audio, richer sound 192 to 320 kbps Better for full-range audio and repeated listening

    A two-axis graphic: bitrate on the horizontal axis, with file size rising and perceived audio quality on the vertical axis (quality curve flattening at higher bitrates). Overlay recommended bitrate ranges highlighted for Voice (64–128 kbps), Podcasts (96–160 kbps), and Music (192–320 kbps).

    This matters if you are handling many files. A freelancer managing dozens of client recordings or a small team archiving support calls can save substantial storage by choosing the right bitrate instead of defaulting to the highest option.

    Metadata and organization

    Another overlooked part of converting M4A files to MP3 is metadata. Metadata includes the title, artist, album, recording date, and sometimes embedded artwork. Some converters preserve this automatically. Others strip it out unless you use specific settings.

    If you are converting a large library of files, metadata can be the difference between a clean archive and a folder full of generic filenames. For business users, it also affects searchability and internal organization. A file named “audio-final-3.mp3” is far less useful than one with proper tags and a clear naming convention.

    Speed, privacy, and workflow

    The best conversion method is not always the most powerful one. It is the one that fits your workflow. Online converters are convenient when you need a quick result and do not want to install software. Desktop tools are better when you need speed, privacy, batch processing, or more control.

    If your files include sensitive content, such as customer calls, interviews, internal recordings, or unreleased media, privacy becomes a serious factor. Uploading audio to an online converter may be fine for public or low-risk content, but many businesses prefer local conversion to keep everything on-device.

    A quick comparison of common conversion approaches

    Method Best For Main Advantage Main Trade-Off
    Online converter Fast one-off tasks No installation Privacy and file size limits
    Desktop app Frequent use Better control and batch processing Requires installation
    Built-in media software Casual users Familiar interface Fewer advanced options
    Professional audio tool Editors and creators Precise settings and export control More complexity

    How to get started converting M4A to MP3

    The good news is that converting an M4A file to MP3 is usually simple. The better news is that you do not need an advanced audio background to do it well. A few smart choices at the start can save you from poor output, oversized files, or repeated work.

    Start with the end use in mind

    Before you convert anything, ask one practical question: what is this file for? If the MP3 is meant for client review, internal sharing, uploading to a web form, or playback in a car or phone, convenience is likely the priority. If the audio will be edited later, archived, or published publicly, quality and consistency matter more.

    This small decision shapes everything else. It influences bitrate, naming, folder structure, and whether you should convert one file manually or automate a batch process. Productivity-minded users often skip this step, then end up reconverting the same files later.

    Choose the right tool for your situation

    If you only need to convert one or two files occasionally, an online tool may be enough. The experience is usually simple, upload the M4A, choose MP3, pick a quality setting, and download the converted file. For non-sensitive recordings, this can be the fastest route.

    If you convert audio regularly, a desktop solution usually makes more sense. It gives you more reliable performance, better batch handling, and fewer restrictions on file size. It also makes repeat work easier, especially if you often process meeting recordings, customer interviews, or content assets in volume.

    Use a sensible conversion process

    A clean workflow helps avoid clutter and accidental quality issues. Keep it simple:

    1. Check the source file and confirm the M4A plays correctly.
    2. Choose MP3 settings based on voice or music use.
    3. Convert a single test file before processing a large batch.
    4. Review the output for sound quality, filename accuracy, and metadata.
    5. Batch convert the rest only after the test looks right.

    This approach takes a minute longer upfront, but it reduces mistakes dramatically. It is especially useful in client-facing workflows where broken or mislabeled files create avoidable friction.

    Avoid common mistakes

    A surprisingly common mistake is choosing the highest possible bitrate for everything. That sounds safe, but it often creates larger files without meaningful benefit, especially for speech. Another mistake is converting already low-quality audio and expecting the MP3 to sound better. Conversion changes format, not source quality.

    People also forget to standardize filenames. If you are converting ten files today, you may remember what they are. If you revisit them in three months, messy naming becomes a real operational problem. Clear file labels, dates, and project references make your audio library far easier to manage.

    When online tools make sense

    Online conversion tools are ideal for quick, lightweight tasks. If you have a short voice memo and need to send it in a more compatible format, they remove friction. For busy professionals, that convenience is valuable.

    Still, it is worth reading the basic terms of service and checking whether files are stored temporarily. For sensitive recordings, local tools are the safer default. Convenience should not come at the cost of privacy when the audio contains business-critical information.

    When you should keep the original M4A

    Converting to MP3 does not mean deleting the source file. In many cases, keeping the original M4A is the smarter move. If you need to reconvert later at a different bitrate, create alternate versions, or preserve the best available source, the original file remains valuable.

    Think of the M4A as your master copy and the MP3 as the delivery copy. That mindset is especially helpful for creators, agencies, and businesses building reusable media libraries.

    Conclusion

    Converting an M4A file to MP3 is ultimately about making audio easier to use. MP3 remains the format people trust for wide compatibility, simple sharing, and dependable playback across platforms. If your goal is speed and convenience, the conversion process can be quick. If your goal is quality and repeatability, a little planning goes a long way.

    The next step is straightforward, choose a tool that matches your workflow, test one file with the right bitrate, and keep the original M4A for backup. That gives you a practical, low-friction system for handling audio without wasting time or sacrificing usability.

  • MP3 to WAV: When to Convert and How It Affects Quality

    MP3 to WAV: When to Convert and How It Affects Quality

    Converting MP3 to WAV sounds simple, but it often becomes confusing the moment audio quality, file size, compatibility, and editing needs enter the picture. Many people assume one format is just as good as the other, or that conversion somehow “restores” lost sound data. It does not. A little clarity saves time, storage, and frustration.

    If you are a small business owner preparing podcast clips, a freelancer editing voice recordings, a developer handling media assets, or someone trying to make an audio file work in the right app, understanding MP3 to WAV conversion matters. The right choice depends on what you need the file to do next, not just on what sounds familiar.

    What is MP3 to WAV?

    At its core, MP3 to WAV means converting an audio file from the MP3 format into the WAV format. MP3 is a compressed audio format designed to reduce file size. WAV is typically an uncompressed audio format that preserves more raw audio data and is widely used in editing, production, and professional workflows.

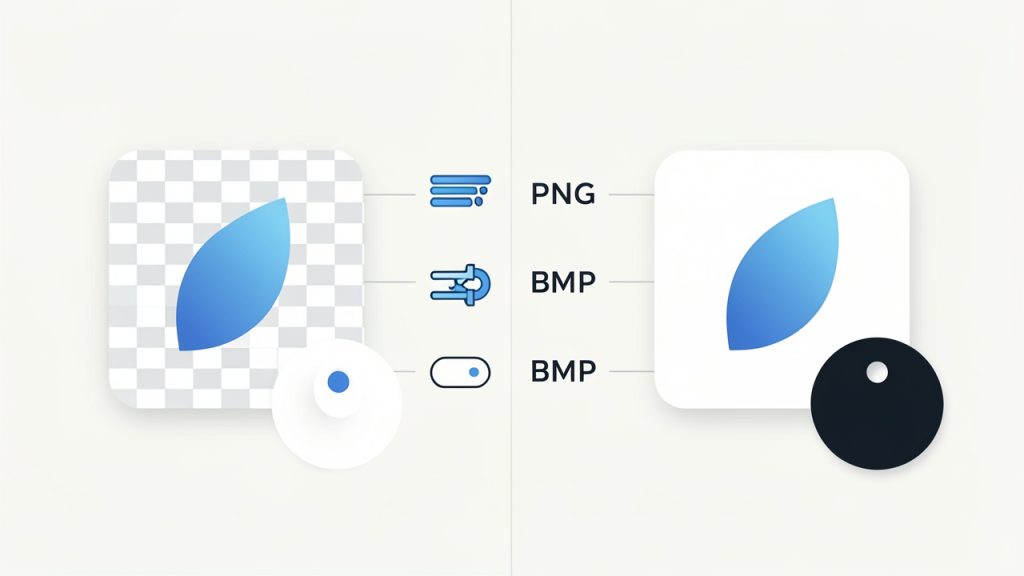
    Side-by-side visual comparing MP3 vs WAV: left panel shows a simplified, 'thinner' waveform with parts faded or missing and a small file-size icon labeled MP3 (lossy/compressed); right panel shows a fuller, detailed waveform and a large file-size icon labeled WAV (uncompressed).

    The key difference is not just the file extension, it is how the audio is stored. An MP3 removes parts of the sound data to make the file much smaller. This is called lossy compression. A WAV file, by contrast, usually stores audio in a much less compressed or uncompressed form, which makes it larger and easier for editing software, recording systems, and some hardware devices to process accurately.

    This leads to an important point that many users miss. Converting an MP3 into WAV does not improve the original audio quality. If the MP3 already lost data during compression, that missing information does not magically come back when you save it as WAV. What conversion does do is make the file more suitable for certain tasks, especially where compatibility and editing stability matter.

    A metaphorical illustration showing an MP3 file with pieces removed (like missing puzzle pieces) being converted into a larger WAV file where the missing pieces remain absent — emphasizing that conversion does not restore lost audio data.

    A simple way to think about it is this. MP3 is like a highly compressed image sent over messaging apps to save space, WAV is more like the original working file used in design software. Turning the compressed image back into a larger file does not recreate the missing detail, but it may make it easier to use in a professional workflow.

    Key Aspects of MP3 to WAV

    Why people convert MP3 to WAV

    The most common reason for converting MP3 to WAV is workflow compatibility. Audio editors, video production tools, DAWs, transcription systems, and some broadcasting platforms often handle WAV files more predictably than MP3s. WAV files are simpler for software to decode because they usually do not rely on the same compression logic as MP3.

    Another major reason is editing performance. When you edit audio repeatedly, cut sections, apply effects, normalize volume, or mix tracks, working with WAV can reduce the chance of introducing additional compression artifacts. Editors often prefer WAV because it gives them a more stable source format, even if the original audio began as MP3.

    There is also the issue of device and platform requirements. Some systems, including legacy hardware, professional recording devices, call systems, and speech processing tools, specifically request WAV uploads. In those cases, the conversion is not about quality improvement, it is about meeting a technical requirement.

    MP3 vs WAV at a glance

    Feature MP3 WAV
    Compression type Lossy Usually uncompressed
    File size Small Large
    Audio quality Reduced to save space Higher retention of source audio
    Best use case Streaming, sharing, storage Editing, production, archiving workflows
    Compatibility in editors Good, but sometimes less ideal Excellent
    Can conversion restore lost quality? No No

    This comparison highlights the practical trade-off. MP3 is efficient, WAV is flexible. One is built for convenience, the other for production.

    Audio quality misconceptions

    One of the biggest misconceptions around MP3 to WAV is the belief that WAV automatically means “better sound.” That is only true if the source audio was already high quality. If your original file is a 128 kbps MP3, converting it to WAV simply creates a much larger file that contains the same compressed audio quality.

    That does not mean the conversion is pointless, it means the benefit is functional, not magical. For example, if you need to import voice audio into editing software, sync it with video, or deliver it to a platform that rejects MP3 uploads, WAV becomes useful even though it does not improve the sound itself.

    A second misconception is that all WAV files are identical. In reality, WAV files can vary by sample rate, bit depth, and encoding settings. A 44.1 kHz, 16-bit WAV may be perfectly fine for music delivery, while 48 kHz, 24-bit is more common in video and production environments. Understanding those settings matters when precision is important.

    File size and storage implications

    Storage is where the difference becomes obvious fast. An MP3 might be only a few megabytes, while the same audio as WAV can be ten times larger or more. For a solo creator working on a few clips, that may not matter. For a business processing hundreds of recordings, it matters a lot.

    Larger files take longer to upload, download, sync, and archive. If you convert everything by default without a reason, your storage bill and project clutter can grow unnecessarily. That is why MP3 to WAV should be intentional. Use WAV where editing, system compatibility, or delivery standards require it. Keep MP3 where portability and smaller files are the priority.

    For teams and freelancers, this decision affects project management too. WAV files are better as working files, MP3 files are often better as sharing files. Knowing when to use each can keep both quality expectations and storage demands under control.

    How to Get Started with MP3 to WAV

    Start with your actual goal

    Before converting any file, ask a practical question: Why do I need WAV? If the answer is “to improve quality,” you may not get the result you expect. If the answer is “my editor, client, software tool, or system requires WAV,” then the conversion makes sense.

    This small mindset shift prevents wasted time. A lot of users convert files simply because WAV sounds more professional. Sometimes it is the right move. Sometimes it just creates larger files with no real benefit. The best workflow starts with the next step in your process, not the format name alone.

    For example, if you are sending a podcast episode draft to a client for approval, MP3 is often enough. If you are importing spoken word tracks into audio editing software for cleanup and mastering, WAV is usually the better choice.

    Choose the right conversion settings

    When converting MP3 to WAV, pay attention to the export settings if the tool allows it. The most common options include sample rate and bit depth. These settings do not restore lost quality from the MP3, but they can affect compatibility with downstream tools.

    For general use, 44.1 kHz, 16-bit WAV is a safe standard. For video production or professional post-production, 48 kHz is often preferred. If you are delivering files to a client or platform, use their required settings rather than guessing.

    If your conversion tool offers “high quality” presets, be careful not to confuse that label with source recovery. A high-quality WAV export from a low-bitrate MP3 is still limited by the original MP3. The conversion can preserve what remains, but it cannot recreate what was removed during compression.

    Use an online tool carefully

    Online converters are popular because they are fast and convenient. For many users, especially those handling a few files at a time, an online MP3 to WAV tool is the easiest option. You upload the MP3, choose WAV, convert, and download.

    That convenience comes with considerations. If your audio contains private interviews, client calls, unreleased media, legal recordings, or sensitive business material, be cautious. Not every free tool clearly explains how long files are stored or whether uploads are deleted after processing. For public or low-risk files, online conversion is usually fine. For confidential work, a trusted desktop app may be the safer route.

    If you do use a browser-based tool, look for clear file limits, transparent privacy policies, and support for the output settings you need. Ease of use matters, but so does control.

    A simple conversion workflow

    1. Upload your MP3 file to a trusted converter or open it in a desktop audio tool.
    2. Select WAV as the output format and review any settings like sample rate or bit depth.
    3. Convert and download the file, then test it in the app, editor, or system where you plan to use it.

    That is enough for basic needs. What matters more is checking the output file in the real destination environment. A conversion is only successful if the new WAV file works where you need it.

    Check the result before moving on

    After converting, play the WAV file and verify a few basics. Make sure the audio starts and ends correctly, volume levels are consistent, and the file opens in your target software. If the file is for client work or production, confirm that the sample rate matches project requirements.

    This verification step is often skipped, especially when converting in bulk. That can create avoidable problems later, such as sync issues in video timelines or rejected uploads on third-party systems. A quick check now can save a rework cycle later.

    If you handle audio regularly, it is smart to create a repeatable mini-workflow. Use the same settings, naming conventions, and storage folders each time. That level of consistency helps freelancers, teams, and small businesses stay organized as media files pile up.

    Conclusion

    MP3 to WAV conversion is less about making audio sound better and more about making it usable in the right context. MP3 is great for compact storage and easy sharing, WAV is better for editing, production, and systems that require a less compressed format. The conversion has value, but only when it supports your actual workflow.

    The next step is simple. Look at how you plan to use the file after conversion. If you need cleaner compatibility, easier editing, or a format accepted by professional tools, convert your MP3 to WAV with the right settings and verify the output. If not, keeping the file as MP3 may be the smarter and more efficient choice.

  • How to Convert Base64 to PDF — Quick Guide

    How to Convert Base64 to PDF — Quick Guide

    A PDF that refuses to open is frustrating enough. When the source comes as a long, unreadable Base64 string, it can feel even worse. You know the file exists somewhere inside that block of text, but turning it into a usable document is not always obvious, especially if you are juggling invoices, contracts, reports, or app-generated files.

    That is exactly where Base64 to pdf conversion comes in. It takes encoded document data and restores it into a normal PDF you can save, share, print, or archive. For small business owners, freelancers, developers, and anyone working with digital workflows, understanding this process can save time, prevent file errors, and make document handling far more reliable.

    What is Base64 to pdf?

    Base64 to pdf refers to converting a Base64-encoded string back into a standard PDF file. Base64 is a text-based encoding method that represents binary data, such as a PDF, in plain ASCII characters. This makes it easier to transmit files through systems that are designed to handle text rather than raw binary content.

    In practical terms, Base64 often appears when files are sent through APIs, embedded in JSON responses, stored in databases, attached to emails, or passed between web applications. Instead of receiving a file named document.pdf, you may receive a long string beginning with something like JVBERi0x…. That string is not random noise. It is the PDF, translated into text form.

    The conversion process simply reverses that translation. Once decoded, the Base64 content becomes a working PDF again. If the original data is valid and complete, the result should open normally in any standard PDF reader.

    Clear flow diagram showing Base64-encoded PDF recovery: leftmost column with source systems (API, email, database) feeding into a long Base64 text block icon; an arrow labeled "decode" pointing to a PDF file icon; final arrow to actions (save, print, share). Include small labels for "text transport layer" over the Base64 block and "original PDF" over the PDF icon.

    Why Base64 is used in the first place

    Base64 exists because many systems are more comfortable handling text than binary files. Some older communication protocols, web forms, and data transfer methods can corrupt or reject binary content. Encoding the file as Base64 creates a safer transport format.

    This matters in everyday business and technical workflows. A freelance designer might receive a signed PDF through an automation platform. A small business owner might export archived records from a system that stores documents as encoded strings. A developer might build a web app that receives PDF data from an API response. In all of these cases, Base64 is not the final format. It is a delivery format.

    That distinction is important. Base64 is not a document type, and it is not a replacement for PDF. It is just a way to carry the PDF from one place to another.

    What a Base64 PDF string looks like

    A Base64 string is usually long and continuous, made up of uppercase and lowercase letters, numbers, plus signs, slashes, and sometimes equals signs at the end. In some cases, it may also include a prefix such as data:application/pdf;base64, before the encoded content begins.

    That prefix is useful in web contexts because it tells the browser what kind of file is being represented. But if you are decoding the content manually or uploading it into a converter, you may need to remove that prefix first. The actual Base64 data starts after the comma.

    If the string has been copied from an email, spreadsheet, or exported file, spacing and line breaks can also cause problems. A valid Base64 to pdf conversion depends on receiving the complete string without accidental edits.

    Annotated example of a Base64 string: show a long continuous line of characters with a highlighted prefix segment (data:application/pdf;base64,) separated from the encoded content. Add callouts pointing to characters allowed (A–Z, a–z, 0–9, +, /) and padding equals signs at the end. Include a small note showing the comma as the split point between prefix and actual data.

    Key Aspects of Base64 to pdf

    The most important thing to understand is that successful conversion depends on clean input data. When a PDF does not decode correctly, the problem is often not the converter. It is usually a broken Base64 string, a missing prefix issue, an incomplete copy-paste, or corrupted source data from the system that generated it.

    This is why Base64 to pdf can seem easy in one scenario and confusing in another. If the source is complete and properly encoded, conversion is almost instant. If the source has been trimmed, altered, or wrapped incorrectly, the output file may be unreadable or fail to generate entirely.

    Common use cases

    Base64 to pdf conversion appears in more places than many people realize. In business settings, it often shows up in automated invoicing, e-signature workflows, customer document portals, and cloud-based record systems. A platform may package a generated PDF as Base64 to send it safely through an API.

    Developers see it constantly in web and mobile applications. An app may generate a PDF receipt, encode it in Base64, and send it to a front end for download. A backend service may receive PDF uploads as encoded strings for temporary processing. Even browser-based tools sometimes use Base64 under the hood when previewing downloadable content.

    For non-technical users, the experience is often accidental. You expected a file and got a wall of text instead. That usually means the PDF was delivered in encoded form and now needs decoding.

    Base64 to pdf vs other file conversion tasks

    This process is different from a traditional file conversion like Word to PDF or JPG to PDF. In those cases, you are changing one file format into another. With Base64 to pdf, you are not really changing the content itself. You are restoring the original binary file from an encoded text version.

    That difference affects expectations. A standard format conversion may alter layout, compression, fonts, or quality. A Base64 to pdf conversion should not do that. If done correctly, it recreates the exact original PDF data.

    This is also why it is often used in document-sensitive workflows. Contracts, receipts, tax forms, and legal documents need to remain intact. Base64 encoding helps move them safely, and decoding brings them back without modifying the document structure.

    Security and privacy considerations

    Whenever you handle Base64-encoded PDFs, you are still handling the actual document content. Even though the data looks scrambled, Base64 is not encryption. Anyone with access to that string can decode it into the original PDF.

    That is especially important for financial files, client records, HR documents, medical forms, or signed agreements. If you are using an online Base64 to pdf converter, think carefully about what kind of data you are uploading and whether the service is appropriate for sensitive information.

    For businesses and developers, local conversion is often the safer route when privacy matters. Keeping the decoding process inside your own environment reduces exposure and gives you more control over storage, retention, and compliance.

    Typical problems users run into

    One frequent issue is the inclusion of extra characters before or after the Base64 string. This often happens when content is copied from logs, web pages, or exported JSON. Even a small interruption can break the conversion.

    Another problem is incomplete data. Base64 strings can be extremely long, and if part of the content is cut off, the PDF will not reconstruct properly. Some tools also struggle when line breaks are inserted in the wrong place, especially if the string was pasted from a formatted document or spreadsheet.

    There is also the issue of file type mismatch. Sometimes users assume a string represents a PDF when it actually encodes a PNG, ZIP file, or another document type. If the source is not really a PDF, decoding it as one will fail no matter how many times you try.

    Quick comparison of common approaches

    Method Best For Pros Trade-offs
    Online Base64 to pdf tool Fast one-off conversions Simple, no setup, beginner-friendly May raise privacy concerns for sensitive files
    Local desktop utility Repeated offline use Better control, no browser upload May require installation
    Custom script or app logic Developers and automated workflows Scalable, flexible, integrates with systems Requires technical setup and testing
    Browser-based manual decoding Lightweight personal tasks Convenient for quick checks Not ideal for confidential business documents

    How to Get Started with Base64 to pdf

    If you are new to this, the easiest path is to start by checking the source string carefully. Make sure you actually have Base64 data for a PDF, not just a partial snippet. If the string includes a prefix like data:application/pdf;base64,, note whether your chosen tool expects the full value or only the encoded portion.

    For a quick conversion, many users choose an online tool. That works well for non-sensitive documents and occasional tasks. You paste the string, run the conversion, and download the resulting PDF. If the document opens correctly, the process is done.

    A simple workflow for first-time users

    Most Base64 to pdf tasks follow the same basic sequence:

    1. Copy the full Base64 string from the source without truncating it.
    2. Remove any unnecessary prefix or extra characters if your tool requires clean encoded data only.
    3. Decode the string into PDF format using a trusted converter or local method.
    4. Open and verify the PDF to confirm that pages, text, and formatting appear correctly.

    This sounds straightforward, and in many cases it is. The real challenge is accuracy. A clean input almost always leads to a smooth result.

    How developers usually handle it

    For developers, Base64 to pdf is often part of a broader workflow rather than a one-time file rescue. You might receive Base64 in an API response, decode it server-side, and write the output as a .pdf file. Or you may let a front end trigger a browser download after decoding a response from a backend service.

    In these situations, validation matters. It helps to confirm that the string is complete, verify the MIME type if available, and handle decoding errors gracefully. When documents are customer-facing, even a small file corruption issue can create support tickets and undermine trust.

    Developers should also be mindful of performance. Base64 increases data size compared to raw binary. That is acceptable for many workflows, but at scale it can affect payload size, memory use, and response times. For large documents or high-volume systems, direct file handling may sometimes be more efficient than passing everything as Base64.

    How to tell if your Base64 string is valid

    A valid PDF encoded in Base64 usually decodes into a file that begins with the standard PDF header internally. You will not always inspect that manually, but a reliable conversion result should open in a normal PDF viewer without warnings or blank pages.

    If the file will not open, first go back to the source string. Check whether the content was cut off. Look for pasted spaces, line wrapping, quote marks, or metadata mixed into the actual encoded data. If a prefix is present, test whether removing it helps.

    It is also worth confirming the origin. If the string came from an API, log export, or database field, verify that the source system actually generated a PDF. Mislabeling happens more often than many users expect.

    Choosing the right method for your workflow

    The right Base64 to pdf method depends on context. If you only need to decode a receipt once, convenience is probably your priority. If you handle confidential business records regularly, privacy and control matter more. If you are building a product or automating document delivery, repeatability and error handling become essential.

    That is why this topic matters beyond a one-time conversion. It sits at the intersection of usability, security, and workflow design. A good process is not just about getting a PDF today. It is about making document handling dependable tomorrow.

    Practical tips for smoother results

    • Keep the source intact: Avoid editing or reformatting the string unless necessary.
    • Check for the data prefix: Some tools accept it, others require only the raw Base64 portion.
    • Use secure methods for sensitive files: Treat Base64 data like the document itself.
    • Verify the output immediately: Open the PDF and confirm that it matches expectations.

    These small checks save time because they catch the most common failure points early. In document workflows, that kind of consistency matters more than speed alone.

    Conclusion

    Base64 to pdf is simpler than it first appears. You are taking text-encoded document data and restoring it to its original PDF form. Once you understand that Base64 is just a transport layer, the process becomes much easier to manage.

    Whether you are a freelancer trying to recover a client file, a small business owner dealing with automated documents, or a developer integrating file delivery into an application, the same rules apply. Start with clean data, choose the right conversion method, and treat encoded documents with the same care you would give the final PDF.

    Your next step is straightforward. Take the Base64 string you have, verify that it is complete, and decode it using a method that fits your privacy and workflow needs. If the output opens cleanly, you have not just solved one file problem. You have learned a practical skill that makes digital document handling far more efficient.

  • Base64 to Text: Decode Base64 Safely and Easily

    Base64 to Text: Decode Base64 Safely and Easily

    A long string ending in = can look like nonsense, but it often hides something very ordinary, a message, a config value, a file header, or plain readable text. If you have a Base64 string and need to turn it back into text, the good news is that the process is usually simple. The challenge is knowing which tool to use, how to spot the right variant, and how to avoid privacy mistakes along the way.

    This guide explains Base64 to text conversion in plain language first, then gives you practical methods for browsers, terminals, and common programming languages. It also covers the parts many quick converter pages skip, including URL-safe Base64, data URI cleanup, character encoding issues, JWT payloads, and secure handling of sensitive data.

    What is Base64 and why you encounter it

    Definition: Base64 encoding in simple terms

    Base64 is a way to represent binary data as text. Instead of sending raw bytes directly, Base64 transforms them into a limited set of characters that are easier to transport through systems built for text.

    That is why a Base64 string often looks like a block of letters, numbers, slashes, plus signs, and sometimes one or two = characters at the end. It is not meant for humans to read directly. It is meant for computers to pass around safely.

    A quick technical note helps here. Base64 takes data and splits it into 6-bit chunks, then maps each chunk to a character from a 64-character alphabet. If the original data length does not divide evenly, Base64 uses padding, usually =, to complete the output.

    Why Base64 exists: binary-to-text transport and common use-cases

    Many older and modern systems handle text more reliably than raw binary. Base64 solves that compatibility problem. It lets images, attachments, tokens, and other binary content travel through channels that expect text.

    That is why you see Base64 in APIs, HTML data URIs, email attachments, certificate files, and authentication tokens. It is not encryption, and it is not compression. It is simply an encoding format.

    The trade-off is size. Base64 makes data about 33% larger than the original. That sounds inefficient, and it is, but the benefit is portability and predictable transport.

    Where you commonly see Base64

    You will often run into Base64 in places where systems need to embed or move data without worrying about binary corruption. A common example is an image embedded directly into HTML or CSS using a data URI, such as data:image/png;base64,....

    Developers also see Base64 in API payloads, particularly when binary files are sent in JSON. Security-related tools use it in JWT tokens, though those use the URL-safe variant. Email systems use Base64 for attachments and MIME parts, and certificate-related formats may contain Base64-encoded blocks inside text files.

    If a string is long, contains only letters, digits, +, /, _, -, and maybe =, there is a fair chance you are looking at Base64 or one of its close variants.

    How Base64 encoding works (brief technical overview)

    The algorithm in steps: grouping, 6-bit chunks, mapping to alphabet, padding

    The process is easier to understand if you think in layers. Original text is first stored as bytes. Those bytes are grouped in sets of 3, which gives 24 bits. Base64 then splits those 24 bits into 4 groups of 6 bits each.

    Each 6-bit value maps to one Base64 character. That is how 3 bytes become 4 text characters.

    For example, the text Hi becomes the Base64 string SGk=. The trailing = appears because Hi is only 2 bytes, not 3, so the output needs padding to complete the final block.

    Diagram showing the Base64 encoding process: 3 input bytes (24 bits) grouped together, split into four 6-bit chunks, each mapped to a Base64 character. Include an example: ASCII for 'Hi' (0x48 0x69) shown as bytes, padded with zeros to make 24 bits, resulting 6-bit values, mapped to characters 'S', 'G', 'k', '=' with the '=' shown as padding. Annotate '3 bytes -> 4 chars', '6-bit chunks', and 'padding when input length ≠ multiple of 3'.

    Base64 alphabet and variants

    Standard Base64 uses this character set: uppercase letters, lowercase letters, digits, +, and /. Padding is done with =.

    A very common variant is Base64URL, used in URLs and JWTs. It replaces + with - and / with _. It also often omits padding. That small change matters, because a standard decoder may reject URL-safe input unless you normalize it first.

    Another variation appears in MIME email content, where line breaks may be inserted every 76 characters. If you copy encoded data from an email, those line breaks usually need to be removed before decoding.

    Side-by-side comparison of Base64 alphabets/variants: left column labeled 'Standard Base64' showing characters A–Z a–z 0–9 + / and '=' padding; right column labeled 'Base64URL' replacing '+' with '-' and '/' with '_' and noting 'padding often omitted'. Include a small note/arrow showing how to normalize URL-safe to standard (+/ and add padding) before decoding.

    Common pitfalls: padding, line breaks, character set assumptions

    Many Base64 decoding errors come from tiny formatting issues. Missing padding is common in JWTs and URL-safe strings. Embedded whitespace or line breaks are common in emails and certificates. Data URI prefixes are common in web contexts.

    Another frequent issue is not Base64 itself, but the character encoding of the decoded bytes. You may decode the Base64 correctly and still see gibberish if the output is not UTF-8 text. It could be Latin-1, UTF-16, compressed data, or even a binary file.

    That is why Base64 to text conversion is really a two-step interpretation. First decode the Base64. Then determine what the resulting bytes actually represent.

    How to convert Base64 to text: quick methods

    Online tools and one-click converters

    For non-sensitive data, a browser-based converter is the fastest route. Paste the Base64 string, decode it, and inspect the result.

    Tools on domains such as base64.guru, www.base64decode.org, and www.utilities-online.info are commonly used for quick checks. They are convenient, but convenience comes with a warning. If the string may contain tokens, personal data, customer records, API secrets, or private messages, avoid random online tools and decode locally instead.

    If your input begins with a data URI prefix like data:text/plain;base64,, remove everything before the comma first. Most good tools handle this automatically, but not all do.

    Browser devtools and console

    If you want a local method in the browser, open developer tools and use JavaScript in the console. This works well for short text strings.

    const input = "SGVsbG8gd29ybGQ=";
    const cleaned = input.replace(/^data:[^,]+,/, "").replace(/s+/g, "");
    const text = decodeURIComponent(
      Array.from(atob(cleaned), c => "%" + c.charCodeAt(0).toString(16).padStart(2, "0")).join("")
    );
    console.log(text);
    

    For a URL-safe string, normalize it first.

    const input = "SGVsbG8td29ybGQ";
    const normalized = input
      .replace(/-/g, "+")
      .replace(/_/g, "/")
      .padEnd(Math.ceil(input.length / 4) * 4, "=");
    
    console.log(atob(normalized));
    

    The first example handles UTF-8 text more reliably than a plain atob() call. That matters when the decoded text includes non-English characters.

    Command-line options on Linux and macOS

    On Unix-like systems, the built-in base64 command is often enough.

    echo 'SGVsbG8gd29ybGQ=' | base64 --decode
    

    If the input may contain whitespace or a data URI prefix, clean it first.

    echo 'data:text/plain;base64,SGVsbG8gd29ybGQ=' | sed 's/^data:[^,]*,//' | tr -d 'nrt ' | base64 --decode
    

    To normalize a URL-safe string:

    s='SGVsbG8td29ybGQ'
    s=$(printf "%s" "$s" | tr '_-' '/+')
    pad=$(( (4 - ${#s} % 4) % 4 ))
    s="${s}$(printf '=%.0s' $(seq 1 $pad))"
    printf "%s" "$s" | base64 --decode
    

    If base64 behaves differently on your system, openssl is another option.

    echo 'SGVsbG8gd29ybGQ=' | openssl base64 -d -A
    

    The -A flag helps when line breaks are involved.

    Windows PowerShell

    PowerShell makes Base64 decoding straightforward for text.

    $input = "SGVsbG8gd29ybGQ="
    $bytes = [Convert]::FromBase64String($input)
    $text = [System.Text.Encoding]::UTF8.GetString($bytes)
    ### $text
    

    To handle a URL-safe string and missing padding:

    $input = "SGVsbG8td29ybGQ"
    $normalized = $input.Replace('-', '+').Replace('_', '/')
    switch ($normalized.Length % 4) {
      2 { $normalized += "==" }
      3 { $normalized += "=" }
    }
    $bytes = [Convert]::FromBase64String($normalized)
    [System.Text.Encoding]::UTF8.GetString($bytes)
    

    To remove a data URI prefix:

    $input = "data:text/plain;base64,SGVsbG8gd29ybGQ="
    $cleaned = $input -replace '^data:[^,]+,', ''
    [System.Text.Encoding]::UTF8.GetString([Convert]::FromBase64String($cleaned))
    

    Programming examples: Python, JavaScript, Java, C#

    If you are building the conversion into an app or script, use the language’s standard library where possible.

    Python:

    import base64
    
    s = "SGVsbG8gd29ybGQ="
    cleaned = s.split(",", 1)[-1].strip()
    decoded = base64.b64decode(cleaned)
    print(decoded.decode("utf-8"))
    

    Python with URL-safe Base64:

    import base64
    
    s = "SGVsbG8td29ybGQ"
    cleaned = s.split(",", 1)[-1].strip()
    padding = "=" * (-len(cleaned) % 4)
    decoded = base64.urlsafe_b64decode(cleaned + padding)
    print(decoded.decode("utf-8"))
    

    JavaScript in Node.js:

    const input = "SGVsbG8gd29ybGQ=";
    const cleaned = input.replace(/^data:[^,]+,/, "").replace(/s+/g, "");
    const text = Buffer.from(cleaned, "base64").toString("utf8");
    console.log(text);
    

    Java:

    import java.nio.charset.StandardCharsets;
    import java.util.Base64;
    
    String input = "SGVsbG8gd29ybGQ=";
    String cleaned = input.replaceFirst("^data:[^,]+,", "").replaceAll("\s+", "");
    byte[] decoded = Base64.getDecoder().decode(cleaned);
    String text = new String(decoded, StandardCharsets.UTF_8);
    System.out.println(text);
    

    C#:

    using System;
    using System.Text;
    
    string input = "SGVsbG8gd29ybGQ=";
    string cleaned = System.Text.RegularExpressions.Regex.Replace(input, @"^data:[^,]+,", "");
    byte[] bytes = Convert.FromBase64String(cleaned);
    string text = Encoding.UTF8.GetString(bytes);
    Console.WriteLine(text);
    

    Step-by-step: Decode Base64 to readable text securely

    Step 1: Identify if string is Base64

    A Base64 string often has a recognizable pattern. It usually contains only letters, digits, +, /, _, -, and optional = padding. It may be very long and may not contain obvious words.

    A quick heuristic is useful, but not perfect. Some ordinary strings can accidentally match the Base64 character set. The best test is to try decoding with a strict decoder and see whether the result makes sense.

    Step 2: Clean the input

    Before decoding, remove anything that does not belong to the encoded payload. That includes data URI prefixes, line breaks, spaces, tabs, and sometimes enclosing quotes.

    If you are dealing with JWTs or URL parameters, convert - back to + and _ back to /. Then restore missing = padding if needed so the length becomes a multiple of 4.

    Step 3: Choose a safe tool

    If the string may contain credentials, customer records, signed tokens, internal logs, or confidential documents, decode it offline using your terminal or a local script.

    Online converters are fine for test strings and harmless samples. They are not a good home for secrets. The same principle applies to screenshots, browser sync, and clipboard history. Sensitive data has a way of traveling farther than expected.

    Step 4: Decode and interpret the result

    Once decoded, inspect the output carefully. If it is readable text, you are done. If it looks scrambled, the issue may be the text encoding rather than the Base64.

    UTF-8 is the most common encoding, but not the only one. Tools like file on Linux or libraries such as chardet in Python can help identify likely encodings.

    echo 'SGVsbG8gd29ybGQ=' | base64 --decode | file -
    
    import chardet, base64
    data = base64.b64decode("SGVsbG8gd29ybGQ=")
    print(chardet.detect(data))
    

    Step 5: Troubleshooting common errors

    If you see invalid character errors, the input may contain whitespace, a data URI prefix, or URL-safe characters that were not normalized.

    If decoding succeeds but the output looks like random symbols, the data may not be text at all. It could be an image, a PDF, compressed bytes, or another encoded layer. In some cases, it is text in a different character set, such as UTF-16 or ISO-8859-1.

    Examples: Real-world Base64-to-text conversions

    Decoding a data URI

    Suppose you have this input:

    data:text/plain;base64,SGVsbG8sIHdvcmxkIQ==

    Remove the prefix and decode the rest. The result is:

    Hello, world!

    If the data URI says image/png instead of text/plain, the decoded output is binary image data, not readable text. That distinction matters.

    Extracting a message from a Base64 email part

    An email body or attachment section may include:

    VGhhbmsgeW91IGZvciB5b3VyIG9yZGVyLg==

    That decodes to:

    Thank you for your order.

    In real emails, line breaks are often inserted automatically. Remove them before decoding.

    Decoding a JWT payload

    JWTs are split into three parts separated by dots. The middle part is the payload and usually uses Base64URL, not standard Base64.

    A payload like:

    eyJzdWIiOiIxMjM0NTY3ODkwIiwibmFtZSI6IkpvaG4gRG9lIiwiaWF0IjoxNTE2MjM5MDIyfQ

    decodes to JSON text like:

    {"sub":"1234567890","name":"John Doe","iat":1516239022}

    This is useful for inspection, but decoding a JWT is not the same as validating it. Anyone can decode it. Trust requires signature verification.

    Recovering text from logs or config files

    You might find a config value like:

    YXBpX2tleT1kZW1vMTIz

    Decoded, this becomes:

    api_key=demo123

    That can be helpful in troubleshooting, but it also shows why Base64 should never be treated as a security feature. It only obscures content, it does not protect it.

    Security, privacy, and integrity considerations

    Never paste secrets into untrusted online tools

    This is the most important practical rule. A Base64 string may contain passwords, private tokens, invoices, identity data, or full file contents. If you paste it into an online converter, you may be sharing that information with a third party.

    Use browser tools, local scripts, or terminal commands whenever the data matters. For businesses and freelancers, that small habit reduces avoidable risk.

    Malicious payloads and why decoding may be risky

    Decoded content is not always harmless text. It could be JavaScript, a macro-enabled document, an executable, or compressed malware. Decoding alone does not execute content, but opening the resulting file might.

    If the decoded output is not clearly text, treat it like an unknown file. Save it carefully, inspect it in a controlled environment, and scan it before opening.

    Verifying integrity

    Base64 does not prove authenticity or integrity. It only changes representation.

    If you need to know whether decoded data is genuine, look for checksums, digital signatures, or protocol-level verification. With JWTs, that means validating the signature using the correct key and algorithm. Reading the payload is easy. Trusting it is a separate step.

    Handling encoded files safely

    When Base64 wraps a file, decode it to disk only if necessary. Then use antivirus or sandbox tools if the origin is uncertain.

    For teams handling customer uploads, logs, or attachments, a simple policy helps: decode locally, inspect file type, scan, then open.

    Advanced topics and troubleshooting

    When decoding yields gibberish

    If the result is unreadable, several things may be happening. The decoded bytes may use the wrong character set. The content may be compressed. Or the string may be encoded more than once.

    A classic clue for gzip-compressed data is the magic byte sequence 1f 8b after decoding. In that case, you must decompress after Base64 decoding.

    echo 'H4sIAAAAA...' | base64 --decode | gunzip
    

    Detecting and handling double-encoded data

    Sometimes Base64 is applied twice. After the first decode, you get another Base64-looking string instead of meaningful text.

    If the first decoded result still matches Base64 patterns and decodes cleanly again, you may be dealing with double-encoded data. This shows up in logs, migrations, and systems where multiple layers try to “safely” wrap the same value.

    Base64 vs other encodings

    Base64 is not the only text-friendly encoding. Hex is simpler and easier to debug by eye, but it doubles size. Base32 is useful in some interoperability contexts. Base58 avoids visually confusing characters and is popular in blockchain-related systems.

    For general binary-to-text transport, Base64 remains the default because it balances efficiency and compatibility well.

    Performance and size considerations

    Base64 increases storage and transfer size by roughly one-third. For occasional values, that is minor. For large attachments or high-volume APIs, it matters.

    Encoding and decoding are fast, but moving oversized payloads through JSON or email still adds cost. If performance is important, prefer direct binary transfer where the system supports it.

    Tools and resources: recommended utilities and references

    The best tools are usually the ones already on your machine. Terminal utilities such as base64, openssl, and PowerShell’s [Convert]::FromBase64String() are reliable and private. For application code, use the standard libraries in Python, Node.js, Java, and .NET rather than hand-rolled decoders.

    If you need an online converter for harmless sample data, choose well-known sites and avoid anything that asks for sign-in, permissions, or uploads unrelated metadata. Examples people commonly use include base64.guru and base64decode.org, but local decoding is still the safer default.

    For authoritative references, start with RFC 4648 for Base64 and Base64URL rules. For JWT behavior, consult RFC 7519. For email-related line wrapping and content transfer details, MIME standards remain the key reference point.

    FAQ: quick answers to common reader questions

    Is Base64 encryption?

    No. Base64 is encoding, not encryption. Anyone can decode it with basic tools.

    Why does decoding sometimes produce strange characters?

    Usually because the decoded bytes are not UTF-8 text, or because the content is binary, compressed, or encoded again. The Base64 decode may be correct even if the displayed text is not.

    Can I safely share Base64-encoded strings?

    Only if you would also be comfortable sharing the underlying content. Base64 does not meaningfully protect sensitive information.

    How do I detect if a string is Base64 programmatically?

    The most dependable method is to try decoding with validation enabled, then inspect whether the result is expected. Pattern matching helps, but it is only a heuristic.

    Conclusion and best-practices checklist

    Base64 to text conversion is easy once you know what to look for. Clean the input, identify the right variant, decode with a trusted local tool, and then interpret the output using the correct text encoding. If something looks wrong, the issue is often padding, URL-safe characters, MIME line breaks, or non-UTF-8 output.

    Use online converters only for non-sensitive samples. For everything else, decode locally and inspect carefully. If your next step is practical, start with the method that matches your environment: browser console, terminal, PowerShell, or a short script in your preferred language.

  • Base64 to Hex: Decode Bytes and Output Hex

    Base64 to Hex: Decode Bytes and Output Hex

    If you have ever copied a Base64 string out of an API response, a certificate file, or a debugging log and then needed it in hexadecimal form, you already know how awkward that conversion can feel.

    The data is there, but it is wrapped in a different encoding, and one wrong assumption can turn a valid byte sequence into nonsense.

    That is where Base64 to hex conversion becomes useful. It is a practical, everyday task for developers, security professionals, freelancers working with integrations, and even non-technical users handling encoded assets.

    Once you understand what is actually being converted, the process becomes simple, reliable, and much easier to troubleshoot.

    What is Base64 to hex?

    At a basic level, Base64 to hex means taking data that has been represented using Base64 encoding and converting it into a hexadecimal representation of the same underlying bytes.

    The important phrase here is the same underlying bytes. You are not changing the meaning of the data. You are only changing how that data is displayed.

    Base64 is a text-based encoding that uses letters, numbers, and a few symbols to represent binary data in a compact ASCII-friendly format.

    It is commonly used when binary content needs to travel through systems that prefer text, such as email, JSON payloads, or web APIs. A Base64 string might look like SGVsbG8=.

    Hex, short for hexadecimal, represents the same data using base-16 notation. Each byte is usually shown as two hex characters, such as 48 65 6c 6c 6f.

    If the Base64 string above decodes to the bytes for the word “Hello,” the hex output would be 48656c6c6f.

    Why this conversion matters

    This conversion is common because different tools and workflows expect different formats.

    A cryptography library may display a hash in hex. A browser or API may send a payload in Base64. A debugging tool may ask for raw bytes or hex values. In each case, the actual information is identical, but the representation changes.

    For small business owners or freelancers using automation tools, this may show up when connecting services, validating webhook payloads, or checking token data.

    For developers, it often appears in backend services, security work, binary protocols, and file inspection.

    For productivity-minded users, an online Base64 to hex converter can save time when quick validation is all that is needed.

    Base64 and hex are not interchangeable

    A common misunderstanding is thinking Base64 and hex are competing storage formats. They are not. Both are encodings of binary data, but they serve different purposes.

    Base64 is more compact than hex when representing binary as text. Hex is more readable at the byte level and often easier to inspect manually.

    If you are comparing byte patterns, checking magic numbers in files, or reading cryptographic values, hex is often the better view. If you are transporting data through text-only systems, Base64 is usually more convenient.

    Key Aspects of Base64 to hex

    Understanding a few core ideas makes Base64 to hex conversion much easier and helps you avoid the most common mistakes.

    The conversion happens in two steps

    The process is conceptually simple. First, you decode the Base64 string into raw bytes. Then, you render those bytes as hexadecimal. That is all.

    A simple flow diagram showing the two-step conversion: (1) Base64 string input -> decode -> raw bytes (visualized as a row of byte boxes), (2) raw bytes -> render -> hexadecimal string output. Include arrows and labels: 'decode Base64 to bytes' and 'format bytes as hex'.

    What often causes confusion is skipping the byte layer mentally. People sometimes try to “translate” Base64 characters directly into hex characters, but that is not how it works.

    Base64 and hex are both views of bytes, so the bytes have to remain the reference point.

    A useful analogy is file compression and file naming. If you rename a .zip file to .txt, the content does not become plain text. Likewise, if you look at bytes through Base64 or through hex, the bytes remain unchanged. Only the notation changes.

    Padding and valid Base64 input

    Many Base64 strings end with one or two equals signs, such as = or ==. These are padding characters.

    They help make the encoded output align correctly. Some systems include them, while others omit them, especially in URL-safe contexts.

    A good Base64 to hex tool should handle standard Base64 correctly and should clearly indicate if the input is malformed. If the input length is off, or if invalid characters appear, the converter may fail or produce misleading output. This is why validation matters, especially in security or API work.

    Standard Base64 vs URL-safe Base64

    Not all Base64 strings look exactly the same. Standard Base64 uses characters like + and /, while URL-safe Base64 replaces them with - and _.

    This small difference matters.

    If you try to decode a URL-safe Base64 string with a strict standard decoder, it may fail unless the tool supports both forms. This is especially relevant when dealing with JWT segments, OAuth tokens, and web application payloads.

    If your converter supports automatic normalization, the job becomes much easier.

    Hex output styles vary

    Hex output is not always shown in one universal style. Some tools output lowercase letters, such as 48656c6c6f, while others use uppercase, such as 48656C6C6F.

    Some insert spaces between bytes, and some prefix values with 0x.

    These differences usually do not affect the underlying data, but they matter when you compare values across tools or paste results into a script. If you are troubleshooting, it helps to know whether formatting differences are cosmetic or meaningful.

    Format Style Example Typical Use
    Lowercase hex 48656c6c6f Common in many developer tools
    Uppercase hex 48656C6C6F Seen in documentation and some security tools
    Spaced bytes 48 65 6c 6c 6f Easier manual inspection
    Prefixed hex 0x48 0x65 0x6c Low-level or educational contexts

    Character encoding can complicate interpretation

    The conversion itself is about bytes, not text. That distinction matters.

    Once you decode Base64, the result might be text, a file fragment, compressed data, an image header, encrypted bytes, or something else entirely.

    If the bytes represent UTF-8 text, the hex output may correspond to familiar characters. If the bytes represent a binary file, the hex may look random. This does not mean the conversion failed. It simply means the original content was not plain text.

    That is why a Base64 to hex converter is often used as a diagnostic step. It reveals what bytes are actually present, even when the decoded content is not human-readable.

    Practical use cases

    In real workflows, Base64 to hex shows up more often than many people expect.

    Security analysts use it to inspect keys, tokens, and binary signatures. Developers use it to validate API payloads and compare byte-level values across systems. Automation users may rely on it when transforming data between services that expect different formats.

    Imagine you receive a Base64-encoded webhook signature from one service, but your verification library logs the expected bytes in hex. You need a clean conversion path to compare them accurately.

    Or consider a binary attachment embedded in JSON. Converting Base64 to hex can help confirm whether the file starts with the correct header bytes before you save or process it.

    How to Get Started with Base64 to hex

    The easiest way to start is with a trusted online tool or a quick script in your preferred language.

    The right choice depends on whether you need a one-time conversion or a repeatable part of your workflow.

    If you only need to inspect a value occasionally, an online Base64 to hex converter is ideal. Paste the Base64 string, run the conversion, and review the hex output. This is fast, especially when debugging integrations or checking encoded values from logs or browser tools.

    If you work with encoded data regularly, a script gives you more control. It also makes it easier to automate repetitive tasks, validate input, and handle URL-safe variants consistently.

    A simple example

    Suppose your input is SGVsbG8=.

    A concrete example panel that shows the three parallel representations of the same data: left column 'Base64: SGVsbG8=', middle 'Bytes (hex pairs): 48 65 6c 6c 6f' shown as byte boxes, right 'Hex string: 48656c6c6f'. Optionally include a small label 'represents the ASCII text "Hello"' to tie to human-readable text.

    That Base64 string decodes to the bytes of the word “Hello”. When shown in hex, the output becomes 48656c6c6f.

    This is a small example, but it illustrates the pattern clearly. The Base64 string is not converted into letters. It is decoded into bytes, and those bytes are displayed in hexadecimal notation.

    Quick ways to convert Base64 to hex in code

    If you want to handle this in a script or application, here are straightforward examples.

    import base64
    
    b64 = "SGVsbG8="
    raw_bytes = base64.b64decode(b64)
    hex_output = raw_bytes.hex()
    
    print(hex_output)  # 48656c6c6f
    

    In Python, the process is very clean. You decode the Base64 string into bytes, then call .hex() on those bytes. This is one of the easiest ways to test values locally.

    const b64 = "SGVsbG8=";
    const buffer = Buffer.from(b64, "base64");
    const hexOutput = buffer.toString("hex");
    
    console.log(hexOutput); // 48656c6c6f
    

    In Node.js, Buffer handles both parts of the conversion. This is especially useful in backend development and API debugging.

    echo "SGVsbG8=" | base64 --decode | xxd -p
    

    On many Unix-like systems, command-line tools can do the job quickly. This approach is handy for terminal-based debugging, though exact command behavior may vary by platform.

    What to check before converting

    Before running any Base64 to hex conversion, it helps to verify a few basics.

    Confirm the string is actually Base64 and not plain text or another encoding.

    Check whether it is standard Base64 or URL-safe Base64.

    See whether missing = characters need to be restored.

    Decide whether you want compact hex, spaced bytes, or uppercase formatting.

    These checks prevent most conversion errors. They also save time when the issue is not the converter, but the input itself.

    Common mistakes to avoid

    One of the most frequent errors is converting the Base64 text characters to hex rather than decoding the Base64 first.

    For example, turning the ASCII characters S, G, V, s into hex is not the same as converting the encoded payload into hex bytes. That mistake produces the hex of the string itself, not the original data.

    Another common issue is pasting in a value that includes line breaks, extra spaces, or metadata such as a data URI prefix. For instance, a string like data:image/png;base64,... needs to be stripped down to the actual Base64 payload before conversion.

    A third issue is assuming the result should always be readable. If the original data is compressed or encrypted, the hex output will look opaque. That is expected. Hex is faithful, not necessarily friendly.

    Online tool versus local conversion

    For convenience, online tools are hard to beat. They are fast, accessible, and useful when you need a quick answer without opening an editor or terminal.

    They are particularly helpful for freelancers, operations teams, and users who do not want to write code for a one-off task.

    For sensitive data, local conversion is usually the better choice. If the Base64 string contains credentials, tokens, internal payloads, or private keys, handling the conversion on your own machine reduces risk.

    This is simple but important.

    Method Best For Main Advantage Main Consideration
    Online converter Quick, one-off tasks Fast and easy Avoid for sensitive data
    Local script Repeatable workflows Flexible and automatable Requires basic setup
    Command line Developer debugging Very fast in terminal Platform syntax may vary

    Conclusion

    Base64 to hex is a straightforward conversion once you focus on the byte layer.

    Base64 is one textual encoding of binary data, and hex is another. The job is not to translate characters directly, but to decode the Base64 into raw bytes, and then display those bytes as hexadecimal.

    That simple understanding unlocks a lot of practical value. You can inspect API payloads more accurately, compare cryptographic data across tools, debug integrations with confidence, and avoid the common pitfalls that waste time.

    The next step is simple: take a real Base64 value you work with, convert it to hex using a trusted tool or a small script, and verify the output against your workflow. Once you do it a couple of times, the process becomes second nature.

  • Encrypt Text Online Free: Secure Your Messages in Seconds

    Encrypt Text Online Free: Secure Your Messages in Seconds

    A plain text message can expose more than most people realize. Client notes, password hints, contract details, API keys, internal plans, and personal information often get copied into emails, chats, and documents without a second thought. That convenience is useful, but it also creates risk. If you need to encrypt text online free, the good news is that modern web tools make the process fast, accessible, and practical for everyday use.

    For small business owners, freelancers, developers, and productivity-focused users, text encryption is no longer a niche security task. It is a simple habit that helps protect sensitive content before it is shared or stored. The real challenge is not whether free online encryption exists, it is knowing what it actually does, when to trust it, and how to use it without creating a false sense of security.

    What is Encrypt text online free?

    At its core, encrypt text online free means using a web-based tool to convert readable text into an unreadable format that can only be restored with the correct key, password, or method. In simple terms, encryption scrambles your message so that even if someone intercepts it, they cannot understand it without authorization. The original readable message is often called plaintext, and the scrambled result is called ciphertext.

    This matters because not all text protection works the same way. Some online tools only encode text, which changes its format but does not truly secure it. Others perform real encryption using established cryptographic methods. That difference is critical. If you are protecting financial details, confidential business notes, customer information, or login-related content, you need actual encryption, not just a cosmetic transformation.

    Free online text encryption tools are popular because they remove friction. You do not need to install software, configure complex settings, or learn command-line utilities just to protect a short message. In many cases, you paste your text into a browser, choose a password or encryption option, and generate encrypted output in seconds. For quick workflows, that ease is valuable.

    Still, convenience should not replace judgment. The phrase encrypt text online free sounds simple, but the safety of the process depends on how the tool handles your data. Some services process everything locally in your browser, which means your text may never leave your device. Others send the content to a server for processing. That distinction can dramatically affect privacy and trust.

    Encryption versus encoding versus hashing

    People often use these terms interchangeably, but they solve different problems. Encryption is reversible with the right key or password, which makes it suitable when you want to protect a message and later recover it. Encoding is mostly about formatting data for compatibility, such as converting text into another representation. It is not security. Hashing creates a one-way fingerprint and is used to verify data or store passwords more safely, but it is not designed to restore the original text.

    A useful analogy is this. Encoding is like changing a document into a different file format. Hashing is like creating a unique fingerprint of the document. Encryption is like placing the document in a locked safe. If your goal is confidentiality, only the safe analogy fits.

    Three-panel comparison illustrating 'Encryption vs Encoding vs Hashing': (1) Encryption — a document placed inside a locked safe with a key labeled 'decrypt' (reversible); (2) Encoding — the same document changing file formats (e.g., text -> encoded string) with a label 'formatting, not secure'; (3) Hashing — a fingerprint icon representing a one-way digest with no key to recover the original.

    Why people use online text encryption

    The use cases are broader than many expect. A freelancer might encrypt contract notes before sending them over a messaging app. A small business owner may protect sensitive instructions shared with a remote assistant. A developer may want to secure an API secret in transit. Even an individual sending personal details to a family member may want more than plain text privacy.

    This is why free tools remain attractive. They serve immediate, practical needs without requiring a budget approval or an IT department. When the tool is well designed and transparent about how it works, it can be an efficient way to add a meaningful layer of protection.

    Key Aspects of Encrypt text online free

    Choosing the right free online encryption method is not just about clicking the first result in a search engine. The quality of the tool, the security model, and your intended use all matter. A polished interface means little if the service stores your message on a server or uses weak cryptography behind the scenes.

    The most important factor is whether the encryption happens client-side, inside your browser. When that is the case, the text is transformed on your device before anything is transmitted. This reduces the risk of exposure. It also means the provider may never see your original message, which is exactly what privacy-conscious users want.

    Some services process everything locally in your browser, which means your text may never leave your device. Others send the content to a server for processing. That distinction can dramatically affect privacy and trust.

    Schematic diagram comparing browser-based (client-side) encryption vs server-side processing: on the left, a laptop with text that is transformed into ciphertext inside the browser, with an arrow showing only ciphertext leaving the device; on the right, a laptop sending plaintext to a remote server which then returns ciphertext — include a warning icon by the server path to indicate higher exposure.

    Browser-based encryption is often the safest online option

    When a tool performs encryption in the browser, it behaves more like a local app than a remote processor. That does not make it automatically perfect, but it is generally better than a service that asks you to trust its servers with your raw text. For business users handling confidential material, this distinction should be near the top of the checklist.

    You should also look for transparency. Reputable tools usually explain what encryption standard they use, whether the process is local, and whether they store any submitted content. If a website is vague about all three, caution is warranted. Security should be visible, not assumed.

    Strong passwords still matter

    Even the best encryption algorithm can be undermined by a weak password. If your encrypted text is protected with something obvious like “123456,” “companyname,” or a predictable phrase, the security benefit drops fast. The encryption system may be strong, but the lock is only as useful as the key you choose.

    A good password for text encryption should be long, unique, and difficult to guess. Passphrases are often easier to remember and stronger than short passwords filled with predictable substitutions. If you are encrypting something genuinely sensitive, create a fresh passphrase for that specific exchange instead of reusing one from another account or app.

    Free does not always mean private

    Many people assume “free” simply refers to price. In reality, free services often operate on trade-offs. Some may show ads, collect analytics, log activity, or monetize traffic indirectly. That does not automatically make them unsafe, but it does mean you should read carefully before using them for anything important.

    A free text encryption tool can be excellent if it limits data collection, processes text locally, and avoids storing content. On the other hand, a free tool that lacks transparency may create more risk than convenience. For sensitive business communications, the right free option is one that minimizes trust requirements.

    Usability matters more than people think

    Security tools fail when they are too awkward to use. If the process is confusing, users make mistakes. They may copy the wrong text, forget the password, store the key in the same message thread, or abandon encryption altogether because it slows them down. Good tools strike a balance between security and clarity.

    That balance is especially important for small teams and solo professionals. A tool that works in seconds and does not require technical expertise is far more likely to become a consistent habit. Consistency, in practice, often matters as much as technical strength.

    Common features to compare

    If you are evaluating online options, these are the features worth comparing at a glance:

    • Encryption location: Determines whether your text is exposed to a server, prefer in-browser or client-side encryption.
    • Password protection: Controls who can decrypt the text, prefer custom, strong passphrase support.
    • Transparency: Shows whether the tool explains its methods, prefer clear documentation and privacy details.
    • Storage policy: Affects whether your message may be retained, prefer no text storage or temporary local handling.
    • Ease of use: Reduces user error and speeds up workflow, prefer simple interfaces with clear steps.
    • Device compatibility: Helps when working across teams and platforms, prefer tools that work on desktop and mobile browsers.

    When online encryption is appropriate, and when it is not

    Free online encryption is ideal for short messages, notes, temporary sharing, and quick protection in a browser-first workflow. It is particularly useful when you need speed and do not want to install software on every device. For routine operational privacy, that can be enough.

    It is less ideal for highly regulated data, long-term secrets, or mission-critical business records that require strict compliance controls. In those cases, dedicated security tools, encrypted file vaults, or enterprise communication systems may be more appropriate. The right question is not “Is online text encryption good or bad?” It is “Is it appropriate for this kind of information?”

    How to Get Started with Encrypt text online free

    Getting started is straightforward, but doing it well requires a little discipline. The first step is understanding what kind of text you are trying to protect and how sensitive it is. A draft note to yourself is one thing. Client account details or private credentials are something else entirely. The more sensitive the text, the more selective you should be about the tool and your process.

    Before using any online service, check whether it states that encryption happens locally in your browser. Then verify that the site uses HTTPS and provides a clear explanation of its privacy approach. These are not advanced technical checks. They are practical signs that the tool takes security seriously.

    A simple process for first-time users

    Most people can begin with a short workflow like this:

    1. Choose a reputable tool: Prefer a browser-based service with clear privacy and encryption information.
    2. Paste only the necessary text: Avoid including extra details that do not need protection.
    3. Create a strong passphrase: Use a long, unique phrase that you do not reuse elsewhere.
    4. Generate the encrypted text: Confirm that the output is unreadable and properly copied.
    5. Share the passphrase separately: Never send the encrypted text and the password in the same message thread.

    That final point is where many users slip. Encrypting a message and then sending the password in the same email defeats much of the purpose. If possible, send the passphrase through a different channel, such as a phone call, secure chat, or separate messaging platform.

    Practical examples in everyday work

    Imagine a freelancer sending a private project brief that contains pricing, timelines, and internal strategy notes. Instead of pasting everything into a standard email, they encrypt the text first and send the ciphertext. Then they call the client or send the passphrase through a different app. The process takes a minute, but it meaningfully reduces exposure if the email is forwarded or intercepted.

    A developer might use a free online text encryption tool to protect a temporary configuration string while coordinating with a teammate. A small business owner could use it to send private HR notes or account recovery details during an urgent handoff. These are not theoretical security exercises; they are ordinary moments where plain text is unnecessarily risky.

    Mistakes to avoid

    Most problems with online text encryption come from process errors rather than cryptography. Users may forget the passphrase, use a weak one, trust an unverified tool, or store the decrypted text carelessly after receiving it. Encryption protects content in transit or at rest, but it cannot help once the text is copied into an unsecured note or left open on a shared device.

    Another common mistake is assuming all scrambled-looking text is secure. Some websites offer obfuscation, encoding, or novelty “cipher” transformations that look impressive but provide little real protection. If a tool does not clearly describe actual encryption, treat it with skepticism.

    A quick trust checklist

    Before you use any service to encrypt text online free, look for these signs:

    • Local processing: The website says encryption happens in your browser.
    • Clear privacy policy: It explains whether any text is stored or transmitted.
    • Recognized methods: It names established encryption approaches instead of vague claims.
    • Secure connection: The site uses HTTPS and appears professionally maintained.

    This short review can save you from the biggest mistake of all, trusting a tool simply because it appears high in search results.

    Building a secure habit

    The real value of text encryption comes from turning it into a repeatable habit. If you handle sensitive information often, set a personal rule for when encryption is required. Maybe it applies to client identifiers, account details, legal drafts, private pricing, or any internal planning document that would be problematic if exposed.

    Habits reduce decision fatigue. Instead of debating each time whether a message is “sensitive enough,” you create a threshold and follow it consistently. For busy professionals, that kind of system is far more reliable than relying on memory or instinct.

    Conclusion

    Using a tool to encrypt text online free is one of the simplest ways to improve digital privacy without adding much friction to your workflow. It helps protect confidential notes, business communications, and personal information from unnecessary exposure. The key is choosing a tool that encrypts in the browser, uses clear privacy practices, and lets you protect your message with a strong passphrase.

    Your next step is simple. Pick a reputable browser-based encryption tool, test it with non-sensitive text first, and build a habit around using it for information that should never travel as plain text. A few extra seconds of care can prevent a surprising amount of risk.

  • Split PDF Online Free – Fast, Secure PDF Splitting

    Split PDF Online Free – Fast, Secure PDF Splitting

    A large PDF can slow down work faster than almost anything else. You open a contract, proposal, report, or scanned packet, only to realize you do not need the whole file. You need pages 3 through 7, or perhaps you want to break a 120-page document into smaller sections you can email, upload, or archive more easily. That is where split PDF online free tools become surprisingly valuable.

    PDF being split into multiple smaller files, labeled with page ranges

    For small business owners, freelancers, developers, and productivity-focused users, the appeal is obvious. You do not want to install heavy software for a simple one-time task, and you definitely do not want to pay for a full document suite just to separate a few pages. A good free online PDF splitter can save time, reduce friction, and keep your workflow moving, especially when speed matters.

    What is Split PDF online free?

    Split PDF online free refers to using a web-based tool to divide a PDF file into smaller PDF documents without paying for premium software. Instead of editing the file on your computer with desktop applications, you upload the PDF to a browser-based service, choose how you want it separated, and download the resulting files.

    In practice, this can mean a few different things. You might extract a specific page range from a larger file, such as pulling only the invoice pages from a monthly report. You might split every page into separate files, which is useful when you need to review or send pages individually. You might also divide a PDF into equal sections, such as splitting a training manual into chapters.

    This is different from simply viewing or compressing a PDF. A PDF splitter changes the structure of the document by creating one or more new files from the original. That makes it especially useful in real-world workflows where file size, page relevance, and sharing constraints matter.

    The reason online tools are so popular is simple. They remove setup time. You do not need to learn a complicated interface, update software, or switch devices. If you have a browser and an internet connection, you can usually complete the task in a few minutes (upload the PDF to a browser-based service).

    Key Aspects of Split PDF online free

    Why people use free online PDF splitters

    Most people look for a way to split PDF online free because they want convenience first. If you are sending a proposal to a client, you may only want to share the pricing pages, not the internal notes or appendices. If you are organizing tax records, invoices, legal forms, or design proofs, breaking one large file into smaller parts makes everything easier to sort and retrieve later.

    For freelancers, this can be a fast way to package deliverables more professionally. Instead of sending one oversized file packed with drafts, notes, and extras, you can send exactly the pages a client needs. That feels cleaner and more intentional.

    For small teams and solo operators, it also reduces friction in collaboration. A massive PDF often creates tiny but constant delays. It takes longer to upload, is harder to email, and requires more effort for recipients to navigate. Splitting it into focused documents can improve communication instantly.

    Common ways PDFs are split

    Not all PDF splitting tasks are the same. Some tools let you extract a custom page range, such as pages 10 to 15. Others let you split after every page, after every few pages, or at manually selected breakpoints.

    If you need to isolate one contract section from a legal packet, page-range extraction works well. If you are digitizing paper documents and each page belongs to a separate record, splitting each page into its own file makes more sense. If you are preparing a presentation or training material, dividing the document into sections may be the most practical approach.

    A useful way to think about it is like cutting a loaf of bread. Sometimes you need one slice. Sometimes you need half the loaf. Sometimes every slice needs to be packaged separately. The file is the same, but the outcome changes based on how you plan to use it.

    What makes a good free online tool

    A strong free online PDF splitter should do more than just split files. It should be easy to understand, reasonably fast, and reliable with different file sizes. The best tools make the process feel obvious, even for someone who rarely works with PDFs.

    Privacy matters too. This is especially important if your files contain client details, financial records, contracts, or internal business information. When choosing a service, look for clear information about how files are processed, how long they are stored, and whether they are deleted automatically after a short period.

    Usability is another major factor. Some free tools bury core features behind aggressive upsells or cluttered interfaces. Others are straightforward and let you upload, select pages, and download the result without unnecessary steps. For productivity-minded users, simplicity is not a luxury. It is part of the value.

    Benefits and trade-offs of splitting PDFs online

    The biggest advantage is speed. You can access the tool instantly, use it from nearly any device, and avoid installing software. This is particularly useful if you work across multiple systems, such as a desktop in the office, a laptop at home, and a phone while traveling.

    Another benefit is cost. Free tools are ideal for occasional use or lightweight workflows. If you only split PDFs once in a while, it often makes little sense to pay for a subscription.

    There are trade-offs, however. Some free tools limit file size, number of daily tasks, or advanced controls. Others may place watermarks on output files or reserve batch processing for paid plans. Browser-based tools also depend on upload speed, which can become noticeable when working with large scanned PDFs.

    Privacy is the biggest trade-off for many users. Uploading documents to an online service always introduces a level of trust. That does not mean online tools are inherently unsafe, but it does mean you should be selective, especially with sensitive business files.

    Online vs desktop PDF splitting

    Choosing between online and desktop solutions often comes down to frequency, sensitivity, and scale. If you need a quick one-off split for a non-sensitive file, online tools are often the fastest path. If you regularly handle confidential documents, very large files, or repeated batch jobs, desktop software may offer more control.

    The difference is similar to using a rideshare app versus owning a delivery van. For occasional transport, the app is efficient and affordable. For constant heavy-duty work, dedicated equipment becomes more practical.

    The table below highlights the difference:

    Factor Free Online PDF Splitter Desktop PDF Software
    Setup Instant, no installation Requires installation
    Cost Often free for basic use Usually paid or limited trial
    Speed for small tasks Very fast Fast after setup
    Large file handling May be limited Usually better
    Privacy control Depends on provider Greater local control
    Batch processing Often limited More robust
    Device flexibility Works across devices with browser Tied to installed system

    File size, page count, and performance

    One of the most overlooked aspects of using a free online PDF splitter is performance. A 10-page text PDF and a 200-page scanned image PDF may both be called “PDFs,” but they behave very differently. Scanned files are often much larger because each page is essentially an image. That affects upload time, processing speed, and sometimes whether the tool can handle the file at all.

    If your document is huge, splitting it online may still work well, but it depends on both your connection and the service limits. Some tools are excellent for lightweight tasks but become frustrating with archives, manuals, or multi-hundred-page scans.

    For business use, this matters because delays add up. A task that should take two minutes can turn into ten if the file is oversized or the tool struggles under load. That is why it helps to know in advance whether your document is text-based, image-heavy, or mixed.

    Security and privacy considerations

    If you are handling contracts, onboarding documents, legal forms, medical records, or internal reports, privacy should not be treated as an afterthought. When using a tool to split PDF online free, you are usually uploading the file to a remote server where it is processed before being returned to you.

    That is not automatically a problem, but it does require judgment. A trustworthy tool should explain whether files are encrypted during transfer, how long they remain on the server, and when they are deleted. If this information is difficult to find, that alone is a signal to be cautious.

    For many users, the right approach is simple. Use free online splitters for ordinary, non-sensitive files. For sensitive documents, consider local tools or company-approved solutions. That balance lets you keep the convenience of online services without exposing information unnecessarily.

    Ease of use matters more than feature overload

    Many PDF tools advertise a long list of features, but most users need only a few of them. They want to upload a file, select the pages, and get the output quickly. Extra features can be helpful, but they should not get in the way.

    A clean interface often produces better results than a feature-packed one. That is especially true when you are in a hurry or working across devices. Mobile browser use, for example, quickly exposes bad design. Tiny buttons, confusing file previews, and unclear page selectors can turn a simple job into a frustrating one.

    The best free tools respect your time. They reduce clicks, provide clear page previews, and make the final download obvious. Good design is not cosmetic here. It directly improves productivity.

    Output quality and formatting

    A good split should preserve the original file’s readability and layout. In most cases, splitting a PDF should not degrade quality, but some tools may recompress files or alter certain properties depending on how they process the document.

    This becomes noticeable when the PDF contains forms, embedded fonts, high-resolution visuals, or annotations. If you rely on those elements, test the output before sharing it widely. Open the split files, scroll through them, and check that page order, formatting, and legibility remain intact.

    For professionals, this final check is essential. Sending a broken PDF is a small error that can create a poor impression. A 20-second review can prevent that.

    How to Get Started with Split PDF online free

    A simple workflow that works for most users

    A simple 4-step workflow: upload, choose split method, process, download

    Getting started is usually easy. Even if you have never used an online PDF splitter before, the process is familiar. You upload the file, choose the pages or split method, run the task, and download the results.

    For most users, the basic process looks like this:

    1. Upload the PDF from your device, cloud storage, or drag-and-drop area.
    2. Choose the split method, such as page ranges, every page, or selected sections.
    3. Process the file and wait for the tool to generate new PDFs.
    4. Download the result and review the output before sharing or storing it.

    This workflow is simple, but there is value in being intentional about the split. Before uploading anything, decide exactly what the output should be. Are you extracting only the signature pages? Are you separating monthly statements? Are you creating one file per invoice? Clarity up front prevents having to repeat the task.

    How to choose the right split method

    The right split method depends on how the document will be used afterward. If your goal is to send a client one section of a report, a custom page range is usually best. If you need to archive scanned records separately, splitting every page can save a lot of manual work. If you are organizing a large guide into modules, dividing it into named sections will feel more structured.

    Think beyond the split itself. The real goal is not just creating smaller files. It is creating more useful files. A split is successful when the resulting documents are easier to send, store, read, or process.

    That mindset helps you avoid random fragmentation. Breaking a PDF into too many small files can create a different kind of mess. The sweet spot is usually the smallest number of files that still matches the task.

    Tips for better results

    A few practical habits can make free online PDF splitting much smoother. Rename your output files immediately after downloading them, especially if the tool gives them generic names. That saves time later and prevents confusion when multiple versions are involved.

    It also helps to review the original page order before splitting. Long PDFs often include appendices, blank pages, scanned inserts, or rotated pages that you may not notice at first glance. A quick scan of thumbnails can prevent extracting the wrong section.

    If the file is sensitive, think carefully before uploading. And if the PDF is extremely large, you may want to test the process with a smaller section first. Small adjustments like these make the whole experience more predictable.

    What to look for before using any online PDF splitter

    Before you trust a service with your file, check a few basics. You do not need a deep technical audit, but you do want signs that the provider has thought through the user experience and security model.

    A quick checklist includes:

    • Privacy policy: Clear explanation of file handling and deletion.
    • File limits: Transparent upload size and usage restrictions.
    • Output quality: No unwanted watermarks or formatting issues.
    • Ease of use: Clean interface with clear page selection tools.

    These points may sound simple, but they separate useful free tools from frustrating ones. If a service is vague about privacy, overloaded with ads, or unclear about limits, it usually shows up later in the process.

    Best use cases for small businesses and freelancers

    For small business owners, splitting PDFs online free is especially useful in finance, operations, and client communication. You can separate invoices from a monthly accounting export, isolate signed pages from agreements, or break one long onboarding pack into role-specific files.

    Freelancers often benefit in client-facing workflows. A designer may separate concept pages from final deliverables. A consultant may pull only the action-plan section from a longer strategy document. A developer may isolate API documentation sections for easier internal sharing.

    The power of the tool is not just in what it does technically. It is in how it reduces friction around document handling. That may sound minor, but repeated small efficiencies create a smoother business process over time.

    Conclusion

    Using a tool to split PDF online free is one of those small digital tasks that can have a big practical payoff. It helps you turn bulky, awkward documents into focused files that are easier to share, archive, review, and manage. For occasional use, online splitters are often the fastest and simplest option available.

    The key is choosing the right tool and using it with a bit of intention. Pay attention to privacy, file limits, and output quality. Then match the split method to the job you actually need to complete. If you do that, you will spend less time wrestling with PDFs and more time getting useful work done.

    Your next step is simple. Take one oversized PDF you deal with regularly, test a reliable free online splitter, and build a faster document workflow around that use case. Often, one small improvement in file handling unlocks a much cleaner process everywhere else.

  • Compress PDF Online: Fast, Secure & High Quality

    Compress PDF Online: Fast, Secure & High Quality

    PDFs get bloated fast. A few scanned pages, some embedded images, a branded cover, and suddenly a simple document turns into a file that is too large to email, slow to upload, and frustrating to share. If you have ever watched an attachment fail at 99% or had a client reject a file for being over the size limit, you already know the problem is not the PDF itself, it is the weight.

    A visual metaphor of a 'bloated' PDF: a large PDF document icon weighed down with heavy elements (photos, a branded cover, embedded images) next to an email progress bar stuck at 99% and an error/toast saying 'attachment too large'.

    That is why so many people look for ways to compress PDF online. The appeal is obvious. You do not need to install software, learn a complicated design tool, or spend time adjusting obscure settings. You upload the file, reduce its size, and move on with your day. For small business owners, freelancers, developers, and productivity-focused teams, that convenience matters.

    Online PDF compression can be a genuine time-saver, but it helps to understand what is actually happening behind the scenes. A smaller PDF is not always a better PDF if text becomes blurry, graphics lose detail, or sensitive information is handled carelessly. The best approach balances file size, readability, speed, and privacy. Once you know how that trade-off works, choosing the right tool and settings becomes much easier.

    What is compress PDF online?

    compress PDF online refers to using a web-based tool to reduce the file size of a PDF without needing desktop software. Instead of opening a program on your computer, you use a browser, upload the document, let the service process it, and then download a smaller version.

    At a basic level, compression works by making the contents of the PDF more efficient. That can mean lowering image resolution, re-encoding graphics, removing unnecessary embedded data, optimizing fonts, or cleaning up structural overhead inside the file. Some tools do this aggressively to achieve the smallest possible result. Others aim for a more balanced reduction so the document still looks professional when viewed or printed.

    This matters because PDFs are everywhere in modern work. Businesses send invoices, proposals, contracts, onboarding packs, reports, and presentations as PDFs every day. Freelancers use them for portfolios and deliverables. Developers generate PDFs for documentation, exports, and user-facing reports. In all of these cases, smaller files are easier to store, share, and load.

    The phrase itself also covers a broad range of use cases. Sometimes you want to compress a scanned contract so it can be emailed quickly. Sometimes you need to shrink a presentation deck so it uploads to a form with strict limits. Other times, you are trying to archive hundreds of PDF files more efficiently. The goal is the same, but the right compression level can vary a lot depending on what the document is for.

    Why file size becomes a problem

    PDFs grow large for predictable reasons. High-resolution images are one of the biggest causes, especially when a PDF contains scanned pages or exported slides with full-page visuals. Embedded fonts can also add bulk, particularly in branded documents with multiple typefaces. In some files, hidden metadata, duplicated elements, or inefficient export settings make the size larger than it needs to be.

    A common example is a scanned document created on an office copier. It may look like a simple black-and-white form, but if it was scanned as a high-resolution color image, the resulting PDF can be far larger than expected. Another example is a pitch deck exported from presentation software with oversized background images. The document looks clean, but each page carries more visual data than necessary.

    When you compress PDF online, the tool tries to strip away that excess while preserving the parts users actually notice. The smart tools do this with minimal visible quality loss. The weaker ones simply crush the file until artifacts become obvious.

    Why online compression is so popular

    The biggest reason is convenience. Browser-based tools are fast, accessible, and usually intuitive enough for anyone to use without training. If you are on a borrowed device, working remotely, or trying to help a client quickly, that matters a lot.

    There is also a workflow advantage. Online tools often make it easy to upload, compress, and redownload in a few clicks. That simplicity is ideal for occasional tasks. If you only need to shrink a PDF once in a while, installing dedicated software can feel unnecessary.

    For many users, the online route also lowers friction across devices. You can compress files from a laptop, tablet, or even a phone. That flexibility is useful when business happens on the move and file issues cannot wait until you are back at your desk.

    Key aspects of compress PDF online

    Not all PDF compression is equal. The quality of the result depends on how the service processes images, text, fonts, layout, and metadata. A good understanding of these differences helps you avoid the most common mistake, which is choosing the smallest file instead of the best usable file.

    Compression usually means image optimization

    In many PDFs, images are the heaviest element. This is especially true for scanned paperwork, brochures, portfolios, and reports with screenshots. So when an online service compresses a PDF, it often focuses first on image data.

    That can involve reducing image resolution, changing the image format internally, or increasing compression on image layers. For a document meant to be read on screen, that may be perfectly fine. For a print-ready brochure or a signed form where every detail must remain crisp, it may not be.

    This is why context matters. A PDF that looks acceptable on a laptop display may appear soft or pixelated when printed. If your document is client-facing, always check the compressed file at 100% zoom and, if relevant, test a sample print before sending it widely.

    Text-based PDFs compress differently than scanned PDFs

    A text-based PDF, such as an exported invoice or a digitally created report, often compresses well without major visual loss. The text itself is relatively lightweight compared to image-heavy content. Optimization here may involve streamlining fonts, removing redundant data, and cleaning internal structure.

    Scanned PDFs are different because each page is often stored more like an image than editable text. That means the file carries much more visual information, and there is less room to shrink it without affecting clarity. Compression can still help, but the trade-off becomes more noticeable.

    If your PDF comes from a scanner, it is worth asking whether it was created with sensible settings in the first place. Lowering scan resolution before compression can sometimes produce a better result than over-compressing a high-resolution file afterward.

    Side-by-side comparison: left panel shows a scanned PDF page rendered as a photographic image (pixel grid visible when zoomed) and labeled 'Scanned / image-based (harder to compress)'; right panel shows a text-based PDF page with crisp selectable text and lightweight layout icons labeled 'Text-based / generated (compresses better)'.

    Privacy should be part of the decision

    Whenever you upload a document to an online tool, you are sending that file to a remote server. For harmless materials, that may be fine. For contracts, tax forms, legal documents, HR records, medical information, or confidential client files, it deserves more caution.

    A trustworthy service should be transparent about file handling, encryption, retention periods, and automatic deletion. If that information is unclear or buried, treat it as a warning sign. Compression is convenient, but convenience should not come at the cost of exposing sensitive business data.

    For privacy-conscious users, the safest approach is to separate files by sensitivity. Generic marketing PDFs and public-facing documents are usually suitable for online compression. Highly confidential files may be better handled with offline tools or internal systems.

    Speed matters, but consistency matters more

    Many people choose a tool because it feels fast. That makes sense when you are in a hurry, but speed alone can be misleading. A very quick compressor may reduce quality too aggressively or fail on larger files.

    Consistency is more valuable in real work. You want a service that reliably handles common document types, preserves formatting, and gives predictable output. If you often send proposals, manuals, or reports, a stable result saves more time than shaving a few seconds off the process.

    The ideal outcome is a compressed PDF that still looks like the original, only smaller. That sounds simple, but it is the benchmark that actually matters.

    Common trade-offs at a glance

    Aspect Lower Compression Higher Compression
    File Size Larger final file Smaller final file
    Visual Quality Better preservation More risk of blur or artifacts
    Print Readiness Usually stronger May degrade in print
    Upload Speed Slower than tiny files Faster uploads and sharing
    Best Use Case Client-facing, archival, print Email limits, web sharing, quick transfers

    This trade-off explains why there is no universal best setting. A freelancer sending a contract for signature may prioritize readability. A developer attaching logs and reports to a support portal may care more about staying under a strict upload cap. A small business owner sending a product brochure may need a middle ground.

    How to get started with compress PDF online

    If you want the best result, the process should be deliberate, not random. Compressing a PDF online is easy, but using it well takes a little judgment. The good news is that the workflow is simple once you know what to check.

    Start with the purpose of the file

    Before uploading anything, ask one practical question, what will this PDF be used for? A document meant for internal review can tolerate more compression than a sales brochure, legal agreement, or printable handout. The answer will guide how aggressive you can be.

    If the document only needs to be readable on screen, moderate or strong compression may be acceptable. If people will zoom in, print it, or inspect fine details, you should preserve more quality. This one decision prevents most avoidable mistakes.

    Use a simple step-by-step process

    1. Choose the PDF you want to reduce in size.
    2. Upload it to a reputable online PDF compression tool.
    3. Select a compression level based on whether you need screen viewing, sharing, or print quality.
    4. Download and review the result carefully before sending or storing it.

    This sequence is straightforward, but the review step is where experienced users separate themselves from rushed users. Never assume the compressed version is acceptable just because the file size dropped.

    Check the right things after compression

    Open the new PDF and inspect the pages that matter most. Zoom in on small text, signatures, charts, and logos. These elements reveal quality loss quickly. If the document contains screenshots, check whether they still look sharp enough to interpret.

    Pay attention to page layout as well. Most online tools preserve formatting well, but occasional issues can appear with unusual fonts, complex layered graphics, or certain exported files. A quick review takes less than a minute and can save you from resending a broken file later.

    It is also smart to compare the original size to the compressed size in practical terms. A reduction from 18 MB to 4 MB is significant. A reduction from 2.1 MB to 1.9 MB may not justify any quality loss. Smaller is useful only when the improvement actually solves a problem.

    Know when to recompress and when to recreate

    If the first compressed result looks poor, do not keep recompressing the same file repeatedly. Multiple rounds can compound quality loss, especially for image-heavy PDFs. In many cases, it is better to return to the original source document and export a fresh PDF using more efficient settings.

    This is especially relevant for presentations, design exports, and scans. If you still have the editable source, recreating the PDF often gives you a cleaner and smaller result than squeezing an already-generated file again and again.

    For scanned documents, you may get better outcomes by rescanning at a more appropriate resolution. For digital documents, exporting with optimized image settings can outperform generic compression tools. Online compression is helpful, but it is not always the first best fix.

    What to look for in an online PDF compressor

    A useful service should feel simple, but there are a few signs of quality worth paying attention to.

    • Clear privacy policy: Explains how files are stored and when they are deleted.
    • Compression options: Offers light, medium, or strong settings instead of a one-size-fits-all result.
    • Reliable formatting: Preserves layout, text, and images consistently.
    • Reasonable file limits: Handles everyday business documents without unnecessary restrictions.

    If a tool makes bold promises but says little about security or file handling, be cautious. If it compresses aggressively without letting you choose the quality level, expect inconsistent results.

    Best use cases for online compression

    Online PDF compression is especially useful when speed and accessibility matter more than advanced editing. It works well for invoices, basic contracts, reports, eBooks, portfolios, proposal drafts, presentations, forms, and scanned records that need lighter file sizes for sharing.

    It is particularly helpful in everyday business scenarios. A consultant can shrink a proposal before emailing it to a client. A freelancer can compress a portfolio for quicker downloads. A small team can optimize training materials before uploading them to a shared workspace. A developer can reduce generated documentation or exported reports before attaching them to tickets or dashboards.

    These are not edge cases. They are the normal friction points of digital work. That is why the ability to compress PDF online has become such a practical utility rather than just a niche feature.

    Conclusion

    To compress PDF online effectively, think beyond the upload button. The real goal is not simply a smaller file, it is a file that is easier to share while still looking professional, reading clearly, and staying secure. When you understand how compression affects images, text, formatting, and privacy, you can make smarter decisions in seconds.

    The next step is simple. Take one PDF that is slowing down your workflow, compress it with a reputable online tool, and compare the result carefully. If the file is smaller, clear, and fit for its purpose, you have found a process worth repeating. If not, adjust the compression level or go back to the source file and optimize it there. That small habit can save time every week.

  • Image to WebP Converter: Optimize Images for Faster Sites

    Image to WebP Converter: Optimize Images for Faster Sites

    Large images quietly slow down websites, clutter storage, and make everyday sharing more frustrating than it needs to be. If you have ever uploaded a product photo, blog image, portfolio mockup, or client asset and then watched page speed suffer, you have already felt the problem that an Image to webp converter is designed to solve.

    The appeal is simple. You keep the visual quality people expect, but reduce file size enough to improve loading times, save bandwidth, and create a smoother experience across devices. For small business owners, freelancers, developers, and anyone trying to work smarter, converting images to WebP is one of those rare improvements that is both technical and practical.

    Side-by-side before/after visualization: left panel shows a large original image with a big file-size label (e.g., 2.3 MB) and a slow loading spinner or progress bar; right panel shows the converted WebP image with a much smaller file-size label (e.g., 230 KB) and a fast/completed load indicator. Include a small callout showing percent size reduction and a subtle speedometer or lightning icon to indicate faster page load.

    What is Image to webp converter?

    An Image to webp converter is a tool that changes image files such as JPG, JPEG, PNG, and sometimes GIF or BMP into WebP. WebP is a modern image format created to make images smaller while preserving strong visual quality. In plain terms, it helps your images take up less space without looking obviously worse.

    That matters more than it may seem at first. Every image on a website adds weight to the page. If that weight is too high, users wait longer, mobile visitors consume more data, and search performance can suffer. A converter removes much of that overhead by compressing the image into a format built for the web.

    What makes WebP especially useful is its flexibility. It supports both Lossy compression and Lossless compression, which means you can choose whether to prioritize the smallest possible file or preserve every detail more carefully. It can also support transparency, which makes it a practical replacement for many PNG files.

    For everyday users, an online Image to webp converter often feels as simple as uploading a file, choosing quality settings, and downloading the new version. Behind that simple experience, the tool is making several optimization decisions that can have a real impact on speed, storage, and usability.

    Key Aspects of Image to webp converter

    Why WebP matters for websites and digital work

    The biggest reason people use an Image to webp converter is performance. Smaller images usually load faster, and faster pages tend to keep visitors engaged. If you run an online store, publish blog content, or showcase visual work, image optimization directly affects how professional and responsive your site feels.

    There is also a cost side to consider. Smaller image files reduce bandwidth usage and can help lower hosting or delivery costs, especially if your site serves many images every day. For freelancers and agencies managing multiple client sites, that efficiency scales quickly.

    Even outside websites, WebP can make routine digital tasks easier. Sending compressed assets to clients, organizing a lighter media library, or preparing visuals for landing pages becomes more manageable when files are smaller but still sharp enough for real use.

    Common input and output formats

    Most Image to webp converter tools accept familiar image formats. JPEG and JPG are common for photos, PNG is common for graphics with transparent backgrounds, and some tools also support GIF, BMP, TIFF, or SVG depending on how advanced the converter is.

    The output, of course, is .webp. What matters is not just the extension but the compression profile used during conversion. A good converter gives you some control over quality level, image dimensions, or metadata handling so the result fits your actual goal.

    Here is a simple comparison of common formats and where WebP fits:

    Format Best For File Size Transparency Typical Use Case
    JPEG/JPG Photos Medium to high No Product photos, blog images
    PNG Graphics, logos High Yes Transparent graphics, UI elements
    GIF Simple animations Medium to high Limited Short animations
    WebP Web images, mixed use Low to medium Yes Websites, marketing assets, optimized image delivery

    This is why WebP often becomes the default target format for modern web publishing. It combines much of what users liked about JPEG and PNG while reducing the trade-off between quality and size.

    Lossy vs lossless conversion

    When using an Image to webp converter, one of the most important decisions is whether to use Lossy compression or Lossless compression. Lossy compression removes some image data to achieve a smaller file. If done well, the visual difference is minor or even invisible to the average viewer.

    Lossless compression keeps the image data intact more faithfully. The file may be larger than a lossy version, but it is useful when visual precision matters, such as interface assets, logos, screenshots, or files that may be edited again later.

    The right choice depends on purpose. A homepage banner or product gallery image can usually handle careful lossy compression. A sharp logo with transparency may benefit more from lossless settings. The best converters help you test both approaches rather than forcing a one-size-fits-all result.

    Lossy vs lossless comparison: three-image strip (original — lossy WebP — lossless WebP). The 'lossy' panel should show a slight quality degradation (softening or light compression artifacts) with a much smaller file-size badge; the 'lossless' panel should look identical to the original with a larger file-size badge. Add labeled callouts explaining when to choose each (e.g., 'good for photos' vs 'good for logos/screenshots').

    Quality settings and image appearance

    Not all conversions are equal. The difference between an excellent and disappointing result often comes down to quality settings. If the compression is too aggressive, images can look soft, smeared, or uneven. If the quality is set too high, the file may barely shrink, which defeats the purpose.

    A good Image to webp converter gives you enough control to find the balance. For example, a lifestyle photo on a blog can often be compressed more heavily than a product close-up on an ecommerce page. The right setting is not universal, it is contextual.

    This is where preview functionality becomes valuable. Seeing the original image beside the converted version helps you make decisions based on visible impact, not guesswork. For users who care about productivity, that saves time and reduces the back-and-forth of exporting multiple versions.

    Browser support and compatibility

    One reason WebP has become widely adopted is that modern browsers support it well. For most websites and mainstream digital use, compatibility is no longer the obstacle it once was. That said, some workflows still benefit from keeping a fallback version, especially in older systems or highly specific environments.

    Developers often serve WebP by default while retaining JPEG or PNG copies as backups. Small business owners using website builders may not need to think about the technical details if the platform handles image delivery automatically. But it is still useful to understand the principle: WebP is optimized for the modern web, not every legacy workflow.

    If you share files directly with clients or collaborators, consider whether they need WebP specifically or whether they expect more traditional formats. An Image to webp converter is powerful, but format choice should still match the destination.

    How to Get Started with Image to webp converter

    Start with the right images

    The easiest way to get value from an Image to webp converter is to begin with the images that have the biggest impact. Website banners, product images, blog feature images, portfolio visuals, and landing page graphics are ideal candidates because they are often large and user-facing.

    There is also a practical angle here. Converting every file in your library at once may create unnecessary work. A better approach is to focus first on the images that are currently slowing down your site or taking up excessive storage. That gives you quick wins and clearer results.

    Use a simple workflow

    For most users, getting started follows a short sequence:

    1. Upload the image to the converter.
    2. Choose quality or compression settings based on the image type.
    3. Preview the result if the tool offers side-by-side comparison.
    4. Download the WebP file and test it where it will actually be used.

    That process is simple, but the testing step matters. An image that looks great in isolation can behave differently on a website, inside a content management system, or across device sizes. Always judge the final result in context.

    Decide what matters most, speed, quality, or transparency

    Every conversion involves trade-offs. If your main goal is faster load speed, you may accept slightly stronger compression. If your brand depends on polished visuals, you may keep quality settings higher. If the image uses a transparent background, preserving that transparency becomes part of the decision.

    Thinking this way makes the converter far more useful. Instead of asking for the best setting, ask for the best setting for this job. A blog thumbnail, hero image, and logo all have different requirements, so they should not always be converted the same way.

    This is especially relevant for freelancers and agencies. The more intentional your conversion decisions are, the more consistent your image quality becomes across projects. That consistency shows up in user experience, brand presentation, and client confidence.

    Watch for metadata, dimensions, and file naming

    A good Image to webp converter does more than change format. It may also strip unnecessary metadata, preserve or adjust dimensions, and help manage the output file cleanly. These details are easy to overlook, but they affect organization and performance.

    Metadata can include camera details, location information, or editing history that is not needed for web use. Removing it can reduce file size further. Dimensions also matter because a giant image converted to WebP is still oversized if the displayed area is much smaller.

    File naming deserves attention too. Clear names make assets easier to manage in websites, shared folders, and SEO-friendly workflows. A smaller file is helpful, but a well-organized image library is what keeps that efficiency sustainable.

    Batch conversion for productivity

    If you manage many images, batch conversion is where an Image to webp converter becomes a real productivity tool. Instead of optimizing files one by one, you can process multiple images at once. That saves time and makes it easier to maintain consistency across a site or project.

    This is particularly useful for ecommerce catalogs, blog archives, agency deliverables, and media-heavy portfolios. A batch workflow lets you standardize image output while reducing repetitive manual work. For a growing business, that efficiency compounds fast.

    Not every batch process should be fully automated, though. High-value images still deserve spot checks. It is smart to treat automation as a time-saver, not a substitute for quality control.

    When not to convert to WebP

    An Image to webp converter is useful, but it is not automatically the right answer for every situation. Some print workflows, design handoffs, or editing pipelines still work better with formats like PNG, JPEG, or layered source files. If an asset will be revised repeatedly, a final delivery format should not replace the original working file.

    That is why the safest approach is to keep source images and export WebP versions for distribution or publishing. Think of WebP as an optimized delivery format rather than the only version you should keep. This protects flexibility while still giving you the performance benefits where they matter.

    Conclusion

    An Image to webp converter is one of the simplest tools for improving digital efficiency. It helps reduce file size, speed up websites, support better user experience, and streamline image-heavy workflows without demanding advanced technical knowledge.

    If you want an immediate next step, start with a few high-impact images from your website or current project. Convert them to WebP, compare quality, and measure the difference in loading speed and file size. Small changes at the image level often create some of the most noticeable gains across the whole experience.

    For guidance on measuring performance improvements, consider testing before and after with tools like page speed insights to see real-world impact.

  • Minify CSS Online: Fast, Easy Stylesheet Optimization

    Minify CSS Online: Fast, Easy Stylesheet Optimization

    Every extra byte on your website has a cost. It can slow down page loads, hurt user experience, and chip away at search visibility, especially on mobile connections where performance matters most. If your stylesheets are larger than they need to be, using a tool to minify CSS online is one of the quickest wins you can make.

    File size comparison: original vs minified CSS, arrow to faster load time

    The appeal is obvious. You do not need to install software, configure a build pipeline, or learn a complicated workflow just to shrink a CSS file. For small business owners, freelancers, and developers who want fast results, an online CSS minifier offers a simple way to reduce file size, improve delivery speed, and keep front-end assets lean without much effort.

    What is minify CSS online?

    To minify CSS online means using a web-based tool to remove unnecessary characters from a CSS file while preserving how it works. This usually includes deleting spaces, line breaks, comments, and other formatting elements that are helpful for humans but irrelevant to browsers. The result is a smaller stylesheet that loads more efficiently.

    Think of it like packing a suitcase for a short trip. A neatly folded wardrobe is nice to look at, but if your goal is to travel light, you strip out anything nonessential. CSS minification works the same way. It keeps the styling rules your website needs, while discarding the visual formatting that only helps during editing.

    Packing metaphor: readable CSS vs minified CSS

    This is different from compression at the server level, although the two can work together. Minification reduces the file’s raw size before delivery. Compression methods like Gzip or Brotli then reduce transfer size even further during transmission. If you care about page performance, both matter.

    Why online tools are so popular

    Online CSS minifiers are popular because they remove friction. You can paste your stylesheet into a browser window, click a button, and get a compact version back in seconds. For many users, that is enough.

    This approach is especially useful when you are working on a quick landing page, updating a client site, troubleshooting front-end code, or cleaning up a small project without setting up a full development environment. It is practical, accessible, and fast.

    For non-technical users, the biggest advantage is simplicity. For developers, the advantage is convenience. If you only need a one-off result, using an online CSS minifier can be faster than adjusting a build script or package configuration.

    What CSS minification does not do

    Minification is valuable, but it is not a magic fix for every performance issue. It will not remove unused CSS unless the tool specifically includes optimization features beyond standard minifying. It also will not fix poorly organized styles, unnecessary selectors, or bloated frameworks that your site does not really need.

    That distinction matters. A minified stylesheet is smaller, but not always efficient in a broader sense. If your site includes thousands of lines of unused declarations, minification helps, but cleanup helps more.

    Key aspects of minify CSS online

    The real value of using an online CSS minifier goes beyond shrinking files. It affects speed, workflow, maintainability, and even how confidently you publish updates.

    Faster load times and better user experience

    When your CSS file is smaller, the browser can download it faster. Since CSS is render-blocking in many cases, reducing its size can help pages appear sooner. This is particularly important for mobile users, slower networks, and visitors who expect near-instant loading.

    For a small business website, this can mean smoother browsing for prospective customers. For freelancers, it can mean delivering leaner, more polished client work. For developers, it can mean shaving off avoidable performance overhead in production.

    The improvement may seem modest on a tiny stylesheet, but the effect becomes more meaningful as stylesheets grow. Across multiple assets and many visits, those savings add up.

    Cleaner production assets

    A development CSS file is often written for readability. It may include comments, indentation, spacing, and line breaks that make editing easier. That is good practice during development.

    Production files have a different job. They need to be delivered efficiently. Minifying creates a version optimized for deployment, not for reading. This separation between human-friendly source code and browser-friendly output is a core principle of modern front-end work.

    SEO and performance signals

    Website speed is not the only factor in search performance, but it is part of the larger user experience picture. Faster sites tend to create better engagement, lower abandonment, and stronger usability signals. Using a tool to minify CSS online supports that effort by reducing unnecessary front-end weight.

    Minification alone will not push a site to the top of search results. Still, it contributes to a healthier technical foundation. In competitive spaces, these small technical gains can matter.

    Ease of use for non-developers

    One reason online minifiers remain relevant is that they serve people who are not working inside advanced toolchains. A solo entrepreneur editing a template, a designer customizing a storefront, or a marketer updating a microsite may only need a quick way to optimize a stylesheet.

    In that context, ease of use matters more than automation. A browser-based tool can turn a technical task into something approachable, which is valuable when you are trying to move quickly.

    Common features to look for

    Not all online CSS minifiers are equal. Some simply remove whitespace. Others validate input, preserve special comments, or offer formatting options for output. If you are comparing tools, differences such as error detection, batch processing, and privacy handling are worth noting.

    Feature Why It Matters Best For
    Basic Minification Removes whitespace, line breaks, and comments Quick file size reduction
    Error Detection Flags invalid CSS before output Preventing broken styles
    Code Beautify Option Lets you reformat compressed CSS back into readable text Editing and troubleshooting
    Batch Processing Handles multiple CSS files at once Larger projects
    Direct File Upload Speeds up workflow beyond copy-paste Frequent use
    Privacy Handling Clarifies whether code is stored or processed temporarily Sensitive client or proprietary work

    Privacy and security considerations

    This issue is often overlooked. When you paste CSS into an online tool, you are submitting code to a third-party service. In many cases that is harmless, especially for public website files. But if your stylesheet contains proprietary patterns, client work not yet launched, or sensitive references, caution is wise.

    Before using any online CSS minifier, check whether the service explains how data is handled. Some tools process input temporarily and do not store it. Others are less transparent. If privacy matters, that transparency should influence your choice.

    Online minification versus local workflows

    Online tools are ideal for quick jobs. Local workflows are better for repeatable production processes. If you regularly deploy websites, manage multiple environments, or collaborate with other developers, automated build tools usually make more sense over time.

    That said, online minifiers fill an important gap. They are excellent for fast edits, testing, learning, and one-off optimization tasks. You do not need enterprise infrastructure to benefit from better CSS delivery.

    How to get started with minify CSS online

    Getting started is straightforward, but doing it well requires a little discipline. The goal is not just to generate a smaller file. It is to make sure your styling remains correct and your workflow stays reliable.

    Start with a clean source file

    Before you minify anything, make sure your original CSS is organized and working properly. Minification is not the right time to discover syntax errors or half-finished edits. If your source file is broken, the minified version will likely be broken too, only harder to debug.

    Keep an uncompressed master copy that you can read and edit comfortably. This is your source of truth. The minified file should be treated as the output version, not the file you actively maintain.

    Follow a simple workflow

    For most users, the process looks like this:

    1. Prepare the CSS: Finalize your stylesheet and confirm it works as expected.
    2. Paste or upload the file: Use a trusted online CSS minifier tool.
    3. Generate the minified version: Let the tool remove unnecessary formatting.
    4. Test the result: Load your site and confirm styles display correctly.
    5. Replace or deploy carefully: Update the production stylesheet without overwriting your editable source file.

    This workflow is simple, but it avoids a common mistake. Many users replace their original CSS with the minified version and later regret it when changes are needed.

    Check for visual issues after minification

    Most of the time, a properly minified CSS file behaves exactly like the original. Still, testing matters. A malformed rule, edge-case syntax issue, or tool-specific parsing quirk can create display problems.

    After you minify CSS online, inspect key pages on desktop and mobile. Look at navigation, buttons, forms, layout spacing, and any custom components. If something looks off, go back to the original file and identify the issue there first.

    Use minification as part of a broader optimization habit

    CSS minification is useful, but it works best when paired with sensible asset management. Review whether your site is loading unused frameworks, duplicate stylesheets, or outdated theme files. In some cases, deleting unnecessary CSS creates more impact than minifying what remains.

    Performance is often cumulative. Minified CSS, optimized images, caching, compressed text assets, and lean JavaScript all work together. A fast site is rarely the result of one tactic alone.

    When online minifiers make the most sense

    Online minifiers are especially practical for quick edits, small projects, client handoffs where you want both readable source and optimized deployment files, and for learning or testing so you can see what minification changes in real time. If your workflow becomes frequent or repetitive, consider moving to automated bundling and build tools.

    Avoid these common mistakes

    One of the biggest mistakes is editing the minified file directly. It may seem convenient in the moment, but it quickly becomes frustrating. Another is assuming every online tool handles CSS identically. If a stylesheet contains uncommon syntax, always test the output before publishing.

    A more subtle mistake is treating minification as the finish line. It is better to see it as one final polish step. Good CSS structure, efficient selectors, and deliberate loading strategy still matter.

    Conclusion

    Using a tool to minify CSS online is one of the easiest ways to make a website lighter and more efficient. It reduces unnecessary file weight, supports faster load times, and gives both non-technical users and developers a quick path to cleaner production assets.

    The smartest next step is simple. Take one stylesheet from your site, minify it with a trusted online tool, and compare the before-and-after file size. Then test the live result. That small action can lead to a faster site, a better user experience, and a more disciplined approach to front-end performance.