JNTZN

Author: olemai

  • How to Create a New Manual Post

    How to Create a New Manual Post

    When a topic appears simple on the surface, it often hides the biggest source of confusion. That is exactly what happens with a new manual post. People hear the phrase and assume it refers to something obvious, but in practice it can mean different things depending on the workflow, platform, or business context. For small business owners, freelancers, developers, and productivity-focused users, that ambiguity quickly becomes a problem. If you do not define the process clearly, you waste time, duplicate work, and create avoidable errors.

    A well-planned manual post is often the fastest way to publish something with control and precision. It gives you the ability to decide what goes live, when it goes live, and how it appears without relying entirely on automation. That matters when you are handling updates, announcements, content publishing, product entries, or records that require a human eye. A new post created manually is not old-fashioned. In many cases, it is the most reliable option.

    What Is a New Manual Post?

    A visual that shows different types of 'new manual post'—icons for a blog article, product listing, social media update, forum thread, and CMS entry—arranged around a central label 'New Manual Post' to show the concept applies across platforms.

    A new manual post is, at its core, a piece of content or an entry created directly by a person rather than being generated automatically by software, synced from another system, or imported in bulk. The exact format may vary. In one environment, it could mean publishing a new blog post by hand. In another, it might refer to creating a product listing, a social update, a forum thread, or an entry inside a content management system without automation.

    The key idea is intentional human input. A manual post is built step by step, usually with decisions made in real time about title, structure, formatting, metadata, media, and timing. That level of control is valuable because automated tools are efficient, but they are not always accurate, context-aware, or brand-sensitive.

    For a small business, creating a new post manually can be the better choice when the message is nuanced. A product change, policy update, client announcement, or limited-time offer often needs a careful tone. Automation can publish quickly, but speed without judgment is risky. A manual workflow gives you room to review details before anything becomes public.

    This also matters for productivity-minded users. Manual posting is not just about typing things in by hand. It is about maintaining quality at the point of publication. If you think of your content system like a storefront, a manual post is the moment someone arranges the display carefully instead of unloading boxes onto the floor and hoping everything looks right.

    Key Aspects of a New Manual Post

    Control and Accuracy

    The biggest strength of a manually created post is control, you decide the wording, the formatting, the category, and the publishing details. That sounds basic, but it is often the difference between polished communication and something that feels rushed or inconsistent.

    Accuracy improves because a person is actively checking the content while creating it. When businesses depend too heavily on imports or templates, small mistakes can spread fast. A wrong date, broken link, outdated price, or mismatched headline can damage trust. A manual process gives you a checkpoint before publication.

    This is especially useful when the content has legal, financial, operational, or customer-facing importance. In those cases, a new post entered manually works as a quality filter. It may take slightly longer, but it reduces the cost of publishing the wrong thing.

    Flexibility Across Platforms

    One reason the phrase “new manual post” covers many scenarios is that it applies across many tools. Whether you use a website builder, a content management system, a database-backed dashboard, a marketplace portal, or a scheduling platform, the principle is the same. You are creating a fresh entry directly within the system.

    That flexibility makes manual posting relevant even in highly automated environments. Not every update belongs inside a pipeline. Sometimes a one-off item needs special wording, custom tagging, or immediate publication. A manual workflow handles exceptions well because it is designed for human decision-making, not rule-based repetition.

    Developers and technical teams also understand this distinction. Even in systems built around APIs and automation, there are moments when a manual entry is the safest and quickest route. For example, testing a new publishing flow, correcting an edge case, or verifying how a content type appears in production often starts with a manually created post.

    Quality Over Volume

    A manually published post usually favors quality over scale. That is not a limitation. It is a strategic choice. If your goal is to produce hundreds of entries at once, automation will almost always win. But if your goal is to publish something clear, credible, and properly formatted, manual work has real advantages.

    This becomes even more important for independent professionals and small teams. They do not always need more content. They need better content. A manually created post gives them the chance to think about audience intent, structure, readability, and action before hitting publish.

    In that sense, manual posting supports a more disciplined content process. It encourages review, consistency, and purpose. Instead of asking, “How fast can we push this out?” the better question becomes, “Is this ready to represent the business?”

    Human Judgment and Context

    Automation works best when the rules are stable. Manual posting works best when context matters. That distinction is worth understanding because many publishing mistakes happen when businesses use the wrong method for the wrong type of content.

    A human can notice tone, timing, and nuance in a way software often cannot. For instance, a promotional message may need softer wording during a sensitive news cycle. A product update may require clarification because customers could misinterpret a feature change. A service notice may need urgency without causing alarm. Those are judgment calls.

    A manually created post gives you space for that judgment. It turns publishing into an active editorial decision rather than a background process. That alone can improve both brand perception and internal confidence.

    How to Get Started With a New Manual Post

    A simple workflow diagram that shows the recommended manual-post process: 'Define purpose' → 'Gather inputs (title, message, media, category, approvals)' → 'Build for readability (headings, short paragraphs, CTA)' → 'Review' → 'Publish'.

    Start With Purpose, Not the Form

    Many people begin by opening the editor and filling in fields. That is understandable, but it leads to weak posts because the structure appears before the message. A better approach is to define the purpose first. Ask what the post needs to achieve. Is it informing, selling, updating, clarifying, documenting, or prompting action?

    Once the purpose is clear, the rest of the post becomes easier to shape. The title can be more specific. The body can stay focused. The call to action can match the reader’s next move. Without that clarity, even a manually created post can feel scattered.

    This step matters whether you are publishing a blog article, a shop listing, a knowledge base entry, or a platform update. The format may differ, but the principle is constant. A strong post starts with clear intent.

    Gather the Right Inputs Before Publishing

    Manual posting becomes inefficient when people build the content while searching for missing details. That is why preparation matters. Before creating a new post manually, make sure you have the essential inputs ready.

    A short checklist helps:

    • Title or working headline: A clear label you can refine.
    • Core message or objective: The single idea the post must convey.
    • Relevant links, files, or media: Images, downloads, or reference URLs.
    • Category, tags, or placement: Where the post belongs in your system.
    • Review notes or approval status: Any quick confirmations needed before publishing.

    This does not need to become a bureaucratic process. The point is to reduce interruptions. When all inputs are prepared, the act of posting becomes smoother and more accurate.

    For freelancers and solo operators, this step also protects focus. Constantly switching between tabs, assets, and draft notes is mentally expensive. A prepared manual post can be published in minutes. An unprepared one can consume an hour.

    Build the Post for Readability

    A new post should not just exist. It should be easy to scan, understand, and act on. That means strong headings, concise paragraphs, and logical flow. Readers rarely move through digital content in a perfectly linear way. They scan first, judge relevance second, and commit attention only if the content feels worth their time.

    That is why structure matters so much. A manual post gives you the chance to make better editorial choices. You can simplify the headline, tighten the opening, clarify the middle, and make the next step obvious. This is especially useful for businesses that publish information customers actually need, such as pricing updates, service notices, tutorials, FAQs, or announcements.

    Good readability is also a productivity gain. When a post is clearer, it generates fewer support questions, fewer misunderstandings, and fewer internal corrections. One carefully built post can save hours of follow-up.

    Review Before You Publish

    The manual nature of the post is not just about creation. It is also about review. Before publishing, check whether the post is accurate, complete, and aligned with its purpose. Look closely at the title, links, formatting, dates, and any visible calls to action.

    A practical way to think about this is to separate writing from checking. First create the content. Then review it as if you were the reader. This small shift changes what you notice. Errors that felt invisible during writing often become obvious during review.

    If multiple people are involved, even a lightweight approval process helps. One person can draft, another can confirm details. For small teams, that balance preserves speed without sacrificing quality.

    Choose Manual Posting When It Actually Makes Sense

    Not every entry should be manual. Some should absolutely be automated, scheduled, or imported. The smart approach is not to treat manual posting as universally better, but as better for specific situations.

    Manual posting is best for important updates, one-off content, and quality-sensitive entries where control and context awareness are priorities. Automated posting shines for repetitive tasks, scheduled campaigns, and large-volume publishing where speed and consistency matter. Bulk import works for large catalogs or archives, and template-based posting helps with recurring formats that need small edits.

    For small business owners and independent professionals, this often means using a hybrid workflow. Routine items can be templated or automated. High-visibility or sensitive content can be posted manually. That balance keeps operations efficient while protecting quality where it matters most.

    Conclusion

    A carefully created manual post is more than a simple entry made by hand. It is a deliberate publishing choice that gives you control, accuracy, flexibility, and editorial judgment. In a world full of automation, those strengths still matter, and in many cases, they matter more than ever.

    A practical next step is to review your current workflow and identify which kinds of posts truly benefit from human oversight. Then create a simple manual posting process for those cases. When the content is important, visible, or easy to get wrong, a careful manual post is not extra work. It is smart work.

    A well-planned manual post is often the fastest way to publish something with control and precision. It gives you the ability to decide what goes live, when it goes live, and how it appears.

  • How to Create a New Manual Post

    How to Create a New Manual Post

    Publishing online should be simple, but in practice it often feels cluttered. Between automation tools, scheduling platforms, content systems, and social feeds, many people lose sight of one basic question: what exactly are you posting, where, and why? That is where the idea of a new manual post becomes useful.

    For small business owners, freelancers, developers, and productivity-focused users, manual posting is not outdated. In many cases, it is the most reliable way to stay accurate, timely, and intentional. A manually created post gives you direct control over wording, formatting, timing, and context, which matters when a message needs to feel human instead of mass-produced.

    What Is a New Manual Post?

    A new manual post is a piece of content you create and publish directly, without relying on automation, duplication rules, or scheduled reposting systems. It can be a blog update, a community post, a social media entry, a product announcement, or even an internal team update. The defining feature is simple, a person actively writes and publishes it with purpose.

    That distinction matters more than it may seem. Automated systems are excellent for efficiency, but they are often blunt instruments. They can repeat old messages, miss changes in context, or publish wording that no longer fits the moment. A manually created post allows you to respond to what is happening now, with language that reflects your current goals and audience expectations.

    For a small business, this might mean posting a same-day update about adjusted opening hours. For a freelancer, it could mean sharing a newly completed project with a tailored explanation. For a developer, it may involve publishing release notes with precise wording. In each case, the manual approach reduces the risk of disconnect between message and reality.

    Split-screen comparison titled "Manual vs Automated Posting": left side shows a person at a laptop writing a tailored message with a speech-bubble preview, checkmarks for 'tone', 'context', 'accuracy'; right side shows an automated pipeline/robot pushing identical posts to multiple platforms with repeating content cards and small error icons (broken link, wrong date) to imply bluntness and risk. Use clear labels "Manual" and "Automated" and a small caption: "Intentional vs. blunt".

    Why Manual Posting Still Matters

    There is also a credibility factor. Readers can often sense when content has been sent through a system rather than written with care. A manually published post tends to feel more immediate and authentic, especially when it addresses a real situation, answers a current question, or reflects a timely update.

    A manually published post also gives you room to review tone, verify links, correct formatting, and avoid the common mistakes that happen when content is pushed out automatically. This does not mean automation is bad. It means manual posting remains important where accuracy, nuance, and timing are critical. The best content workflows usually combine both, using automation for repetitive tasks and manual posts for moments that need judgment.

    Key Aspects of a New Manual Post

    Understanding a manually created post starts with understanding what makes it effective. It is not enough to publish something by hand. The value comes from how the post is planned, written, and delivered.

    Control Over Message Quality

    One of the biggest strengths of a manual post is editorial control. You decide what stays, what goes, and how the message is framed. That matters when brand voice is important or when a careless phrase could confuse readers.

    This is especially useful for businesses and solo professionals who want to sound consistent and trustworthy. Instead of using a recycled template, you can shape the post around the exact situation. That leads to stronger communication and fewer misunderstandings.

    Better Context and Relevance

    A manually created post is usually more context-aware. It reflects current events, audience mood, product changes, or business priorities at the time of publishing. That context improves relevance, and relevance is what makes content feel timely rather than generic.

    Think of it like writing a note to a customer instead of sending a canned autoresponder. The manual version can acknowledge what has changed, answer the likely question, and guide the reader more clearly. Even when the information is simple, the extra relevance makes the content more useful.

    Reduced Risk of Publishing Errors

    Automation can save time, but it can also repeat old mistakes at scale. A broken link, outdated date, wrong image, or mismatched caption becomes much harder to manage when the system publishes it everywhere. Creating a manual post introduces a review step that helps catch those issues before they go live.

    That review step is not glamorous, but it is valuable. It is often the difference between a polished announcement and a post that creates extra support requests. For busy teams and independent professionals alike, preventing avoidable errors is a meaningful productivity gain.

    Stronger Audience Trust

    Trust is built through consistency and clarity. When readers see that your posts are current, specific, and human, they are more likely to believe the rest of what you publish. A manually created post can contribute to that trust because it feels deliberate.

    This is particularly important in customer-facing communication. Updates about pricing, features, availability, deadlines, or service interruptions should not feel robotic. They should feel dependable. Manual posting supports that impression because it gives you the chance to communicate with care.

    Flexibility Across Platforms

    A manual post is not tied to one format. It can be adapted to different platforms while still staying true to the original message. That flexibility matters because each channel has its own expectations. A website announcement may need detail, while a social update needs brevity and immediacy.

    Manual posting helps you tailor the same core information for different audiences. Instead of forcing one version everywhere, you can write what fits each platform. That often results in better engagement because the content feels native rather than copied.

    How to Get Started With a New Manual Post

    Starting with manual posting does not require a complicated system. In fact, the most effective approach is often the simplest one. The goal is to build a repeatable habit that gives you control without slowing you down.

    Begin With a Clear Purpose

    Before writing a manual post, decide what it needs to accomplish. Is it informing, promoting, clarifying, updating, or inviting action? A post without a clear purpose tends to become vague, and vague content rarely performs well.

    A useful test is to finish this sentence before you write: After reading this post, I want the audience to know, feel, or do what? That one question keeps the content focused. It also prevents unnecessary filler, which is especially important when time is limited.

    Match the Post to the Platform

    Manual posting works best when the content fits the place where it appears. A post on a company website can carry more detail and structure. A LinkedIn update may need a stronger professional angle. A short-form social post should get to the point quickly while still sounding natural.

    This is where manual creation shines. You can adapt tone, length, and formatting instead of relying on a one-size-fits-all template. That small adjustment often improves readability and response.

    Create a Simple Publishing Workflow

    You do not need an enterprise content operation to publish well. A lightweight workflow is usually enough. For many users, the essentials are:

    1. Define the goal: Know why the post exists.
    2. Draft the message: Write clearly and directly.
    3. Review for accuracy: Check facts, links, and formatting.
    4. Publish and monitor: Watch for questions or needed edits.

    Simple linear workflow graphic with four connected boxes/icons: 1) Define goal (target icon + short phrase), 2) Draft the message (pencil and document), 3) Review for accuracy (magnifying glass over a link/date), 4) Publish & monitor (upload/rocket icon and a small chat/alert icon). Arrows connect each step; emphasize repetition and simplicity.

    What matters is consistency. If every manually published post goes through the same basic process, quality becomes easier to maintain. That is particularly helpful for small teams and solo operators who need reliable output without extra complexity.

    Focus on Readability First

    A manual post should be easy to scan and easy to understand. That means short paragraphs, clear wording, and a logical flow. Readers do not reward complexity for its own sake. They reward clarity.

    If the topic is technical or detailed, break it into sections and use descriptive headings. If the message is brief, keep it tight and direct. In both cases, remove anything that distracts from the main point. Good manual posting is often less about writing more and more about writing better.

    Use Manual Posting Where It Adds the Most Value

    Not every piece of content needs to be written from scratch at the moment of publishing. The smart approach is to use manual posting selectively, where it offers the greatest return. This usually includes announcements, customer updates, timely commentary, product changes, and sensitive communication.

    The comparison below shows where a manually created post tends to be strongest.

    Use Case Manual Post Strength Why It Works
    Time-sensitive updates High You can reflect current conditions accurately
    Product or service announcements High Tone and details can be tailored carefully
    Routine recurring promotions Medium Manual editing helps, but templates may also work
    Evergreen scheduled content Low to Medium Automation is often efficient here
    Customer issue communication Very High Human wording builds clarity and trust

    Avoid Common Mistakes

    Manual posting is valuable, but it is not automatically effective. Some users publish too quickly and skip review. Others overthink every word and slow themselves down. The right balance is intentional, but practical.

    A few simple habits can help you avoid common problems:

    • Check accuracy: Confirm names, dates, prices, and links.
    • Keep tone consistent: Write in a voice that matches your brand or role.
    • Add one clear action: Tell the reader what to do next, if anything.
    • Edit for brevity: Remove sentences that do not serve the purpose.

    These basics sound obvious, but they solve most quality issues. In real-world publishing, success often comes from disciplined fundamentals rather than elaborate strategy.

    Conclusion

    A manually created post is more than just content typed and published by hand. It is a deliberate communication choice. It gives you control over message quality, improves contextual relevance, reduces preventable errors, and helps your audience feel that a real person is paying attention.

    If you want better results from your content, start small. Choose one important update this week and publish it manually with care. Focus on purpose, clarity, and accuracy. That single habit can improve not only how your posts look, but also how your business, brand, or work is understood.

  • How to Convert JPG Images to PDF — Easy Methods & Best Tools

    How to Convert JPG Images to PDF — Easy Methods & Best Tools

    A JPG can be opened almost anywhere, but it is often the wrong format when you need a document that looks polished, prints correctly, combines multiple pages, or stays intact when shared. That is why many people need to convert a JPG into a PDF, whether they are sending invoices, uploading application documents, archiving receipts, or turning phone snapshots into something more professional.

    The good news is that converting images to PDF is usually quick. In many cases, you do not even need to install anything. Windows, macOS, iPhone, iPad, and Android all offer built-in ways to save a JPG as a PDF, while online converters and desktop apps add batch processing, compression, OCR, and stronger editing controls.

    This guide covers the easiest ways to create a PDF from JPG files, the best tools for different needs, and the trade-offs that matter most, especially quality, privacy, file size, and convenience. If you only need a one-off conversion, there is a fast option for you. If you handle client documents, bulk image folders, or sensitive files, there is a better workflow for that too.

    Why Convert a JPG to a PDF?

    A JPG is ideal for a single image. A PDF is better when that image needs to behave like a document. That difference matters more than many users expect.

    For everyday work, PDFs solve several practical problems at once. They are easier to share in a professional context, more predictable when printed, and much better for bundling multiple pages into a single file. If you have ten receipt photos, a contract signature page, or a stack of scanned notes, sending them as separate image files is messy. Turning them into one PDF makes the result easier to open, store, annotate, and archive.

    PDF files also preserve layout more reliably across devices. A JPG can still be viewed almost anywhere, but it has no real concept of page order, document metadata, page size, or password protection. A PDF does. That is why PDFs are commonly preferred for forms, signed paperwork, reports, applications, invoices, and legal records.

    How JPG and PDF Differ

    A JPG, or JPEG, is an image format built for photographs and compressed graphics. It uses lossy compression, which means some image data is discarded to reduce file size. That is excellent for sharing photos quickly, but repeated saving can reduce clarity over time. A JPG is also usually a single image, not a true multi-page document.

    A PDF, by contrast, is a document container. It can hold one image or many images, along with text, metadata, fonts, annotations, links, and security settings. When you convert a JPG to a PDF, you are usually wrapping the image inside a document format rather than changing it into a text-editable file.

    That distinction explains a common misunderstanding. Converting a low-quality JPG into a PDF does not magically improve image sharpness. If the original image is blurry, the PDF will still be blurry. The best conversions preserve what you already have while giving you better structure, sharing, and output options.

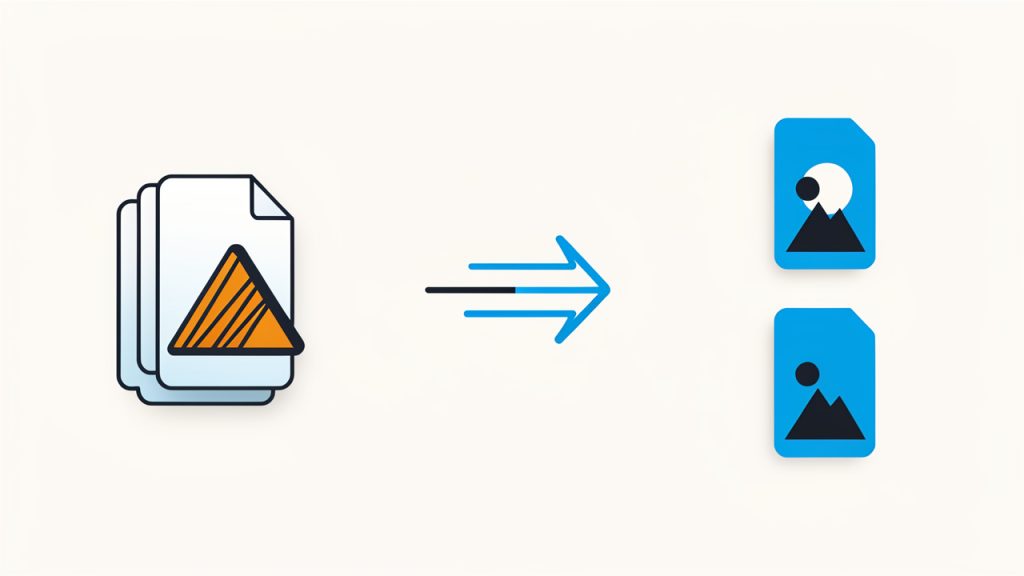
    Side-by-side illustration comparing a JPG (single floating photo) and a PDF (stack of pages in a document container with icons for metadata, password lock, and text layer). The JPG side shows lossy compression artifacts; the PDF side shows multiple pages, page size ruler, and a lock to indicate security.

    Fast Methods to Convert JPG to PDF

    If speed matters most, start with the tools already on your device. They are often enough for one-off tasks and basic multi-page PDFs.

    A simple platform workflow graphic with four labeled panels/icons: Windows (Photos -> Print -> Microsoft Print to PDF), macOS Preview (Open in Preview -> Print -> Save as PDF), iPhone/iPad (Photos -> Share -> Print -> pinch-out -> Save), Android (Gallery/Photos -> Share/Print -> Save as PDF). Each panel shows the minimal tap/click sequence with small device icons.

    Windows 10 and Windows 11

    Windows includes Microsoft Print to PDF, which works with many image viewing apps. Open the JPG in Photos or another viewer, choose Print, then select Microsoft Print to PDF as the printer. After that, set paper size, quality, orientation, and fit options, then save the resulting PDF.

    If you want to combine multiple JPG files into one PDF, select all the images in File Explorer, right-click, and choose Print. Windows will let you arrange the images and output them into a single PDF file. Before saving, double-check page order. If filenames are inconsistent, Windows may sort them in an unexpected sequence.

    macOS Preview

    On a Mac, Preview is one of the easiest local tools for JPG-to-PDF conversion. Open one or more JPG files in Preview. If you are combining images, make sure the thumbnail sidebar is visible so you can drag pages into the correct order. Then choose File > Print, followed by Save as PDF from the PDF menu.

    Preview is especially useful for light cleanup. Before exporting, you can rotate pages, reorder them, or remove extras. For many users, that makes it a better option than uploading files to a website.

    iPhone and iPad

    On iPhone and iPad, you can turn a JPG into a PDF using the Share menu. In Photos, select the image, tap Share, then choose Print. On the print preview screen, pinch outward on the thumbnail preview. iOS will generate a PDF preview, which you can then share or save to Files.

    For multiple images, select them first in Photos, then repeat the same process. This method is slightly hidden, but it is reliable and does not require a third-party app. It is especially helpful when you need to send travel documents, receipts, or handwritten notes while away from your desk.

    Android

    Many Android devices support PDF creation through the Print option inside Google Photos, Files, or gallery apps. Open the image, tap Share or the menu icon, choose Print, then set Save as PDF as the destination. You can then save the file locally or upload it to cloud storage.

    The exact menu path varies by manufacturer, so Samsung, Pixel, and other Android phones may look slightly different. If your device supports selecting multiple images before printing, you can often combine them into a single PDF without extra software.

    Adobe Acrobat for More Control

    If you need professional output, Adobe Acrobat offers a cleaner workflow. You can create PDFs from images, combine many files into one document, reorder pages, compress large outputs, and apply OCR if the images contain text.

    This is the better choice when the PDF is going to a client, a court filing portal, a procurement system, or any environment where consistency matters. Acrobat is not the fastest tool for casual use, but it is one of the most complete.

    Best Free Online and Offline Tools for JPG-to-PDF Conversion

    Different users need different tools. Some want the fastest possible web converter. Others need offline privacy, batch processing, or mobile scanning. The options below cover the most useful choices.

    Quick Comparison

    Tool Best For Platform Free Option Batch Support OCR/Advanced Editing Privacy Fit
    Smallpdf Fast browser-based conversions Web Yes, limited Yes Limited on free tier Moderate
    ILovePDF Quick online workflows and file merging Web Yes Yes Some extra PDF tools Moderate
    PDFCandy Flexible free online PDF utilities Web/Desktop options Yes Varies Some editing tools Moderate
    Adobe Acrobat Pro Professional, secure, advanced workflows Desktop/Web Trial only Yes Strong High, especially local workflows
    Preview Free local conversion on Mac macOS Yes Yes Basic only High
    PDF24 Creator Free Windows desktop utility Windows Yes Yes Good utility set High
    Microsoft Lens Mobile scanning to PDF iOS/Android Yes Limited Strong scanning features Moderate to high
    Adobe Scan Clean mobile document capture iOS/Android Yes Limited OCR available Moderate
    CamScanner Mobile scanning and export iOS/Android Yes, often limited Limited Good scanning tools Moderate

    1. Smallpdf

    Screenshot of smallpdf.com

    Smallpdf is one of the easiest ways to convert a JPG into a PDF online. The interface is simple, the upload flow is smooth, and it works well for users who want a quick result without learning new software. For freelancers, students, and small teams doing occasional conversions, it is often the fastest route from image to shareable document.

    Key features include browser-based conversion with drag-and-drop upload, support for multiple JPGs so you can combine images into one PDF, easy page reordering before export, and a range of adjacent PDF tools such as compression and merging. Its advantages are convenience and a clean interface; the drawbacks are free usage limits and limited suitability for confidential files unless you trust the service. Advanced features require a paid plan.

    Website: https://smallpdf.com

    2. ILovePDF

    Screenshot of ilovepdf.com

    ILovePDF combines a straightforward JPG-to-PDF converter with a broad toolkit for common document tasks. Upload one or more image files, choose orientation and page size, and convert. In addition to conversion, the platform offers merge, split, compress, and organize tools, and it integrates with cloud storage. It is a solid all-around option for small business owners who handle invoices, forms, and customer paperwork. Free limits apply for heavy use, and uploads may not be appropriate for highly sensitive documents without extra caution.

    Website: https://www.ilovepdf.com

    3. PDFCandy

    Screenshot of pdfcandy.com

    PDFCandy is a flexible option for users who want more than a single conversion page. It offers image-to-PDF conversion alongside editing, compression, and other format conversion features, making it appealing for people who work across many file types. PDFCandy is useful when your workflow includes converting images one day, compressing PDFs the next, and extracting pages later on. It provides a wide feature set accessible through a simple browser workflow, with desktop options available in some cases. Performance depends on file size and browser, and privacy considerations apply to any online service.

    Website: https://pdfcandy.com

    4. Adobe Acrobat Pro

    Adobe Acrobat Pro is the professional benchmark for image-to-PDF conversion. It is not the lightest or cheapest option, but it is the tool people choose when the result needs to be dependable. If you regularly prepare client documents, submit paperwork to regulated systems, or need searchable PDFs with OCR, Acrobat earns its place.

    Its advantages are depth of capability: combine many images, optimize file size, run OCR, add passwords, edit page order, redact content, and export in various formats. The downsides are cost and complexity for casual users. Acrobat is usually sold as a subscription.

    Website: https://www.adobe.com

    5. Preview

    Preview is the unsung hero for Mac users. It is free, built in, and surprisingly capable for creating PDFs from JPG files. You can open images, arrange them visually, rotate or delete pages, and export everything into a single PDF without uploading anything. For privacy-conscious users, that local workflow is a major advantage. The main limitation is that Preview is macOS-only and does not provide advanced OCR or enterprise features.

    Website: https://www.apple.com/macos/preview

    6. PDF24 Creator

    PDF24 Creator is a strong free desktop option for Windows users who want offline control. It is particularly useful for batch conversions, merging files, and performing utility tasks without sending anything to the web. Think of it as a local PDF workstation: it is not as polished as Acrobat, but it covers common needs such as file assembly, compression, and document creation while keeping everything on your machine.

    The tool is free, works offline, and is ideal for repeated document tasks; the trade-off is a utilitarian interface and Windows-only availability.

    Website: https://tools.pdf24.org

    7. PDFsam

    PDFsam is known for splitting and merging PDFs and is useful in a JPG-to-PDF workflow when you need to organize and refine PDFs after creating them. If your images are already in PDF form, PDFsam helps you combine sets, reorder sections, and prepare cleaner final packages. It is a smart companion tool for larger workflows. There is a free basic version and paid editions for expanded capabilities.

    Website: https://pdfsam.org

    8. ImageMagick

    ImageMagick is a powerful choice for developers, IT teams, and power users who want scripted or repeatable conversion workflows. It is excellent when you need automation, server-side processing, or command-line control over many files at once. Use ImageMagick to automate repeated conversions, rename files systematically, or integrate image handling into scripts. The learning curve is steeper and PDF policy settings on some systems may require troubleshooting, but ImageMagick is open source and free.

    Website: https://imagemagick.org

    9. Microsoft Lens

    Screenshot of microsoft.com

    Microsoft Lens is one of the best mobile apps for turning photos into useful PDFs. It is especially strong for scanning documents, whiteboards, receipts, and notes rather than simply wrapping an existing photo into a PDF. Lens crops edges, improves readability, and integrates with Microsoft 365 workflows, which is helpful if you use Outlook, OneDrive, Word, or Teams. The app is free and works well for mobile professionals who need cloud handoff and decent scan quality.

    Website: https://www.microsoft.com

    10. Adobe Scan

    Adobe Scan is a polished mobile app for turning camera captures into PDFs quickly. It is particularly effective for receipts, contracts, handwritten notes, and other documents that need cleanup before export. The app offers good auto-detection, cropping, and OCR integration so scanned text can become searchable. Adobe Scan is free to start, with expanded capabilities tied to Adobe services.

    Website: https://www.adobe.com/acrobat/mobile/scanner-app.html

    11. CamScanner

    Screenshot of camscanner.com

    CamScanner is a popular mobile option for converting photographed documents into PDFs on the go. It provides enhancement filters, cropping tools, and a mobile-first convenience that suits freelancers, students, field staff, and small teams. It works best when the source is a physical page rather than an already clean digital image. Be aware of export limits, potential watermarks on free plans, and privacy terms before relying on any cloud-based scanning app for sensitive paperwork.

    Website: https://www.camscanner.com

    When to Use an Online Tool vs an Offline App

    Online converters are best when the job is simple, the files are not sensitive, and speed matters more than anything else. If you have two JPGs from a product manual or a non-confidential receipt, a browser-based tool is often the easiest answer.

    Offline tools are better when the images contain personal data, financial details, legal documents, medical information, contracts, or client records. They are also the smarter choice for batch jobs, recurring workflows, and anyone who wants predictable output without upload limits.

    A useful rule is simple: if you would hesitate to email the image openly, you should probably not upload it to a random converter either.

    Advanced Tips for Better PDF Results

    Quality problems usually begin before conversion. If the original JPG is small, heavily compressed, rotated incorrectly, or poorly lit, the resulting PDF will inherit those flaws. Check image resolution, orientation, and cropping before creating the PDF.

    For text-heavy images, OCR can be transformative. OCR, or optical character recognition, turns an image-based PDF into a searchable document so you can select text, search inside the file, and improve accessibility. Adobe Acrobat, Adobe Scan, and some other tools do this well, but accuracy depends on image clarity and contrast.

    Compression also deserves care. Aggressive compression reduces file size, but it can blur text and damage readability, especially with receipts, forms, and thin lines. For archival or print-ready documents, aim for moderate compression and test the output before sending.

    Privacy, Security, and Legal Considerations

    Privacy is a common blind spot. Web tools are safe enough for ordinary use, but not all services handle uploads the same way. Some delete files quickly; others retain them longer. Some process files server-side, while others use more privacy-friendly methods.

    Before uploading anything sensitive, read the provider’s privacy policy and retention terms. Look for automatic deletion, encryption in transit, account requirements, and whether files are used for service improvement or analytics. If you handle HR records, tax forms, ID documents, signed contracts, or health data, local processing is the safer route.

    If the PDF contains sensitive content, consider adding password protection or redacting information after conversion. Passwords restrict opening or editing, while redaction permanently removes visible and hidden sensitive content rather than simply covering it up.

    Troubleshooting Common JPG-to-PDF Problems

    If your PDF looks blurry, the most common cause is a low-resolution source image or excessive compression during export. Start with a higher-quality JPG, choose a larger paper size, or disable aggressive optimization. Scanned text should remain crisp enough to read at normal zoom; if it does not, fix the image quality first.

    If the page orientation is wrong, rotate the image before conversion when possible. Some systems interpret photo orientation based on EXIF metadata, which can produce surprises. Preview on macOS is especially good for correcting this before export. On Windows, checking the print preview carefully can save frustration.

    Large file sizes usually come from high-resolution photos, many pages, or minimal compression. If the file is too big to upload or email, run it through a trusted compression tool afterward and review the compressed result carefully, especially if the document contains fine print.

    If you cannot combine multiple images into one PDF, the issue is usually the workflow, not the files. On Windows, select all images together before printing to PDF. On Mac, open them in one Preview window and arrange them in the sidebar. In online tools, make sure multi-file upload is supported before converting.

    When to Use JPG vs PDF

    Use a JPG when the file is truly just an image, such as a product photo, social media graphic, or casual snapshot. It is lightweight, widely supported, and easy to insert into websites, slides, and chat messages.

    Use a PDF when the image needs to function like a document. That includes job applications, invoices, signed forms, proposals, receipts, scanned IDs, handouts, and archive files. If order, print consistency, professionalism, or security matters, PDF is usually the better choice.

    A helpful mental shortcut: if the recipient needs to view a picture, send a JPG. If they need to review a document, send a PDF.

    Recommended Workflows

    For a one-time personal conversion, use your device’s built-in tools first. They are fast, free, and private enough for ordinary needs. On Mac, use Preview. On Windows, use Print to PDF. On iPhone or Android, use the Print-to-PDF share flow.

    For business use, especially with repeated conversions, adopt a deliberate workflow: standardize filenames, check page order before export, compress only after reviewing readability, and keep a local copy of the original images. That reduces errors when you need to resend or revise the document later.

    For confidential files, stay offline whenever possible. Convert locally, apply OCR only if needed, add passwords when sharing, and use proper redaction tools if sensitive content must be removed. This is the safer path for legal, HR, finance, and healthcare-adjacent workflows.

    Appendix: Quick Reference for Power Users

    For advanced users, command-line tools can automate repeated conversions and bulk jobs. ImageMagick is a common choice, although configuration varies by system and some installations restrict PDF operations by default for security reasons.

    Common patterns include converting multiple JPG images into a single PDF via command-line tooling, then optimizing the resulting PDF with Ghostscript for compression. These tools are best suited to developers, IT admins, and anyone building repeatable automation rather than occasional manual conversions.

    The best way to convert a JPG into a PDF depends on what you care about most. If you want speed, use Smallpdf, ILovePDF, or your device’s built-in print features. If you want privacy and offline control, stick with Preview, PDF24 Creator, or Adobe Acrobat on desktop. If you want to capture paper documents from a phone, Microsoft Lens, Adobe Scan, and CamScanner are strong mobile options.

    The next step is simple. Pick the method that matches your situation, run a test conversion, and check three things before you send the file: clarity, page order, and file size. Those three checks prevent most problems and turn a quick image export into a document you can send with confidence.

  • How to Convert MP3 Files to AIFF — Fast, Lossless Guide

    How to Convert MP3 Files to AIFF — Fast, Lossless Guide

    If you need to convert an MP3 to an AIFF, you are probably not chasing better sound by magic. You are trying to solve a workflow problem. Maybe your editor prefers AIFF, your mastering chain expects uncompressed audio, or an older studio tool refuses to play nicely with MP3 files.

    That is where this guide helps. Converting an MP3 to an AIFF file is easy on Windows, macOS, and Linux, and you can do it with free tools in just a few minutes.

    The important part is understanding what this conversion does, what it does not do, and which settings make sense for your actual use case.

    A quick reality check matters here. Turning an MP3 into AIFF does not restore lost detail. MP3 is a lossy format, which means some audio data was discarded when the file was originally compressed. AIFF can preserve what remains without adding new loss, but it cannot rebuild what is already gone. Still, for editing, compatibility, and production workflows, converting MP3 files to AIFF can be the right move.

    What Is MP3 and What Is AIFF?

    MP3: a quick overview

    MP3 is one of the most widely used audio formats ever created. Its main advantage is file size, and it uses lossy compression, which reduces the amount of audio data by removing sounds that are considered less noticeable to human hearing.

    That compression is what made MP3 perfect for portable players, downloads, email attachments, and streaming-era convenience. A three-minute song in MP3 format might only take a few megabytes, while the same audio in an uncompressed format can be many times larger.

    The tradeoff is quality. At high bitrates, an MP3 can sound very good, even transparent for casual listening, but it is still a compressed format, and once the data has been removed, it is gone.

    AIFF: a quick overview

    AIFF, short for Audio Interchange File Format, is an audio container developed by Apple. It typically stores uncompressed PCM audio, similar in quality and structure to WAV. Because it is uncompressed, AIFF preserves the audio exactly as stored, without additional quality loss during conversion or editing.

    AIFF is common in music production, audio editing, mastering, broadcast workflows, and legacy Mac-based environments. Many professional audio tools support it well, especially in Apple-centric studios.

    A useful way to think about AIFF is this: MP3 is optimized for convenience, while AIFF is optimized for fidelity and workflow stability.

    Split-screen illustration comparing MP3 vs AIFF: left side labeled “MP3 (lossy)” shows a waveform and spectrogram with attenuated high-frequency content and visible compression artifacts, plus a small file-size icon; right side labeled “AIFF (uncompressed)” shows a fuller waveform and dense spectrogram with preserved detail and a large file-size icon. A short caption reads: “MP3 strips data to save space — AIFF preserves what remains.”

    Key differences: quality, size, metadata, and compatibility

    The biggest difference between MP3 and AIFF is lossy versus uncompressed audio. MP3 sacrifices some information to save space. AIFF keeps the waveform intact as PCM data, which makes it better for processing and repeated editing.

    File size is the next major difference. AIFF files are much larger. If storage space matters, that increase can be significant. If you are working in a DAW, preparing for CD authoring, or handing files to professional gear, the size increase is often worth it.

    Metadata handling also differs. MP3 commonly uses ID3 tags for artist, title, album, artwork, and track information. AIFF can store metadata too, but it often uses chunks rather than the exact same tagging structure. Some converters copy tags cleanly, some only copy part of them, and some ignore artwork unless you re-add it manually.

    When and Why You Should Convert MP3 to AIFF

    Useful cases for converting

    There are several valid reasons to convert MP3 files to AIFF, even though the conversion does not improve original fidelity. One of the most common is audio editing. Many editors and DAWs handle uncompressed audio more smoothly, especially when applying effects, trimming, crossfading, or exporting multiple versions.

    Another good reason is professional workflow compatibility. Some studio tools, samplers, older hardware units, and archival systems prefer or require AIFF or WAV. If you are sending files to a collaborator, a post-production engineer, or a CD authoring system, AIFF can be the more reliable handoff format.

    It can also make sense for archival copies of already-delivered MP3 assets when you need a stable, uncompressed working version for repeated processing. You are not improving the source, but you are preventing further quality loss from repeated lossy exports.

    The limitation that many guides gloss over

    This is the part many people misunderstand. Converting MP3 to AIFF does not make the sound better. It only changes the container and storage method.

    If an MP3 was encoded at 128 kbps and lost high-frequency detail, switching it to AIFF keeps that 128 kbps-derived sound exactly as it is, only in a larger, uncompressed form. This is not the same thing as creating a true lossless master.

    The same logic applies to upsampling. Changing a 44.1 kHz MP3 to 96 kHz AIFF does not create more sonic detail. It only increases the sample count mathematically. Sometimes higher rates are required by a workflow, but they do not recover lost information.

    Visual explaining that conversion doesn’t restore lost data: a small diagram showing an original MP3 waveform sampled at 44.1 kHz with missing/highly smoothed detail, and an arrow to an AIFF waveform at 96 kHz that shows interpolated samples but not new information; includes a label: “Upsampling adds samples, not detail.”

    When not to convert

    If your goal is streaming, mobile listening, or saving space, converting MP3 to AIFF usually makes little sense. The files get larger, transfer slower, and offer no audible improvement for casual playback.

    For everyday listening, keeping the original MP3 is often smarter. AIFF is best used when you need editing headroom, format compatibility, or a professional delivery standard.

    Best Ways to Convert MP3 to AIFF

    There is no single best tool for every user. The right method depends on whether you value speed, editing features, batch conversion, privacy, or metadata control.

    Desktop apps are usually the best starting point. They are faster, more reliable with large files, and safer for private audio. Tools like VLC, Audacity, Apple Music, and dedicated converters can handle one-off jobs well.

    Online converters are convenient when you need a fast result without installing software, but they come with tradeoffs, especially file-size limits, slower uploads, and privacy concerns. If the audio is sensitive, copyrighted, or client-related, uploading it to a third-party service may not be appropriate.

    Command-line tools like FFmpeg are ideal for power users. They are fast, flexible, scriptable, and excellent for batch jobs. If you regularly convert folders full of files, FFmpeg is often the most efficient route.

    Step-by-Step: Convert MP3 to AIFF on Windows (Using Free Tools)

    Method A, using VLC Media Player

    VLC is free, widely trusted, and easy for quick conversions. Download it from the official VideoLAN site to avoid bundled installers.

    1. Open VLC Media Player.
    2. Go to Media > Convert / Save.
    3. Click Add and choose your MP3 file.
    4. Click Convert / Save.
    5. In Profile, choose an audio profile that outputs AIFF, or create a custom profile if needed.
    6. Set the destination filename with the .aiff extension.
    7. Start the conversion.

    VLC is excellent for speed, but metadata handling can be inconsistent. If song info matters, check the exported file afterward in a tag editor or media library.

    For settings, use 44.1 kHz for CD-related audio and most music files, or 48 kHz if the destination is video production. Keep channels in stereo unless you specifically need mono.

    Method B, using Audacity

    Audacity is free and better when you want editing control before export. It is also a more comfortable option if you want to inspect waveforms, trim silence, or normalize levels.

    1. Install Audacity from the official Audacity site.
    2. Open the program and drag your MP3 file into the window.
    3. If needed, edit or inspect the track.
    4. Go to File > Export > Export Audio.
    5. Choose AIFF Files as the export format.
    6. Pick the destination folder and filename.
    7. Set sample rate and channel options if needed.
    8. Add or confirm metadata in the export dialog.
    9. Click Export.

    Audacity is a strong choice when metadata and manual quality control matter. It also makes it easier to hear whether your MP3 source has artifacts before you commit it to a larger AIFF workflow.

    Method C, using FFmpeg

    FFmpeg is the most flexible free solution on Windows, especially for repeated conversions. Install it from the official FFmpeg source or trusted package managers, then make sure the executable is available in your system path.

    A basic single-file conversion looks like this:

    ffmpeg -i input.mp3 output.aiff
    

    If you want explicit control over sample rate, channels, and metadata mapping, use:

    ffmpeg -i input.mp3 -ar 44100 -ac 2 -sample_fmt s16 -map_metadata 0 output.aiff
    

    This keeps the workflow predictable. -ar 44100 sets the sample rate, -ac 2 sets stereo, -sample_fmt s16 sets 16-bit PCM style output, and -map_metadata 0 copies source metadata where possible.

    If FFmpeg throws errors, the usual causes are bad file paths, permission issues, or an incorrect install. On Windows, quoting paths with spaces is essential.

    Step-by-Step: Convert MP3 to AIFF on macOS (Using Native Tools and Free Apps)

    Method A, using Apple Music or iTunes

    On macOS, Apple Music is one of the easiest built-in methods. On older systems, the equivalent process may still be under iTunes.

    First, configure the import settings. Open Music, then go to Settings or Preferences, find Files, and open Import Settings. Choose AIFF Encoder. This tells the app what format to create during conversion.

    Then:

    1. Add the MP3 file to your library if it is not already there.
    2. Select the track.
    3. Use File > Convert > Create AIFF Version, or right-click if your version offers that shortcut.
    4. Wait for the new AIFF file to appear in the library.
    5. Reveal it in Finder if you need the actual file location.

    This method is simple and preserves library organization well. It is especially useful for users already working inside the Apple ecosystem.

    Method B, using Audacity or VLC

    Audacity and VLC on macOS work much like they do on Windows. Audacity gives you better visibility into export settings and metadata entry. VLC is faster for quick conversions.

    If you care about artwork, track titles, and album data, Audacity usually gives you more explicit control. If you just need an AIFF file quickly, VLC is often enough.

    Method C, using FFmpeg with Homebrew

    For batch conversion on macOS, FFmpeg is hard to beat. The easiest installation path is Homebrew.

    Install Homebrew if you do not already use it, then install FFmpeg with:

    brew install ffmpeg
    

    Once installed, convert a file with:

    ffmpeg -i input.mp3 -ar 44100 -ac 2 -sample_fmt s16 -map_metadata 0 output.aiff
    

    For a whole folder, a simple shell loop works well:

    for f in *.mp3; do ffmpeg -i "$f" -ar 44100 -ac 2 -sample_fmt s16 -map_metadata 0 "${f%.mp3}.aiff"; done
    

    That command converts every MP3 in the current folder to AIFF while preserving names and attempting to copy metadata.

    Step-by-Step: Convert MP3 to AIFF on Linux (GUI and CLI)

    Method A, using SoundConverter

    Linux users who prefer a graphical interface can use SoundConverter or similar desktop tools. It is lightweight and straightforward for bulk jobs.

    On many distributions, you can install it from the package manager. After launch, add your MP3 files or drag in a folder, choose AIFF as the output format if supported by the installed backend, select your destination, and run the conversion.

    This route is convenient, but exact format support may vary depending on codecs and backend packages installed on your system.

    Method B, using FFmpeg

    On Linux, FFmpeg is usually the most dependable approach. Install it with your distribution’s package manager, then use:

    ffmpeg -i input.mp3 output.aiff
    

    For more control:

    ffmpeg -i input.mp3 -ar 48000 -ac 2 -sample_fmt s16 -map_metadata 0 output.aiff
    

    Linux users often run into path and permission quirks, especially when converting files in protected directories. If a command fails, confirm you have write access to the destination folder.

    Tips for scripting batch jobs

    A practical batch command for the current directory is:

    for f in *.mp3; do ffmpeg -i "$f" -ar 44100 -ac 2 -sample_fmt s16 -map_metadata 0 "${f%.mp3}.aiff"; done
    

    If your folder tree is deeper, you may want a find-based workflow. The key is to test on a few files first before processing hundreds of tracks.

    Top Online Converters: Quick Comparison and Privacy Considerations

    Online converters are useful when you need a one-time conversion and do not want to install software. The best known services usually support drag-and-drop uploads, simple format selection, and quick downloads. Common examples include CloudConvert, Convertio, FreeConvert, and Zamzar.

    What matters most is not the prettiest interface. It is whether the service uses HTTPS, states how long files are retained, allows control over output settings, and handles metadata properly. Some online tools silently re-encode with defaults you did not choose, which can create unexpected sample rates or strip tags.

    If you are converting sensitive recordings, unreleased music, client audio, or large folders, online tools are usually the wrong choice. Local conversion is faster, more private, and more predictable.

    Recommended Tools: Features, Pros, Cons, and Use Cases

    Choosing the right tool is easier when you match it to your workflow rather than just the format.

    FFmpeg runs on Windows, macOS, and Linux and is best for batch conversion, automation, and precise settings. It is fast, scriptable, and powerful, but the command line can intimidate beginners.

    Audacity is cross-platform and ideal when you need editing plus conversion. It provides excellent control and visual editing, but it is slower for large batch jobs.

    Apple Music or iTunes works well in Apple-centric environments for simple library conversion. It is built in and integrates with your library, but it offers limited advanced control.

    VLC is good for quick one-off conversions across platforms. It is free and familiar, but metadata handling can be inconsistent.

    Online converters are useful in a pinch, but privacy, upload time, and file limits are disadvantages.

    For most users, 44.1 kHz, stereo, 16-bit is a safe default. If the destination is video production, 48 kHz is often the better fit. If you plan more intensive editing inside a modern DAW, you might prefer 24-bit AIFF, but remember that raising bit depth on an MP3 source does not add lost detail. It mainly gives your processing chain more room for subsequent work.

    Common Conversion Settings Explained

    Sample rate

    The sample rate determines how many times per second the waveform is measured. 44.1 kHz is standard for music and CDs. 48 kHz is standard in video and many broadcast workflows.

    Higher rates like 88.2 or 96 kHz have their place in recording and production, but they do not magically improve an MP3 source. If the original file came from a standard compressed music file, staying at 44.1 or 48 kHz is usually the practical choice.

    Bit depth

    16-bit is standard for CD-quality delivery. 24-bit is common in production because it provides more headroom for processing and level adjustments.

    When converting from MP3, increasing bit depth does not recover detail. It can still be useful if the AIFF file will go through further EQ, dynamics processing, or mixing, because the working environment may benefit from the added processing margin.

    Channels

    Most MP3 music files are stereo, and they should generally stay that way. Converting stereo to mono should only happen when the destination explicitly requires it, such as voice-only material or bandwidth-limited production systems.

    Normalization and dithering

    Normalization adjusts loudness, usually to bring the peak level to a target. It can be helpful if the source is unusually quiet, but it also changes the file, so it should be intentional.

    Dithering matters when reducing bit depth, especially in professional workflows. If you are exporting to 16-bit after processing in a higher internal precision environment, dithering can help reduce quantization artifacts. If you are simply converting without meaningful editing, it is less critical.

    Metadata and Tags: Preserving Song Info When Converting

    MP3 files usually carry metadata in ID3 tags. AIFF stores metadata in different ways, often through chunks inside the file container. Because of this mismatch, metadata transfer is not always perfect.

    FFmpeg can copy metadata with -map_metadata 0, and Apple Music often keeps library info well when converting inside its own ecosystem. Audacity lets you manually confirm or edit tags during export, which is useful when accuracy matters more than automation.

    If metadata is missing after conversion, use a dedicated tag editor such as Kid3 or Mp3tag. For music libraries, this extra step can save a lot of cleanup time later. Artwork is especially worth checking, since it is one of the first things many converters drop.

    Audio Quality Myths and Realities

    The biggest myth in conversion is that AIFF sounds better simply because it is bigger. It does not. The conversion only prevents additional loss during later stages. It does not reverse the original lossy compression.

    You may still hear differences after conversion in a production environment, but not because AIFF repaired the source. More often, it is because your editing software handles uncompressed files more predictably, avoids repeated MP3 decoding, or reduces compatibility issues in the workflow.

    The best practice is simple. Start with the highest-quality source available, avoid multiple lossy transcodes, and use AIFF or another lossless format once you enter the editing or mastering stage.

    Troubleshooting: Common Problems and Fixes

    Conversion failures usually come down to a few recurring causes. The first is permissions. If the destination folder is read-only or protected, the converter may fail silently or throw a generic error. The second is path formatting, especially on Windows when filenames contain spaces. The third is a broken or unofficial install.

    If metadata disappears, the issue is usually not the audio itself but the converter’s handling of tags. Try FFmpeg with metadata mapping, or export with Audacity and re-enter tags manually. If album artwork is missing, a dedicated tag editor is often the fastest fix.

    Online converters can fail on large files because of browser timeouts or upload caps. In that case, switch to a desktop tool. If an exported AIFF will not play correctly, check the sample rate and channel settings. Some older hardware is picky about unexpected combinations.

    Practical Examples and FFmpeg Command Cheatsheet

    If you want a reliable way to convert MP3 to AIFF with full control, FFmpeg is the most useful tool to learn.

    A basic conversion:

    ffmpeg -i input.mp3 output.aiff
    

    A safer production-style conversion with explicit settings:

    ffmpeg -i input.mp3 -ar 44100 -ac 2 -sample_fmt s16 -map_metadata 0 output.aiff
    

    For 48 kHz output:

    ffmpeg -i input.mp3 -ar 48000 -ac 2 -sample_fmt s16 -map_metadata 0 output.aiff
    

    For batch conversion in the current folder on macOS or Linux:

    for f in *.mp3; do ffmpeg -i "$f" -ar 44100 -ac 2 -sample_fmt s16 -map_metadata 0 "${f%.mp3}.aiff"; done
    

    For Windows PowerShell, a simple loop is:

    Get-ChildItem *.mp3 | ForEach-Object { ffmpeg -i $_.FullName -ar 44100 -ac 2 -sample_fmt s16 -map_metadata 0 ($_.BaseName + ".aiff") }
    

    If you want loudness adjustment or normalization, do it carefully and only when needed. That step changes the audio content, so it is not part of a pure format conversion.

    Legal and Ethical Considerations

    Converting your own files for editing, backup, or device compatibility is usually straightforward. Sharing or distributing converted files that you do not have rights to is a different matter. Copyright still applies, regardless of the format.

    Privacy matters too. If you use an online converter, you are uploading audio to someone else’s servers. That may be harmless for a public podcast intro and unacceptable for confidential interviews, client recordings, or unreleased music.

    Responsible archival means keeping track of what the source was, what settings you used, and whether the result is a working copy or a final deliverable.

    Summary: Best Practice Recommendations

    If you need an easy way to handle an MP3-to-AIFF workflow, the smartest choice depends on what you are actually doing with the file afterward. For quick one-off conversions, VLC or Apple Music can be enough. For editing and metadata control, Audacity is the better choice. For batch conversion, automation, and precise settings, FFmpeg is the clear winner.

    A few defaults work well for most people. Use 44.1 kHz, 16-bit, stereo for general music and CD-related tasks. Use 48 kHz when the file is headed into video production. Expect much larger files, and do not expect better fidelity than the original MP3 already contained.

    Your next step is simple. Pick the method that matches your workflow, convert one test file first, verify playback and metadata, then process the rest with confidence.

    Appendix: Resources and Download Links

    Use official sources whenever possible. That reduces the risk of bundled adware, outdated builds, and broken codecs.

    The most trustworthy places to get started are the official sites for FFmpeg, Audacity, VLC Media Player, and Apple Music or iTunes support documentation. For tag editing, Kid3 and Mp3tag are both reputable options.

    If you want to learn more, look for vendor documentation and established audio engineering references covering PCM audio, AIFF and WAV containers, sample rate standards, bit depth, dithering, and mastering workflows. Those resources will help you make better decisions long after a simple conversion job is done.

  • How to Convert a JPG into a Professional ICO File

    How to Convert a JPG into a Professional ICO File

    A simple image file can quietly make your brand look polished, or make it look unfinished. If you have ever uploaded a logo, favicon, or app icon and realized the platform wants an ICO file instead of a JPG, you are not alone. This is one of those small technical tasks that seems trivial until it blocks a website launch, desktop shortcut, or software packaging workflow.

    Converting a JPG to an ICO file is usually easy, but doing it well takes a little more care than most people expect. The right dimensions, transparency, sharpness, and file quality all affect how your icon appears in browser tabs, Windows folders, shortcuts, and app interfaces. A rushed conversion can leave you with blurry edges, awkward backgrounds, or an icon that looks fine in one place and terrible in another.

    What Is Converting a JPG to an ICO File?

    A conversion from a JPEG image into an ICO file turns a photograph-style image into the icon format commonly used by Windows and often associated with website favicons and application icons. While a JPG is designed for photographs and general image sharing, an ICO file is built specifically to display small icons clearly across different sizes.

    An ICO file can contain multiple image sizes in one file, which allows the operating system or browser to choose the most appropriate version depending on where the icon is displayed. That is why a proper icon can still look crisp at 16×16 pixels and remain usable at 32×32 or 64×64.

    Side-by-side diagram showing a single JPG image on one side and an ICO file on the other containing multiple embedded icons at different pixel sizes (16x16, 32x32, 48x48, 64x64). Label the ICO variants and show an arrow indicating the OS/browser choosing the appropriate size.

    This difference matters more than it seems. A JPG usually contains a single flat image, often compressed in a way that sacrifices some fine detail. An ICO file, in contrast, is optimized for clarity at small dimensions. If the source image is too detailed, too rectangular, or lacks contrast, the final icon may be technically correct but visually weak.

    For small business owners and freelancers, this often comes up when setting up a favicon for a website, creating a branded desktop shortcut, or preparing assets for a Windows application. For developers, it may be part of the packaging process for software, browser extensions, or desktop tools. In all of these cases, the goal is the same: create a small, recognizable image that still works when scaled down dramatically.

    Key aspects of converting JPG images to ICO files

    File format differences matter

    A JPG is excellent for photos because it keeps file sizes low while preserving acceptable visual quality. The trade-off is that JPEG compression can introduce artifacts, especially around text, logos, and hard edges. Those imperfections become much more visible when the image is reduced to icon size.

    An ICO file serves a different purpose. It is designed for clarity at small dimensions, not for photographic realism. In practice, clean lines, strong contrast, and simple shapes perform far better than busy graphics. If your source image is a detailed banner or a full-color photograph, converting it directly into an icon may technically work, but the result often looks muddy and unreadable.

    Size and scalability are critical

    Most icons are viewed at very small sizes. A logo that looks sharp on a website header at 500 pixels wide may become impossible to recognize at 16×16. That is why resizing is not just a mechanical step, it is a design decision.

    A good icon usually starts with a simple, centered subject. If your JPG includes extra background space, long text, or multiple visual elements, the icon will likely lose impact. Cropping and simplifying the image before conversion often makes a bigger difference than the conversion tool itself.

    Comparison of two icons at tiny size (16x16): one produced from a detailed photo/logo that looks muddy and unreadable, and one from a simplified monogram/symbol that remains clear and recognizable. Include captions like 'Too detailed → unreadable' and 'Simple → recognisable'.

    The most common icon sizes include 16×16, 32×32, 48×48, and 64×64 pixels. Some tools let you generate several sizes in a single ICO file, which is usually the best option. This allows systems to choose the size they need rather than scaling one version up or down.

    If you are creating a favicon, your smallest size matters a lot. Fine details vanish quickly. Test whether the icon still looks recognizable at 16×16 before finalizing it. If it does not, the design likely needs to be simplified rather than merely resized.

    Transparency can be a hidden issue

    One of the biggest limitations of a JPG source file is that JPEG does not support transparency. If your original image has a white or colored background, that background will usually stay visible after conversion unless you edit the image first.

    This becomes especially noticeable when the icon is displayed against dark mode interfaces, colored browser themes, or custom desktop backgrounds. A white box around a logo can make an otherwise professional brand asset look unfinished. If transparency matters, it may be better to first edit the image in a format like PNG, remove the background, and then create the ICO file from that cleaner source.

    For users who only have a JPG available, this does not mean the project is doomed. It simply means expectations need to be realistic. Some icons work perfectly well with a solid background, especially if they are designed intentionally as square badges. Others need a transparent edge to blend naturally into their environment.

    Quality depends on the source image

    The phrase garbage in, garbage out applies here. A low-resolution JPG will not magically become a sharp icon because it has been converted to ICO. If the original image is blurry, heavily compressed, or poorly cropped, the final result will reflect those flaws.

    The best source images are usually high-resolution, square or near-square, and visually simple. Logos, initials, symbols, and bold marks convert well. Detailed flyers, photos of people, and full website screenshots do not. Think of an icon like a road sign. It needs to be understandable instantly, even from a distance, or in this case, at a tiny scale.

    Use case shapes the right output

    Not every icon is for the same environment. A favicon for a website has different practical needs than a Windows application icon. A browser tab icon needs to be recognizable at a glance and often appears at very small dimensions. A desktop application icon may appear in shortcuts, file explorers, taskbars, and installation files, sometimes at several sizes.

    For that reason, a smart JPG-to-ICO workflow considers where the icon will actually be used. If the file is for a website, prioritize simplicity and contrast. If it is for a software product, consider multiple sizes and how the icon will appear on both light and dark backgrounds.

    How to get started converting a JPG to an ICO file

    Start with the right image

    Before you use any converter, look at the JPG critically. Ask whether the image is truly suited to icon use. If it includes small text, busy textures, or multiple focal points, simplify it first. Often the best approach is to isolate the brand mark, monogram, or symbol rather than using the full logo lockup.

    If possible, crop the image into a square. Most icons display best in square proportions, and many conversion tools will otherwise force the image into a square area in ways that create awkward spacing or distortion. Centering the important visual element before conversion gives you much more predictable results.

    Choose an appropriate size

    Generate icon sizes that match common usage, such as 16×16, 32×32, 48×48, and 64×64. If your tool allows multiple embedded sizes in one ICO file, use that feature so systems can pick the best resolution.

    If you are creating a favicon, your smallest size matters a lot. Fine details vanish quickly, so simplify the design until it remains readable at 16×16.

    Use a reliable conversion tool

    Many online tools can convert a JPG to an ICO file in seconds. That convenience is useful, especially for freelancers or small teams who do not want to install extra software for a one-time task. Still, not all converters produce equally clean results. Some compress aggressively, some offer limited size options, and some do not preserve image quality as well as expected.

    When evaluating a tool, focus on whether it lets you control icon dimensions, generate multiple sizes, and preview the result. If the task is business-critical, such as preparing a branded favicon for a live website or packaging a software release, it is worth testing more than one tool and comparing outputs side by side.

    Follow a simple workflow

    For most users, the process is straightforward. Select a clean JPG image that is high-resolution and square if possible. Crop or simplify the image so the core visual remains clear at small sizes. Upload it to a converter that supports ICO output and size selection. Download and test the file in the environment where it will actually appear.

    Testing in context is often skipped, and it should not be. An icon that looks fine in a preview may appear too small, too soft, or too cluttered once placed in a browser tab or Windows shortcut. Real-world testing is part of the conversion process.

    Check the result in context

    A favicon should be tested in a browser tab, bookmark bar, and mobile browser if relevant. A desktop icon should be viewed on different background colors and at different scaling settings. Developers should also verify that the file is accepted by the build system, installer, or framework they are using.

    This context-based testing separates a merely converted file from a usable one. It is the difference between checking a box and creating an asset that actually supports brand recognition and usability.

    Common mistakes to avoid

    Here are predictable problems and better alternatives:

    • Using a detailed photo: Icon becomes blurry and unreadable, use a simple symbol, logo mark, or initial instead.
    • Starting with a low-resolution JPG: Final ICO looks soft or pixelated, use the highest-quality source available.
    • Ignoring background color: White or awkward box appears around icon, edit the background first or use a cleaner source image.
    • Using only one size: Icon scales poorly in different contexts, create an ICO with multiple size variants.

    Conclusion

    Converting a JPG to an ICO file is simple on the surface, but quality depends on more than just uploading and downloading. The source image, its clarity at small sizes, the presence or absence of transparency, and the intended use all shape whether the final icon looks professional or improvised.

    If you need an icon for a website, app, shortcut, or branded digital asset, start with the cleanest possible image and think like a designer, not just a file converter. A strong icon is small, clear, and instantly recognizable. Your next step is straightforward: choose your best source image, create the ICO file, and test it where your audience will actually see it.

  • How to Convert JPG Images to BMP Without Losing Quality

    How to Convert JPG Images to BMP Without Losing Quality

    Converting a JPG to a BMP sounds simple, until image quality shifts, file sizes explode, or a once-sharp graphic suddenly becomes awkward to use in another program. If you have ever needed an image format for printing, legacy software, design work, or a device that refuses to accept JPG files, you have already run into this exact problem.

    The good news is that turning a JPG image into BMP format is usually quick and straightforward. The more important question is when it makes sense, what changes during conversion, and how to do it without losing control over quality, size, or compatibility. For small business owners, freelancers, developers, and anyone using online tools to stay productive, understanding the difference can save time and prevent frustrating rework.

    What is converting a JPG image to a BMP?

    A conversion from JPG to BMP is the process of taking an image stored in JPG (or JPEG) format and saving it as a BMP bitmap file. Both formats store pictures, but they do it in very different ways. JPG is designed for efficient compression, which makes it ideal for web use, email attachments, and digital photos.

    A JPG (or JPEG), an open description, is linked here for reference: https://en.wikipedia.org/wiki/JPEG. A BMP bitmap file is linked here: https://en.wikipedia.org/wiki/BMP_file_format.

    That difference matters in real-world use. A JPG is usually much smaller, which is why it loads quickly and travels easily between apps and devices. A BMP is often much larger, but it can be easier for certain software to read, especially older Windows-based applications, image-processing tools, embedded systems, or workflows where compression artifacts are a problem.

    When people search for a way to convert a JPG image to a BMP, they are often trying to solve a practical compatibility issue. Maybe a printer utility only accepts BMP files. Maybe a game asset pipeline needs bitmap images. Maybe a legacy application cannot correctly process JPEG compression. In each case, the conversion itself is easy, but choosing the right settings is where good results come from.

    Why these formats exist side by side

    JPG became dominant because it offers an excellent balance between visual quality and small file size. For photographs and general-purpose sharing, it works extremely well. The trade-off is that JPG uses lossy compression, which means some image information is discarded each time the file is compressed. See more about lossy compression here: https://en.wikipedia.org/wiki/Lossy_compression.

    BMP takes a different approach. It is one of the oldest and simplest raster image formats, widely associated with Microsoft Windows. Because it often stores image data more directly, it can preserve the exact pixel layout without the compression behavior you get from JPG. That simplicity can be useful, even if it comes at the cost of much larger files.

    A good way to think about it is this, JPG is built for efficiency, while BMP is built for straightforward storage and compatibility. Neither is universally better. The right choice depends on what you need the file to do next.

    JPG vs BMP comparison diagram, Efficiency vs straightforward storage

    Caption: Efficiency (JPG) vs straightforward storage and compatibility (BMP).

    Key aspects of converting a JPG image to a BMP

    Before you convert a JPG file to BMP, it helps to understand what actually changes. The file extension changes, of course, but the deeper effects involve quality, compression, file size, transparency, and use case. These are the factors that determine whether the conversion is useful or just unnecessary extra weight.

    File size usually increases significantly

    The first surprise for most users is how much larger a BMP file can become. A compact JPG image that is only a few hundred kilobytes might become several megabytes after conversion. This is not a mistake. It is a consequence of BMP’s less compressed structure.

    File size increase example: identical image, JPG small vs BMP large

    A compact JPG image that is only a few hundred kilobytes might become several megabytes after conversion. For businesses and freelancers, this matters when images need to be stored in bulk, uploaded to cloud systems, or shared with clients. A single conversion may be harmless, but converting an entire folder of JPG photos into BMP can quickly consume storage space and slow down workflows. If your goal is simply to change the file format for broad compatibility, BMP may be fine. If your goal is efficiency, it usually is not the best destination format.

    Converting does not restore lost JPG detail

    This is one of the most important points to understand. If a JPG image has already been compressed, converting it to BMP does not magically recover detail that was lost earlier. The BMP will store the image as it exists now, including any JPG artifacts such as blockiness, smoothing, or edge degradation.

    That means a JPG-to-BMP conversion is best understood as a format change, not a quality upgrade. The resulting BMP can prevent further lossy compression if you continue editing, but it cannot recreate information that was already discarded when the JPG was made.

    Imagine photocopying a document and then placing the copy in a premium folder. The folder may protect the copy from further damage, but it does not make the copied text sharper than it was to begin with. The same logic applies here.

    BMP can improve software compatibility

    Despite its age, BMP still matters in specific environments. Some desktop tools, industrial systems, documentation workflows, custom apps, and older Windows utilities work more reliably with bitmap images than with compressed formats like JPG. In these situations, converting a JPG image to a BMP is not about visual improvement. It is about predictable file handling.

    Developers and technical users see this often. If a parser, import tool, or image library has limited format support, BMP can be the simplest bridge. The file may be larger, but it can be easier to process because the structure is less complex than modern compressed formats.

    For non-technical users, the same principle applies in a simpler way. If a piece of software says “unsupported image format” when you upload a JPG, a BMP version may solve the problem immediately.

    Image dimensions stay the same, but storage changes

    When you convert a JPG to BMP, the pixel dimensions usually remain unchanged unless you explicitly resize the image. A 1200 x 800 image will still be 1200 x 800 after conversion. What changes is the way those pixels are stored.

    This distinction is useful because many people confuse file size with image dimensions. A BMP may be dramatically larger in megabytes, yet look exactly the same on screen because the width and height are identical. The larger size reflects storage method, not necessarily a bigger visual image.

    Color handling matters in some workflows

    Most simple conversions preserve colors well enough for everyday use, but not every tool handles color profiles in exactly the same way. If your work depends on visual consistency, such as product photography, print preparation, UI design, or branded graphics, it is smart to inspect the converted BMP before using it in production.

    Even small color shifts can matter when an image appears in marketing materials or customer-facing assets. A quick quality check after conversion can prevent mismatched visuals later.

    JPG vs BMP at a glance

    Feature JPG BMP
    Compression Lossy, highly compressed Usually uncompressed or lightly compressed
    File Size Small Large
    Best Use Photos, web, sharing Compatibility, editing workflows, legacy software
    Image Quality Over Re-saves Can degrade with repeated compression More stable once saved
    Software Support Very broad Broad, especially in Windows and older systems
    Transparency Support Limited in standard JPG Typically limited in basic BMP workflows

    How to get started converting a JPG image to a BMP

    If you need to convert a JPG image into BMP format, the actual process is usually fast. The smarter part is choosing the right method for your workflow. online tools are ideal for quick, occasional tasks. Built-in desktop tools work well for offline use. Batch-capable apps are better if you handle many files at once.

    Choose the right conversion method

    For most users, an online JPG-to-BMP converter is the fastest option. You upload the JPG file, let the tool process it, then download the BMP result. This works well for occasional conversions, especially when you do not want to install software.

    If your images contain sensitive client material, internal documents, or unreleased creative assets, a local method may be better. Basic image editors on Windows and macOS often let you open a JPG and use “Save As” or “Export” to create a BMP file. This keeps the image on your device and reduces privacy concerns.

    Developers and power users may prefer desktop tools with batch processing. When handling dozens or hundreds of files, automation matters more than convenience. In those cases, BMP is usually chosen because a downstream system specifically requires it.

    A simple way to convert

    The actual steps are usually short and familiar.

    1. Select your JPG file from your device or cloud storage.
    2. Choose BMP as the output format in the converter or editor.
    3. Convert and download the new bitmap file.
    4. Open the BMP to confirm the image looks correct and works in your target software.

    These steps look simple because they are. What separates a good result from a frustrating one is the review afterward. Always open the converted file before sending it to a client, uploading it to a platform, or passing it into a production workflow.

    What to check after conversion

    After converting a JPG to BMP, verify that the image dimensions are correct, the colors look normal, and the file opens in the software that required the BMP format in the first place. A conversion is only successful if it solves the next step of your workflow.

    It is also wise to check file size. If the BMP is too large for your intended use, that is not necessarily a problem with the converter. It may simply mean BMP is the wrong final format unless a specific system requires it. If the image is only being shared or displayed online, keeping it in JPG or switching to PNG may be more practical.

    When an online tool makes sense

    An online converter is especially useful when speed matters more than advanced settings. If you are preparing a one-off image for a vendor portal, a hardware utility, or a software import screen, the browser-based route is hard to beat. It removes friction and makes the task accessible to non-technical users.

    That said, not all online tools are equal. A reliable tool should be easy to use, clear about supported formats, and quick to process standard file sizes. It should not force unnecessary account creation for simple conversions, and it should make downloads immediate and predictable.

    Common mistakes to avoid

    A few small mistakes cause most conversion problems. Users often assume BMP will improve image quality, when in fact it only preserves the current state of the JPG. Others forget how much the file size will grow and then struggle to upload or store the result. Another common issue is converting first and checking compatibility second, instead of testing the final BMP in the software that actually needs it.

    The best approach is simple, convert with purpose. Know why you need BMP, confirm that BMP is truly required, and inspect the file once it is created. That discipline keeps image workflows clean and efficient.

    Best use cases for BMP conversion

    Scenario Is BMP a Good Choice? Why
    Uploading product photos to a website Usually no JPG is smaller and better for web delivery
    Using images in older Windows software Often yes BMP may offer better compatibility
    Editing after avoiding further JPG compression Sometimes yes BMP can preserve the current image state
    Emailing files to clients Usually no BMP files are often too large
    Importing into a specialized device or app Yes, if required Some systems explicitly expect bitmap files

    Conclusion

    Converting a JPG image to a BMP is not complicated, but it is more than a basic file swap. It changes how the image is stored, usually increases file size, and can improve compatibility with software or systems that prefer bitmap files. What it does not do is restore detail lost to JPEG compression.

    If you need a quick result, an online tool is often the easiest starting point. If privacy, batch processing, or software-specific requirements matter more, a local workflow may be the better fit. The next step is simple, take one JPG file, convert it to a BMP, open the result in your target application, and confirm that it solves the problem you actually need to solve.

    Links referenced in this article:

  • Convert JPG Images to WebP for Faster Page Loads

    Convert JPG Images to WebP for Faster Page Loads

    If your website feels slower than it should, your images are often the reason. Large JPG files can quietly eat bandwidth, delay page loads, and hurt the user experience, especially on mobile. Converting a JPG to WebP is one of the simplest ways to reduce image size without noticeably sacrificing visual quality.

    That matters whether you run a small business site, manage client projects, sell products online, or just want faster pages with less manual work. A smart JPG to WebP workflow can improve performance, support better SEO, and make your content feel more polished. The good news is that you do not need expensive software or deep technical expertise to make the switch.

    What Is a JPG to WebP Conversion?

    A JPG to WebP conversion is the process of taking an image in JPG format and saving it as a WebP file instead. JPG has been a standard image format for years because it is widely supported and generally efficient for photographs. WebP, developed for the web, was designed to deliver similar visual quality at smaller file sizes, and more details are available at the WebP documentation.

    In practical terms, this means you can often keep an image looking sharp while making it lighter and faster to load. That is especially valuable for websites with many product photos, blog visuals, portfolio images, or landing page graphics. Smaller files reduce the amount of data a browser needs to download, which can help pages render more quickly.

    For many users, the appeal of converting JPG images to WebP comes down to speed, efficiency, and simplicity. You are not changing the content of the image. You are changing the container and compression method so the file is better optimized for modern web use.

    Why WebP Has Become So Popular

    Web performance has moved from a technical concern to a business concern. Visitors expect fast pages, and search engines reward strong user experience signals. Hosting and bandwidth costs add up when a site serves thousands of large images every day.

    WebP fits neatly into that reality. It is widely supported in modern browsers, and it is now a common choice for websites that want to improve performance without redesigning everything from scratch. For developers, it offers a practical optimization layer. For non-technical users, it is an easy win.

    There is also a productivity angle. Instead of manually resizing and compressing the same images again and again, many online tools and content systems now make JPG to WebP conversion almost automatic. That lowers the barrier for freelancers, marketers, and business owners who just need results.

    JPG vs WebP at a Glance

    The difference between these formats is easiest to understand side by side.

    Feature JPG WebP
    Primary use Photos and general web images Modern web image optimization
    Compression Lossy Lossy and lossless
    Typical file size Larger for similar quality Often smaller at similar quality
    Transparency support No Yes
    Browser support Very broad Broad across modern browsers
    Best fit Legacy workflows, compatibility Faster websites, modern performance needs

    This does not mean JPG is obsolete. It still works well and remains useful in many workflows. But if your goal is better web performance, WebP is often the stronger choice.

    Key Aspects of Converting JPG to WebP

    The biggest advantage of converting a JPG to WebP is usually file size reduction. Smaller images improve loading time, particularly on mobile connections where every kilobyte matters. A page with ten heavy JPG images can feel sluggish. The same page using optimized WebP files may feel noticeably quicker and more responsive.

    That speed improvement has real consequences. Visitors are less likely to bounce. Product pages feel more professional. Content loads more smoothly in image-heavy blog posts and galleries. If your business depends on first impressions, image optimization is not a minor detail. It is part of the customer experience.

    Quality vs Compression

    One concern many people have is image quality. That concern is valid. Any time you compress an image, you are balancing visual fidelity against file size. The goal is not to make the smallest possible file at all costs. The goal is to find the point where the image still looks clean to the human eye while taking up less space.

    WebP performs well here because it can often preserve perceived quality at lower file sizes than JPG. That does not mean every converted file will always look better. Results depend on the original image, the compression level, and how the image is used. A product photo with fine texture may need gentler settings than a simple blog header image.

    This is why testing matters. It helps to compare a few versions rather than assume one default export setting is perfect. A smart workflow focuses on acceptable visual quality, not theoretical perfection at 400 percent zoom.

    SEO and Page Performance Benefits

    Search engine optimization is about more than keywords and backlinks. Technical experience matters too. Faster pages tend to support better engagement, and optimized images reduce one of the most common sources of slow load times.

    Using WebP can help improve metrics connected to user experience, especially when images make up a large share of page weight. While image format alone will not guarantee rankings, it supports the broader goal of a fast, efficient site. For small businesses competing against larger brands, these cumulative improvements can make a meaningful difference.

    There is also a practical SEO benefit in media-heavy publishing. When your site serves lighter images, it can handle traffic more efficiently. Users can browse more pages with less friction. That can support longer sessions and better interaction overall.

    Compatibility and Real-World Considerations

    Modern browser support for WebP is strong, which is one reason the format has become mainstream. Still, compatibility is not just about browsers. It also includes your CMS, email workflows, design tools, client handoff process, and any platform where the image will be reused.

    For example, a WebP image may be perfect for a website but less convenient if a client expects a file for print or for use in an older application. In those cases, it makes sense to keep the original JPG as a source file and generate WebP specifically for web delivery. That way, you preserve flexibility without giving up performance.

    This is often the best mindset, JPG for source compatibility, WebP for web publishing. You do not have to treat the formats as competitors in every context. They can serve different roles in the same workflow.

    When a JPG to WebP Conversion Makes the Most Sense

    A conversion is especially useful when the image will be displayed on a website, app, blog, online store, or landing page. These are environments where smaller files improve speed and where browser support is already strong enough to make the format practical.

    It is also valuable when you are working with many images at once. A single file saved 100 KB smaller may not seem dramatic. But across hundreds of images, the savings become substantial. That can improve performance, reduce storage needs, and make uploads more manageable.

    Side-by-side JPG vs WebP comparison showing file sizes, subtle quality slider overlay (JPG: 420 KB, WebP: 120 KB)

    How to Get Started With a JPG to WebP Workflow

    The easiest way to start is with an online converter. For most small business owners, freelancers, and productivity-focused users, this is the fastest path. You upload a JPG, choose a quality level if the tool provides that option, convert the file, and download the WebP version.

    A simple process flow illustrating four steps: 1) Upload JPG, 2) Adjust quality/resolution, 3) Convert & preview, 4) Download & publish

    This approach is ideal when you need quick results and do not want to install software. It also works well for occasional tasks, such as optimizing blog images, updating portfolio pieces, or shrinking hero banners before uploading them to a site.

    Choosing the Right Tool

    Not all conversion tools are equally useful. Some focus on convenience, while others give you more control over quality, size, or batch processing. The best choice depends on how often you convert images and how much precision you need.

    If you handle images regularly, look for a tool that supports batch conversion, lets you preview quality differences, and keeps the interface simple. If privacy matters, you may prefer a desktop solution or a browser-based tool with clear file handling policies. If speed matters most, prioritize drag-and-drop uploads and quick downloads.

    A practical evaluation comes down to a few questions.

    1. Can it preserve acceptable image quality?
    2. Does it support multiple files at once?
    3. Is the workflow fast enough for repeated use?
    4. Does it fit your privacy and storage preferences?

    If you want a lightweight, in-browser converter to experiment with, try converting JPG images to WebP with Squoosh to see immediate visual and file-size differences.

    A Simple Conversion Process

    For most users, the process itself is straightforward.

    1. Upload your JPG image to a trusted converter or image optimization tool.
    2. Adjust quality settings if available, aiming for a balance between clarity and file size.
    3. Convert and preview the result to check for unwanted artifacts or softness.
    4. Download the WebP file and upload it to your website or project.

    That is enough to get started. Over time, you can fine-tune settings based on your content type. Product photography, blog headers, screenshots, and background images may all benefit from slightly different compression choices.

    Best Practices for Better Results

    A successful JPG to WebP workflow is not just about conversion. It is about using the right image at the right size. If you upload a massive 4000-pixel image for a small blog thumbnail, converting it to WebP helps, but it does not solve the whole problem. Resize before or during export whenever possible.

    It also helps to keep your original JPG files. Think of them as your editable source material. If you later need a different size, a different compression level, or another format, starting from the source usually gives better results than repeatedly converting the same already-compressed file.

    Naming and organization matter too. If you manage many site assets, use a clean folder structure and consistent naming convention so your optimized WebP files do not become a confusing pile of duplicates. A small amount of discipline here saves time later, especially in client work or collaborative projects.

    Common Mistakes to Avoid

    One common mistake is assuming every image should be converted with the same settings. Different images behave differently. A detailed photograph may need higher quality than a simple decorative background. Treating them identically can lead to either bloated files or visible quality loss.

    Another mistake is focusing only on file size and ignoring actual display context. If an image looks good on the page, that matters more than microscopic differences visible only when zoomed in. Optimization should support the user experience, not chase numbers without context.

    Some users also forget to test the final result on real devices. An image that looks fine on a desktop monitor may feel too soft on a high-density mobile screen, or it may be larger than necessary for its actual display dimensions. A quick check across devices can prevent avoidable issues.

    Making JPG to WebP Part of a Smarter Workflow

    Once you understand the basics, the next step is consistency. Rather than converting files one by one whenever you remember, build image optimization into your normal publishing process. If you write blog posts, optimize visuals before uploading. If you run an online store, prepare WebP versions as part of product image management.

    This creates two benefits. First, you stop treating optimization as a cleanup task. Second, your site becomes consistently faster over time instead of improving only in isolated spots. For freelancers and agencies, this also adds professionalism to deliverables. Clients may never ask what format their images use, but they notice when pages load smoothly.

    Developers can go a step further by integrating image optimization into build processes or CMS workflows. Non-technical users do not need to go that far, but the principle is the same. The more automatic the process becomes, the easier it is to maintain performance gains.

    Who Benefits Most?

    • Small business owners: Faster pages, better mobile experience, and more efficient product or service imagery.
    • Freelancers: Cleaner deliverables, better-performing client websites, and less time spent on manual optimization.
    • Developers: Better control over page weight and front-end performance.
    • Content creators: Faster-loading blog posts, portfolios, and media-rich pages.

    Even if your website is relatively small, image optimization is one of those improvements that compounds. A modest gain on every page becomes a noticeable upgrade across the whole site.

    Conclusion

    Converting a JPG to WebP is a practical, high-impact way to improve image efficiency for the web. It can reduce file sizes, support faster load times, and help create a smoother experience for visitors without forcing you into a complicated workflow. For modern websites, it is one of the easiest technical improvements to make.

    The smartest next step is simple: take a few of your largest JPG images, convert them to WebP, and compare the results. Check file size, visual quality, and page speed. Once you see the difference in a real use case, it becomes much easier to turn JPG to WebP conversion into a standard part of how you publish online.

    For more on browser support, see why WebP is widely supported in modern browsers, and read about user experience signals to understand how performance affects search rankings. If your site depends on first impressions, invest some time in image optimization to improve load times and overall engagement.

  • How to Convert MP3 Files to M4A: Easy Methods and Tips

    How to Convert MP3 Files to M4A: Easy Methods and Tips

    If you need a quick way to convert an MP3 to M4A, the good news is that you have several solid options. The better news is that the right option depends less on the file format itself and more on what you care about most: convenience, privacy, batch conversion, Apple compatibility, or preserving tags and album art.

    A lot of people assume converting audio will magically improve sound quality. It will not. In most cases, changing an MP3 into an M4A means re-encoding one lossy file into another lossy format, which can actually reduce quality if you choose poor settings. Still, there are good reasons to do it. M4A files, especially those using AAC, often deliver similar perceived quality at a smaller size and tend to work especially well across the Apple ecosystem.

    This guide explains what MP3 and M4A actually are, when conversion makes sense, how the process works, and which tools are worth using. You will also get step-by-step instructions, FFmpeg examples, metadata tips, and a practical comparison table so you can choose the best method for your workflow.

    What Is MP3 and What Is M4A? Key Differences Explained

    MP3 became the default digital audio format for a reason. It made music files small enough to store, transfer, and stream back when bandwidth and disk space were far more limited than they are today. It still works almost everywhere, from older car stereos to Windows PCs, Android phones, budget music players, and web apps.

    M4A is different. It is usually a container format that holds audio encoded with AAC. In practice, when people talk about M4A, they usually mean AAC audio stored in an M4A file. This format is especially common in Apple devices and apps, including iPhone, iPad, iTunes, the Music app on macOS, and parts of the broader Apple media ecosystem.

    A simple labeled diagram comparing MP3 and M4A: left side shows an 'MP3 file' with an MP3 codec block and a list of broad compatibility icons (older car stereo, Android, web); right side shows an 'M4A file' as a container box with an AAC codec block inside and Apple ecosystem icons (iPhone, iTunes, Music app). Add a small caption: 'MP3 = codec; M4A = container (commonly AAC) — AAC is generally more efficient.'

    The technical difference matters. MP3 and AAC are both lossy codecs, but AAC is generally more efficient. That means an M4A file encoded with AAC can often sound as good as, or better than, an MP3 at the same bitrate. In some cases, it can also be smaller for the same perceived quality. That is why people often move from MP3 to M4A when optimizing libraries for mobile use.

    Compatibility is broad for both formats, but not identical. MP3 is still the safest universal format. M4A works well on iPhone, iTunes, macOS, many Android apps, modern Windows players, VLC, and most current media software. If your main goal is Apple device sync, better metadata handling, or more efficient AAC compression, converting can make sense.

    When Should You Convert MP3 to M4A?

    There are a few practical reasons to convert. If you organize your music in Apple Music, iTunes, Finder, or an iPhone-focused workflow, M4A often feels more natural. If you are trying to reduce file size while keeping decent listening quality, AAC in an M4A container can also be a smart choice. Podcasts and spoken-word content can especially benefit from efficient AAC settings.

    That said, you should not convert simply because you expect better audio. If your source file is already an MP3, converting it to M4A does not restore lost detail. It is a bit like photocopying a photocopy into a different paper size. You might get a more convenient version, but you do not recover the original information.

    If sound quality matters, the best path is to start from a lossless source such as WAV, FLAC, or ALAC, then create your M4A from that original. If you downloaded an MP3 and just want it to play, sometimes the best move is to leave it alone. If a service offers the same track in AAC or M4A natively, downloading that version is better than converting the MP3 yourself.

    How Conversion Works: What Actually Happens When You Convert Audio

    In most MP3-to-M4A workflows, the audio is re-encoded. That means the MP3 is decoded back into audio data, then encoded again as AAC inside an M4A container. This is not the same as simply changing a filename extension or repackaging the stream. Because MP3 and AAC are different codecs, a true conversion almost always requires this extra compression step.

    A step-by-step conversion flow diagram: MP3 (compressed) -> decode to PCM (raw audio) -> encode to AAC -> wrap in M4A container. Include side notes: 'Re-encoding can reduce quality', 'Sample rate usually unchanged', and an icon showing metadata mapping (ID3 -> MP4 tags) with a warning about album art/custom fields.

    Bitrate plays a major role. For music, AAC-LC at 192 to 256 kbps is a sensible range for most users. For podcasts or voice recordings, lower settings may still sound perfectly fine. Sample rate usually stays the same as the source unless you deliberately change it. In most cases, there is no need to force a different sample rate.

    Metadata is another overlooked issue. MP3 files typically use ID3 tags, while M4A files use MP4-style metadata tags. Good converters can map fields such as title, artist, album, track number, and genre automatically, but album art and some custom fields may not always carry over cleanly. That is why the best tools either preserve metadata directly or make retagging easy afterward.

    Top Methods to Convert MP3 to M4A

    Below are the most useful tools and services for converting MP3 to M4A, ranked by flexibility, ease of use, and real-world practicality.

    1. FFmpeg

    FFmpeg is the most powerful option on this list. It is a free, open-source command-line tool that can convert audio with precise control over codec, bitrate, metadata, and batch workflows. If you want repeatable results, automation, or professional-level flexibility, FFmpeg is hard to beat.

    FFmpeg supports AAC encoding into M4A, batch conversion through scripts or terminal commands, metadata copying with -map_metadata 0, and cross-platform support for Windows, macOS, and Linux. It offers fine control over bitrate, sample rate, and encoder options. Because it runs offline, it is better for privacy and automation than web tools.

    FFmpeg is free and open-source, extremely flexible, excellent for bulk conversion, and works offline. Its downsides are the command-line interface, which may intimidate beginners, and the fact that some advanced AAC encoders may not be included in every build.

    A simple high-quality conversion command looks like this:

    ffmpeg -i input.mp3 -c:a aac -b:a 256k -map_metadata 0 output.m4a
    

    This tells FFmpeg to take input.mp3, encode it as AAC at 256 kbps, copy metadata from the source, and save the result as output.m4a.

    For quality-based encoding with an FFmpeg build that includes libfdk_aac, you can use:

    ffmpeg -i input.mp3 -c:a libfdk_aac -vbr 3 -map_metadata 0 output.m4a
    

    For batch conversion on macOS or Linux:

    for f in *.mp3; do ffmpeg -i "$f" -c:a aac -b:a 256k -map_metadata 0 "${f%.mp3}.m4a"; done
    

    For batch conversion in Windows PowerShell:

    Get-ChildItem *.mp3 | ForEach-Object { ffmpeg -i $_.FullName -c:a aac -b:a 256k -map_metadata 0 "$($_.BaseName).m4a" }
    

    Website: https://ffmpeg.org

    2. VLC Media Player

    VLC is best known as a video player, but it also works as a capable media converter. For users who want a free desktop app with a graphical interface, VLC is one of the easiest ways to convert MP3 files to M4A without installing a specialized audio program.

    VLC includes a built-in converter, processes files offline, and runs on Windows, macOS, and Linux. It is convenient if you already have VLC installed and it is safer than many random online converters for private files. The interface is not optimized for batch audio workflows, metadata handling can be inconsistent, and it exposes fewer transparent settings than FFmpeg.

    To use VLC, open Media > Convert/Save, add your MP3 file, choose Convert, select an AAC or M4A-compatible profile, set the destination filename with the .m4a extension, then start the conversion. If the default profile is vague, create a custom profile with AAC audio and verify the container format.

    Website: https://www.videolan.org

    3. Apple Music app / iTunes

    If you are an Apple user, this is often the smoothest method. On older Windows systems and older macOS versions, iTunes can convert MP3 files to AAC. On modern Macs, the Music app handles similar library-based workflows. This route is ideal if your files are already organized in an Apple library and you want tight integration with iPhone or iPad syncing.

    Apple’s tools are built for Apple workflows, offer library-based conversion, and generally manage metadata and artwork well. They are very convenient for Mac and iPhone users, require no command-line knowledge, and produce files that are highly compatible with Apple devices. The trade-off is less flexibility than FFmpeg and fewer options for advanced batch automation.

    To convert, go to the import settings in iTunes or the Music app, choose AAC Encoder, set your preferred quality, then select the MP3 file in your library and create an AAC version. The converted file will typically appear alongside the original.

    Website: https://www.apple.com

    4. CloudConvert

    CloudConvert is one of the better online options for converting MP3 to M4A when you do not want to install software. It supports many file types, has a cleaner interface than most web converters, and usually provides clearer conversion settings than bare-bones alternatives.

    CloudConvert offers web-based conversion with custom output settings and works across devices without local installation. It is very convenient and beginner friendly, but uploading audio to a third-party server is not ideal for sensitive recordings, private voice notes, unreleased media, or licensed content with restrictions. For occasional non-sensitive files, it is a solid choice.

    If you use CloudConvert, upload the MP3, select M4A as the output format, check audio settings if available, choose AAC at a sensible bitrate such as 192 or 256 kbps, then download the converted file.

    Website: https://cloudconvert.com

    5. Zamzar

    Zamzar has been around for years and remains one of the most recognizable online conversion services. Its strength is simplicity: upload a file, choose the target format, and wait for the conversion. For users who want minimal friction and do not need advanced settings, Zamzar is often enough.

    Zamzar is very easy to use from almost any browser, but it provides limited control over advanced audio settings and is not ideal for sensitive files. It may be slower for large uploads and is best for public-domain clips or disposable test files.

    Website: https://www.zamzar.com

    6. Online-Convert

    Online-Convert is another web-based service that often gives users more direct control over conversion settings than ultra-simple competitors. That makes it a better pick if you want some configurability without using FFmpeg or desktop software.

    Online-Convert is convenient from the browser and offers more settings than some competitors. Privacy concerns still apply, the interface can feel utilitarian, and free usage may be limited, but it works well for quick experiments and basic bitrate adjustments.

    Website: https://audio.online-convert.com

    7. The Audio Converter (iPhone/iPad)

    For iOS users, The Audio Converter is one of the more straightforward apps for converting files directly on a phone or tablet. It is useful when you receive audio by email, Files, or cloud storage and need a quick format change without moving to a desktop.

    The main benefit is mobility, and it is handy for a few files on the go. For larger libraries, mobile conversion can feel clunky.

    Website: https://www.floattechapps.com

    8. Android converters

    On Android, several apps can convert MP3 to M4A locally. The exact best choice can change over time, so choose an app with solid reviews, recent updates, and clear permission requirements. Good Android converters are handy for quick mobile edits or field recordings, but be cautious: mobile store apps vary widely in quality and some include ads or ask for suspicious permissions.

    Website: https://play.google.com

    Recommended Tools and Where They Shine

    Choosing the best converter is easier when you map it to your actual use case rather than chasing a generic “best tool” label.

    Tool Best For Platform Privacy Ease of Use Batch Support
    FFmpeg Power users, developers, archivists Windows, macOS, Linux Excellent, offline Moderate to low for beginners Excellent
    VLC Media Player Casual desktop users Windows, macOS, Linux Excellent, offline Good Basic
    Apple Music / iTunes Apple-centric libraries macOS, Windows Excellent, offline Very good Moderate
    CloudConvert Quick one-off web conversions Browser Moderate to low Excellent Limited
    Zamzar Simple online use Browser Moderate to low Excellent Limited
    Mobile apps Phone-only workflows iOS, Android Varies by app Good Low

    If you want the best free desktop option, use FFmpeg if you are comfortable with commands and VLC if you prefer buttons. If you live in the Apple ecosystem, Music app or iTunes is the most seamless route. If you only need one quick conversion and the file is not sensitive, CloudConvert is usually the strongest online pick.

    Step-by-Step: Convert MP3 to M4A Using FFmpeg

    Installing FFmpeg is straightforward. On Windows, download a trusted build from the official FFmpeg site or a reputable package source. On macOS, many users install it through Homebrew. On Linux, it is usually available through the distribution’s package manager.

    Once installed, start with a simple command:

    ffmpeg -i input.mp3 -c:a aac -b:a 256k -map_metadata 0 output.m4a
    

    Here is what the flags mean. -i input.mp3 sets the source file. -c:a aac selects the AAC audio encoder. -b:a 256k sets audio bitrate to 256 kbps. -map_metadata 0 copies metadata from the first input. output.m4a defines the destination file and container.

    If your build supports libfdk_aac, many users consider it a high-quality AAC encoder:

    ffmpeg -i input.mp3 -c:a libfdk_aac -vbr 3 -map_metadata 0 output.m4a
    

    For voice content or smaller files, you can reduce bitrate:

    ffmpeg -i input.mp3 -c:a aac -b:a 128k -map_metadata 0 output.m4a
    

    If album art does not transfer automatically, you may need a more explicit mapping workflow, especially when the source contains embedded cover art in a form FFmpeg interprets separately.

    How to Keep Metadata and Album Art When Converting

    Metadata transfer is where many converters fall short. MP3 files commonly use ID3 tags, while M4A relies on a different metadata structure. Basic tags like artist, album, and title often copy over without trouble, but embedded artwork can be inconsistent.

    FFmpeg’s -map_metadata 0 helps preserve tags, but after conversion, it is worth checking the result in a dedicated tag editor such as Mp3tag or Kid3. These tools are especially useful if fields appear blank, track numbering breaks, or cover art disappears.

    If metadata matters a lot to you, the Apple Music app and iTunes often do a better job in Apple-centric workflows. For manual cleanup on Windows, Mp3tag is one of the easiest options. On cross-platform setups, Kid3 is a solid choice.

    Quality Tips and Best Practices

    The most important rule is simple, do not expect quality gains from lossy-to-lossy conversion. If your MP3 is already compressed, your best goal is to avoid making it noticeably worse. For music, AAC-LC at 192 to 256 kbps is a safe recommendation. For podcasts and voice, 96 to 128 kbps can be enough, depending on the source.

    AAC-LC is the standard choice for most music. HE-AAC can be efficient at very low bitrates, but it is not the best default for general music libraries. If you care about future-proofing, keep your original MP3 and, when possible, archive from a lossless master like FLAC or WAV so future conversions do not compound quality loss.

    Safety, Privacy, and Legal Considerations

    Online converters are convenient, but they introduce real privacy risk. If the file contains private interviews, internal business recordings, client assets, or unreleased material, keep the conversion offline. Use FFmpeg, VLC, or an Apple desktop tool instead.

    Legality matters too. Converting audio you own for personal use may be acceptable in some contexts, but converting protected streaming content or bypassing platform restrictions can violate terms of service or copyright law. Always check the rules that apply in your region and with the service you are using.

    Malware is another concern, especially with obscure “free converter” apps. Download software from official websites, avoid bundled installers, and verify app reviews and permissions before installing on desktop or mobile.

    Troubleshooting Common Problems

    If the converted file will not play, the issue is often the codec or container combination. Make sure you encoded to AAC and saved with the .m4a extension. Simply renaming a file is not conversion.

    If metadata is missing, rerun the conversion with metadata mapping or open the file in Mp3tag or Kid3 to inspect fields manually. If track names become generic or artwork disappears, the source tags may not have mapped cleanly into the M4A structure.

    If quality sounds worse than expected, check whether you converted a low-bitrate MP3 into an even lower-bitrate AAC. That usually compounds artifacts. Try a higher target bitrate, but remember that higher bitrate cannot restore detail already lost in the original MP3.

    If file sizes are too large, your bitrate may be unnecessarily high. For everyday listening, stepping down from 256 kbps to 192 kbps AAC often offers a better balance between size and perceived quality.

    Frequently Asked Questions (FAQ)

    Does converting an MP3 to M4A improve quality?

    No. Converting an existing MP3 to M4A does not improve the original audio quality. It may help with compatibility, library management, or file size efficiency, but it cannot restore lost detail.

    Can I convert without losing metadata?

    Often, yes. Tools like FFmpeg, iTunes, Music app, and some desktop converters can preserve metadata. Album art and custom fields may still need manual checking.

    Is M4A better than MP3 for all devices?

    No. M4A is excellent for Apple devices and many modern apps, but MP3 remains the most universally compatible format across older hardware and software.

    Which is smaller, MP3 or M4A?

    At similar perceived quality, M4A with AAC is often smaller than MP3. The exact result depends on the encoder and bitrate you choose.

    Conclusion and Recommended Next Steps

    If you want the simplest answer, here it is. Use FFmpeg for control and batch jobs, VLC for an easy free desktop workflow, Apple Music or iTunes if you live in the Apple ecosystem, and CloudConvert only for non-sensitive one-off files.

    For the best results, keep your original file, use AAC-LC, aim for 192 to 256 kbps for music, and verify metadata after conversion. If quality really matters, start from a lossless source instead of an MP3.

    A practical next step is to create a small test set with one song, one podcast, and one file with album art. Convert them with your preferred tool, compare file size, playback, and metadata, then apply the same settings to the rest of your library. That simple test will save you far more time than redoing hundreds of files later.