JNTZN

Author: olemai

  • Creating a New Manual Post: A Practical Workflow

    Creating a New Manual Post: A Practical Workflow

    Manual posting remains one of the fastest ways to regain control when automation becomes noisy, brittle, or overly abstract. A new manual post workflow matters because many teams and solo operators need something simple, visible, and dependable. When publishing depends on layers of integrations, schedulers, and opaque rules, even a small mistake can become expensive.

    A well-structured approach to creating a thoughtful manual post solves a practical problem. It gives the publisher direct control over timing, content, formatting, and review. For developers and efficiency-focused users, that control is not old-fashioned, it is a form of operational clarity. Manual posting, when done correctly, becomes a deliberate process that reduces ambiguity and improves quality.

    What Is a New Manual Post?

    A manual post is a piece of content created, reviewed, and published directly by a user rather than being generated or deployed through an automated pipeline. The term applies across multiple environments, including content management systems, internal dashboards, knowledge bases, product update feeds, and social publishing interfaces. The defining attribute is the method, not the platform: a human initiates the post and controls each stage of publication.

    This distinction matters because manual posting introduces intentionality. In automated systems, content can inherit templates, metadata, and timing rules without sufficient scrutiny. A manual process forces inspection. The author sees the title, body, links, tags, attachments, and publish state as discrete inputs. That visibility often leads to fewer errors and stronger editorial alignment.

    For technical teams, the idea of a manual post is also comparable to a manual deployment. It is not always the fastest path in terms of raw volume, but it is often the safest path when precision matters. If the content is sensitive, time-bound, or tied to a product release, a manual entry can provide the confidence that no background rule has altered the intended output.

    In practical terms, a manual post typically includes direct interaction with the publishing interface. The user enters content into a form, selects categories or channels, optionally previews the result, and then publishes. That sounds basic, but the underlying value is high. Every field becomes auditable at the moment of creation.

    Key Aspects of a New Manual Post

    Direct control over content quality

    The first major advantage of a manual post is quality control at the point of entry. Instead of trusting a sync job or template engine to assemble the final message, the author validates the content in its finished form. This reduces formatting anomalies, broken internal references, accidental duplication, and incorrect metadata.

    That hands-on review is especially useful when content contains technical instructions, release notes, pricing updates, or legal language. In those scenarios, small differences matter. A missing character in a version number or a malformed link can create support overhead that far exceeds the time saved by automation. Manual posting acts as the final inspection layer before publication.

    Better context awareness

    A manual post is usually created with full awareness of current conditions. The author knows what else has been published, what the audience is seeing, and what should be emphasized now. Automated systems work from rules, humans work from context. That difference is substantial.

    For example, a product team may need to publish a quick update after an outage, a patch release, or a policy change. A manual process allows the message to reflect the real situation rather than a generic content pattern. The tone, structure, and timing can all be adapted without rewriting automation logic.

    Lower system dependency

    Manual posting reduces dependency on upstream services, connectors, and scheduling infrastructure. Every automated workflow introduces failure points, including API mismatches, expired credentials, queue delays, malformed payloads, and edge-case formatting issues.

    A manual post bypasses much of that complexity because the user works in the destination system directly. That can be inefficient for high-volume publishing, but it is efficient in a different sense. It lowers the probability of invisible failure. For teams that value reliability over throughput in certain workflows, this trade-off is often worthwhile.

    Improved accountability

    Another key aspect is clear ownership. When someone creates a post manually, the responsible party is usually obvious. That supports review, revision, and auditability. In organizations where multiple people contribute content, accountability can be more valuable than speed.

    This becomes even more relevant in environments with compliance requirements or cross-functional approvals. A manual process can preserve the chain of responsibility. The person who entered the copy, chose the category, and pressed publish can be identified without reconstructing an automation trail.

    Manual does not mean inefficient

    There is a common assumption that manual work is inherently slow and outdated. That is only partially true. Poorly designed manual workflows are inefficient. Well-designed ones are not. If the interface is streamlined, templates are sensible, and review standards are clear, a manual post can be completed quickly while still preserving quality.

    This is where tools and workflow design matter. Platforms such as Home can help centralize content tasks, reduce friction in navigation, and make manual publishing less fragmented. The value is not that they remove the human decision, the value is that they reduce the cost of making the right decision.

    How to Get Started with a New Manual Post

    Define the purpose before opening the editor

    The fastest way to create a poor manual post is to begin typing without a clear objective. Before touching the interface, the author should know what the post is supposed to do. Is it informing, announcing, documenting, correcting, or persuading? That purpose determines structure, tone, and the level of detail required.

    A useful mental model is to treat the post as an operational artifact rather than just content. Every post has an input, a target audience, and an expected outcome. If those are undefined, the manual process becomes guesswork. If they are defined, the process becomes efficient.

    Prepare the essential inputs

    A successful manual post usually depends on a small set of inputs being ready in advance. In most systems, the practical prerequisites are:

    1. Title: A clear, specific heading that reflects the post’s purpose.
    2. Body content: The main message, already reviewed for clarity and accuracy.
    3. Metadata: Tags, categories, publish date, author attribution, or status values.
    4. Linked assets: Images, attachments, URLs, or references needed by the post.

    Having these ready turns manual posting from a stop-start task into a controlled execution step. It also reduces the chance of publishing placeholders, partial text, or incorrect categorization.

    Use a repeatable creation sequence

    The most efficient way to handle a manual post is to follow the same sequence every time. Consistency removes cognitive overhead. The author no longer decides what to check next. The workflow itself provides order.

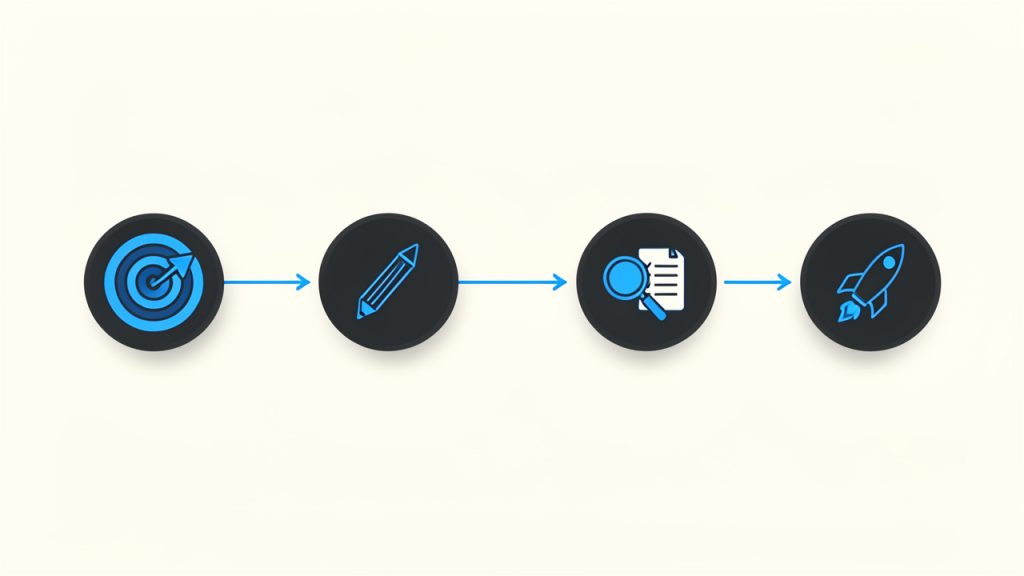
    A practical sequence starts with entering the title and body, then validating formatting, then adding metadata, then previewing the output, and finally publishing. In high-risk contexts, a peer review or approval state may sit between preview and publication. This sequence mirrors the logic of software release discipline. First create, then validate, then deploy.

    A clean linear workflow diagram showing the repeatable manual-post sequence

    Optimize for readability and retrieval

    Manual posts are often created under time pressure, which leads many authors to focus only on publication. That is short-sighted. A good post should not only be readable in the moment but also retrievable later. Searchability matters, especially in internal documentation systems and knowledge repositories.

    This means using precise titles, meaningful section breaks, and tags that reflect how users will look for the information. A vague title may feel fast to write, but it creates friction for everyone who needs to find the post later. The manual process is the ideal point to enforce this discipline because the author is still present and accountable.

    Check the post as a user would see it

    Preview is not a cosmetic step. It is a validation layer. When reviewing a manual post, the author should inspect it as if encountering it for the first time. The critical question is simple: does the post communicate correctly without requiring extra explanation?

    Formatting issues, missing links, broken hierarchy, and awkward spacing are easy to ignore in an editor view. They become obvious in preview or after publication. This is why strong manual workflows include a final user-perspective review. The post must not merely exist, it must function.

    Compare manual posting to automated publishing realistically

    The most useful way to decide whether to use manual posting is not through ideology, but through fit. Some tasks benefit from scale and automation, others benefit from direct oversight. The following comparison clarifies the difference:

    Aspect Manual Post Automated Publishing
    Control High, field-by-field validation Rule-based, less visible at publish time
    Speed at scale Lower for large volumes High for recurring or bulk tasks
    Error visibility Immediate to the author Often discovered after execution
    Context sensitivity Strong, human-led judgment Limited to configured logic
    Operational complexity Lower in simple cases Higher due to integrations and dependencies

    This comparison shows why a manual post remains relevant. It is not replacing automation in every case, it is providing a safer and often smarter path when context, accuracy, and accountability are the priority.

    A two-column infographic comparing Manual Post vs Automated Publishing across five attributes

    Build a lightweight standard operating procedure

    If manual posting is part of a recurring workflow, the process should be documented in a compact internal standard. Not a bloated policy document, but a short operating guide. This ensures that quality does not depend entirely on individual habits.

    That standard can define naming patterns, required metadata, review thresholds, and publication timing. Over time, this creates a predictable content system. The paradox is useful: a manual process becomes more efficient when it is standardized. Human control and procedural discipline work well together.

    Conclusion

    A manual post is more than a basic publishing action. It is a deliberate workflow for maintaining control, improving quality, and reducing the hidden risks that often accompany automation-heavy systems. For developers, operators, and efficiency-minded teams, manual posting remains valuable because it creates visibility at the exact moment when errors are easiest to prevent.

    The next step is straightforward. Review the systems where content is currently published, identify the moments where precision matters most, and introduce a clear manual posting workflow for those cases. If the current process feels scattered, a centralized environment such as Home can help simplify execution while keeping human oversight intact. The goal is not to avoid automation entirely, the goal is to use manual posting where it delivers the highest operational value.

  • Las mejores herramientas de SEO con IA para equipos y proyectos

    Las mejores herramientas de SEO con IA para equipos y proyectos

    Elegir mal una herramienta de SEO con IA no solo cuesta dinero. También cuesta tiempo, foco y oportunidades de crecimiento orgánico. Hoy el mercado está lleno de plataformas que prometen automatizar keywords, contenidos, auditorías y enlazado interno, pero no todas resuelven los mismos problemas ni sirven para el mismo perfil de usuario.

    Para desarrolladores, equipos de marketing y perfiles orientados a la eficiencia, el reto no consiste en encontrar una herramienta “inteligente”, sino en identificar qué sistema realmente reduce trabajo manual sin degradar la calidad estratégica. Esa distinción importa. Una plataforma puede generar cientos de sugerencias en segundos y, aun así, producir ruido, canibalización o contenido superficial.

    Esta guía analiza qué debe entenderse por las mejores herramientas de SEO con IA, qué criterios separan una solución útil de una moda pasajera y cómo empezar con un stack práctico según objetivos reales. La idea no es acumular software, sino construir un flujo de trabajo más rápido, medible y sostenible.

    Qué son las mejores herramientas de SEO con IA

    Hablar de las mejores herramientas de SEO con inteligencia artificial implica referirse a plataformas que aplican modelos de análisis, automatización y generación asistida para mejorar tareas clave del posicionamiento orgánico. Eso incluye investigación de palabras clave, análisis semántico, optimización on-page, detección de oportunidades de contenido, auditorías técnicas y, en algunos casos, generación de borradores o recomendaciones editoriales.

    La diferencia respecto a las suites SEO tradicionales está en la capa de interpretación. Una herramienta clásica suele mostrar datos. Una herramienta de SEO con IA intenta además inferir patrones, priorizar acciones y acelerar decisiones. No se limita a decir qué keywords existen, sino que propone agrupaciones temáticas, identifica intención de búsqueda, sugiere estructuras de contenido y, en los productos más maduros, ayuda a escalar procesos sin perder consistencia.

    Esto no significa que la IA sustituya la estrategia. En SEO, la calidad del resultado sigue dependiendo de señales fundamentales como la autoridad del dominio, arquitectura web, rendimiento técnico, enlazado interno y ajuste real a la intención del usuario. La IA funciona mejor como una capa de productividad y análisis, no como un reemplazo del criterio experto.

    Dónde aportan más valor

    El mayor valor aparece en tareas repetitivas y de alto volumen. Un ejemplo claro es el clustering de keywords, que al hacerse manualmente en proyectos medianos o grandes consume muchas horas y suele generar inconsistencias entre responsables. La IA puede agrupar consultas relacionadas, detectar entidades semánticas y sugerir jerarquías de páginas con mucha más velocidad.

    También destaca en entornos donde hay que producir o actualizar gran cantidad de contenido. En ese contexto, la IA permite identificar huecos temáticos, comparar una URL con competidores, resumir hallazgos SERP y proponer mejoras concretas. El ahorro operativo es real, especialmente cuando hay equipos pequeños gestionando sitios amplios.

    Qué no deberían hacer por sí solas

    Una de las confusiones más frecuentes consiste en delegar completamente la creación de contenido. Generar texto en masa sin supervisión editorial suele producir páginas genéricas, con baja diferenciación y escaso valor para el usuario. Google no penaliza la IA por sí misma, pero sí el contenido pobre, redundante o creado solo para manipular rankings.

    Por eso, cuando se evalúan herramientas SEO basadas en IA, la pregunta correcta no es si “escriben artículos”. La pregunta útil es si ayudan a crear mejor contenido, mejores decisiones y mejores prioridades. Si la herramienta solo acelera la publicación de piezas débiles, el problema no se resuelve, se amplifica.

    Aspectos clave para identificar una buena herramienta de SEO con IA

    No todas las plataformas con una capa de IA son equivalentes. Algunas están orientadas al análisis técnico, otras a contenido, otras a automatización de reporting. Elegir bien exige revisar criterios concretos, no solo promesas comerciales.

    Calidad de datos y profundidad del análisis

    La IA es tan útil como los datos que la alimentan. Si una plataforma trabaja con bases de palabras clave limitadas, métricas desactualizadas o lecturas superficiales de la SERP, sus recomendaciones serán poco fiables. Esto es especialmente importante para nichos con alta competencia o búsquedas long-tail, donde pequeñas diferencias en intención cambian por completo la estrategia.

    Una herramienta sólida debe combinar datos cuantitativos con contexto de búsqueda. No basta con mostrar volumen y dificultad. Conviene que interprete el tipo de resultado que domina en la SERP, la intención principal, el formato ganador y la viabilidad real de competir según el estado del sitio.

    Utilidad operativa, no solo automatización

    Muchas plataformas impresionan en la demo porque generan mucho output. Pero generar mucho no equivale a generar valor. Desde una perspectiva de eficiencia, una buena herramienta debe reducir pasos, evitar duplicidades y facilitar la ejecución.

    Por ejemplo, si una solución detecta oportunidades de contenido, pero obliga a exportar datos, limpiar hojas, reinterpretar clusters y reconstruir briefs fuera del sistema, su impacto operativo disminuye. En cambio, cuando la plataforma conecta descubrimiento, priorización y acción, el flujo de trabajo mejora de verdad.

    Integración con procesos técnicos y de contenido

    Para equipos con sensibilidad técnica, las integraciones importan tanto como las funciones. API, exportaciones limpias, conectores con Search Console, CMS, hojas de cálculo o herramientas de analítica pueden marcar la diferencia entre una utilidad aislada y un sistema realmente aprovechable.

    En proyectos donde colaboran SEO, desarrollo y contenidos, conviene que la plataforma permita trazabilidad. Esto incluye seguimiento de recomendaciones, estados de implementación y comparación entre hipótesis y resultados. Cuanto más fácil sea insertar la herramienta en el stack existente, más rentable será.

    Comparativa de herramientas destacadas

    No existe una única respuesta universal sobre cuáles son las mejores herramientas de SEO con IA. La elección depende del tipo de proyecto, del nivel técnico y del objetivo principal. Aun así, sí puede trazarse una clasificación práctica según fortalezas predominantes.

    Herramienta Enfoque principal Mejor para Fortalezas Limitaciones
    Semrush Suite SEO integral con funciones de IA Equipos que necesitan una plataforma todo en uno Investigación de keywords, análisis competitivo, contenido, auditorías Puede resultar extensa y costosa para necesidades simples
    Ahrefs Análisis de backlinks, keywords y contenido Usuarios orientados a investigación y competencia Base de datos potente, exploración de oportunidades, interfaz sólida Algunas funciones de IA no son el núcleo del producto
    Surfer SEO Optimización de contenido asistida por IA Equipos editoriales y content SEO Briefs, optimización semántica, análisis on-page Menor foco en SEO técnico profundo
    Frase Generación y estructuración de contenido SEO Creadores de contenido y pequeños equipos Research rápido, esquemas de contenido, resúmenes SERP Requiere revisión editorial exigente
    Clearscope Calidad semántica y relevancia editorial Marcas que priorizan contenido premium Muy útil para mejorar profundidad temática Precio elevado para proyectos pequeños
    MarketMuse Planificación de contenido y autoridad temática Estrategias content-first de gran escala Modelado temático y detección de gaps Curva de aprendizaje más alta
    Screaming Frog + capas IA externas Auditoría técnica con automatización complementaria SEOs técnicos y desarrolladores Rastreo avanzado, extracción, análisis profundo La IA no viene como propuesta editorial integrada
    Home Organización y eficiencia operativa con visión práctica Equipos que buscan centralizar trabajo y acelerar ejecución Simplifica procesos, mejora coordinación y reduce fricción Su valor depende de cómo se integre en el flujo real

    La tabla deja ver un patrón importante. Las mejores herramientas de SEO con IA no compiten todas en el mismo terreno. Semrush o Ahrefs funcionan como suites amplias. Surfer, Frase o Clearscope destacan más en contenido. Screaming Frog sigue siendo un referente técnico, aunque normalmente necesita complementos o procesos externos para sumar una capa de inteligencia automatizada.

    Diagrama comparativo de tipos de herramientas de SEO con IA

    En ese contexto, Home puede encajar bien cuando el cuello de botella no es solo el análisis, sino la ejecución diaria. Si el problema real del equipo es dispersión entre tareas, recomendaciones y seguimiento, una solución orientada a centralizar trabajo y mejorar eficiencia puede aportar más valor que otra plataforma con más dashboards pero menos operatividad.

    Herramientas de contenido frente a herramientas técnicas

    Conviene separar dos universos. El primero es el de las herramientas que usan IA para idear, estructurar y optimizar contenidos. El segundo es el de las plataformas que ayudan a analizar salud técnica, arquitectura, enlazado o rendimiento orgánico desde una lógica más analítica.

    El error habitual es intentar resolver ambas capas con una sola suscripción. En sitios pequeños puede ser suficiente. En proyectos de crecimiento serio, suele funcionar mejor una combinación. Una herramienta para investigación y auditoría, otra para contenido y una capa adicional para gestión operativa. Esa arquitectura es menos vistosa que la promesa de “todo en uno”, pero suele ser más robusta.

    Aspectos clave de las herramientas de SEO con IA

    Más allá de nombres concretos, hay varios componentes que deberían evaluarse antes de contratar cualquier plataforma.

    Investigación de keywords con intención de búsqueda

    Una buena herramienta debe ir más allá del volumen mensual. Lo importante es entender por qué busca el usuario, qué formato espera encontrar y qué nivel de profundidad exige la consulta. La IA ayuda a detectar estos matices, especialmente cuando analiza patrones SERP, entidades semánticas y agrupaciones por intención.

    Esto es útil para evitar errores clásicos, como intentar posicionar una guía informativa con una página transaccional o mezclar consultas que parecen similares pero responden a necesidades distintas. Una clasificación inteligente reduce canibalizaciones y mejora la arquitectura de contenidos.

    Optimización semántica y cobertura temática

    El SEO moderno ya no depende de repetir una keyword exacta. Importa la cobertura conceptual del tema, la claridad estructural y la capacidad de responder mejor que la competencia. Las herramientas con IA que trabajan bien esta capa ayudan a detectar subtemas faltantes, preguntas recurrentes y términos contextuales que fortalecen la relevancia de una URL.

    El beneficio no está solo en “meter más términos”. Está en construir piezas más completas y alineadas con la intención del usuario. Cuando se usa bien, la IA actúa como una segunda revisión editorial basada en patrones de búsqueda, no como un generador indiscriminado de texto.

    Automatización de auditorías y priorización

    En SEO técnico, uno de los mayores problemas no es detectar errores, sino decidir cuáles corregir primero. Hay sitios con miles de incidencias que no tienen el mismo impacto. La IA puede ayudar a priorizar según gravedad, frecuencia, dependencia y posible efecto sobre rendimiento orgánico.

    Para perfiles técnicos, esto tiene mucho valor. Reduce el tiempo invertido en triage y permite que desarrollo trabaje con una cola de tareas más lógica. La automatización, en este caso, no reemplaza la validación humana, pero sí mejora la asignación de recursos.

    Cómo empezar con herramientas de SEO con IA

    Empezar bien no significa contratar varias plataformas a la vez. Significa definir primero el problema operativo que se quiere resolver. El punto de partida cambia si el sitio tiene fallos técnicos graves, si falta estrategia de contenidos o si el equipo está saturado por procesos manuales.

    Flujo paso a paso para comenzar con herramientas de SEO con IA

    Paso 1, definir el caso de uso dominante

    Antes de evaluar software, conviene responder una pregunta simple: ¿qué consume hoy más tiempo o genera más pérdida de oportunidad? Si el problema es la investigación de keywords, la prioridad será una plataforma fuerte en datos y clustering. Si el bloqueo está en producción editorial, la mejor opción será una herramienta de briefs y optimización semántica. Si la fricción está en coordinación y seguimiento, una solución como Home puede tener más impacto inmediato.

    Esta fase evita compras impulsivas. Muchas herramientas parecen imprescindibles hasta que se analiza el flujo real de trabajo. En ese análisis suele verse que la empresa no necesita más datos, sino menos fricción.

    Paso 2, validar con un proceso pequeño y medible

    La adopción debería comenzar con un piloto. En lugar de rediseñar toda la operación, conviene elegir un grupo reducido de URLs, un clúster temático o una categoría concreta. Así puede medirse si la herramienta mejora velocidad, calidad de decisión o rendimiento.

    Los indicadores más útiles al inicio suelen ser los siguientes:

    1. Tiempo ahorrado en research, briefing o auditoría.
    2. Calidad de la priorización respecto al proceso manual previo.
    3. Impacto en producción de contenidos o implementación técnica.
    4. Mejora orgánica en impresiones, clics o posiciones tras aplicar recomendaciones.

    Con ese enfoque, la evaluación deja de ser subjetiva. La herramienta ya no se juzga por su interfaz o por el volumen de funciones, sino por su efecto en KPIs y en eficiencia real.

    Paso 3, mantener supervisión humana

    La IA acelera, el criterio decide. Este principio debería mantenerse siempre. Las sugerencias automáticas de keywords, entidades, títulos o mejoras semánticas necesitan revisión para asegurar adecuación de marca, precisión temática y consistencia editorial.

    En entornos técnicos ocurre lo mismo. Una recomendación automatizada sobre enlazado interno, canonicals o estructura puede ser útil, pero debe evaluarse dentro del contexto del sitio. La automatización sin control puede escalar errores igual de rápido que escalar aciertos.

    Errores habituales al elegir herramientas SEO con inteligencia artificial

    Uno de los errores más comunes es confundir generación de texto con estrategia SEO. Que una plataforma redacte rápido no implica que entienda negocio, intención ni diferenciación competitiva. Publicar más no siempre significa posicionar mejor.

    Otro error frecuente es sobredimensionar el stack. Muchas empresas contratan varias herramientas con funciones superpuestas y terminan pagando por redundancia. El resultado es más complejidad, no más rendimiento. En la práctica, un stack compacto y bien integrado suele ofrecer mejores resultados que una colección de plataformas infrautilizadas.

    También es habitual ignorar el coste de adopción. Una herramienta puede ser excelente, pero si requiere semanas de configuración, formación intensiva o procesos paralelos difíciles de mantener, su retorno se reduce. La eficiencia no depende solo de la potencia técnica, sino de la capacidad de uso continuado.

    Qué perfil de herramienta conviene según el tipo de usuario

    No todos los equipos buscan lo mismo, y esa diferencia debería guiar la selección.

    Perfil Necesidad principal Tipo de herramienta más adecuada
    Freelancer SEO Rapidez y cobertura amplia con coste controlado Suite integral o combo ligero de research + contenido
    Equipo editorial Briefs, optimización semántica y escalado de contenidos Herramientas centradas en contenido con IA
    Desarrolladores y SEO técnico Rastreo, auditoría, priorización y automatización Herramientas técnicas con integraciones y análisis profundo
    Startup o pyme Eficiencia operativa y foco en tareas de mayor impacto Soluciones simples, integrables y fáciles de adoptar
    Empresa con múltiples stakeholders Coordinación, ejecución y trazabilidad Plataformas que centralizan flujos, como Home, combinadas con una suite SEO

    Esta segmentación ayuda a evitar decisiones genéricas. Una agencia con necesidades de reporting, colaboración y auditoría no debería elegir igual que un creador de nicho o una startup de software con equipo técnico interno.

    Cómo construir un stack de SEO con IA sin sobrecargar el sistema

    La forma más sostenible de trabajar suele basarse en tres capas. La primera es una herramienta de datos e investigación. La segunda es una capa de contenido o análisis semántico. La tercera es una solución de ejecución y organización.

    Ese modelo permite separar claramente descubrimiento, decisión y acción. Además, facilita cambiar una pieza del stack sin rehacer toda la operación. Si el equipo ya dispone de una suite fuerte para investigación, puede tener más sentido añadir una plataforma de coordinación como Home antes que contratar otra suite similar.

    Para equipos orientados a eficiencia, esta arquitectura modular tiene una ventaja clara. Reduce duplicidades, mejora trazabilidad y hace más fácil justificar inversión. Cada herramienta cumple una función específica y puede medirse por resultados concretos.

    Conclusión

    Las mejores herramientas de SEO con IA no son necesariamente las que más funciones prometen, sino las que mejor encajan en un flujo de trabajo real. Una buena elección debe mejorar investigación, priorización, producción o ejecución, no solo añadir automatizaciones llamativas.

    Si el objetivo es crecer con menos fricción, el siguiente paso es auditar el proceso actual y detectar el cuello de botella dominante. A partir de ahí, se puede probar una herramienta centrada en datos, una orientada a contenido o una solución operativa como Home para conectar estrategia y ejecución. Cuando la IA se aplica con criterio, el resultado no es solo más velocidad. Es un SEO más claro, más escalable y mucho más útil.

  • Creating a New Manual Post for Precise Publishing

    Creating a New Manual Post for Precise Publishing

    Speed matters, but control matters more. In a world filled with automation, scheduled publishing, and one-click workflows, there are still moments when a manually created post is the right tool for the job. A new manual post gives the author direct control over timing, structure, formatting, and intent, which is often exactly what developers, operators, and efficiency-focused teams need.

    Automation vs Manual Post

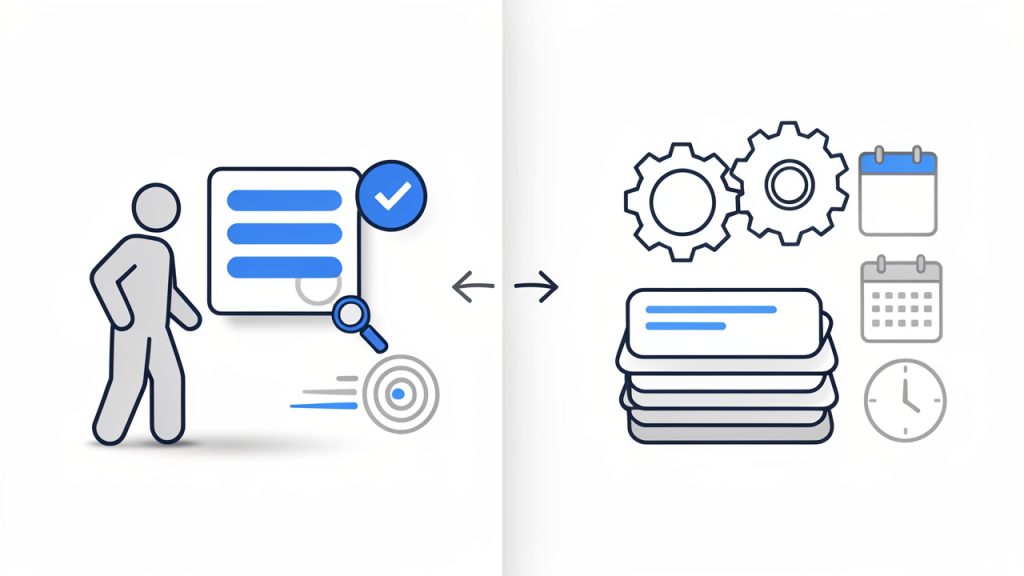
    Automation optimizes for throughput, manual posting optimizes for intent, and neither is universally better. The right choice depends on the risk of mistakes, the complexity of the message, and the level of control required by the workflow.

    That is especially true when the content must be deliberate. Release notes, system updates, incident summaries, internal knowledge entries, and product announcements often benefit from a hands-on publishing process. Instead of relying on generated templates or automated triggers, a manual workflow creates space for validation, review, and precision.

    What Is a Manual Post?

    A manual post is a content entry created directly by a user rather than generated by an automation, imported from another system, or published through a scheduled pipeline. The phrase can apply across several environments, including CMS platforms, internal dashboards, knowledge bases, forums, developer portals, and productivity tools.

    The core concept is simple, but its value is often underestimated. A manual post is not just a basic entry form with a title and body. It is a controlled publishing event. The author chooses the structure, wording, metadata, attachments, and publication timing in a way that remains explicit and observable.

    For developers and operations-minded users, that distinction matters. Automated systems are excellent at scale, repetition, and consistency. Manual posting is better when the task requires judgment. If the content depends on context, needs human verification, or carries operational consequences, creating the post manually can reduce errors and improve clarity.

    A useful way to think about it is this: automation optimizes for throughput, while manual posting optimizes for intent. Neither is universally better. The right choice depends on the risk of mistakes, the complexity of the message, and the level of control required by the workflow.

    Where Manual Posting Fits in Modern Workflows

    A manually created post often appears in places where content has a direct operational function. Teams publish maintenance notices, deployment summaries, customer updates, policy revisions, or documentation patches by hand because those posts must reflect current conditions precisely.

    Manual Post Checkpoint

    In many systems, the act of creating a new manual post also acts as a checkpoint. It forces the author to confirm categories, tags, visibility rules, access permissions, and final wording. That pause can be more valuable than it looks, especially in environments where a small publication mistake has downstream effects.

    This is one reason manual posting remains relevant even in highly automated stacks. It is not a legacy habit. It is a control layer.

    Key Aspects of a New Manual Post

    Understanding a new manual post requires more than defining it. The practical value comes from its operational characteristics: control, accuracy, flexibility, and accountability.

    Direct Control Over Content and Timing

    The most immediate advantage of creating a post manually is direct control. The user decides what gets published, when it appears, and how it is formatted. There is no dependency on an external trigger, no waiting for a sync job, and no hidden automation logic altering the final output.

    This matters in time-sensitive scenarios. If a service status update needs to go live immediately, or an internal process change needs to be documented without delay, manual posting reduces the chain of dependencies. Fewer moving parts often means fewer failure points.

    That control also extends to tone and structure. Automated systems tend to favor consistency, which is useful until the message requires nuance. A manual post allows the author to adapt the content to the situation rather than forcing the situation into a rigid template.

    Higher Accuracy in Context-Sensitive Communication

    Manual posts are often more accurate when the topic involves exceptions, edge cases, or evolving conditions. A generated announcement may be technically correct at the time it is produced, but a human author can account for ambiguity, caveats, and context that automation cannot easily infer.

    For developers, this is familiar territory. Systems can validate syntax, but they cannot always validate meaning. The same principle applies to content. A new post created manually is valuable when semantic accuracy matters more than speed.

    This is particularly important for internal documentation and operational notices. If readers are making decisions based on the post, a manually reviewed and authored message can prevent misinterpretation. In practice, that translates into fewer follow-up questions, fewer corrections, and a lower chance of process drift.

    Better Fit for Review and Governance

    A manual posting process is easier to align with review rules, compliance requirements, and editorial governance. Because each post is explicitly authored, it is usually easier to inspect who created it, what changed, and when it was published.

    That visibility is useful in organizations where posts are not merely content assets but part of the operational record. Product teams, IT teams, legal reviewers, and support functions often need a publish flow that supports accountability. A manual post naturally supports that requirement because it begins with a conscious user action.

    This does not mean every manual workflow is automatically well-governed. It means the structure is more compatible with governance because the event is discrete and human-initiated. If the platform includes version history, draft states, approval checkpoints, or publication logs, the value becomes even stronger.

    Flexibility Without Full-System Complexity

    A new manual post is also attractive because it offers flexibility without requiring a large automation architecture. Not every team needs webhooks, queue processors, integration layers, and rules engines for publishing. In many cases, that stack introduces more overhead than value.

    A manual workflow is often sufficient when posting volume is moderate and content quality matters more than raw output. It can also serve as the fallback path when automation fails. Mature teams often keep both modes available: automated posting for routine events, and manual posting for exceptions, overrides, and critical communications.

    This hybrid approach is usually the most efficient. Automation handles repetition, manual posting handles judgment.

    Trade-Offs to Consider

    Manual posting is not perfect. It can be slower, more dependent on human discipline, and less scalable when volume increases. If multiple people create posts without a shared standard, formatting inconsistency and metadata errors can appear quickly.

    That is why the best manual systems are structured. They provide clear fields, validation rules, editorial guidance, and publishing constraints. A good interface reduces friction without removing control.

    The following comparison clarifies where manual posting tends to perform best:

    Workflow Type Best Use Case Strength Limitation
    Manual Post Creation High-importance updates, documentation changes, exceptions Precision and human judgment Slower at scale
    Automated Posting Repetitive updates, routine feeds, scheduled events Speed and consistency Weak contextual awareness
    Hybrid Workflow Mixed publishing environments Balance of control and efficiency Requires process design

    How to Get Started with a New Manual Post

    Starting with a new manual post should not mean starting without structure. The most effective setup is a lightweight process that preserves human control while minimizing avoidable friction.

    Define the Purpose Before the Platform

    Many teams begin with the tool, but the better starting point is the publishing intent. A manual post should exist for a reason. Is it meant to communicate an urgent update, document a change, share an insight, or create a permanent reference? The answer shapes everything that follows, from length to metadata to review requirements.

    Without that clarity, manual posting becomes inconsistent. One person writes a brief notice, another writes a long-form update, and neither uses the same categories or naming conventions. The result is a repository of posts that are technically published but operationally difficult to use.

    A useful baseline is to standardize four elements before authors begin: title pattern, audience, required fields, and publication criteria. This is enough structure to keep quality high without making the workflow heavy.

    Create a Repeatable Input Pattern

    A manual workflow becomes efficient when the inputs are predictable. Even if the post itself is written by hand, the author should know which elements are always required. That usually includes a clear title, summary, main body, tags or labels, visibility setting, and publication status.

    For efficiency-focused users, this is where systems thinking helps. A manual process does not have to be informal. In fact, the strongest manual publishing environments behave like well-designed forms. They reduce cognitive load by making decisions explicit and repeatable.

    If the platform supports templates, use them carefully. A template should provide structure, not force generic writing. It should accelerate the process while preserving room for context-specific detail.

    Start Small, Then Introduce Rules

    When implementing a new manual post workflow, it is better to begin with a narrow use case than to design for every scenario at once. Start with one content type, such as release updates or internal notices, and observe where authors hesitate or make mistakes.

    That observation phase matters. It reveals whether the issue is missing fields, unclear permissions, poor editor design, or weak review logic. Once the workflow is stable, additional rules can be added gradually. This may include approval steps, required tags, retention rules, or publishing windows.

    A compact onboarding model usually works best:

    1. Identify the post type that truly requires manual control.
    2. Define the minimum required fields for every new entry.
    3. Establish a review path if the content has operational impact.
    4. Measure errors and delays before expanding the workflow.

    This approach keeps the process practical. It also prevents overengineering, which is a common problem when teams try to make a manual workflow behave like a full automation platform.

    Choose a Tool That Supports Intentional Publishing

    The quality of a manual post is shaped by the interface used to create it. A good system should make drafting, editing, reviewing, and publishing straightforward. It should expose state clearly and avoid hidden behaviors that confuse authors.

    For teams that want efficiency without losing control, a platform like Home can be useful when it supports clear publishing states, lightweight templates, searchable archives, and role-aware permissions. The value is not simply that content can be entered manually. The value is that the system respects manual work as a first-class workflow rather than treating it as a fallback.

    That distinction matters for long-term adoption. If authors feel the manual path is awkward or underpowered, they will either avoid using it or publish with avoidable inconsistency. A platform designed for clarity turns manual posting into a reliable operational habit.

    Common Mistakes When Creating a New Manual Post

    The most common problem is not writing quality. It is process inconsistency. Teams often assume that because a post is manual, every detail can be improvised. That leads to vague titles, missing metadata, unclear ownership, and poor discoverability later.

    Another issue is treating manual posting as inherently slow. In reality, it is slow only when the workflow is undefined. A structured process with a clean interface can be fast enough for most high-value communication tasks.

    A third mistake is failing to distinguish between urgent and important posts. Not every manual post needs immediate publication. Some need careful review. Others need speed. If the workflow does not separate those cases, both quality and responsiveness suffer.

    Conclusion

    A new manual post remains a practical and often essential part of modern content operations. It offers direct control, stronger contextual accuracy, and better alignment with review, governance, and exception handling. For developers and efficiency-focused users, manual posting is not the opposite of optimization, it is a deliberate optimization for cases where judgment matters more than throughput.

    The most effective next step is to define one use case where manual publishing clearly outperforms automation, then build a lightweight, repeatable workflow around it. When the system is structured well, a manual post becomes more than a simple entry. It becomes a reliable mechanism for precise communication, operational clarity, and long-term content quality.

  • How to Create a New Manual Post: A Step-by-Step Guide

    How to Create a New Manual Post: A Step-by-Step Guide

    Creating a post manually sounds simple until you are staring at a blank editor, a dozen settings, and one nagging question: what actually matters before you hit publish? A poorly built post can hurt readability, SEO, loading speed, and even your brand credibility. A well-built one can do the opposite, it can rank, convert, and stay useful for months.

    This guide explains how to create a new manual post from start to finish, without tying the process to just one platform. Whether you publish in WordPress, Wix, Squarespace, a forum, a social platform, or a custom admin panel, the same core principles apply. You need the right structure, the right metadata, clean formatting, and a publishing workflow that reduces errors.

    If you are a small business owner, freelancer, developer, or a productivity-minded creator, this article will help you build posts with more control and fewer surprises. You will learn when manual posting is the right choice, how to prepare your content, how to publish it properly across common platforms, and how to measure whether it actually worked.

    Introduction: What Is a Manual Post and Why It Matters

    A manual post is any post you create directly inside a content editor, rather than generating it automatically through code, imports, RSS feeds, APIs, or bulk upload tools. In practice, that can mean writing a blog article in WordPress, adding a news update in a custom CMS, publishing a discussion thread in a forum, or posting a long-form update on a social platform.

    The phrase shows up in different contexts, but the idea stays consistent. A manual post is created with human input at every important step. You choose the title, write the body, add images, set the slug, define categories or tags, and control the publication settings yourself. That hands-on approach is often slower, but it gives you much more precision.

    That precision matters. Manual posting is usually better when content quality, brand voice, SEO, compliance, and layout all need close attention. Automated posting has its place, especially for scale, but imported content often needs cleanup. A manually created post is typically stronger when discoverability and presentation are priorities.

    When to Create a Manual Post vs. Automated Posting

    The biggest advantage of manual posting is control. You can shape the message for a specific audience, optimize the page for search intent, and catch issues before they go live. That is especially important for landing pages, thought leadership pieces, product updates, service pages, and evergreen blog content where small details affect performance.

    The trade-off is time. Creating each post manually requires writing, formatting, metadata entry, media prep, and quality checks. If your team publishes hundreds of short updates per week, a fully manual workflow may become inefficient. In those cases, automation can support scale, but it should still include review steps for anything customer-facing.

    A practical way to decide is to look at the content’s purpose. If the post is high value, brand sensitive, conversion focused, or search focused, manual creation is usually the better route. If it is data-driven, repetitive, or high volume, automation may be more appropriate.

    Here is a simple comparison:

    Factor Manual Posting Automated Posting
    Quality control High Variable
    Speed at scale Low to medium High
    SEO customization Strong Often limited
    Brand voice Precise Inconsistent unless monitored
    Best for Important content, evergreen posts, editorial work Bulk updates, feeds, large catalogs, recurring campaigns

    Infographic comparing manual posting and automated posting

    Preparing to Create a Manual Post

    Before you open the editor, clarify your goal. Every strong post has a job. It may be meant to attract search traffic, educate customers, announce a change, generate leads, or answer a recurring support question. Without that goal, it is easy to create content that looks complete but does not actually perform.

    Next, define the audience. A freelancer writing for startup founders should sound different from a developer documenting a feature for technical users. The language, structure, examples, and depth should match what the reader already knows and what they need next.

    Keyword planning also belongs in this stage. If your target phrase is the awkward raw term “New Manual Post”, do not force it word-for-word into every heading. Use it naturally in context, such as “how to create a new manual post” or “steps for publishing a manual post.” That approach keeps the wording human while still signaling relevance to search engines.

    Gather all assets before you start building the post. That includes images, links, references, downloadable files, author details, captions, and metadata ideas. It also includes accessibility details like alt text, which should describe the image meaningfully rather than stuffing in keywords.

    A short outline saves time later. Even a simple structure like introduction, key steps, examples, and next action helps you write faster and format more cleanly. In most editors, structure problems become harder to fix once images, embeds, and callouts are already in place.

    Step-by-Step: Creating a Manual Post in Common Platforms

    WordPress, Block Editor, and Gutenberg

    In WordPress, creating a new post usually starts from Posts > Add New. You will first enter the title, then build the body using blocks. The block editor makes it easy to insert paragraphs, headings, images, lists, embeds, quotes, and buttons without code, but it also makes it easy to over-format. Keep the design simple unless the post genuinely needs more visual elements.

    After writing the main content, move to the settings panel and complete the fields many users skip. Add a featured image, assign the right category, use tags sparingly, write an excerpt if your theme uses one, and review the permalink or slug. That slug should be short, descriptive, and readable. For a guide like this, a clean slug might be /create-manual-post/.

    Before publishing, check the post status and visibility settings. WordPress lets you save as draft, publish immediately, schedule the post, make it private, or password-protect it. Preview the post on desktop and mobile before going live.

    WordPress block editor screenshot: title field, content blocks, categories, featured image, and publish panel

    Squarespace and Wix

    In Squarespace and Wix, the process is similar even if the interface differs. You begin by adding a new blog post, choosing a layout, and entering the title and body content. Most users can work visually, which is helpful, but that same visual freedom can lead to inconsistent spacing and oversized media.

    Pay close attention to the built-in SEO fields. Add a clear SEO title, a concise description, and a clean URL slug. If the platform lets you define social sharing images or summaries separately, use that option. It improves how the post appears when shared externally.

    Media insertion is generally straightforward in both platforms, but image size still matters. Uploading a massive image directly from a phone can slow the page and reduce the user experience. Resize and compress before upload whenever possible.

    Social Platforms and Forums

    A manual post on LinkedIn, Reddit, Facebook groups, or niche forums works differently from a blog post. The field options are lighter, but the fundamentals remain. You still need a strong opening, clear formatting, and the right tone for the platform.

    Forums reward specificity and relevance. Social platforms reward clarity and engagement. That means your first few lines matter even more. On Reddit, for example, a vague title can sink a post immediately. On LinkedIn, a strong opening line can significantly improve dwell time and interaction.

    These platforms also have community norms. A polished blog-style post may work well on LinkedIn but feel out of place in a technical forum. Manual posting gives you the flexibility to adapt, which is one of its biggest strengths.

    Custom CMS or Admin Panels

    Custom CMS tools often include fields that standard website owners rarely see directly. These can include author attribution, content status, publication date, slug, summary, meta title, meta description, canonical URL, structured data options, and revision notes.

    Developers and content teams should agree on field definitions before publishing at scale. If one editor uses the summary field as an internal note and another uses it as an excerpt, output will become inconsistent across the site. Good manual posting depends not just on the editor, but on a predictable workflow.

    If your custom admin panel supports staging, use it. Draft in staging, preview on multiple devices, then publish to production only after verification. That reduces formatting regressions and prevents broken public pages.

    Formatting and Readability Best Practices

    Good formatting is invisible when done well. The reader should move through the post naturally, without friction. That means clear headings, short paragraphs, enough white space, and media that supports the content instead of interrupting it.

    Headlines should be specific and useful, not clever for the sake of it. If your topic is how to create a manual post, say that clearly. Search users and busy readers respond better to direct language than to vague creative phrasing. Subheadings should also help scanning. A reader should be able to skim them and still understand the article structure.

    Paragraph length matters more than many editors realize. Huge blocks of text feel harder than they are, especially on mobile. In most web content, two to four sentences per paragraph is a good rule. This is not just a style preference. It directly improves readability and time on page.

    Images should be optimized for both clarity and performance. Use captions when context helps. Add descriptive alt text such as “WordPress post editor with category and featured image settings open” rather than “manual post SEO image.” For audio and video, transcripts or summaries improve accessibility and search value.

    SEO and Metadata: Make Your Manual Post Discoverable

    Creating a post manually gives you a chance to shape the metadata properly, and that is one of the clearest advantages over low-review automation. Start with the meta title. It should be specific, readable, and aligned with the page intent. Then write a meta description that explains the benefit of clicking.

    Permalinks deserve care. Short slugs usually perform better than long ones because they are cleaner and easier to share. Avoid unnecessary dates, filler words, or category clutter unless your site structure requires them. A readable URL improves trust and can help users understand the page before clicking.

    If you are targeting a phrase like new manual post, use it naturally in places that matter. The title can say “How to Create a New Manual Post,” the introduction can mention the phrase once in context, and the slug can reflect the core topic. Do not force the exact phrase into every subheading. Search engines are better at understanding natural language than many outdated SEO habits suggest.

    Structured data can further improve discoverability. For blog-style content, Article or BlogPosting schema is often appropriate. Many CMS plugins handle this automatically, but it is worth checking. Tools like Yoast and Rank Math can help you review metadata, readability, and schema output without making the process overly technical.

    Internal linking also matters. Link the new post to relevant service pages, related articles, or documentation. If similar versions of the content exist, review canonical tags to avoid duplicate content confusion.

    Images, Media, and File Management

    Media handling is where many otherwise strong manual posts lose performance. The most common problem is uploading oversized files without compression. For most posts, WebP is an excellent choice for web images because it keeps quality high and file size low. JPEG still works well for photographs, while PNG is better reserved for graphics that truly need transparency.

    Naming files well helps more than people think. A filename like create-manual-post-wordpress.webp is clearer than IMG_4837.webp. It supports organization and can offer a small contextual benefit.

    Captions and credits should be deliberate. Use captions when they add meaning, not just because the platform offers the field. If an image comes from a licensed source or external contributor, include proper attribution according to your usage rights.

    For video embeds, check responsiveness. A video that looks fine on desktop can overflow or distort on mobile if the theme or container is poorly configured. Attachments and downloads should also be hosted securely, especially if they include client resources, lead magnets, or internal documentation.

    Scheduling, Publishing, and Post-Publish Checklist

    Scheduling gives you breathing room. Instead of rushing content live the moment it is finished, you can set a publication time that aligns with your audience and your promotional plan. The best posting time depends on the platform and audience, but consistency usually matters more than chasing generic timing advice.

    Before publishing, do a full review. Read the post in preview mode, not just in the editor. Editors can hide spacing issues, embed problems, and mobile layout flaws. Check links, headings, image alignment, metadata, and whether the page still makes sense when skimmed quickly.

    Use the publication settings intentionally. Immediate publishing is fine for urgent updates. Scheduled posts are better for editorial consistency. Private and password-protected posts are useful for internal reviews, gated resources, or client previews.

    After the post goes live, the work is not finished. Share it through relevant channels, submit the URL to Google Search Console if appropriate, and watch early behavior. If the page has poor click-through rate or low engagement, the title, intro, or featured image may need refinement.

    Editing, Versioning, and Managing Revisions

    Manual posts are rarely one-and-done. Good content gets revised. Platforms like WordPress include revision history, which makes it easier to restore earlier versions after a mistake. That is especially useful when multiple people touch the same piece.

    Teams should have a clear draft workflow. A common system is draft, editor review, SEO review, final approval, scheduled, then published. This sounds formal, but even very small teams benefit from defined checkpoints. It reduces accidental publication and keeps responsibilities clear.

    Author attribution matters too. In multi-author environments, record who wrote the content, who edited it, and who approved it. This improves accountability and makes future updates easier. Older manual posts should also be reviewed periodically for refresh opportunities, outdated information, and repurposing into newsletters, social threads, or downloadable guides.

    Measuring Success: Analytics and Optimization After Publishing

    Once your post is live, success should be measured against the original goal. If the goal was traffic, watch impressions, clicks, and sessions. If the goal was lead generation, track conversions, CTA clicks, or form submissions. If the goal was education, time on page and scroll depth may be more meaningful.

    Google Analytics 4 and Google Search Console are the core tools for this. Search Console shows how the page performs in search, including queries, impressions, and click-through rate. GA4 helps you understand engagement, user paths, and conversion behavior after visitors land on the page.

    Performance should be reviewed in stages. In the first 30 days, focus on indexing, early engagement, and obvious issues. By 90 days, look for ranking movement and user behavior trends. By 180 days, you should be evaluating whether the post deserves an update, a stronger internal linking push, or a changed title to improve clicks.

    Testing can help, especially for high-value content. A headline tweak or featured image change can improve results without rewriting the entire article. The key is to test with purpose, not constant random changes.

    Common Manual Post Problems and How to Fix Them

    Formatting issues often appear after publication because themes, block settings, or pasted content behave differently across devices. If a page looks broken on mobile, check for oversized embeds, copied formatting from external documents, and inconsistent heading styles. Cleaning pasted text before formatting it in the CMS can prevent many of these problems.

    SEO issues are another common frustration. Duplicate titles, weak meta descriptions, missing canonical tags, and noindex settings can suppress visibility. If a manual post is not appearing in search, confirm that it is published, indexable, internally linked, and included in the sitemap.

    Media failures usually come down to file size, unsupported formats, or CDN delays. If images load slowly, compress them, enable lazy loading if your platform supports it, and test performance in Lighthouse. If a file will not upload, check platform size limits and file permissions.

    Permission errors often affect team workflows in CMS platforms. If a user can draft but not publish, review role settings. Custom CMS setups are especially prone to this issue because workflows are sometimes built around granular permissions that are not obvious in the interface.

    Checklist: Final Manual Post Publication Template

    Use this template as a practical final review before and after publishing a new manual post.

    1. Pre-publish
      1. Title is clear, specific, and aligned with search intent.
      2. Slug is short, readable, and relevant.
      3. Meta title and description are filled in.
      4. Headings are structured logically.
      5. Images are compressed, aligned, and include alt text.
      6. Links work and open as intended.
      7. Mobile preview looks clean.
      8. Categories, tags, excerpt, and featured image are set if needed.
    2. Immediate post-publish
      1. URL is live and indexable.
      2. Search Console submission is completed if appropriate.
      3. Social sharing is scheduled or published.
      4. Analytics tracking is verified.
      5. Team or client notification is sent if required.
    3. 90-day follow-up
      1. Performance is reviewed in GA4 and Search Console.
      2. Headline or meta description is updated if CTR is weak.
      3. Internal links are added from newer content.
      4. Outdated details are refreshed.
      5. Backlinks and conversions are assessed.

    Resources and Tools

    A good manual posting workflow is easier with the right tools. Writing tools like Grammarly help with clarity and proofreading. SEO plugins such as Yoast or Rank Math simplify metadata checks in WordPress. TinyPNG and similar compressors help keep images lean, while Canva helps non-designers create clean visuals quickly.

    For scheduling and promotion, Buffer and Hootsuite are useful options. For site performance and technical checks, Google Lighthouse is a practical place to start. Search Console remains essential for indexing and search visibility, regardless of platform.

    It is also worth bookmarking official documentation for the platform you use most. WordPress, Wix, and Squarespace all maintain help libraries that explain interface updates and settings changes. That matters because editors evolve, and manual posting steps can shift over time.

    Conclusion: Best Practices Recap and Next Steps

    A strong manual post is not just written, it is assembled carefully. The title, structure, images, slug, metadata, accessibility details, and publish settings all contribute to how the post performs. Manual posting takes more effort than automation, but it rewards that effort with better control, cleaner SEO, and stronger user experience.

    Your next step is simple. Pick one platform you use regularly, create a draft, and apply the workflow in this guide from preparation to post-publish review. If you build that habit now, every future manual post will be faster, cleaner, and more effective.

  • Set Up a New Manual Posting Workflow

    Set Up a New Manual Posting Workflow

    Manual workflows fail quietly. A post gets drafted in the wrong format, published without review, duplicated across channels, or forgotten in a queue that nobody monitors closely enough. For developers and efficiency-focused teams, that is not just a content problem. It is a systems problem.

    A manual posting process exists where human control still matters. It is the deliberate creation and publication of a post without relying entirely on automation, templates, or scheduled syndication. In the right environment, that manual step is not a weakness. It is a control layer that protects quality, timing, and context when automation would be too rigid or too risky.

    The challenge is that manual posting often becomes inconsistent when it is not documented like a technical workflow. Teams know what they want to publish, but not always how to standardize decisions, approvals, formatting, and validation. A structured approach turns a manual post from an ad hoc action into a repeatable operational task.

    What Is a New Manual Post?

    A new manual post refers to a freshly created post that is authored, reviewed, and published through direct human action rather than through a fully automated pipeline. The term can apply across content systems, internal knowledge bases, CMS platforms, social publishing tools, marketplaces, and product update channels. What defines it is not the platform. It is the method of execution.

    In practical terms, a manual post is usually created when nuance matters more than speed. A developer relations team may need to publish an urgent release clarification. A product team may need to adjust messaging based on a same-day change. An operations team may need to post a status update that requires exact wording and immediate verification. In each case, a human operator is making decisions in real time.

    This matters because automation is optimized for scale, while manual posting is optimized for judgment. Scheduled systems work well for predictable outputs, but they are less effective when timing, compliance, tone, or context can shift within minutes. A manual post gives the operator room to validate facts, confirm audience fit, and inspect the final rendered result before publication.

    There is also a governance dimension. Many organizations still require a manual publishing event for regulated content, executive communications, incident notices, or high-visibility announcements. In those cases, the manual post is not a fallback. It is the approved control mechanism.

    Why the Term Matters in Workflow Design

    The phrase points to a specific category of work. A post is not just content. It is a payload moving through a system of formatting rules, permissions, metadata, approval states, and publication triggers.

    When teams label something as a new manual post, they are implicitly distinguishing it from imported content, replicated content, scheduled batches, and API-driven publishing. That distinction affects how the task should be documented and measured.

    For efficiency-minded users, this is useful because it clarifies where friction is acceptable. Manual effort should not exist by accident. It should exist because the task benefits from human oversight. Once that is clear, the process can be streamlined without removing the human role that gives the post its value.

    Key Aspects of a New Manual Post

    The first key aspect is intentional control. Manual posting is valuable when it provides a checkpoint that machines cannot easily replicate, such as factual sensitivity, platform-specific judgment, audience awareness, or timing based on live events. Without that control function, a manual process is just slower automation.

    The second aspect is structured consistency. Many teams assume manual means informal. That assumption creates operational drift. One person writes a post title one way, another uses a different taxonomy, and a third forgets to include metadata or internal references. The solution is to define a manual post as a systemized workflow with explicit fields, review expectations, and validation rules.

    A third aspect is platform context. A manual post does not behave the same way in every environment. In a CMS, the concern may be SEO, canonical URLs, and draft states. In a social tool, the concern may be character limits, audience segmentation, and media rendering. In an internal tool, access control and audit logging may be more important than formatting. The underlying principle stays the same, but the implementation changes based on the target surface.

    Accuracy and Human Judgment

    A major strength of manual posting is precision. Human reviewers catch ambiguity that templates often ignore. They spot wording that could confuse users, miss the audience, or create legal and support issues later.

    This is especially important when publishing updates related to product changes, outages, migrations, deprecations, or policy revisions. In these scenarios, wording is part of the product experience. A slightly inaccurate phrase can create unnecessary tickets, friction, or reputational damage.

    For developers, this resembles the difference between autogenerated documentation and docs reviewed by an engineer who understands edge cases. Both have value. Only one reliably captures nuance.

    Operational Cost and Trade-Offs

    Manual posting introduces overhead, and that overhead should be acknowledged rather than hidden. A human has to draft, inspect, approve, and publish. If the workflow is poorly designed, the task becomes expensive in time and attention.

    The trade-off is whether that cost buys meaningful quality. If a team is manually publishing routine, low-risk, repetitive content, then the process is likely inefficient. If the content is variable, sensitive, high-stakes, or time-dependent, then manual posting can be the more reliable choice.

    Mature teams do not ask whether manual posting is good or bad in absolute terms. They ask where it belongs in the publishing architecture. The answer is usually a hybrid model, where automation handles repeatable content and manual posting handles exception cases, strategic updates, and high-context communication.

    Standardization and Auditability

    A new manual post should still be traceable. That means there should be a clear record of who created it, what changed, when it was approved, and when it went live. Without these controls, manual publishing becomes difficult to analyze and nearly impossible to improve.

    This is where efficiency tools become useful. A system such as Home can support manual workflows by giving teams a structured environment for drafting, reviewing, and tracking content state without forcing every action into a rigid automation model. The benefit is not just convenience. It is operational visibility.

    The ideal setup preserves human discretion while reducing avoidable variance. In other words, the post is manual, but the process around it is engineered.

    Core Comparison: Manual vs Automated Posting

    Factor Manual Post Automated Post
    Control High human oversight High system dependence
    Speed at scale Lower Higher
    Context sensitivity Strong Limited by rules and inputs
    Consistency Depends on process discipline Strong if rules are well defined
    Error profile Human omission or inconsistency Rule misconfiguration or stale logic
    Best use case Sensitive, custom, real-time content Repetitive, scheduled, predictable content

    Manual Post vs Automated Post

    How to Get Started with a New Manual Post

    The best starting point is not the editor. It is the workflow definition. Before a team creates a new manual post, it should identify the trigger condition that justifies manual handling. That trigger might be urgency, compliance, strategic importance, audience specificity, or content complexity.

    Once the trigger is clear, the team can document the path from draft to publication. This should include who authors the post, who reviews it, what fields are mandatory, what the approval threshold is, and what verification happens after publishing.

    Manual post lifecycle flowchart

    A useful way to think about this is as a lightweight deployment process. A post moves from authoring to validation to release. The object is different, but the discipline is similar. Good manual publishing borrows heavily from good engineering operations.

    Build a Minimal Posting Standard

    A practical standard does not need to be large. It needs to be precise. The goal is to remove avoidable decisions so people can focus on the decisions that actually require judgment.

    For most teams, a minimal standard includes the following:

    1. Purpose definition: Why does this post exist and what outcome is expected.
    2. Audience identification: Who must see or be notified about this content.
    3. Required metadata and formatting rules: Fields, tags, and presentation that must be present before approval.
    4. Approval and post-publication verification: Who must sign off and what checks happen after the post goes live.

    These points look simple, but they create stability. A writer knows what problem the post is solving. A reviewer knows what to check. An operator knows what counts as complete.

    Use Checkpoints, Not Friction

    Many manual workflows become slow because they confuse control with bureaucracy. Every additional checkpoint should prevent a real failure mode. If a review step never catches issues, it may not deserve to exist.

    A better approach is to place a few high-value checkpoints at the most error-prone moments. One checkpoint before approval can verify message accuracy and formatting. Another immediately after publication can confirm rendering, links, tagging, and visibility. That keeps the process lean while still protecting quality.

    Developers will recognize this pattern. It is the same logic used in CI pipelines with targeted validation rather than bloated gatekeeping. The system is safer because checks are placed where they matter most.

    Start With a Small, Repeatable Process

    Teams often overdesign manual publishing frameworks before they have observed real usage. That creates documentation nobody follows. A better method is to start with a small operating model, use it on a limited set of posts, and refine it based on actual failure points.

    For example, a team may initially define manual posting only for release notes, service alerts, and executive announcements. After a month, it can review where delays occurred, what fields were commonly missed, and which approvals added value. That data can then inform a stronger process.

    This is where a central workspace such as Home can help consolidate drafts, ownership, and review state. The advantage is not just organization. It is the ability to reduce context switching and make manual work observable.

    Common Early Mistakes

    The most common mistake is treating manual posting as self-explanatory. It rarely is. Even skilled operators interpret unwritten rules differently.

    Another frequent issue is relying on memory instead of templates or required fields. Memory-based workflows degrade under pressure. The faster the publishing environment, the more likely a step gets skipped. Standardized prompts and structured forms reduce this risk significantly.

    A third issue is failing to define completion. Publication is not always the end of the task. For a new manual post, completion may also include URL validation, formatting inspection, stakeholder notification, analytics tagging, or archiving a revision note. Without a completion definition, teams mark work done too early.

    Practical Notes and References

    The term can apply across many content systems, internal knowledge bases, CMS platforms, social publishing tools, marketplaces, and product update channels.

    In a CMS, the concern may be SEO, canonical URLs, and draft states.

    One person writes a post title one way, another uses a different taxonomy, and a third forgets to include metadata or internal references.

    Many organizations still require a manual publishing event for regulated content, executive communications, incident notices, or high-visibility announcements.

    A manual post gives the operator room to validate facts, confirm audience fit, and inspect the final rendered result before publication.

    Conclusion

    A new manual post is not just a piece of content entered by hand. It is a controlled publishing event that prioritizes judgment, precision, and context over raw throughput. When designed well, it gives teams a reliable way to handle high-importance communication without surrendering quality to automation or chaos to improvisation.

    The next step is to document one manual posting workflow that your team currently handles informally. Define the trigger, the fields, the review path, and the verification step. Then run it consistently for a small set of posts. Once the process is visible, it can be improved, supported with tools like Home, and scaled without losing the human oversight that makes manual publishing effective.

    External and internal references:

  • How to Create a New Manual Post

    How to Create a New Manual Post

    Manual posting sounds simple until it becomes the bottleneck. What begins as a straightforward way to publish content, log data, update systems, or push records into a workflow often turns into a repetitive, error-prone task that consumes attention better spent elsewhere.

    That is why a clear understanding of a process for creating a new manual post matters. For developers and efficiency-focused users, the goal is not merely to post something by hand. The goal is to make manual posting structured, repeatable, auditable, and as frictionless as possible. When handled correctly, a manual post remains flexible without becoming chaotic.

    A well-designed manual posting workflow can serve as a bridge between automation gaps, approval-heavy operations, and one-off exceptions. It gives teams control where full automation is either unnecessary, too expensive, or operationally risky. The difference between a useful manual post and a messy one usually comes down to process design, validation, and consistency.

    What Is a New Manual Post?

    A manual post created directly by a user generally refers to a posting action initiated by a person, rather than generated automatically by a script, API integration, scheduler, or background process.

    In a CMS, it may be a hand-created content entry. In an internal tool, it may be a manually submitted record. In operations software, it may represent a user-triggered status update, transaction, or job dispatch.

    The defining characteristic is the same across environments: a person initiates and controls the submission. That matters because human input introduces flexibility and judgment, but it also introduces variability. A manual post can handle edge cases that automation often struggles with, such as unusual formatting, conditional approvals, exception routing, or context-sensitive messaging.

    For developers, a manual post should not be viewed as the opposite of a mature system. In many cases, it is an intentional component of one. Systems that support both automated and manual submission paths tend to be more resilient because they can absorb failures, test new workflows, and handle cases that have not yet been codified into software logic.

    For efficiency-minded individuals, the concept is equally practical. A manual post is often the fallback mechanism that keeps work moving when integration is unavailable, delayed, or overengineered. Instead of waiting for the perfect toolchain, teams can maintain throughput with a reliable manual process that still preserves structure and traceability.

    Side-by-side diagram comparing automated vs manual posting paths: left column shows an automated pipeline (trigger → script/API → background process → published) with green arrows and minimal human touch; right column shows the manual post path (user → guided form → validation/review → submit → published) with highlights for human decision points.

    Key aspects of creating a new manual post

    Control and precision

    The strongest advantage of a manual post is direct control. A user can inspect the content, verify fields, adjust timing, and apply context before submission. This is especially useful when the posted data needs interpretation rather than mechanical transformation.

    Precision matters in environments where a small mistake can ripple through downstream systems. A manually created post allows the operator to pause, validate assumptions, and confirm intent. In content operations, that might mean checking metadata and formatting. In business systems, it might mean verifying identifiers, amounts, destinations, or approval status.

    This level of control is why many organizations keep manual posting capabilities even after introducing automation. It acts as a safeguard and an exception handler. Automation can process the predictable majority, while manual posts cover the nuanced minority.

    Flexibility in edge cases

    Most real workflows contain exceptions. The challenge is that exceptions rarely justify a full engineering sprint, yet they still need to be handled correctly. A manual post workflow excels here because it can accommodate variation without requiring immediate schema redesign or integration work.

    That flexibility is valuable, but it should not be confused with informality. The best manual posting systems define required fields, acceptable formats, validation rules, and review checkpoints. In other words, flexibility should exist within constraints, not instead of them.

    A useful way to think about this is to compare a manual post to a command-line utility with optional flags. The operator has room to adapt behavior, but the system still expects valid input. Good manual workflows operate the same way.

    Traceability and accountability

    A manual post should always leave an audit trail. When a person creates a record by hand, the system needs to capture who submitted it, when it was submitted, what values were entered, and whether later edits occurred. Without that metadata, manual actions become difficult to verify and even harder to troubleshoot.

    This is where many weak workflows break down. Teams often allow manual posts because they are convenient, but fail to make them observable. The result is a process that works until something goes wrong. Then nobody can tell whether the issue came from the source data, the operator, the timing, or a downstream system.

    For developers, auditability is not an optional enhancement. It is part of the design. Even a lightweight interface for creating a new manual post should log state transitions and preserve submission history. That approach reduces operational ambiguity and improves incident response.

    Speed versus standardization

    A manual post can be fast in the short term, and expensive in the long term if it lacks standardization. Users often optimize for immediate completion, especially under deadline pressure. They skip naming conventions, use inconsistent labels, or enter free-form data where structured fields would be more reliable.

    The solution is not to eliminate manual work entirely. The solution is to define a posting model that preserves speed while enforcing consistency. Templates, defaults, dropdowns, validation hints, and pre-filled fields can dramatically reduce input friction without sacrificing data quality.

    The trade-off can be summarized clearly:

    Aspect Manual Post Strength Manual Post Risk Recommended Mitigation
    Control High operator oversight Human inconsistency Required fields and validation
    Flexibility Handles exceptions well Process drift Standard templates
    Speed Fast for one-off actions Scales poorly when repeated Convert repeat tasks into automation
    Accuracy Can be highly precise with review Typing and formatting errors Input constraints and confirmation steps
    Auditability Strong if logged properly Weak if unmanaged User, timestamp, and revision logging

    The role of user experience

    A poor interface makes every manual post slower and less reliable. Even technically strong systems fail if the person entering the data has to interpret unclear field labels, navigate too many steps, or remember hidden business rules.

    The ideal manual posting interface behaves like a guided transaction. It should tell the user what belongs in each field, surface dependencies early, and flag invalid combinations before submission. This reduces cognitive load and increases throughput without requiring full automation.

    This is also where a platform such as Home can fit naturally. If the objective is to reduce operational drag while keeping human control, a centralized workspace can simplify how users create, review, and manage manual posts. Instead of scattering these actions across disconnected tools, teams benefit from a single environment that supports consistency and visibility.

    How to get started with creating a new manual post

    Define the exact purpose

    Before creating any workflow, it is necessary to define what the manual post is supposed to do. That sounds obvious, but many teams begin with the interface rather than the outcome. They create a form first and only later discover that users disagree on what the post represents.

    A good starting point is to identify the business event behind the action. Is the manual post publishing content, creating an internal record, triggering a task, updating status, or correcting a failed automated submission? The answer determines the required fields, validation logic, approval model, and retention policy.

    Without this clarity, the process becomes too generic. Generic workflows invite interpretation, and interpretation produces inconsistency. A focused definition creates operational stability.

    Establish required inputs

    Every manual post should have a minimum viable schema. Even if the process is lightweight, there must be a set of non-negotiable inputs that make the post usable after submission. These usually include identifiers, ownership details, timestamps, category labels, and the actual payload or message body.

    The structure should be strict enough to ensure quality and loose enough to support real work. If the form requires too many fields, users will resist it or enter placeholder values. If it requires too few, the output becomes unreliable. The design target is essential completeness, not maximal data capture.

    A practical way to begin is with a short requirements set:

    • Purpose field: What the post is intended to do.
    • Owner or submitter identity: Who is responsible for the post.
    • Timestamp or effective date: When the action takes effect.
    • Core payload or content body: The substantive data being posted.
    • Status or routing designation: Where the post belongs in the workflow.

    That baseline is often enough to support useful posting while preserving traceability.

    Build a repeatable workflow

    A process for creating a new manual post should not depend on tribal knowledge. If only experienced users know the correct sequence, the workflow is fragile by definition. Repeatability comes from documentation, interface design, and validation logic working together.

    This workflow should specify where the post is created, who is allowed to create it, what checks happen before submission, and what occurs afterward. Post-submission behavior matters as much as the creation step. A post may need review, publication, synchronization, or archival. If these downstream states are undefined, the process remains incomplete.

    For developers, this is a useful place to think in terms of state transitions. Even without coding the entire path, the workflow should define statuses such as draft, submitted, approved, published, failed, or archived. That model makes the manual process easier to monitor and improve later.

    State-transition diagram of a manual post lifecycle showing nodes: Draft → Submitted → (Review →) Approved → Published; alternate paths to Failed or Archived; include transitions for Edits and Revisions with timestamps and responsible users alongside the arrows.

    Start small, then instrument

    The most effective way to launch a manual post workflow is to keep the first version narrow. Support one use case well, observe where users hesitate, and refine the process based on actual friction. Trying to anticipate every future scenario usually leads to bloated forms and overcomplicated review logic.

    Instrumentation is what transforms manual work into an improvable system. Track submission time, completion rate, validation failures, edits after submission, and downstream error frequency. These signals reveal whether the process is efficient or merely tolerated.

    Once metrics exist, a team can make an informed decision about what to automate next. That is the ideal path. A manual post should become either a stable long-term exception path or a prototype for future automation, not a permanent workaround left unexamined.

    Know when manual should stay manual

    Not every manual post needs to be automated. Some actions are too infrequent, too sensitive, or too context-dependent to justify engineering effort. In those cases, optimization should focus on usability, reviewability, and risk reduction rather than replacement.

    The right question is not, “Can this be automated?” but, “Should this be automated given volume, cost, error rate, and business importance?” A manual post that occurs twice a month with high contextual nuance may be perfectly rational. A manual post repeated 500 times a week is usually a signal that the workflow is overdue for redesign.

    The distinction is important because efficiency is not about removing humans from every path. It is about assigning human attention where it creates the most value.

    Conclusion

    A well-designed workflow for creating a new manual post provides something that many systems still need: controlled flexibility. It allows users to act directly, handle exceptions, and maintain progress when automation is unavailable or inappropriate. At the same time, it must be structured enough to support auditability, consistency, and future optimization.

    The next step is straightforward. Define the purpose of the post, establish the minimum required inputs, and document the submission path clearly. Then measure how it performs in practice. If the process lives inside a unified environment such as Home, that effort becomes easier to standardize and manage. The result is not just a manual task done better, but a workflow that respects both operational reality and long-term efficiency.

  • How to Convert JPG to SVG for Sharp Logos and Icons

    How to Convert JPG to SVG for Sharp Logos and Icons

    A blurry logo can make even a polished brand look amateur in seconds. If you have ever tried to enlarge a JPG for a website header, a storefront sign, or a client presentation, you have probably run into the same problem, the image gets soft, jagged, and unusable fast.

    That is where converting a JPG to an SVG becomes so valuable. For small business owners, freelancers, developers, and anyone working with digital assets, understanding this conversion can save time, reduce design friction, and improve visual quality across print and screen.

    The catch is simple. A JPG and an SVG are not just different file extensions, they are built in completely different ways. That means converting a JPG image into SVG format is sometimes straightforward, sometimes messy, and often misunderstood. Once you know what actually happens during the process, it becomes much easier to choose the right tool, the right image, and the right expectations.

    What Is Converting a JPG into an SVG?

    A JPG is a raster image format. It stores pictures as a grid of colored pixels, which makes it ideal for photographs and detailed images with gradients, shadows, and subtle textures. The downside is that raster images lose quality when scaled up. Every enlargement stretches those pixels further.

    An SVG, or Scalable Vector Graphics file, works differently. Instead of storing a fixed grid of pixels, it uses mathematical paths, curves, and shapes to describe the image. Because of that, SVG files can scale to almost any size without losing sharpness. A logo on a business card and the same logo on a billboard can remain crisp when stored as an SVG.

    Side-by-side comparison showing a JPG (zoomed-in pixel grid with jagged edges when enlarged) next to an SVG (same artwork rendered with smooth vector paths at multiple sizes). The SVG side should show crisp scaling from small to billboard size, while the JPG side shows pixelation when enlarged.

    When people search for a way to convert a JPG to an SVG, they are usually trying to solve one of three problems. They want a logo that scales cleanly, an icon that looks sharp on modern screens, or artwork that can be edited more easily in design software. In all three cases, the goal is not just conversion for its own sake. The real goal is flexibility, quality, and reuse.

    That said, converting a JPG into an SVG is not magic. The software does not restore lost quality from a compressed photo. It interprets the image and attempts to turn visible edges, colors, and shapes into vector paths. This is why a simple black-and-white icon converts beautifully, while a complex photo of a person or landscape often becomes bloated, inaccurate, or visually strange.

    Key Aspects of Converting JPG Images to SVG

    Raster and vector are fundamentally different

    The biggest misunderstanding about converting a JPG image into SVG format is the assumption that every image will improve just by changing file type. It will not. File format conversion does not automatically upgrade the design itself.

    A low-resolution JPG logo might become an SVG file, but if the original image is noisy, pixelated, or poorly cropped, the vector result may simply trace those flaws. Think of it like tracing a wrinkled sketch with a pen. You may create clean lines, but you are still starting from imperfect source material.

    This is why the best candidates for conversion are images with clear edges, limited colors, strong contrast, and simple shapes. Logos, symbols, badges, signatures, and line art usually perform well. Product photos, portraits, and detailed scenic images usually do not.

    Automatic conversion vs. manual redrawing

    Most online tools that convert JPG files to SVG use auto-tracing. They analyze the image, identify boundaries between color areas, and convert those boundaries into vector paths. This is fast, convenient, and often good enough for simple use cases.

    Two-panel illustration of auto-tracing versus manual redrawing: left panel shows an auto-traced result with many rough anchor points, stray artifacts, and cluttered paths; right panel shows a clean, manually redrawn vector with simplified, smooth shapes and tidy anchor points.

    However, automatic conversion has limits. It may create too many anchor points, rough edges, layered shapes, or odd artifacts around text and corners. If you need a polished brand asset, especially for commercial use, you may need to clean the SVG afterward in a design editor or recreate the artwork manually.

    Manual redrawing takes more time, but it gives better control. For example, if you have a logo that must look perfect on packaging, signage, and mobile screens, redrawing the mark as true vector artwork often produces a cleaner result than relying entirely on auto-conversion.

    Image complexity changes the outcome

    The more detailed the original JPG, the harder the conversion. A simple coffee shop logo with one icon and a wordmark might trace neatly. A photograph of a coffee cup on a wooden table with steam, shadows, and reflections will not convert into a practical SVG in the same way.

    This matters because many users expect SVG to be a universal better format. It is better for certain types of visuals, especially graphics that need to scale. It is not inherently better for every image. For many photographs, keeping the image as JPG, PNG, or WebP is the smarter choice.

    A useful way to think about it is this, SVG is best for designed graphics, not captured reality. If the image is built from intentional shapes, SVG makes sense. If the image depends on photographic detail, raster formats usually remain the right fit.

    File size is not always smaller

    Another common assumption is that an SVG will always be lighter than a JPG. Sometimes it is. Sometimes it is much larger.

    A simple vector icon can be tiny and efficient. But an SVG created from a detailed JPG can include thousands of paths and become cumbersome. That can slow down editing, complicate rendering, and create unnecessary overhead for web use.

    For developers and site owners, this matters. A clean SVG logo in a navigation bar is excellent. A messy auto-traced SVG with excessive vector data is not. If performance matters, the output file should be checked, simplified, and tested rather than accepted at face value.

    Text, transparency, and background cleanup matter

    Many JPG files include backgrounds, shadows, and flattened text. That creates friction during conversion. A logo saved as a JPG may have a white background baked in, which the converter interprets as part of the image. The result is often an SVG with an unwanted rectangle or extra paths around the edges.

    Text can also become problematic. Instead of remaining editable text, it may be converted into shapes, and sometimes inaccurate ones. If typography matters, it is often better to recreate the text with the original font rather than rely on an automatic trace.

    This is why source image preparation matters so much. Before converting, it often helps to crop tightly, remove the background, increase contrast, and simplify the image. A cleaner JPG usually leads to a cleaner SVG.

    How to Get Started With Converting JPG Files to SVG

    Start with the right image

    The quality of the final SVG begins with the quality of the original image. If possible, choose the cleanest version available. A high-resolution logo with strong contrast will trace far better than a blurry screenshot copied from social media.

    If you only have a poor JPG, do some preparation first. Remove unnecessary background space. Straighten the image if it is tilted. Increase contrast if the edges are faint. If the design uses only one or two colors, simplify it before conversion. These small steps can dramatically improve the result.

    For business users, this is especially important when dealing with old branding files. Many companies discover that their “logo file” is just a low-quality JPG buried in an email thread from years ago. In that case, conversion can help as a starting point, but the best long-term fix may be to rebuild the logo properly in vector format.

    Choose a tool based on your goal

    Not every converter is built for the same outcome. Some online tools prioritize speed and convenience. Others offer more control over threshold, color count, smoothing, and path simplification. Design software may go further by allowing you to edit, clean, and optimize the vector after tracing.

    If your goal is quick reuse for a website icon or mockup, an easy online converter may be enough. If your goal is print-ready brand artwork, you will likely want a tool that gives you more control over the tracing process and the ability to refine the output.

    The best approach depends on how exact the result needs to be. For casual use, convenience often wins. For professional assets, control usually matters more than speed.

    Follow a simple conversion process

    You do not need a complicated workflow to get started. In most cases, the process looks like this:

    1. Upload the JPG to a converter or vector design tool.
    2. Adjust tracing settings such as detail, contrast, or color count.
    3. Preview the result and look for rough edges, missing shapes, or unwanted background areas.
    4. Export the SVG and open it in an editor if cleanup is needed.

    That sounds simple, but the preview stage is where smart decisions happen. If the traced image looks cluttered or inaccurate, exporting immediately usually leads to more frustration later. It is better to pause, simplify the source image, or reduce trace complexity before moving on.

    Check the SVG before using it everywhere

    Once the file is exported, test it in the environments that matter. Open it in a browser. Place it in a design tool. Resize it large and small. If it is for a website, see how it renders on light and dark backgrounds. If it is for print, inspect the edges and curves closely.

    This testing step often reveals issues that are easy to miss at first glance. Thin strokes may disappear at small sizes. Background remnants may show up only on colored layouts. Overly complex paths may make editing painful later. Catching those issues early prevents repeat work.

    A practical mindset helps here. The purpose of converting a JPG into an SVG is not merely to produce a new file type. It is to create an asset that is more useful than the original. If the new file is harder to use, the conversion has not really succeeded.

    Comparing JPG and SVG for real-world use

    The difference between these formats becomes clearer when you compare how they behave in everyday projects.

    Format Best For Scaling Editability Typical Weakness
    JPG Photos, complex images, web images with many colors Loses quality when enlarged Limited, pixel-based edits Blurry edges at larger sizes
    SVG Logos, icons, illustrations, simple graphics Scales cleanly at any size Highly editable in vector tools Poor fit for detailed photos

    For a freelancer designing social media graphics, JPG may still be ideal for photographic banners and content images. But for logos, buttons, icons, and brand marks, SVG usually offers better flexibility.

    For developers, SVG is especially useful in modern interfaces because it looks crisp on high-density screens. That makes it a strong choice for UI icons, product illustrations, and scalable brand elements. Still, the key is using SVG where it belongs, not forcing every image into vector form.

    Common mistakes to avoid

    Many conversion problems come from unrealistic expectations rather than bad tools. One of the most common mistakes is trying to vectorize a complex photograph and expecting a clean, minimal SVG. The software can only interpret what it sees, and detailed photos create a flood of shapes and paths.

    Another frequent issue is using a poor source image. Tiny screenshots, compressed files, and images with noisy backgrounds make tracing far less accurate. If the original is weak, the final result usually reflects that weakness.

    There is also a tendency to skip cleanup. Users often convert the file, see that it technically opens as SVG, and assume the job is done. But for professional use, especially in branding or product design, cleanup is often where the real quality work happens.

    When converting a JPG into an SVG makes sense

    A JPG-to-SVG workflow is worth using when the image is simple, the shape matters more than photographic detail, and scalability is important. That applies to logos, badges, stamps, icons, diagrams, and line drawings. In these cases, vector output can be significantly more useful than the original raster file.

    It also makes sense when you need a more editable version of an existing graphic. Even if the first conversion is imperfect, it can provide a workable base for refining the artwork instead of redrawing everything from scratch.

    On the other hand, if your original image is a photo or heavily textured artwork, conversion may not be the right answer. You may be better off improving the raster image itself, exporting in a better raster format, or using a hybrid workflow that combines vector and bitmap assets.

    Conclusion

    Converting a JPG into an SVG can be a smart move, but only when you understand what the process is actually doing. You are not simply changing file extensions. You are translating a pixel-based image into vector shapes, and that translation works best with simple, clean graphics.

    If you want the best result, start with a strong source image, choose the right tool for your needs, and review the output carefully before using it in production. For logos, icons, and branded graphics, SVG can bring sharpness, scalability, and long-term flexibility that a JPG simply cannot match.

    Your next step is practical. Take one image you use often, preferably a logo or icon, and test a conversion with a clean source file. Compare the result at different sizes, on different backgrounds, and in the tools you already use. That quick experiment will tell you more than any definition ever could.

  • How to Create a New Manual Posting Workflow

    How to Create a New Manual Posting Workflow

    Manual posting sounds simple until it becomes the slowest part of a workflow. A task that starts as a quick update can turn into repeated copy-paste actions, approval delays, formatting inconsistencies, and avoidable human error. For developers and efficiency-focused teams, that friction matters, because even small manual steps scale badly.

    A new manual posting process is often introduced when an organization needs tighter control over what gets published, where it appears, and how it is formatted. That can apply to blog publishing, CMS updates, internal knowledge bases, product announcements, marketplace listings, or operational content queues. The value is not in making work more manual for its own sake. The value is in creating a controlled publishing path when automation is either too risky, too immature, or too inflexible.

    When implemented well, a manual posting workflow becomes a precision tool. It defines ownership, reduces accidental publishing, improves quality assurance, and gives teams a clear operational baseline. Once that baseline is stable, it also becomes much easier to decide what should stay manual and what should later be automated.

    What is a new manual posting process?

    A new manual posting process refers to an established method for creating, reviewing, and publishing content through direct human action rather than relying entirely on scheduled automation, API-driven syndication, or bulk posting systems. In practical terms, it usually means someone enters content into a platform, applies structure and metadata, validates formatting, and explicitly triggers publication.

    This matters in environments where precision beats speed. A developer documentation team, for example, may need strict control over release notes and version labels. A product operations team may need marketplace listings that match exact compliance requirements. A small organization may simply not trust an automated pipeline yet, especially if previous posting tools introduced errors at scale.

    The phrase can also describe a newly adopted manual publishing standard inside a team. In that sense, it is less about a single post and more about a controlled method. The post becomes the output, while the manual system becomes the operating model behind it.

    Why manual posting still exists in automated environments

    Automation is attractive because it reduces repetitive effort. However, not every publishing context is stable enough for full automation. Data sources may be inconsistent. Business rules may change often. Approval requirements may involve multiple stakeholders. In these cases, manual posting remains useful because it gives a human operator the ability to catch contextual problems before they go live.

    There is also a governance benefit. When a process is manual, responsibility is visible. Teams can identify who entered the content, who reviewed it, and when it was published. That makes troubleshooting easier, especially when debugging content mismatches, broken formatting, or metadata issues.

    For many teams, a manual workflow is not the final state. It is the control layer that precedes selective automation. A strong manual process reveals repeated steps, common failure points, and decision logic. That information is exactly what developers need before building a reliable publishing tool.

    Typical use cases

    A new manual posting workflow appears in a wide range of environments. Content teams use it to maintain editorial quality. Developers use it when publishing changelogs, release notes, or documentation that requires exact version control. Operations teams use it when platform-specific formatting rules make generic automation unreliable.

    It is also common during migrations. If a company moves from one CMS to another, manual posting often serves as the safest transition method. The team can verify structure, validate output, and adapt to the new platform before introducing scripts, connectors, or API jobs.

    Key aspects of a new manual posting process

    The most important characteristic of a manual posting system is intentional control. Every field, label, and publishing action is performed with awareness. That sounds basic, but in operational terms it changes the quality of output. It reduces silent failures, such as wrong categories, broken embeds, malformed headings, or missing calls to action.

    A second key aspect is process definition. A manual workflow only becomes efficient when it is standardized. Without standards, manual posting degrades into personal habit, and personal habit is hard to scale. Teams need a clear understanding of content structure, review checkpoints, naming conventions, ownership, and fallback procedures.

    Accuracy and human validation

    Manual posting is strongest when the cost of an error is higher than the cost of taking extra time. A pricing page update, policy change, or customer-facing release note often falls into this category. Human validation catches nuance that rule-based systems may miss. It can detect awkward wording, inaccurate sequencing, or context-specific legal and brand issues.

    This does not mean humans are automatically more accurate. They are not. Humans are simply better at certain forms of contextual judgment. The real goal is to use manual posting where judgment matters, and to support that process with templates and validation rules so quality does not depend purely on memory.

    Speed versus control

    Every manual workflow lives on a spectrum between speed and control. A fast posting process with minimal checks may move content quickly but create inconsistencies. A highly controlled process may produce clean output but frustrate teams if it becomes too slow.

    The right balance depends on publishing risk. Internal updates can tolerate lighter checks. Public-facing product content usually cannot. Efficient teams define different manual posting modes based on impact, which prevents the entire organization from being locked into one overly rigid model.

    Speed vs Control horizontal spectrum visualization with four zones: Fully Manual, Manual with Templates, Manual with Validation Tools, Fully Automated

    The table below illustrates the trade-offs.

    Workflow Type Strength Limitation Best Fit
    Fully Manual Maximum review and contextual control Slowest throughput Compliance-sensitive or high-risk publishing
    Manual with Templates Better consistency and reasonable speed Requires initial setup and maintenance Documentation, CMS articles, structured announcements
    Manual with Validation Tools Human oversight plus fewer formatting errors Tooling complexity may increase Developer teams, operations, content QA
    Fully Automated Highest scale and speed Can propagate errors widely Stable, repetitive, low-variance publishing

    Standardization matters more than effort

    A manual process is often criticized as inefficient, but the real problem is usually not manual effort. It is unstructured manual effort. If two team members publish the same type of content in different ways, the process becomes unpredictable. Metadata diverges. Formatting drifts. Reporting becomes unreliable.

    Standardization fixes this. A documented schema for titles, summaries, tags, categories, internal links, image handling, and review states turns manual posting into a repeatable operational function. Developers, in particular, benefit from treating the content process like a system with inputs, states, outputs, and validation checkpoints.

    Tooling still plays a role

    Manual does not mean tool-free. The best manual posting workflows are supported by checklists, field validation, editorial templates, lightweight dashboards, and task routing. A platform like Home can be useful here when teams need a central environment for organizing publishing work, keeping submissions visible, and reducing the chaos that often surrounds ad hoc content operations.

    The advantage of using a centralized solution is not simply convenience. It is the ability to reduce context switching. If drafting, review, status tracking, and publishing preparation happen in one place, manual work becomes easier to manage and easier to improve.

    How to get started with a new manual posting process

    The first step is to define what the post type actually is. That sounds obvious, but many teams skip it. They say they need a manual publishing process without specifying whether they are posting articles, release notes, support notices, product updates, or structured listings. Each of these has different requirements, risk levels, formatting rules, and approval paths.

    Once the content type is clear, the next step is to identify the minimum required fields. A manual process becomes more reliable when required data is visible and non-negotiable. That may include title, body, tags, status, owner, publish date, canonical URL, revision note, or compliance approval. If these fields are ambiguous, quality issues appear immediately.

    Build a controlled posting template

    Templates are the fastest way to improve a manual process without writing automation. A good template reduces decision fatigue and makes each post easier to verify. It should not be bloated. It should only include the fields and content blocks that matter to the publishing target.

    A useful starting set of requirements often includes the following:

    • Title structure: A consistent naming convention for discoverability and reporting.
    • Content body format: Defined heading patterns, paragraph style, and link policy.
    • Metadata rules: Required tags, categories, author attribution, and publish status.
    • Review checkpoint: A mandatory verification step before the post goes live.

    Once a template exists, test it against real content. If users repeatedly skip a field or misunderstand an instruction, the template is not clear enough. Manual systems fail when they assume people will remember hidden rules.

    Document the workflow as a system

    Treat the posting process the way a developer would treat a service flow. Define states such as draft, ready for review, approved, scheduled, and published. Define transitions between those states. Define who is authorized to move an item from one state to another.

    This structure matters because manual content operations often break at handoff points rather than at creation. One person writes the content, another checks formatting, a third publishes it, and nobody is sure who owns the final verification. A clear state model removes that ambiguity.

    A practical sequence can be kept simple:

    1. Create the post using the approved template.
    2. Validate formatting, metadata, and links.
    3. Review content for accuracy and policy compliance.
    4. Publish manually and confirm live output.
    5. Log the action for traceability and future optimization.

    A simple state-machine diagram showing the lifecycle of a manual post: Draft -> Validate -> Review -> Approve -> Publish -> Log

    Measure before you automate

    One of the biggest mistakes teams make is trying to automate a messy process too early. If a new manual posting system is still unstable, automation will only make inconsistency faster. Before building scripts or workflow connectors, measure the manual process first.

    Track how long posts take to create, where errors happen, what fields are commonly missed, and which review steps cause delay. These observations reveal whether the bottleneck is formatting, approvals, platform limitations, or poor content intake. Once the problem is visible, automation can target the right layer.

    For efficiency-minded users, this is where a solution like Home can help operationally. If the platform centralizes task flow, status tracking, and content staging, teams can collect cleaner process data. That makes future optimization much easier because the workflow is observable rather than scattered across chat threads, docs, and browser tabs.

    Common pitfalls to avoid

    A new manual posting process often fails because it is introduced as a rule without being supported as a workflow. Teams are told to publish manually, but they are not given templates, review criteria, or status visibility. The result is not control. It is confusion.

    Another frequent problem is excessive rigidity. If every post requires the same level of review regardless of impact, the process becomes slow and users start bypassing it. A mature manual system is structured, but it is also proportionate. Lightweight updates should move faster than high-risk public communications.

    The final pitfall is lack of feedback. If publishing errors are corrected silently, the process never improves. Teams need a mechanism for logging mistakes, revising templates, and updating instructions. A manual workflow should evolve like any other operational system.

    Conclusion

    A new manual posting process is not just a slower alternative to automation. It is a deliberate publishing model built for control, traceability, and quality. When teams define structure, assign ownership, and support the workflow with templates and validation, manual posting becomes far more efficient than its reputation suggests.

    The best next step is to audit one content type that currently causes friction. Define its required fields, create a standard template, document the review states, and measure the process for two weeks. That baseline will show whether the manual system is already sufficient or whether it is ready for selective automation. If coordination is the real problem, using a centralized workspace like Home can make the process easier to manage and improve.

  • How to Create a New Manual Post

    How to Create a New Manual Post

    When a topic appears simple on the surface, it often hides the biggest source of confusion. That is exactly what happens with a new manual post. People hear the phrase and assume it refers to something obvious, but in practice it can mean different things depending on the workflow, platform, or business context. For small business owners, freelancers, developers, and productivity-focused users, that ambiguity quickly becomes a problem. If you do not define the process clearly, you waste time, duplicate work, and create avoidable errors.

    A well-planned manual post is often the fastest way to publish something with control and precision. It gives you the ability to decide what goes live, when it goes live, and how it appears without relying entirely on automation. That matters when you are handling updates, announcements, content publishing, product entries, or records that require a human eye. A new post created manually is not old-fashioned. In many cases, it is the most reliable option.

    What Is a New Manual Post?

    A visual that shows different types of 'new manual post'—icons for a blog article, product listing, social media update, forum thread, and CMS entry—arranged around a central label 'New Manual Post' to show the concept applies across platforms.

    A new manual post is, at its core, a piece of content or an entry created directly by a person rather than being generated automatically by software, synced from another system, or imported in bulk. The exact format may vary. In one environment, it could mean publishing a new blog post by hand. In another, it might refer to creating a product listing, a social update, a forum thread, or an entry inside a content management system without automation.

    The key idea is intentional human input. A manual post is built step by step, usually with decisions made in real time about title, structure, formatting, metadata, media, and timing. That level of control is valuable because automated tools are efficient, but they are not always accurate, context-aware, or brand-sensitive.

    For a small business, creating a new post manually can be the better choice when the message is nuanced. A product change, policy update, client announcement, or limited-time offer often needs a careful tone. Automation can publish quickly, but speed without judgment is risky. A manual workflow gives you room to review details before anything becomes public.

    This also matters for productivity-minded users. Manual posting is not just about typing things in by hand. It is about maintaining quality at the point of publication. If you think of your content system like a storefront, a manual post is the moment someone arranges the display carefully instead of unloading boxes onto the floor and hoping everything looks right.

    Key Aspects of a New Manual Post

    Control and Accuracy

    The biggest strength of a manually created post is control, you decide the wording, the formatting, the category, and the publishing details. That sounds basic, but it is often the difference between polished communication and something that feels rushed or inconsistent.

    Accuracy improves because a person is actively checking the content while creating it. When businesses depend too heavily on imports or templates, small mistakes can spread fast. A wrong date, broken link, outdated price, or mismatched headline can damage trust. A manual process gives you a checkpoint before publication.

    This is especially useful when the content has legal, financial, operational, or customer-facing importance. In those cases, a new post entered manually works as a quality filter. It may take slightly longer, but it reduces the cost of publishing the wrong thing.

    Flexibility Across Platforms

    One reason the phrase “new manual post” covers many scenarios is that it applies across many tools. Whether you use a website builder, a content management system, a database-backed dashboard, a marketplace portal, or a scheduling platform, the principle is the same. You are creating a fresh entry directly within the system.

    That flexibility makes manual posting relevant even in highly automated environments. Not every update belongs inside a pipeline. Sometimes a one-off item needs special wording, custom tagging, or immediate publication. A manual workflow handles exceptions well because it is designed for human decision-making, not rule-based repetition.

    Developers and technical teams also understand this distinction. Even in systems built around APIs and automation, there are moments when a manual entry is the safest and quickest route. For example, testing a new publishing flow, correcting an edge case, or verifying how a content type appears in production often starts with a manually created post.

    Quality Over Volume

    A manually published post usually favors quality over scale. That is not a limitation. It is a strategic choice. If your goal is to produce hundreds of entries at once, automation will almost always win. But if your goal is to publish something clear, credible, and properly formatted, manual work has real advantages.

    This becomes even more important for independent professionals and small teams. They do not always need more content. They need better content. A manually created post gives them the chance to think about audience intent, structure, readability, and action before hitting publish.

    In that sense, manual posting supports a more disciplined content process. It encourages review, consistency, and purpose. Instead of asking, “How fast can we push this out?” the better question becomes, “Is this ready to represent the business?”

    Human Judgment and Context

    Automation works best when the rules are stable. Manual posting works best when context matters. That distinction is worth understanding because many publishing mistakes happen when businesses use the wrong method for the wrong type of content.

    A human can notice tone, timing, and nuance in a way software often cannot. For instance, a promotional message may need softer wording during a sensitive news cycle. A product update may require clarification because customers could misinterpret a feature change. A service notice may need urgency without causing alarm. Those are judgment calls.

    A manually created post gives you space for that judgment. It turns publishing into an active editorial decision rather than a background process. That alone can improve both brand perception and internal confidence.

    How to Get Started With a New Manual Post

    A simple workflow diagram that shows the recommended manual-post process: 'Define purpose' → 'Gather inputs (title, message, media, category, approvals)' → 'Build for readability (headings, short paragraphs, CTA)' → 'Review' → 'Publish'.

    Start With Purpose, Not the Form

    Many people begin by opening the editor and filling in fields. That is understandable, but it leads to weak posts because the structure appears before the message. A better approach is to define the purpose first. Ask what the post needs to achieve. Is it informing, selling, updating, clarifying, documenting, or prompting action?

    Once the purpose is clear, the rest of the post becomes easier to shape. The title can be more specific. The body can stay focused. The call to action can match the reader’s next move. Without that clarity, even a manually created post can feel scattered.

    This step matters whether you are publishing a blog article, a shop listing, a knowledge base entry, or a platform update. The format may differ, but the principle is constant. A strong post starts with clear intent.

    Gather the Right Inputs Before Publishing

    Manual posting becomes inefficient when people build the content while searching for missing details. That is why preparation matters. Before creating a new post manually, make sure you have the essential inputs ready.

    A short checklist helps:

    • Title or working headline: A clear label you can refine.
    • Core message or objective: The single idea the post must convey.
    • Relevant links, files, or media: Images, downloads, or reference URLs.
    • Category, tags, or placement: Where the post belongs in your system.
    • Review notes or approval status: Any quick confirmations needed before publishing.

    This does not need to become a bureaucratic process. The point is to reduce interruptions. When all inputs are prepared, the act of posting becomes smoother and more accurate.

    For freelancers and solo operators, this step also protects focus. Constantly switching between tabs, assets, and draft notes is mentally expensive. A prepared manual post can be published in minutes. An unprepared one can consume an hour.

    Build the Post for Readability

    A new post should not just exist. It should be easy to scan, understand, and act on. That means strong headings, concise paragraphs, and logical flow. Readers rarely move through digital content in a perfectly linear way. They scan first, judge relevance second, and commit attention only if the content feels worth their time.

    That is why structure matters so much. A manual post gives you the chance to make better editorial choices. You can simplify the headline, tighten the opening, clarify the middle, and make the next step obvious. This is especially useful for businesses that publish information customers actually need, such as pricing updates, service notices, tutorials, FAQs, or announcements.

    Good readability is also a productivity gain. When a post is clearer, it generates fewer support questions, fewer misunderstandings, and fewer internal corrections. One carefully built post can save hours of follow-up.

    Review Before You Publish

    The manual nature of the post is not just about creation. It is also about review. Before publishing, check whether the post is accurate, complete, and aligned with its purpose. Look closely at the title, links, formatting, dates, and any visible calls to action.

    A practical way to think about this is to separate writing from checking. First create the content. Then review it as if you were the reader. This small shift changes what you notice. Errors that felt invisible during writing often become obvious during review.

    If multiple people are involved, even a lightweight approval process helps. One person can draft, another can confirm details. For small teams, that balance preserves speed without sacrificing quality.

    Choose Manual Posting When It Actually Makes Sense

    Not every entry should be manual. Some should absolutely be automated, scheduled, or imported. The smart approach is not to treat manual posting as universally better, but as better for specific situations.

    Manual posting is best for important updates, one-off content, and quality-sensitive entries where control and context awareness are priorities. Automated posting shines for repetitive tasks, scheduled campaigns, and large-volume publishing where speed and consistency matter. Bulk import works for large catalogs or archives, and template-based posting helps with recurring formats that need small edits.

    For small business owners and independent professionals, this often means using a hybrid workflow. Routine items can be templated or automated. High-visibility or sensitive content can be posted manually. That balance keeps operations efficient while protecting quality where it matters most.

    Conclusion

    A carefully created manual post is more than a simple entry made by hand. It is a deliberate publishing choice that gives you control, accuracy, flexibility, and editorial judgment. In a world full of automation, those strengths still matter, and in many cases, they matter more than ever.

    A practical next step is to review your current workflow and identify which kinds of posts truly benefit from human oversight. Then create a simple manual posting process for those cases. When the content is important, visible, or easy to get wrong, a careful manual post is not extra work. It is smart work.

    A well-planned manual post is often the fastest way to publish something with control and precision. It gives you the ability to decide what goes live, when it goes live, and how it appears.

  • How to Create a New Manual Post

    How to Create a New Manual Post

    Publishing online should be simple, but in practice it often feels cluttered. Between automation tools, scheduling platforms, content systems, and social feeds, many people lose sight of one basic question: what exactly are you posting, where, and why? That is where the idea of a new manual post becomes useful.

    For small business owners, freelancers, developers, and productivity-focused users, manual posting is not outdated. In many cases, it is the most reliable way to stay accurate, timely, and intentional. A manually created post gives you direct control over wording, formatting, timing, and context, which matters when a message needs to feel human instead of mass-produced.

    What Is a New Manual Post?

    A new manual post is a piece of content you create and publish directly, without relying on automation, duplication rules, or scheduled reposting systems. It can be a blog update, a community post, a social media entry, a product announcement, or even an internal team update. The defining feature is simple, a person actively writes and publishes it with purpose.

    That distinction matters more than it may seem. Automated systems are excellent for efficiency, but they are often blunt instruments. They can repeat old messages, miss changes in context, or publish wording that no longer fits the moment. A manually created post allows you to respond to what is happening now, with language that reflects your current goals and audience expectations.

    For a small business, this might mean posting a same-day update about adjusted opening hours. For a freelancer, it could mean sharing a newly completed project with a tailored explanation. For a developer, it may involve publishing release notes with precise wording. In each case, the manual approach reduces the risk of disconnect between message and reality.

    Split-screen comparison titled "Manual vs Automated Posting": left side shows a person at a laptop writing a tailored message with a speech-bubble preview, checkmarks for 'tone', 'context', 'accuracy'; right side shows an automated pipeline/robot pushing identical posts to multiple platforms with repeating content cards and small error icons (broken link, wrong date) to imply bluntness and risk. Use clear labels "Manual" and "Automated" and a small caption: "Intentional vs. blunt".

    Why Manual Posting Still Matters

    There is also a credibility factor. Readers can often sense when content has been sent through a system rather than written with care. A manually published post tends to feel more immediate and authentic, especially when it addresses a real situation, answers a current question, or reflects a timely update.

    A manually published post also gives you room to review tone, verify links, correct formatting, and avoid the common mistakes that happen when content is pushed out automatically. This does not mean automation is bad. It means manual posting remains important where accuracy, nuance, and timing are critical. The best content workflows usually combine both, using automation for repetitive tasks and manual posts for moments that need judgment.

    Key Aspects of a New Manual Post

    Understanding a manually created post starts with understanding what makes it effective. It is not enough to publish something by hand. The value comes from how the post is planned, written, and delivered.

    Control Over Message Quality

    One of the biggest strengths of a manual post is editorial control. You decide what stays, what goes, and how the message is framed. That matters when brand voice is important or when a careless phrase could confuse readers.

    This is especially useful for businesses and solo professionals who want to sound consistent and trustworthy. Instead of using a recycled template, you can shape the post around the exact situation. That leads to stronger communication and fewer misunderstandings.

    Better Context and Relevance

    A manually created post is usually more context-aware. It reflects current events, audience mood, product changes, or business priorities at the time of publishing. That context improves relevance, and relevance is what makes content feel timely rather than generic.

    Think of it like writing a note to a customer instead of sending a canned autoresponder. The manual version can acknowledge what has changed, answer the likely question, and guide the reader more clearly. Even when the information is simple, the extra relevance makes the content more useful.

    Reduced Risk of Publishing Errors

    Automation can save time, but it can also repeat old mistakes at scale. A broken link, outdated date, wrong image, or mismatched caption becomes much harder to manage when the system publishes it everywhere. Creating a manual post introduces a review step that helps catch those issues before they go live.

    That review step is not glamorous, but it is valuable. It is often the difference between a polished announcement and a post that creates extra support requests. For busy teams and independent professionals alike, preventing avoidable errors is a meaningful productivity gain.

    Stronger Audience Trust

    Trust is built through consistency and clarity. When readers see that your posts are current, specific, and human, they are more likely to believe the rest of what you publish. A manually created post can contribute to that trust because it feels deliberate.

    This is particularly important in customer-facing communication. Updates about pricing, features, availability, deadlines, or service interruptions should not feel robotic. They should feel dependable. Manual posting supports that impression because it gives you the chance to communicate with care.

    Flexibility Across Platforms

    A manual post is not tied to one format. It can be adapted to different platforms while still staying true to the original message. That flexibility matters because each channel has its own expectations. A website announcement may need detail, while a social update needs brevity and immediacy.

    Manual posting helps you tailor the same core information for different audiences. Instead of forcing one version everywhere, you can write what fits each platform. That often results in better engagement because the content feels native rather than copied.

    How to Get Started With a New Manual Post

    Starting with manual posting does not require a complicated system. In fact, the most effective approach is often the simplest one. The goal is to build a repeatable habit that gives you control without slowing you down.

    Begin With a Clear Purpose

    Before writing a manual post, decide what it needs to accomplish. Is it informing, promoting, clarifying, updating, or inviting action? A post without a clear purpose tends to become vague, and vague content rarely performs well.

    A useful test is to finish this sentence before you write: After reading this post, I want the audience to know, feel, or do what? That one question keeps the content focused. It also prevents unnecessary filler, which is especially important when time is limited.

    Match the Post to the Platform

    Manual posting works best when the content fits the place where it appears. A post on a company website can carry more detail and structure. A LinkedIn update may need a stronger professional angle. A short-form social post should get to the point quickly while still sounding natural.

    This is where manual creation shines. You can adapt tone, length, and formatting instead of relying on a one-size-fits-all template. That small adjustment often improves readability and response.

    Create a Simple Publishing Workflow

    You do not need an enterprise content operation to publish well. A lightweight workflow is usually enough. For many users, the essentials are:

    1. Define the goal: Know why the post exists.
    2. Draft the message: Write clearly and directly.
    3. Review for accuracy: Check facts, links, and formatting.
    4. Publish and monitor: Watch for questions or needed edits.

    Simple linear workflow graphic with four connected boxes/icons: 1) Define goal (target icon + short phrase), 2) Draft the message (pencil and document), 3) Review for accuracy (magnifying glass over a link/date), 4) Publish & monitor (upload/rocket icon and a small chat/alert icon). Arrows connect each step; emphasize repetition and simplicity.

    What matters is consistency. If every manually published post goes through the same basic process, quality becomes easier to maintain. That is particularly helpful for small teams and solo operators who need reliable output without extra complexity.

    Focus on Readability First

    A manual post should be easy to scan and easy to understand. That means short paragraphs, clear wording, and a logical flow. Readers do not reward complexity for its own sake. They reward clarity.

    If the topic is technical or detailed, break it into sections and use descriptive headings. If the message is brief, keep it tight and direct. In both cases, remove anything that distracts from the main point. Good manual posting is often less about writing more and more about writing better.

    Use Manual Posting Where It Adds the Most Value

    Not every piece of content needs to be written from scratch at the moment of publishing. The smart approach is to use manual posting selectively, where it offers the greatest return. This usually includes announcements, customer updates, timely commentary, product changes, and sensitive communication.

    The comparison below shows where a manually created post tends to be strongest.

    Use Case Manual Post Strength Why It Works
    Time-sensitive updates High You can reflect current conditions accurately
    Product or service announcements High Tone and details can be tailored carefully
    Routine recurring promotions Medium Manual editing helps, but templates may also work
    Evergreen scheduled content Low to Medium Automation is often efficient here
    Customer issue communication Very High Human wording builds clarity and trust

    Avoid Common Mistakes

    Manual posting is valuable, but it is not automatically effective. Some users publish too quickly and skip review. Others overthink every word and slow themselves down. The right balance is intentional, but practical.

    A few simple habits can help you avoid common problems:

    • Check accuracy: Confirm names, dates, prices, and links.
    • Keep tone consistent: Write in a voice that matches your brand or role.
    • Add one clear action: Tell the reader what to do next, if anything.
    • Edit for brevity: Remove sentences that do not serve the purpose.

    These basics sound obvious, but they solve most quality issues. In real-world publishing, success often comes from disciplined fundamentals rather than elaborate strategy.

    Conclusion

    A manually created post is more than just content typed and published by hand. It is a deliberate communication choice. It gives you control over message quality, improves contextual relevance, reduces preventable errors, and helps your audience feel that a real person is paying attention.

    If you want better results from your content, start small. Choose one important update this week and publish it manually with care. Focus on purpose, clarity, and accuracy. That single habit can improve not only how your posts look, but also how your business, brand, or work is understood.