JNTZN

Category: Uncategorized

  • Best Free Online Grammar Checker: Compare Top Tools

    Best Free Online Grammar Checker: Compare Top Tools

    A single typo can make a freelance proposal look careless, a client email sound rushed, or a landing page quietly lose trust. That is why so many people search for an online grammar checker free solution, not because they want perfect prose, but because they want a fast, reliable second pair of eyes before they hit publish or send.

    The good news is that free grammar tools are genuinely useful now. The bad news is that they are not all useful in the same way. Some are better for email and day-to-day business writing. Some are stronger for style and readability. Others help multilingual users catch awkward phrasing that basic spellcheck misses. If you pick the wrong one, you may end up with lots of noisy suggestions and not much real improvement.

    This guide compares the best free online grammar checkers, explains how they work, and shows you how to choose one based on your writing, privacy needs, and workflow. It also covers the part most roundup articles skip, namely where these tools fail, when a free plan is enough, and how to use them without blindly accepting every change.

    What is an Online Grammar Checker and How Does It Work?

    An online grammar checker is a web-based or app-based writing assistant that scans your text for grammar, punctuation, spelling, clarity, style, and sometimes tone. At a basic level, it looks for mistakes such as subject-verb disagreement, repeated words, missing commas, and misspellings. More advanced tools also flag wordiness, passive voice, awkward phrasing, and inconsistent tone.

    That broad feature set is why free grammar tools have become popular with students, consultants, marketers, developers, and small business owners. They do more than spellcheck. A standard spellchecker might catch teh instead of the. A grammar checker may also suggest changing There is many reasons to There are many reasons, or point out that your should actually be you’re.

    Definition and core functions

    Most modern checkers focus on five core areas. The first is grammar, which covers sentence structure and agreement. The second is punctuation, such as commas, apostrophes, and capitalization. The third is spelling, including contextual spelling mistakes. The fourth is style, which includes clarity, concision, and readability. The fifth is tone, which tries to estimate whether your writing sounds formal, confident, friendly, or overly blunt.

    Tone matters more than many people realize. If you write sales emails, support replies, proposals, or cover letters, grammar is only part of the job. The wording also needs to sound appropriate for the reader. Some AI-assisted tools now try to help with that, although their tone detection is still imperfect.

    How modern checkers use rules, statistical models, and AI

    A simple infographic illustrating how modern grammar checkers work: three parallel lanes labeled 'Rule-based checks' (handwritten rules → flagged errors), 'Statistical models' (corpus comparison → probability-based suggestions), and 'AI/suggestions' (neural model → rewrite suggestions), with arrows merging into 'User suggestions' and a note 'May overcorrect / can miss jargon'.

    Older grammar checkers relied heavily on rule-based systems, using hand-built language rules such as, “a singular subject usually takes a singular verb.” Rule-based tools are often transparent and good at catching predictable errors, but they can be rigid. Newer tools mix those rules with statistical language models and AI-based writing suggestions. In simple terms, the software does not just ask, “Does this break a grammar rule?” It also asks, “Does this phrase look unusual compared to how fluent writers usually write?” That combination is why modern tools catch more subtle issues than the grammar software of a decade ago.

    AI is not infallible. It can overcorrect intentional phrasing, misunderstand industry jargon, and flatten creative voice. A grammar checker is best seen as a smart assistant, not a final editor.

    Where they run

    Free online grammar checkers now show up in several formats. The most common is the web editor, where you paste text into a browser and review suggestions. Many also offer browser extensions that work inside Gmail, LinkedIn, Google Docs, and other web apps. Some provide desktop apps, mobile keyboards, or integrations for Microsoft Word.

    For productivity-minded users, integrations matter almost as much as accuracy. A good checker you never remember to open is less useful than a slightly less powerful one that works wherever you write.

    Why Use a Free Online Grammar Checker? Benefits and Typical Use Cases

    A free grammar checker saves time in a way manual proofreading rarely can. It scans instantly, flags obvious issues, and helps you clean up first drafts before you spend mental energy polishing. For busy professionals, that speed is often the main benefit.

    There is also a consistency advantage. If you write lots of emails, support documentation, proposals, blog posts, or product copy, a grammar checker helps maintain a baseline level of quality. It catches errors you stop seeing because you are too close to the text.

    Common benefits

    The biggest benefit is simple, fewer avoidable mistakes. That matters whether you are a solo founder emailing leads or a developer writing documentation. Small errors do not always destroy credibility, but repeated errors chip away at it.

    Another advantage is that these tools act like a lightweight editorial pass. They can spot duplicate words, long-winded sentences, and clunky transitions. Even when you reject the actual suggestion, the alert itself can help you notice where the sentence needs another look.

    Use cases by audience

    For students, free tools are helpful for drafts, essays, personal statements, and discussion posts. They can reduce surface-level mistakes, although they should not be trusted as the only check for academic writing.

    For professionals and freelancers, free grammar checkers are especially useful for proposals, invoices, outreach emails, reports, and website copy. These are high-frequency writing tasks where speed matters.

    For non-native English speakers, grammar checkers can be even more valuable. They often catch article usage, preposition choices, and awkward constructions that basic spellcheck misses. Tools with paraphrasing or rewrite suggestions can also help users sound more natural.

    For content creators and marketers, the best tools do more than fix grammar. They improve readability and help adjust tone for a landing page, newsletter, social post, or blog article.

    When a free tool is enough

    A free grammar checker is usually enough if you mainly need basic grammar, punctuation, spelling, and light clarity improvements. That covers most short business writing, casual professional communication, and first-pass editing.

    You may need a premium plan, or human editing, if you require advanced rewrites, plagiarism detection, deep style analysis, team features, or support for sensitive client content. Academic manuscripts, legal writing, investor documents, and brand-critical marketing copy often deserve more than a free automated check.

    Top Free Online Grammar Checkers (Side-by-Side Overview)

    The tools below are among the most widely used options for anyone searching for an online grammar checker free solution. Each one takes a slightly different approach. Some prioritize all-purpose correction. Others focus on readability, multilingual support, or rewrite assistance.

    Quick comparison table

    Tool Best For Free Plan Strengths Main Limitations on Free Tier Platforms
    Grammarly General business writing Strong grammar, punctuation, browser support Advanced style, tone rewrites, plagiarism gated Web, browser, desktop, mobile
    LanguageTool Multilingual users, privacy-conscious users Good grammar checks across multiple languages Some advanced suggestions limited Web, browser, desktop, mobile
    QuillBot Grammar Checker Quick cleanup and paraphrasing-adjacent workflows Simple grammar correction, easy interface Broader writing features split across tools Web, browser extensions
    ProWritingAid Writers who want deeper analysis Good reports and style guidance Many advanced reports and usage limits Web, browser, desktop, Word
    Hemingway Editor Readability and clarity Great for simplifying dense writing Not a true grammar-first checker Web, desktop
    Ginger ESL users and sentence rewrites Helpful corrections and rewrite support Free tier can feel restricted Web, desktop, mobile

    Clean side-by-side browser mockup showing five editor screenshots (Grammarly, LanguageTool, QuillBot, ProWritingAid, Hemingway) with each tool’s name, a short 'Best for' label, and checkmarks highlighting strengths vs. limitations — visualizing the quick comparison table.

    1. Grammarly

    Grammarly is still the default recommendation for many users because it balances ease of use, broad platform support, and solid free grammar checking. The free version is particularly good for catching everyday mistakes in emails, documents, and browser-based writing fields. If you live in Gmail, Google Docs, LinkedIn, or Slack, its extension is convenient.

    Its biggest strength is accessibility. You do not have to change your writing process much. Grammarly meets you where you already work, then highlights issues in real time. For freelancers, consultants, and small teams, that frictionless experience is often more important than having the deepest editorial analysis.

    Key features

    Grammarly provides real-time grammar and spelling checks, a browser extension for web writing, and tone and clarity signals in many contexts. It also offers desktop and mobile apps so you can get suggestions across devices.

    Pros and cons

    Grammarly is very easy to start using, and its free tier covers general mistakes well. Integration across common writing platforms is excellent. On the downside, many advanced suggestions are locked behind premium, the tool can overflag stylistic choices, and privacy-sensitive users may want to review policies carefully.

    The free plan is enough for basic correction, while premium features add advanced rewrites, vocabulary suggestions, and plagiarism checking.

    Website: https://www.grammarly.com

    Screenshot of languagetool.org

    2. LanguageTool

    LanguageTool is one of the strongest choices if you want a free grammar checker that supports multiple languages and offers a practical balance between usability and flexibility. It is especially appealing for international users, multilingual teams, and anyone writing in more than English alone.

    It does not feel as tightly locked into one ecosystem. It works through a web editor, via extensions, and in several app environments. It also has a reputation for being a practical option for users who care about control and language coverage.

    Key features

    LanguageTool offers grammar and style checking in many languages, browser extensions and office integrations, a picky mode for stricter checks, and options that appeal to privacy-aware users.

    Pros and cons

    LanguageTool provides excellent multilingual support and useful style suggestions with flexible setup options. Some advanced recommendations are limited to paid plans, the interface can feel utilitarian compared to rivals, and not every suggestion is equally polished across languages.

    Its free version is generous for everyday writing, while paid plans unlock fuller style suggestions and higher usage limits.

    Website: https://languagetool.org

    3. QuillBot Grammar Checker

    QuillBot is known more broadly for paraphrasing, but its grammar checker is a solid free option for users who want a quick browser-based cleanup tool. It is especially useful if your workflow already includes QuillBot’s rewriting or summarizing features.

    For students, bloggers, and non-native speakers, QuillBot feels approachable. The interface is simple, and the tool focuses on fast corrections rather than overwhelming you with deep editorial reports. That makes it good for short drafts and quick revisions.

    Key features

    QuillBot provides fast, approachable grammar corrections with a simple interface and easy access to paraphrasing tools when you want rewrite options.

    Pros and cons

    QuillBot is quick to use and works well for fast fixes. Advanced writing help is spread across separate tools, and it is less comprehensive than some dedicated grammar-first options. It’s also less ideal for enterprise or workflow-heavy users.

    Website: https://quillbot.com

    Screenshot of prowritingaid.com

    4. ProWritingAid

    ProWritingAid is better thought of as a deeper writing analysis platform than a lightweight spellcheck replacement. Its free functionality can help everyday users, but it shines most with longer-form writers who want feedback on style, pacing, readability, repetition, and structure.

    For fiction writers, bloggers, and long-form content marketers, this extra depth is valuable. Where some tools simply say “change this,” ProWritingAid helps you understand broader writing patterns. That said, its interface can feel more analytical than casual users need.

    Key features

    ProWritingAid delivers grammar and style reports, detailed writing analytics, and integrations for Word and browser workflows, making it useful for long-form editing.

    Pros and cons

    ProWritingAid is excellent for deeper style analysis and reporting, which suits serious writers and editors. It can feel heavy for simple email editing, free usage limits are noticeable, and there is a learning curve compared with simpler tools.

    The free plan offers limited access, while premium expands the number of reports, integrations, and document support.

    Website: https://prowritingaid.com

    5. Hemingway Editor

    Screenshot of hemingwayapp.com

    Hemingway is not the strongest pure grammar checker on this list, but it deserves a place because it solves a different problem extremely well, readability. If your writing is technically correct yet still hard to read, Hemingway can be more useful than a grammar-first tool.

    It highlights long sentences, dense phrasing, excessive adverbs, and passive voice. For website copy, blog content, sales pages, and internal documentation, that kind of clarity feedback can be more valuable than catching a missing comma.

    Key features

    Hemingway emphasizes readability by highlighting complex sentences, dense phrasing, and passive constructions, and it provides a distraction-free interface for focused editing.

    Pros and cons

    Hemingway is excellent for simplifying dense writing and is very useful for readability-focused editing. It is not a comprehensive grammar checker, can push writing toward oversimplification, and is less helpful for nuanced correctness issues.

    There is a free web version, with desktop options available separately.

    Website: https://hemingwayapp.com

    6. Ginger

    Ginger has long focused on helping users improve sentence construction, making it particularly useful for ESL learners and business users who want rewrite-style support. It combines grammar correction with phrasing assistance in a way that feels practical for everyday communication.

    Its interface and brand may not feel as dominant as Grammarly’s, but it still earns attention for users who care about sentence-level fixes and alternative wording. It can be a useful secondary tool when a first checker catches errors but does not help enough with flow.

    Key features

    Ginger provides grammar correction alongside sentence rephrasing, with desktop and mobile support for users who want alternative wording suggestions.

    Pros and cons

    Ginger is helpful for non-native English speakers and offers useful rewrite-style support. Free tier limitations are noticeable, it is less widely integrated than top rivals, and the interface is less streamlined than some newer tools.

    Ginger uses a freemium model, with more robust writing assistance available in paid plans.

    Website: https://www.gingersoftware.com

    How to Choose the Right Free Grammar Checker for Your Needs

    The best free grammar checker is not necessarily the one with the most features. It is the one that fits your writing habits, tolerance for noise, and privacy requirements. If you write short emails all day, you want speed and browser integration. If you write long articles, you may care more about readability and style analysis.

    Accuracy also depends on what you write. A tool that performs well on general business English may struggle with legal language, technical documentation, creative dialogue, or industry shorthand. The right question is not “Which tool is best?” but “Best for what kind of writing?”

    Decision factors that matter

    Start with accuracy for your use case by pasting in a real sample, not a polished paragraph from a homepage. Check privacy, especially if you handle client data, contracts, medical information, or internal business content. Then evaluate language support, integrations, interface quality, and the likely cost to upgrade if the free plan feels too limiting.

    A browser extension is a huge advantage for many users, but not for everyone. Some people prefer a clean web editor because they do not want suggestions popping up in every text field online. Others want offline or desktop support because they write in Word or work with sensitive documents.

    Quick decision checklist

    If you want the shortest path to a good choice, use this simple filter: for general business convenience, start with Grammarly. For multilingual or privacy-aware needs, try LanguageTool. Students who want quick web-based edits will find QuillBot approachable. Long-form writers and editors benefit from ProWritingAid. Marketers focused on readability should use Hemingway. ESL users needing sentence help may prefer Ginger.

    Red flags to watch for

    A free tool stops being helpful if the privacy policy is vague, upload limits are too restrictive, or the interface buries basic suggestions behind constant upgrade prompts. Also be cautious if a tool offers very little detail on how it handles stored text, shared data, or AI training. Poor context awareness is another red flag; if a tool keeps flagging correct industry terms or pushing obviously wrong changes, it may create more editing work than it saves.

    Step-by-Step: Using a Free Online Grammar Checker Effectively

    Most people get mediocre results from grammar tools because they use them too late or trust them too much. The best workflow is not “paste text, accept all, done.” It is a short editing sequence where the tool helps you think more clearly.

    Preparing your text and context

    Before checking grammar, decide who the writing is for and how formal it should sound. A sales email, support response, investor update, and blog post all need different wording. If the tool allows tone or audience context, use it. Even a rough context cue improves suggestions.

    Next, clean up obvious issues yourself. Remove duplicate fragments, unfinished sentences, and placeholder notes. Grammar tools work better when the draft is complete enough to show your intended meaning.

    Best practices for accepting or rejecting suggestions

    Treat every suggestion like a junior editor, not a law. Ask two questions: Is the suggestion technically correct, and does it improve the sentence for this audience? Sometimes the answer to the first is yes and the second is no. For example, a tool might suggest simplifying a sentence that is deliberately formal because you are writing a proposal or legal notice. In that case, precision may matter more than simplification, so reject the change.

    How to combine tools for better results

    A strong workflow often combines one grammar checker with one readability tool and a final human pass. You might use Grammarly or LanguageTool for correctness, then Hemingway for clarity, then do a final manual read for tone and nuance. If you publish professionally, especially in academic, legal, or brand-sensitive contexts, consider grammar software as the first screen, not the final authority.

    Privacy, Security, and Data Concerns with Free Grammar Tools

    Privacy is one of the most overlooked parts of choosing an online grammar checker free tool. Many people paste client emails, contracts, internal strategy documents, resumes, or product roadmaps into these platforms without thinking about where that text goes.

    Because these tools often process writing in the cloud, your text may be transmitted to remote servers for analysis. That does not automatically make a tool unsafe, but it means you need to read the privacy terms more carefully than most roundup posts suggest.

    What to check in a privacy policy

    Look for plain answers to these questions: How long is text retained? Is content used to improve models or services? Is data shared with subprocessors or third parties? Can you delete stored content? Are there different terms for free users versus business users? If the language is overly vague, that is worth noticing. A privacy policy should tell you enough to understand the risk level, not force you to guess.

    Safer options for sensitive content

    If you work with sensitive information, the safest options are typically local editing tools, on-device solutions, or paid business plans with stronger contractual protections. In some cases, open-source or self-hosted language tools can make sense for technical teams.

    For many solo users, a practical middle ground is to avoid pasting highly sensitive text into web editors and instead use desktop integrations or anonymized drafts wherever possible.

    Practical tips to reduce risk

    If you need a grammar check on sensitive material, remove names, account numbers, pricing details, internal code names, and confidential identifiers first. Replace them with placeholders, run the check, then restore the original details locally. That extra minute is often worth it. Good writing is valuable, but not at the cost of exposing information that should stay private.

    Limitations and Common Mistakes of Free Grammar Checkers

    Free grammar tools are useful, but they have blind spots. They are strongest on surface-level correctness and weakest on context, nuance, voice, and specialized language. This matters because the closer your writing gets to persuasion, creativity, or technical precision, the more costly a bad suggestion can be.

    They also struggle with intentional rule-breaking. Creative writing often uses fragments, repetition, or unusual punctuation for effect. Marketing copy sometimes does the same. A tool may flag those choices as errors even when they are doing their job.

    Typical false positives and false negatives

    A false positive is when the tool flags something that is not actually wrong. For example, in the sentence “Let’s move fast. Really fast.” a checker may dislike the fragment. But in marketing copy, that fragment may be intentional and effective.

    A false negative is when the tool misses a real problem. For example, “We help startups scale securely, quickly, and without increasing operational complexity for teams that are already overloaded” may be grammatically acceptable, but still too dense for easy reading. Some grammar tools will let that pass.

    Jargon can also confuse checkers. A developer writing “containerized microservices” or a finance professional writing “EBITDA adjustments” may trigger irrelevant suggestions, especially in tools trained mostly on general-purpose prose.

    When to get human editing

    If the stakes are high, human review still matters. That includes investor decks, legal terms, grant applications, academic submissions, thought leadership articles, and major website copy. A human editor can understand subtext, persuasion, and audience expectations in ways a free grammar checker cannot. Use software to catch what is obvious, then apply judgment or a human pass to refine what matters.

    Advanced Tips: Getting Better Results From Any Grammar Tool

    You can improve almost any grammar checker by giving it better input and using it in the right sequence. This matters even more now that many tools mix rules with AI suggestions.

    How to give AI-based tools better context

    If the tool allows custom instructions or rewrite context, be specific. Tell it the audience, desired tone, reading level, and purpose. For example, “Rewrite for a busy B2B client, concise, confident, and polite” will usually produce better results than asking for a generic improvement. Context helps the model choose between technically valid but stylistically different options.

    Combining rule-based and AI suggestions

    A useful pattern is to trust rule-based corrections more for punctuation, agreement, and spelling, while treating AI-style rewrites as optional ideas. Rules are often reliable for mechanics. AI can be great for clarity, but it is also more likely to distort your meaning. This separation keeps you from accepting a polished-sounding sentence that is less accurate than the original.

    Build a personal editing checklist

    The most effective writers do not rely only on tools. Create a short style checklist for recurring issues, such as sentence length, jargon, headline tone, Oxford comma preference, contractions, or preferred product names. Once you know your patterns, grammar tools become more useful because you are not asking them to define good writing for you. You are using them to support standards you already understand.

    Frequently Asked Questions

    Are free grammar checkers reliable enough for academic work?

    They are reliable enough for basic proofreading, but not for final academic review. They can catch surface-level issues, yet they may mishandle discipline-specific wording or make style suggestions that do not fit academic conventions. For important submissions, combine a grammar tool with manual review and, if possible, a human editor or supervisor.

    Do grammar checkers store or use my writing to train models?

    Sometimes, depending on the tool and plan. Policies differ. Some services retain text temporarily for processing, some may use data for service improvement under certain terms, and some business tiers offer stronger protections. Always review the current privacy policy before uploading sensitive content.

    Can they detect plagiarism?

    Some can, but plagiarism detection is usually not fully included in free plans. Even when available, it is often part of a premium feature set or a separate product. If plagiarism screening matters for academic or publishing reasons, confirm exactly what the free tier includes before relying on it.

    Conclusion, Quick Recommendations and Next Steps

    If you want the safest all-around starting point, begin with Grammarly for general writing convenience or LanguageTool if you need multilingual support or want a strong alternative. Choose Hemingway if readability is your primary goal, ProWritingAid if you write long-form content, and QuillBot or Ginger if you want quick sentence help and easy web-based editing.

    The best next step is practical. Take one real piece of writing, such as an email, proposal, blog intro, or support reply, and test it in two tools from this list. Compare not just how many errors they find, but whether the suggestions actually improve the message. That small test will tell you more than any feature page.

    For further improvement, keep a trusted style reference nearby, such as the AP Stylebook, Chicago Manual of Style, or your own internal brand guide. A free online grammar checker is excellent for catching mistakes. Your judgment is what turns clean writing into effective writing.

  • Best QR Code Generator Online: Choose, Create, Compare

    Best QR Code Generator Online: Choose, Create, Compare

    A good QR code generator online can turn a plain link, menu, contact card, or payment request into something people can scan in seconds.

    A bad one can leave you with blurry exports, broken redirects, weak analytics, or a printed code you cannot change after 1,000 flyers are already out the door.

    That is why choosing the right tool matters. Small business owners want something fast and affordable. Freelancers care about branding and ease of use. Developers often need APIs, automation, and predictable output. This guide covers all three angles, with a practical how-to, a balanced comparison, and a clear decision framework so you can pick the right online QR code generator without trial and error.

    What is an online QR code generator?

    Quick definition and how it works

    An online QR code generator is a web-based tool that converts information into a scannable QR code image. Instead of installing software, you open a browser, choose a content type, paste in your data, and download the finished code as an image or vector file.

    Behind the scenes, the tool encodes your content into a matrix of square modules. A phone camera reads that pattern, reconstructs the data, and triggers an action such as opening a URL, joining Wi-Fi, saving a contact, or displaying text. Most generators also let you choose export formats like PNG, SVG, or PDF, and many offer design controls such as colors, frames, and logo placement.

    QR codes also include error correction, which allows the code to remain scannable even if part of it is damaged or covered. That is useful on packaging, signage, or business cards. But higher error correction can make the pattern denser, so customization needs to be handled carefully.

    Common QR code types (URL, vCard, Wi‑Fi, text, email, SMS, PDF, event)

    Most online tools support the most common QR code formats used by businesses and individuals. A URL QR code is the simplest and most common, often used for websites, menus, forms, landing pages, app downloads, and portfolios.

    A vCard QR code stores contact details so someone can save your name, phone number, email, and company instantly. Wi‑Fi QR codes let guests join a network without typing a password. Email and SMS QR codes prefill communication details, which is useful for support or lead capture. PDF and file-based QR codes point users to downloadable assets such as brochures or manuals. Event QR codes can contain calendar information like date, time, and location.

    For business use, URL and dynamic landing page codes dominate because they are flexible and measurable. For personal use, vCard, Wi‑Fi, and text codes are often enough.

    Static vs dynamic QR codes, key differences and use cases

    A static QR code directly stores the final content. If you encode a URL into it, that URL is permanent. Static codes are usually free, simple, and ideal for information that will not change, such as a personal website, a permanent portfolio link, or a stable support page.

    A dynamic QR code points to a short redirect URL managed by the provider, which means you can change the final destination later without changing the printed code. This is extremely useful for restaurant menus, campaigns, product packaging, event materials, and any situation where content may evolve after printing.

    Dynamic codes also enable scan analytics, device insights, geographic trends, and campaign management. The trade-off is that they usually require a paid plan and depend on the provider’s infrastructure. If the subscription ends or the provider changes limits, your code behavior may be affected, so provider reliability is a real selection factor, not just a pricing detail.

    Diagram comparing static vs dynamic QR codes: left panel shows a static QR encoding a final URL, right panel shows a dynamic QR pointing to a short redirect URL, editable destination, and analytics dashboard

    Side-by-side diagram comparing static vs dynamic QR codes: left encodes a full URL, right points to a provider-managed redirect with editable destination and analytics

    Why use an online QR code generator, benefits and limitations

    Benefits, speed and accessibility

    The main appeal of a QR code generator online is speed. You can go from idea to downloadable file in under a minute, without installing desktop software or dealing with graphic design tools. That matters when you need a code for a flyer, invoice, event badge, or product insert right away.

    Online tools are also accessible from anywhere. A freelancer can create a vCard QR code on a laptop, a café owner can update a menu from a tablet, and a marketer can build campaign codes from a browser while collaborating with a remote team. Many platforms provide templates, brand color controls, logo options, and multiple file formats so the same code can be used on social posts, posters, print collateral, and packaging.

    Limitations, privacy and reliability

    Not every free tool is truly free in practical terms. Some add watermarks, limit high-resolution exports, or gate dynamic codes behind a subscription. Others let you build a code but retain control over tracking links, analytics dashboards, or branded landing pages.

    Privacy is another real issue. If you create dynamic QR codes through a third-party platform, that provider may process scan data, destination URLs, campaign names, or visitor metadata. For basic use, that may be acceptable. For healthcare, finance, internal operations, or regulated customer data, it may not be.

    Reliability matters too. If you print a dynamic code on packaging and the provider’s redirect service fails, users hit a dead end. For mission-critical use, you want strong uptime, account controls, and a clear understanding of what happens if your plan lapses.

    When to choose a free tool versus paid or enterprise solutions

    A free tool makes sense when you need static QR codes, simple exports, and no analytics. It is perfect for portfolio links, Wi‑Fi access cards, contact sharing, internal labels, or one-off printed materials where the destination will not change.

    A paid tool is better when you need dynamic redirects, tracking, campaign organization, editable destinations, multiple team members, or brand consistency across many codes. An enterprise solution becomes worthwhile when QR codes are tied to customer journeys, asset management, retail packaging, large events, or compliance-sensitive workflows.

    How to pick the best QR code generator for your needs

    Key criteria you should check

    Start with the use case, not the tool. If you need a QR code for a business card, almost any solid generator will do. If you need to manage 500 product QR codes, rotate destinations seasonally, and export data into your reporting stack, your shortlist gets much smaller.

    The most important criteria are content type support, static versus dynamic options, analytics quality, customization controls, and export formats. For print, SVG and PDF matter because they scale cleanly. For digital use, PNG is often enough. If you are a developer or part of an ops team, look for API access, bulk generation, and campaign-level organization.

    Security and privacy checklist

    Before committing to a platform, ask simple but important questions. Does the site use HTTPS? Does it explain how scan data is stored? Can you restrict team access? Is there a way to delete codes or export ownership data? Does the provider document privacy compliance or data processing terms?

    If you plan to collect user interactions through dynamic codes, especially in the EU or similar regulated markets, your privacy posture matters. QR scan analytics can include location patterns, device types, and timestamps. Even when data is aggregated, it can still fall into a broader compliance conversation.

    Budget and licensing considerations

    Pricing models vary more than people expect. Some tools are free for unlimited static codes but charge for dynamic ones. Others price by code volume, scan volume, or feature tier. A design platform may include QR generation as part of a broader subscription, while enterprise tools package analytics, integrations, and support into higher monthly contracts.

    If you are comparing costs, calculate the total value of one printed mistake. A paid dynamic plan may cost less than reprinting menus, shelf talkers, or event materials because a destination changed.

    Step-by-step guide, create a QR code online

    Step 1, choose the QR code type and enter content

    Begin with the end action you want the user to take. If the goal is to drive traffic, use a URL QR code. If the goal is contact sharing, use a vCard. If it is convenience in a physical location, Wi‑Fi may be the right fit.

    Keep the destination clean and purposeful. For links, use final URLs that are mobile-friendly and fast-loading. If you are tracking campaigns, apply UTM parameters consistently so analytics are meaningful after the scan.

    Screenshot-style mockup of an online QR code generator interface showing content-type options, input field, static vs dynamic toggle, customization controls, export format buttons, and a prominent Download button

    Browser-based QR code generator interface showing content-type buttons, input field with a sample URL, Static/Dynamic toggle, export format dropdown, color & logo customization controls, and a live QR preview

    Step 2, select static or dynamic and set redirect options

    Choose static if the destination will stay fixed. Choose dynamic if you might need to update the destination later, pause a campaign, A/B test landing pages, or review scan analytics.

    For dynamic campaigns, define naming conventions early. A label like “Spring Poster” is not enough at scale. Use structured names such as “2026-Q2-Retail-Window-NYC-A” to make later reporting and management straightforward.

    Step 3, customize design with accessibility in mind

    A branded QR code can look great, but scan reliability always comes first. Maintain strong contrast between foreground and background. Dark code on a light background is still the safest choice. Avoid busy backgrounds, low-contrast color pairs, and oversized logos that eat into the scannable area.

    If you add a logo, use an appropriate error correction level and test aggressively. Decorative frames can improve response rates because they signal action, but keep the quiet zone, the blank margin around the code, intact.

    Step 4, set tracking and test across devices

    If your platform offers analytics, enable them before launch. Use campaign naming and UTM structure that match the rest of your marketing stack. That way, scans can be tied back to source materials, locations, or placements.

    Then test on multiple devices, under real conditions. A code that scans perfectly on a new flagship phone in bright office light may struggle on an older budget phone in a dim restaurant. Test both iPhone and Android if possible, and check common camera apps rather than relying on a single scanner app.

    Step 5, download the right file format for print or web

    Use PNG for quick digital use, social graphics, or slide decks. Use SVG for logos, signage, packaging, and any design that may be resized. Use PDF when delivering assets to printers or embedding in production-ready materials.

    For print, avoid tiny codes. In many real-world cases, at least 2 x 2 cm is a practical minimum for close-range scanning, while posters and signage usually need more. If the scanning distance increases, the code size should increase too. A useful rule of thumb is that the scanning distance should be roughly ten times the code width.

    Comparison: Top online QR code generators (features, pricing, pros & cons)

    Overview of evaluated tools

    The tools below are among the most visible and useful options for people searching for a QR code generator online. They differ in philosophy. Some focus on free static generation and design flexibility. Others focus on dynamic campaigns, enterprise controls, or template-driven design workflows.

    Tool Best For Static Codes Dynamic Codes Analytics Design Customization API/Automation Typical Pricing Position
    QRCode Monkey Free, high-quality static codes Yes Limited via related services Limited Strong No major public focus Free-first
    QR Code Generator by Egoditor General business use Yes Yes Yes Good Limited compared with enterprise tools Freemium
    Beaconstac Teams, enterprise, analytics Yes Yes Strong Good Yes Premium
    QRStuff Straightforward business use Yes Yes Moderate Moderate Limited Mid-range
    Canva Design-first users Yes Limited depending on workflow Limited Excellent in design context No Subscription ecosystem

    QRCode Monkey

    QRCode Monkey is one of the most popular choices for people who want a free online QR code generator with strong visual customization. It is especially appealing to freelancers, designers, and small businesses that need high-resolution codes quickly without getting pulled into a complex subscription flow.

    Features include high-resolution PNG and SVG exports, logo and color customization, and support for multiple content types. Its simplicity and quality output make it a reliable pick for brochures, posters, packaging mockups, or business cards.

    Its main advantages are ease of use and excellent free static QR code generation with strong customization for visual branding. The downsides are limited analytics and dynamic management, which make it less suitable for enterprise workflows that require campaign tracking or API automation.

    Website: https://www.qrcode-monkey.com

    QR Code Generator by Egoditor

    This platform balances consumer simplicity and business functionality. It supports both static and dynamic QR codes, offers editable destinations and basic scan analytics, and provides business-ready templates for common use cases like promotions, menus, and landing pages.

    It is a good fit for marketers, local businesses, agencies, and teams who want editable destinations and tracking without committing to enterprise pricing. Advanced analytics may be limited compared with enterprise platforms, and free access is narrower than static-only tools, so costs can rise as usage grows.

    Website: https://www.qr-code-generator.com

    Beaconstac

    Beaconstac is geared toward serious business use where dynamic QR codes, analytics, team controls, integrations, and operational reliability matter. It supports advanced dynamic QR management, campaign analytics, team and enterprise features, API and integration support, and is built for compliance-aware environments.

    This tool is strong for scale and governance, making it suited to packaging, retail, field marketing, customer journeys, and multi-location campaigns. The trade-offs are higher cost and increased setup discipline to get full value, so it may be overkill for basic personal use.

    Website: https://www.beaconstac.com

    QRStuff

    QRStuff is an established, practical option for users who want a broad selection of QR content types without a design-heavy workflow. It supports many content types, static and dynamic options, and a simple interface, which makes it useful for educators, small businesses, and non-designers.

    Its appeal is breadth and familiarity rather than cutting-edge design controls. Customization is less polished than some competitors and analytics depth may not satisfy larger teams, but it remains a solid practical option for many scenarios.

    Website: https://www.qrstuff.com

    Canva

    Canva is not a dedicated QR platform, but it is valuable for users who already design flyers, menus, posters, and social graphics there. Generating a QR code inside a layout saves time and preserves visual consistency, which is why many small businesses prefer it.

    Canva’s strength is context and template integration rather than deep analytics or dynamic campaign management. If you need enterprise-level tracking or API access, a dedicated QR platform will be a better fit.

    Website: https://www.canva.com

    Best practices and real-world use cases

    Print marketing (posters, business cards, flyers)

    In print, placement matters almost as much as the code itself. A QR code tucked into a crowded corner of a flyer often underperforms, even if it scans fine. Give it room, pair it with a clear call to action, and make the destination match the user’s context. A poster in a shop window should not send users to a cluttered homepage; it should route to the exact offer.

    For business cards, use a QR code to reduce friction. A vCard or booking link often performs better than a generic homepage. For posters and public signage, expect scan rates to depend heavily on visibility, urgency, and the clarity of the action promised.

    Restaurants and menus

    Restaurant QR codes need durability and trust. If the code links to a PDF menu that loads slowly, the user experience breaks immediately. A mobile-friendly webpage is often better than a heavy file. The code should be easy to wipe clean, physically visible, and not buried among decorative patterns.

    Dynamic QR codes are especially valuable here because menus change. One printed table card can continue working across seasonal updates, item changes, or language variations.

    Events and ticketing

    For events, QR codes can handle registration, maps, agenda pages, and ticket validation. Security matters more in this context. If codes grant access or reveal attendee information, do not treat them as casual marketing assets.

    A dynamic QR setup can help rotate destinations or disable outdated pages after the event. It also allows organizers to track where attendee engagement is strongest, such as entrances, booths, or printed schedules.

    Product packaging and inventory

    On packaging, QR codes often outlive the original campaign timeline, which makes dynamic management especially useful. A code can first support a launch page, then later route to instructions, warranty registration, or updated compliance information.

    For inventory or asset tracking, reliability beats decoration. Use high contrast, consistent labels, and durable materials. Fancy styling rarely helps in warehouse conditions.

    Contactless payments and check-ins

    Payment and check-in flows raise the stakes because users expect speed and confidence. If you link to payment pages, use trusted domains and clear branding. If you support venue check-ins, consider privacy disclosure and how long associated data will be retained.

    Troubleshooting and FAQs

    Why won’t my QR code scan?

    The most common causes are low contrast, insufficient size, poor print quality, broken quiet zone, or over-customization. If you inserted a large logo, changed the eye shapes, and used a gradient on a dark background, the design may simply be too aggressive.

    Start by testing the plain black-and-white version. If that scans reliably, add branding back gradually.

    How to track scans and where analytics might be misleading

    Scan analytics are useful, but they are not perfect. A “scan” may represent a camera recognition event, a redirect hit, or a user who never fully loaded the destination page, depending on the provider. That means QR platform data and web analytics may not match exactly.

    Use QR scan data as directional insight, then confirm behavior with landing-page analytics and campaign tags.

    How to change destination after printing

    You can only change the destination after printing if the QR code is dynamic. Static codes are fixed once generated.

    If flexibility matters, always choose dynamic for printed materials with any chance of future updates.

    Legal and privacy questions

    If your QR setup collects scan metadata or routes users to forms, privacy obligations may apply. In GDPR-sensitive contexts, be transparent about data collection, minimize unnecessary tracking, and coordinate with your legal or compliance team when scan data links to identifiable individuals.

    Recommended workflow and checklist before launch

    A reliable QR workflow prevents expensive mistakes. Treat QR codes like mini digital products, not just images. Define the objective, assign ownership, test under real conditions, and keep a version record of every live code.

    Before launch, confirm the destination URL, mobile usability, print size, contrast, file format, and device testing coverage. After launch, monitor scan trends, landing-page conversions, and failure signals such as sudden drop-offs or geographic anomalies.

    StageWhat to CheckWhy It Matters
    Pre-launchDestination URL, UTM tags, mobile page speedPrevents broken journeys
    Design reviewContrast, quiet zone, logo size, CTA textProtects scan reliability
    TestingiPhone, Android, bright light, dim light, print sampleReduces real-world failure
    DeploymentFinal export format, print proof, version namingAvoids production mistakes
    Post-launchScan trends, page conversions, redirect statusEnables optimization

    Resources and tools

    Quick references (size and print table, contrast rules)

    A few practical guidelines go a long way. Keep contrast high, preserve the quiet zone, and scale the code to match the expected scanning distance. For close-up materials like table tents or business cards, a modest size may work. For walls, posters, or storefront glass, increase size generously.

    Use Case Recommended Starting Size Best Format
    Business card 2 x 2 cm SVG
    Flyer or brochure 2.5 to 3 cm SVG or PDF
    Table tent/menu card 3 to 4 cm SVG or PDF
    Poster 4 cm and up SVG or PDF
    Packaging label Depends on viewing distance, often 2.5 cm+ SVG

    Links to tools and further reading

    For tool evaluation, start with the official sites mentioned in this guide. For standards and technical background, consult authoritative references such as ISO-related materials, printer guidelines, and analytics platform documentation. Also review your web analytics setup so scan traffic is categorized properly.

    Free assets (print-ready templates, QR test checklist)

    If you build QR codes regularly, create your own internal assets: a print proof template, a naming convention sheet, and a device testing checklist. These lightweight documents save more time than hopping between tools.

    Conclusion, which QR generator should you use?

    If you want the best free QR code generator online for static, high-quality, customizable exports, QRCode Monkey is an easy recommendation. If you want a balanced business tool with dynamic options, QR Code Generator by Egoditor is a practical fit. If analytics, team management, and scale are priorities, Beaconstac is the stronger choice. If you prefer straightforward breadth, QRStuff still holds up. If your workflow starts in design, Canva is the most convenient.

    The right choice depends less on the QR code itself and more on what happens after the scan. Pick the tool that matches your need for flexibility, measurement, and reliability.

    Then test it like it matters, because once a QR code is printed, it often does.

  • New Manual Post: CMS-agnostic Publishing Standard

    New Manual Post: CMS-agnostic Publishing Standard

    A New Manual Post is where content operations either become repeatable or start breaking at scale. Teams often assume publishing is simple until metadata is inconsistent, slugs collide, schema fails validation, assets load slowly, and the same article renders differently across platforms. What looks like a writing task is usually a systems task.

    This manual defines a CMS-agnostic, technically prescriptive standard for creating a new manual post across documentation portals, knowledge bases, release note systems, blogs, and headless content pipelines. It is designed for developers, editors, and content operators who need output that is structured, searchable, compliant, and production-ready on the first pass.

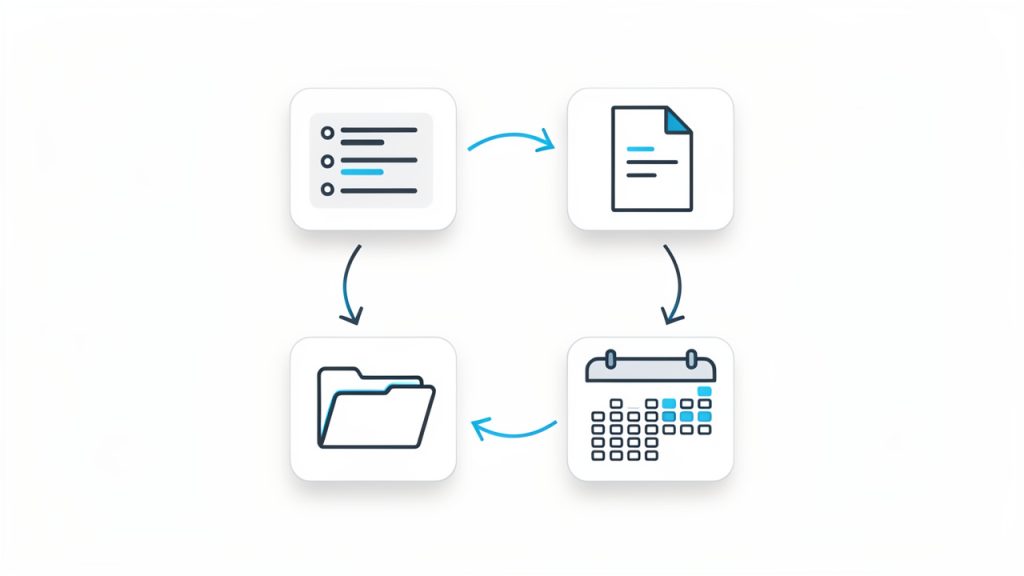
    Flow diagram of the New Manual Post lifecycle showing stakeholders and systems

    Overview: Purpose and Scope of the New Manual Post

    Definition: What is a “New Manual Post” in content workflows

    A New Manual Post is a manually authored content entry created according to a defined publishing specification rather than ad hoc editor behavior. In practical terms, it is a post that includes required metadata, controlled structure, taxonomy assignments, media rules, validation steps, and a governed publishing workflow.

    The term applies across multiple contexts. In a traditional CMS such as WordPress or Drupal, it refers to a post created through the editorial interface with enforced fields and plugins. In a headless CMS, it refers to a structured entry with validated content models. In static site generators, it usually means a Markdown or MDX file with front-matter and repository-based review. In developer documentation and release notes, it may also include schema annotations, version tags, and CI-driven preview builds.

    The important distinction is that a manual post is not merely “new content.” It is a governed content object with predictable behavior in rendering, indexing, syndication, and archival systems.

    Intended audience and prerequisites

    This manual is written for content authors, technical writers, developers, editors, SEO managers, and documentation maintainers. It is especially relevant for teams that publish to more than one surface, such as a marketing site, product docs, help center, and changelog.

    Readers should understand basic publishing concepts such as slugs, metadata, categories, and media assets. For repository-based workflows, familiarity with Git branching, pull requests, and linting is assumed. For CMS-based teams, familiarity with content types, plugins, and editorial permissions is sufficient.

    Where organizations need a unified workspace for documentation, workflows, and reusable content operations, a platform such as Home can reduce fragmentation by centralizing templates, approvals, and publishing standards.

    Objectives: What this manual post should achieve

    The first objective is standardization. Every new manual post should conform to the same structural and metadata rules regardless of author or platform, which reduces editorial ambiguity and prevents downstream rendering issues.

    The second objective is reproducibility. Another team member should be able to recreate, audit, update, and republish the post without reverse-engineering hidden assumptions. This is essential for documentation teams, release engineering, and regulated environments.

    The third objective is discoverability and compliance. The post must support search, faceted navigation, structured data, canonical control, and metadata validation. A post that cannot be found, parsed, or trusted is operationally incomplete.

    Technical Requirements and Environment

    Supported platforms and CMS integrations

    A robust New Manual Post specification must operate across WordPress, Drupal, Contentful, Sanity, Strapi, Ghost, Netlify CMS, Hugo, Jekyll, Eleventy, Docusaurus, and Next.js-based content stacks. The governing principle is separation of concerns, content fields should remain portable even when rendering layers differ.

    In monolithic CMS platforms, field mapping should be implemented through custom post types, field groups, or modules. In headless systems, content models should explicitly enforce required metadata and validation constraints. In static site generators, the same constraints should be represented in front-matter schemas and pre-commit validation.

    Platform Type Example Platforms Metadata Support Structured Data Injection Repo Workflow Recommended Fit
    Traditional CMS WordPress, Drupal High High Optional Editorial teams
    Headless CMS Contentful, Sanity, Strapi High High Mixed Multi-channel delivery
    Static Site Generator Hugo, Jekyll, Eleventy High High Native Developer docs
    App-integrated docs Docusaurus, Next.js High High Native Technical content
    Lightweight publishing Ghost Medium Medium Low Blog-first teams

    Platform-compatibility illustration showing separation of concerns

    Visual compatibility matrix for platform types

    File formats, encodings, and naming conventions

    All source files should use UTF-8 encoding without BOM. This avoids character corruption in multilingual content, code samples, and schema serialization. Markdown-based posts should use .md or .mdx, while data sidecars should use .yml, .yaml, or .json where required by the stack.

    Naming conventions must be deterministic. The canonical slug should use lowercase letters, numerals, and hyphens only. Spaces, underscores, locale-specific punctuation, and date prefixes should be avoided unless the platform requires them. A recommended rule is ^[a-z0-9]+(?:-[a-z0-9]+)*$.

    File naming should mirror the slug whenever possible. If the stack supports nested routes, the preferred form is content///index.md. This pattern improves portability, colocates assets, and reduces path ambiguity.

    Dependencies: components, libraries, and plugins

    A New Manual Post often depends on more than the editor. It may require syntax highlighters, schema injectors, image optimization plugins, sitemap generators, link checkers, search indexers, and consent managers for embeds.

    Version constraints should be explicit. A content system that validates one schema version in preview and another in production creates hard-to-diagnose failures. Teams should pin critical dependencies, especially those affecting rendering and metadata generation.

    At minimum, the environment should include a markdown linter, HTML validator, schema validator, image optimizer, and broken-link checker. If the workflow is centralized through Home, those checks can be exposed as reusable publishing gates rather than separate manual tools.

    Content Structure and Schema

    Required front-matter and metadata fields

    Every New Manual Post should define a minimum metadata contract. The required fields are typically title, slug, date, author_id, status, canonical_url, meta_description, og_image, and schema_type. Optional but recommended fields include updated_at, revision, locale, categories, tags, and noindex.

    A YAML front-matter template should remain compact but strict:

    title: "New Manual Post"
    slug: "new-manual-post"
    date: "2026-03-17"
    updated_at: "2026-03-17"
    author_id: "docs-team"
    status: "draft"
    canonical_url: "https://example.com/docs/new-manual-post"
    meta_description: "Technical manual for creating a new manual post with metadata, schema, workflow, and QA requirements."
    og_image: "/assets/og/new-manual-post.png"
    schema_type: "TechnicalArticle"
    categories:
      - "documentation"
    ### tags:
      - "cms"
      - "metadata"
      - "seo"
    revision: "1.0.0"
    locale: "en-US"
    noindex: false
    

    These fields should be validated before preview generation. If a platform lacks native field validation, pre-publish automation should block incomplete entries.

    Content blocks: headings, lead, body, code blocks, and assets

    A compliant post should use a predictable internal structure. That usually includes a lead section, hierarchical headings, body content, code blocks where relevant, tables for comparisons, and media assets with descriptive metadata.

    Heading hierarchy must remain semantic. The title exists outside body markup, main sections use H2, and subordinate concepts use H3. Skipping levels creates accessibility and navigation issues. Code blocks must declare language identifiers, and examples should be minimal but executable where possible.

    Assets should be referenced by stable paths or media IDs, never by temporary editor links. If diagrams or screenshots are essential, they should be versioned alongside the post or managed through a controlled asset pipeline.

    Taxonomy, tags, and category assignment rules

    Taxonomy is where discoverability either becomes precise or collapses into noise. Categories should represent broad content domains such as documentation, release-notes, tutorials, or product-updates. Tags should represent narrower attributes such as technologies, product modules, workflows, or standards.

    Each post should have one primary category and a limited, controlled tag set. Free-form tags tend to proliferate spelling variants and duplicates, which damages faceted search and analytics. Controlled vocabularies should be documented in a shared taxonomy register.

    Assign tags only when they improve retrieval for a real user task. If a tag does not alter filtering, search relevance, or reporting, it is usually noise.

    Authoring Guidelines and Style Specifications

    Tone, voice, and terminology constraints

    The prescribed tone for a New Manual Post is neutral, technical, and operational. It should avoid inflated marketing language, undefined shorthand, and conversational ambiguity. Terms must be stable across articles, especially for product names, workflow states, field labels, and component names.

    Controlled vocabulary matters because search, analytics, and translation memory depend on consistency. A post that alternates between “post,” “entry,” “article,” and “document” without reason creates unnecessary interpretation cost.

    Writers should prefer direct statements and explicit requirements. “Must” indicates a hard requirement. “Should” indicates a default expectation with limited exceptions. “May” indicates optional behavior.

    Code formatting, language specification, and snippet policies

    When the post includes technical implementation, code blocks should be copyable, labeled, and runnable in the stated environment. Every block must declare its language, and every sample should match the version assumptions documented elsewhere in the article.

    Inline fragments should be reserved for short commands, paths, variables, or field names. Longer examples should be isolated in fenced blocks. Snippets that omit required imports, flags, or configuration keys should be clearly marked as partial to prevent failed execution.

    A code sample that is not validated is documentation debt. In mature workflows, code examples should be exercised by test runners or example builds in CI.

    Accessibility and localization requirements

    Accessibility is a publishing requirement. All images require meaningful alt text unless purely decorative. Tables need clear headers. Heading levels must remain sequential. Embedded media should include captions or transcripts where applicable.

    For interactive components, semantic HTML should be preferred over script-only behavior. ARIA attributes should only be added when native semantics are insufficient.

    Localization readiness should be considered at authoring time. Dates, units, locale-sensitive references, and UI labels should be structured for translation. If the stack supports i18n tokens or translation keys, avoid hard-coded strings in reusable snippets.

    Media and Assets Handling

    Image specs: resolutions, formats, compression

    Images should be generated in responsive variants rather than uploaded as a single oversized file. Recommended derivatives often include widths such as 640, 960, 1280, and 1600 pixels, with actual breakpoints aligned to the front-end layout.

    Preferred formats are AVIF and WebP, with JPG or PNG fallback for legacy support or edge-case graphics. Compression targets should preserve readability in screenshots, especially where code or interface labels appear. Excessive compression creates support costs because screenshots become unusable in documentation.

    Video, audio, and third-party embeds

    Embeds should be treated as external dependencies with privacy, performance, and availability implications. A YouTube or Vimeo iframe may degrade load performance, leak user data, or fail under restrictive consent settings.

    The preferred implementation is a consent-aware lazy embed with preview thumbnails and explicit user activation. Audio and video assets that carry instructional value should also have text alternatives, timestamps, or summary transcripts.

    Third-party widgets should only be allowed if ownership, retention, and consent requirements are documented. If the embedded platform changes API behavior, the post should fail gracefully rather than breaking layout.

    Asset storage, CDN usage, and caching policies

    Assets should live in a managed storage layer with deterministic paths, access controls, and lifecycle retention. Whether stored in CMS media libraries, object storage, or repository paths, the source of truth must be documented.

    CDN distribution should include cache headers aligned with update frequency. Fingerprinted assets can use long-lived immutable caching, while mutable editorial assets require shorter TTLs or explicit purge logic. Cache busting through hashed filenames is preferred over query-string versioning where possible.

    This is one of the areas where operational tooling matters. Platforms like Home can simplify asset governance by aligning storage, versioning, and publishing approval into one workflow rather than splitting them across CMS, CDN, and team chat.

    SEO, Metadata, and Structured Data

    Meta tags: title, description, robots, canonical

    Every New Manual Post should generate a unique HTML title and meta description. A practical title target is 50 to 60 characters, while meta descriptions usually perform best around 140 to 160 characters. These are not rigid limits, but they are useful operational constraints.

    Canonical URLs are mandatory when content can appear through multiple paths, preview domains, or syndicated endpoints. Robots directives should be explicit for drafts, archives, and staging environments. A missing robots rule in preview systems can cause accidental indexation.

    Open Graph and Twitter Card implementation

    Open Graph metadata should map directly from the source fields used by the post schema. At minimum, implement og:title, og:description, og:type, og:url, and og:image. Social previews should use stable image dimensions and avoid text near image edges due to platform cropping.

    Twitter Card behavior typically mirrors Open Graph, though teams should verify current platform support. The key operational principle is field parity. If title, description, and image differ between search and social without intent, click-through metrics become difficult to interpret.

    JSON-LD schema examples for article types

    Structured data should use the schema type appropriate to the content. General documentation may use Article, current-event or release communications may use NewsArticle, and technical tutorials or references should prefer TechnicalArticle.

    A compact JSON-LD example for a technical post is shown below:

    {
      "@context": "https://schema.org",
      "@type": "TechnicalArticle",
      "headline": "New Manual Post",
      "description": "Technical manual for creating a new manual post with metadata, schema, workflow, and QA requirements.",
    ## "author": {
        "@type": "Organization",
        "name": "Docs Team"
      },
      "datePublished": "2026-03-17",
      "dateModified": "2026-03-17",
      "mainEntityOfPage": "https://example.com/docs/new-manual-post",
    ### "image": [
        "https://example.com/assets/og/new-manual-post.png"
      ]
    }
    

    The schema should be generated from the same source metadata as the visible page to prevent drift between rendered content and structured data output.

    Workflow: Creation, Review, and Publishing Process

    Authoring flow and branching strategy (if in repo)

    The cleanest workflow follows a controlled path from draft to review to publish. In repository-based systems, each post should originate from a dedicated branch named after the ticket or slug. This improves traceability and allows preview builds to map directly to proposed content changes.

    In CMS-based systems, workflow states should mirror repository discipline. Draft, in review, approved, scheduled, and published are typically sufficient. The state model should not be overloaded with informal statuses that nobody enforces.

    Review checklist and QA steps

    Review is not only editorial, it is also structural and technical. The post must pass metadata validation, render checks, accessibility checks, link verification, and asset performance checks before publication.

    A concise QA checklist, enforced consistently, typically includes these steps:

    • Validate metadata: ensure required front-matter fields are present.
    • Test links and embeds: verify external and internal links, check consent behavior.
    • Run linting and schema validation: catch structural issues before build.
    • Verify alt text, headings, and tables: ensure accessibility requirements are met.
    • Confirm preview rendering on target devices: check critical viewports and mobile.
    • Approve scheduling or publish immediately: ensure timing and dependencies are correct.

    Publishing actions, scheduling, and rollback procedures

    Publishing should be an explicit event with auditability. Scheduled content must respect time zone rules, embargo policies, and dependency readiness, especially for release notes tied to product deployment windows.

    Rollback procedures should be predefined. If a post ships with broken assets, invalid schema, legal exposure, or critical technical inaccuracies, the team should know whether to unpublish, hotfix in place, redirect temporarily, or restore the previous revision. Ambiguity during rollback increases incident duration.

    Versioning, Archival, and Change Log

    Semantic versioning and content revision IDs

    Content changes should be versioned using a semver-like pattern. Major revisions reflect conceptual restructuring or materially changed guidance. Minor revisions capture additive updates. Patch revisions cover typo fixes, screenshot updates, and link corrections.

    A revision ID should exist in metadata and in the editorial log. This is especially useful when support teams, developers, and search analysts need to reference a specific state of a page.

    Archival policy and deprecated content handling

    Not every old post should be deleted. Some should be archived, some redirected, and some retained with deprecation banners. The decision depends on traffic, backlink value, legal retention rules, and whether the information is historically important.

    Deprecated technical content should identify the replacement page, last verified date, and reason for deprecation. Redirects are useful when intent remains equivalent. Archives are better when the old content has reference value but should no longer rank as current guidance.

    Programmatic changelog format and examples

    Machine-readable changelogs help automation, auditing, and release reporting. A Markdown summary can serve readers, while JSON or YAML can feed tooling.

    {
      "slug": "new-manual-post",
      "revision": "1.2.0",
      "date": "2026-03-17",
      "changes": [
        {
          "type": "minor",
          "area": "seo",
          "summary": "Added JSON-LD TechnicalArticle example"
        },
        {
          "type": "patch",
          "area": "assets",
          "summary": "Updated image compression guidance"
        }
      ]
    }
    

    Quality Metrics and Monitoring

    KPIs: engagement, technical accuracy, and performance

    A New Manual Post should be measured not only by pageviews but by whether it actually solves user tasks. Useful KPIs include time on page, scroll depth, task completion, bounce rate, search exit rate, and support deflection.

    Technical quality metrics are equally important. Monitor broken links, schema validation pass rates, Lighthouse performance scores, and rendering regressions after theme or plugin updates. A high-traffic article with invalid metadata is still an underperforming asset.

    Automated tests: link checkers, linting, schema validators

    Automation is the only reliable way to enforce standards at scale. Markdown linting catches structural inconsistency. HTML validators catch malformed markup. Schema validators catch structured data drift. Broken-link tools catch one of the most common failure classes in documentation.

    The ideal model is pre-merge validation plus scheduled revalidation after publication. This matters because external dependencies decay over time even when the original article was correct.

    Monitoring alerts and periodic audits

    Monitoring should distinguish between immediate failures and slow degradation. A failed build, missing canonical tag, or broken deployment preview requires rapid alerting. Declining page speed or stale screenshots can be addressed through scheduled audits.

    Quarterly audits are a practical baseline for evergreen content, while release notes and compliance-sensitive content may require monthly review. Escalation paths should map clearly to editorial, engineering, SEO, and legal owners.

    Security, Privacy, and Compliance

    Handling PII and secure content practices

    Personally identifiable information should never appear in screenshots, examples, logs, or downloadable assets unless explicitly approved and lawfully documented. Test data should be synthetic. Sensitive tokens, account IDs, and internal URLs must be redacted before publication.

    Security also includes content integrity. Author accounts should use role-based permissions, MFA where possible, and auditable approvals for publish actions.

    Cookie, consent requirements for embedded content

    Third-party embeds may set cookies or transmit user data before consent is granted. This creates compliance and trust issues. Embeds should therefore be blocked or replaced by consent placeholders until the user opts in, depending on jurisdiction and policy.

    Consent behavior should be documented as part of the component library, not left to each author. A manual post should consume a compliant embed component rather than inventing custom iframe behavior.

    Regulatory considerations (GDPR, CCPA, industry-specific)

    Compliance requirements vary by market and industry, but the common baseline includes lawful processing, data minimization, transparency, and auditability. GDPR and CCPA are the most commonly cited, though healthcare, finance, and public sector teams may face additional controls.

    Documentation teams often underestimate compliance because content feels non-transactional. In reality, embedded analytics, forms, videos, and third-party scripts can all create regulated data flows.

    Troubleshooting and FAQs

    Common issues and diagnostics

    Most failures in a New Manual Post are predictable. Rendering issues usually trace back to malformed front-matter, unsupported block types, or escaped characters. Missing social previews often come from absent OG images or blocked crawlers. Slow pages usually point to unoptimized assets or heavy embeds.

    Diagnostics should start with the source metadata, then preview rendering, then generated HTML, then network behavior. This layered approach prevents teams from debugging symptoms before validating source truth.

    Error codes and remediation steps

    Error Condition Likely Cause Remediation
    Missing metadata field Incomplete front-matter or CMS field omission Block publish, populate required field, rerun validation
    Schema validation failure Incorrect schema_type or malformed JSON-LD Regenerate schema from source fields, revalidate
    Broken hero image Invalid path or CDN purge lag Verify asset path, purge cache, redeploy
    Slug conflict Duplicate route or permalink collision Rename slug, update canonical, create redirect if needed
    Embed blocked Consent policy or CSP restriction Use approved embed component, verify consent configuration

    Support escalation matrix

    Escalation should follow ownership boundaries. Editorial handles structure and copy, engineering handles templates and build failures, SEO handles indexing anomalies, and legal or privacy handles regulated content concerns.

    A mature team defines response targets by severity. A failed production publish or compliance issue may require same-day handling. A taxonomy refinement can wait for the next scheduled content operations cycle.

    Templates, Snippets, and Reference Artifacts

    YAML front-matter template

    The front-matter template shown earlier should be treated as the default contract for Markdown-based systems. In form-based CMS environments, the same field set should be represented in the content model with matching validation rules.

    JSON-LD article schema snippet

    The JSON-LD example provided above is intentionally minimal, but production implementations may also include publisher, breadcrumbs, articleSection, keywords, and image variants. The key requirement is consistency between visible content and structured data output.

    CI/CD pipeline snippet for publishing

    A simple CI pipeline for a repository-based New Manual Post should lint content, validate links and schema, generate a preview build, and only then allow merge or deploy.

    name: content-publish
    ### on:
      pull_request:
      push:
        branches: [main]
    
    jobs:
      validate-and-build:
        runs-on: ubuntu-latest
    ### steps:
          - uses: actions/checkout@v4
          - name: Install dependencies
            run: npm ci
          - name: Lint markdown
            run: npm run lint:md
          - name: Check links
            run: npm run test:links
          - name: Validate schema
            run: npm run test:schema
          - name: Build site
            run: npm run build
    

    A sample commit message can follow the form docs(new-manual-post): add initial technical specification. A pull request title can mirror the same scope naming for traceability.

    Appendices and Further Reading

    Glossary of terms and acronyms

    Canonical URL refers to the preferred URL for indexing when duplicates or variants exist. Front-matter is structured metadata placed at the beginning of a content file. JSON-LD is a linked data serialization format used for structured data. OG refers to Open Graph metadata for social sharing. TTL means time to live in caching behavior.

    Additional terms worth standardizing include slug, taxonomy, revision, embed, CDN, CSP, and PII. Teams should keep these definitions in a shared glossary to reduce drift across authors and systems.

    Change history for the manual post

    The manual itself should be versioned and periodically reviewed. As publishing systems evolve, the specification should reflect actual platform capabilities rather than preserving outdated assumptions.

    This is especially important for schema types, embed policies, performance thresholds, and consent requirements, all of which change faster than most editorial playbooks.

    Links to validation tools and references

    Useful references include Markdown linters, W3C HTML validators, Schema.org documentation, Google Rich Results testing tools, Lighthouse, broken-link checkers, accessibility auditing tools, and official CMS documentation for the platforms in use.

    The next step is practical, convert this specification into your team’s working template. Build the metadata contract into your CMS or repository, automate the checks, and publish one New Manual Post under full validation. Once that succeeds, the process becomes a system rather than a habit.

  • Free PDF to Word Converter: Convert PDFs to Editable DOCX

    Free PDF to Word Converter: Convert PDFs to Editable DOCX

    You have a PDF that needs editing, a client asking for a Word file, or a contract trapped in a scanned image. Converting a PDF into an editable Word document is one of those everyday productivity tasks that can save hours of manual retyping. Fortunately, there are reliable, free ways to do it that work for small business owners, freelancers, developers, and anyone who values speed and accuracy.

    This article explains what a free Pdf to word converter actually does, the trade-offs to expect, how conversion works behind the scenes, and clear, practical steps to get the job done quickly and safely. Read on to choose the right approach for your file type, privacy requirements, and desired outcome.

    What is a Pdf to word converter?

    A Pdf to word converter is a tool that transforms a Portable Document Format file into an editable Microsoft Word document, usually .doc or .docx. The goal is to preserve the original layout, text, images, tables, and fonts as closely as possible while producing content you can change, comment on, or repurpose.

    Not all conversions are the same. A simple text PDF created from a Word export converts with high fidelity because the PDF already contains selectable text. A scanned PDF, which is an image of each page, requires optical character recognition, or OCR, to extract text. OCR adds complexity and often requires trade-offs between accuracy, formatting, and speed.

    Side-by-side illustration showing (A) a 'digital PDF' with selectable text and embedded layout metadata, and (B) a 'scanned PDF' that is an image of a page requiring OCR. Label differences (selectable text vs image, OCR required) and show typical outcomes after conversion.

    Think of conversion like translating a printed newsletter into a document template. You want the translation to keep headlines, columns, and images in place, but you also want the text to be editable without extra cleanup. A good free converter balances that, and this article helps you pick one depending on the file you have and the result you need.

    Key Aspects of Pdf to word converter

    Accuracy and formatting fidelity

    When you search for Pdf to word converter, accuracy will be the central concern. Tools differ in how well they preserve fonts, spacing, columns, headers and footers, and image placement. Converting a one-page resume is usually straightforward, but multi-column brochures, complex tables, or documents with custom fonts often need manual tweaks after conversion.

    Accuracy generally depends on how the PDF was created. PDFs generated from digital sources like Word or InDesign contain embedded text and layout information that converters can map to Word styles. Scanned documents require OCR, which introduces possible misreads for unusual fonts, low-resolution scans, or handwritten notes.

    OCR and scanned documents

    A free converter that includes OCR is essential if your PDF is a scan. OCR analyzes the pixels and predicts letters and words. Modern OCR is quite good with printed text at reasonable resolution, but expect to proofread and correct errors, especially in columnar layouts and tables.

    Some free OCR tools let you choose the language, output format, and recognition accuracy. Higher accuracy may increase processing time, and cloud-based OCR tools might upload files to remote servers, which raises privacy considerations.

    Privacy and security

    Privacy is a major factor for business and freelance users. Free online converters often process files on remote servers. If you are converting confidential contracts, financial statements, or personally identifiable information, verify the service’s privacy policy and retention rules. Desktop or open-source solutions that run locally avoid the upload step and keep data on your machine.

    Always check whether the converter uses encryption during upload, how long temporary files are retained, and whether the provider explicitly deletes files after conversion. When in doubt, use an offline method.

    File size limits and batch conversion

    Free online converters commonly impose file size limits or daily quotas. If you work with large PDFs or need bulk conversions, these restrictions can slow workflows. Desktop tools usually handle larger files and batch processing more efficiently, but may require more setup.

    Batch conversion capability is a practical consideration for agencies and freelancers who need to convert dozens of files at once. A free desktop solution or scripted approach tends to scale better than free web forms.

    Compatibility and output quality

    Not all converters produce the same .docx structure. Some convert visually, embedding text into text boxes and fixed positions, which preserves appearance but makes editing awkward. Others reconstruct paragraph styles and headings, which creates a more natural editing experience in Word. For long-form documents or those you plan to revise, prefer tools that produce editable flow text rather than fixed-position blocks.

    Speed and convenience

    For quick one-off conversions, an online free converter is often the fastest option. For repetitive work, desktop tools and integrated solutions like Google Docs or Microsoft Word may save time. Developers may prefer command-line or API-based free tools they can script into pipelines.

    How to Get Started

    Quick decision guide

    Begin by evaluating three factors: sensitivity of the document, complexity of layout, and how often you need to convert files. If the document is confidential, choose an offline method. If layout is complex and fidelity matters, test a couple of tools and compare the outputs. If you convert frequently, invest time in a desktop or scripted solution.

    Decision flowchart that helps choose a conversion method: start with three questions (document sensitivity, layout complexity, frequency). Branch to online free converters (fast, upload), desktop/Word/LibreOffice (local, better for privacy/large/batch), open-source/CLI (scriptable, technical), or mobile apps (on-the-go).

    Prerequisites

    Before converting, ensure the PDF is high enough quality for OCR if needed. Scanned PDFs should be at least 200 to 300 DPI for better OCR accuracy. Make sure you have an editor that can open .doc or .docx files, and confirm you have permission to convert and edit the document. As a safety measure, keep a copy of the original PDF before conversion.

    Step-by-step: Converting with a free online tool

    1. Upload the PDF file to the converter website.
    2. Select the output format as Microsoft Word (.doc or .docx).
    3. Choose OCR options if your file is a scanned image.
    4. Start the conversion and wait for the process to finish.
    5. Download the resulting Word document and open it for proofreading.

    This process is fast for simple documents and convenient when you are away from your main workstation.

    Step-by-step: Converting offline using desktop software

    1. Open Microsoft Word and choose File, Open, then select the PDF.
    2. Allow Word to convert the PDF to an editable document.
    3. Review the converted document and correct any formatting or OCR errors.
    4. Save the file as .docx.

    If you prefer open-source, LibreOffice can import PDFs and let you export to editable document formats, though results vary with layout complexity.

    Tips for best results

    Start with the highest-quality PDF available. If the PDF contains multiple languages, select the appropriate OCR language. After conversion, focus on headings, lists, tables, and special characters during proofreading. If fonts are missing, substitute similar ones to maintain layout while keeping text editable.

    Comparison table: Types of free converters

    Type

    Cost

    Best for

    Pros

    Cons

    Online free converters

    Free, sometimes limited

    Quick single-file conversions

    Fast, no install, easy UI

    File size limits, potential privacy concerns

    Desktop converters (Word, LibreOffice)

    Free with existing software

    Frequent users, large files

    Local processing, no upload needed

    Variable fidelity with complex layouts

    Open-source tools and CLI

    Free

    Developers, automated workflows

    Scriptable, no vendor lock-in

    Requires setup, technical knowledge

    Mobile apps

    Free tiers available

    Scanning and quick edits on the go

    Handy for fieldwork, built-in camera OCR

    Ads, in-app limits, privacy trade-offs

    Handling complex elements: tables, images, and forms

    Tables often cause the most trouble during conversion. Simple tables typically convert cleanly, but nested tables or those with merged cells may break into image elements or text blocks. If preserving table data is critical, consider extracting tables to CSV using a tool designed for table recognition, then reinsert or rebuild them in Word.

    Images generally convert as embedded images that retain position. For forms and fillable fields, converting to Word will not preserve form functionality. If you need an editable form, consider recreating it in Word or using form-building tools after conversion.

    Privacy-conscious workflows

    If privacy matters, run conversions locally whenever possible. Use desktop applications, virtual machines, or open-source CLI tools that keep files on your device. If you must use online services, choose providers with clear data-deletion policies and TLS encryption. Avoid uploading files containing sensitive personal data or financial information unless the service explicitly supports secure workflows.

    Common pitfalls and how to fix them

    A frequent issue with a free Pdf to word converter is layout breakup, where paragraphs become text boxes or headings lose their styles. To fix this, paste the text into a fresh document and reapply styles, or use Word’s Find and Replace to remove extra line breaks.

    Another pitfall is misrecognized characters after OCR, such as confusion between 0 and O or l and 1. A quick skim for common patterns and language-specific spell-check tools substantially reduces these errors.

    Finally, images or graphics may lose resolution during conversion. If image quality is critical, extract the original images from the PDF before conversion and reinsert high-resolution copies into the Word document.

    When to choose paid tools

    Free converters cover many needs, but paid solutions become worthwhile for high-volume workflows, guaranteed security, batch automation, or the best possible fidelity for complex layouts. If you often convert legal documents, marketing collateral, or large manuals, evaluate paid options that offer enterprise-grade OCR, batch processing, and SLAs for data handling.

    Conclusion

    A Pdf to word converter is an indispensable tool for modern productivity when used with an awareness of its limits. For quick edits and one-off files, free online converters are efficient, while desktop and open-source solutions are better for privacy and bulk work. Understand whether your PDF contains selectable text or scanned images, choose the right tool for fidelity and privacy, and always proofread the converted Word file.

    Next step: try a short test conversion with a non-sensitive PDF to compare results. If you need help choosing tools based on a specific document type or workflow, share a brief description and I will recommend a tailored approach.

  • Designing Efficient Manual Posting Workflows

    Designing Efficient Manual Posting Workflows

    Manual posting sounds simple until it becomes a bottleneck. What begins as a straightforward act—publishing an update, logging a record, submitting a task, or entering a system change—often turns into a slow, error-prone routine that drains focus from higher-value work.

    A new manual post is rarely just a post. In most operational environments, it is a unit of work tied to approvals, formatting rules, timing, ownership, and downstream visibility. For developers and efficiency-focused professionals, the real issue is not whether manual posting is possible. It is whether the process is structured well enough to remain reliable when volume, complexity, and team size increase.

    This article examines what a new manual post represents in modern workflows, where manual posting still makes sense, where it breaks down, and how to design a cleaner system around it. The goal is practical: reduce friction, preserve control, and make every manual action intentional instead of repetitive.

    What a new manual post is

    A new manual post can be understood as any content, record, update, or operational entry created directly by a user rather than generated through automation, integration, or scheduled logic. In developer-adjacent environments, that might refer to a CMS entry, a changelog update, a marketplace listing, a support announcement, an internal knowledge base article, or a structured operational submission.

    The phrase matters because manual posting still exists in highly automated systems. Even mature teams with APIs, webhooks, and orchestration layers encounter edge cases that require direct human input. Launch-day edits, emergency notices, one-off compliance entries, and corrective updates are common examples. The presence of a manual path is not a design failure. In many cases, it is a necessary fallback for accuracy and control.

    The challenge appears when manual posting becomes the default instead of the exception. At that point, the workflow starts accumulating hidden costs. Time per post increases. Formatting drift appears between contributors. Metadata becomes inconsistent. Review cycles lengthen because every item requires interpretation rather than validation against a standard.

    Treating the post as a controlled interface

    From a systems perspective, a manual post is best treated as a controlled interface for human-authored data entry. That framing changes how the process should be designed. Instead of asking users to “just create a post,” an efficient system defines the required fields, expected structure, validation rules, publishing conditions, and ownership model before the user starts writing.

    This is especially important for technical teams. Developers tend to optimize automated pipelines, but many organizations neglect the final human-operated layer. The result is a mismatch: sophisticated backend architecture paired with a weak content or data-entry surface. That mismatch introduces preventable errors, even when the surrounding platform is technically sound.

    A strong manual-post workflow behaves more like a well-designed form than an open text box. It gives users freedom where judgment matters and constraints where consistency matters. That distinction is what separates a scalable process from a fragile one.

    Commercial and opportunity-cost considerations

    The commercial side of a new manual post is equally important. Every manually created entry consumes labor, and labor has a cost. If one employee spends ten minutes creating, reviewing, and publishing a post, that may seem negligible. Across hundreds of posts per month, the cumulative overhead becomes substantial.

    There is also an opportunity-cost layer. Skilled contributors should not spend most of their time correcting titles, re-entering tags, or chasing missing fields. Manual posting should support strategic work, not replace it. This is why efficiency tools matter so much in this category. They do not eliminate human judgment. They preserve it for the moments where it adds the most value.

    For organizations balancing speed and control, the right question is not whether manual posting should exist. The right question is where manual posting should be used, how it should be standardized, and what parts of the process should be assisted by tooling.

    Why manual posting still matters

    Despite the push toward automation, manual posting remains essential because not every update follows a predictable pattern. Structured automation works best when inputs are stable and rules are clear. Real operations are messier. Teams encounter exceptions, urgent revisions, unique announcements, and context-sensitive messaging that cannot always be reduced to predefined templates.

    Manual posting also provides accountability. A human-authored post often carries deliberate intent, especially when the content affects customers, compliance records, public communication, or product documentation. In these cases, direct authorship is a feature, not a liability. It allows for judgment, nuance, and contextual awareness that automation may not capture correctly.

    That said, the value of manual posting depends on the design of the posting environment. A poor manual workflow forces users to remember hidden rules. A good one exposes them clearly, at the moment they are needed.

    Manual control vs automated throughput

    The trade-off between manual and automated posting is not ideological. It is operational. Automation improves throughput, repeatability, and scale. Manual posting improves exception handling, editorial judgment, and contextual precision. Strong systems use both.

    Three-column comparison infographic labeled 'Manual', 'Automated', 'Hybrid' showing each column's best use case, primary strength, and primary risk (icons for human judgement, speed/repeatability, and balance/complexity).

    The difference becomes clearer when evaluating typical scenarios.

    Workflow Type Best Use Case Primary Strength Primary Risk
    Manual Post One-off updates, sensitive communications, corrections Human judgment and flexibility Inconsistency and slower execution
    Automated Post High-volume recurring entries, synchronized platform updates Speed and repeatability Incorrect output at scale if rules fail
    Hybrid Post Template-driven entries with human review Balance of efficiency and control Complexity in process design

    For most teams, the hybrid model is the most practical. It reduces repetitive work while preserving a human checkpoint. That is often the ideal environment for a new manual post, especially when quality standards matter.

    When manual posting is the better choice

    A manual post is usually the better option when the content is unique, time-sensitive, or dependent on human interpretation. For example, a product team issuing a service incident update may need to revise language based on evolving facts. A support team publishing a temporary workaround may need to adapt tone and detail to user sentiment. These are not fixed-output scenarios.

    Manual posting also works well when the total volume is still manageable. If a team creates only a small number of high-value posts each week, full automation may introduce more complexity than benefit. In such cases, improving the manual workflow yields faster gains than building a complete automated system.

    The decision should be based on frequency, variability, business impact, and error tolerance. Those four variables determine whether manual posting is a strategic choice or an expensive habit.

    The hidden costs of a new manual post

    The most significant cost in manual posting is not typing time. It is context switching. Each new manual post requires the author to stop one task, remember rules, gather source information, enter data, validate accuracy, and often notify stakeholders. That interruption degrades focus, especially for developers and technical operators already working across multiple systems.

    Another hidden cost is inconsistency. Without a defined structure, different contributors produce different outputs. Titles may follow conflicting patterns. Categories may be selected unevenly. Important metadata may be omitted entirely. Over time, this affects searchability, analytics quality, and downstream reporting.

    There is also a governance cost. If manual posts are not easy to audit, teams struggle to answer simple operational questions. Who created this entry? Which version is current? Was it approved? Did it go live on time? Systems that support manual posting need to capture these answers automatically, even when the content itself is manually authored.

    Error surfaces in manual workflows

    Every manual post introduces multiple potential failure points. The content may be correct but categorized incorrectly. The date may be accurate but the timezone may be wrong. The message may be approved but published to the wrong destination. In technical environments, these are not minor defects. They create rework and can damage trust.

    An effective workflow reduces these error surfaces through design. Required fields, constrained options, preview states, approval checkpoints, and post-publication logs all contribute to reliability. This is where an efficiency platform can create immediate value. Instead of relying on memory and tribal knowledge, the system carries part of the operational burden.

    Tools such as Home are particularly useful when teams need a central environment for structured manual actions. The benefit is not only speed. It is consistency, visibility, and lower cognitive load across recurring posting tasks.

    Documentation drift and operational debt

    A poorly managed manual posting process generates operational debt. Teams begin with a lightweight informal system, often because the volume is low. As usage grows, undocumented conventions appear. New contributors learn through screenshots, chat messages, and corrections rather than through a reliable workflow. At that point, even simple posting tasks become fragile.

    Documentation drift follows. The official instructions say one thing, but the real process has changed. This disconnect creates duplicated effort and onboarding friction. In practical terms, the team is paying an efficiency tax every time a new manual post is created.

    The solution is not always large-scale software replacement. Often, it starts with standardizing the entry model, clarifying ownership, and adding validation where mistakes commonly occur.

    How to design a better manual posting workflow

    A better workflow starts by defining the object being posted. That sounds obvious, but many teams skip it. If the organization cannot clearly describe what constitutes a valid post, no amount of interface polishing will fix the underlying ambiguity.

    The post should have a schema, even if it is not called that. There should be clear rules for title construction, body format, status values, tags, ownership, and publication conditions. Once these rules are made explicit, the workflow can be optimized around them.

    The second step is to reduce unnecessary decisions. Decision fatigue is a major contributor to slow manual processes. If every author must choose formatting, taxonomy, distribution logic, and review paths from scratch, the system is doing too little. Defaults, templates, and guided inputs improve speed without removing control.

    Build for validation, not correction

    Many organizations design posting processes that detect problems only after publication. That is inefficient. The correct model is to validate before release. Required fields should be enforced early. Ambiguous choices should be replaced with predefined options where possible. Preview states should show exactly how the post will appear in its destination context.

    This validation-first design is especially useful for technical and operational posts. Small errors often have outsized impact in these environments. A missing identifier or incorrect status label can make an entry difficult to trace later. Preventing the mistake is cheaper than fixing it after downstream systems have already consumed the data.

    Standardization without rigidity

    Standardization often fails when it becomes overly restrictive. People then bypass the process, creating side channels and shadow workflows. The objective is not to eliminate flexibility. It is to preserve it only where it matters.

    A practical approach is to standardize the structural layer and leave the interpretive layer open. In other words, the system can require title syntax, category selection, timestamps, and ownership while still allowing the author to write a nuanced explanation. This model works well because it aligns software constraints with human strengths.

    A new manual post should feel guided, not trapped. If users feel boxed in, adoption suffers. If they feel unsupported, quality suffers. Good workflow design sits between those extremes.

    Practical criteria for evaluating manual post systems

    When evaluating a platform or internal tool for manual posting, the most useful lens is operational fit. A system may look clean and still perform poorly if it lacks field validation, version visibility, or role-aware permissions. Conversely, a technically plain interface may be highly effective if it reduces task time and enforces consistency.

    The following criteria are especially relevant for developers and efficiency-minded teams:

    1. Input structure.
    2. Validation logic.
    3. Approval and publishing visibility.
    4. Auditability and revision tracking.
    5. Template and reuse support.

    These criteria should be measured against actual workflow behavior, not vendor language. A system is effective only if it reduces friction in live use.

    Comparing basic and structured manual posting

    Capability Ad Hoc Manual Posting Structured Manual Posting
    Field consistency Variable High
    Error prevention Limited Built into workflow
    Team onboarding Slow, person-dependent Faster, process-driven
    Audit trail Often incomplete Usually explicit
    Scalability Weak beyond low volume Stronger across teams

    A structured environment does not necessarily require heavy enterprise software. In many cases, a focused tool like Home can centralize routine manual posting tasks in a way that feels lightweight to contributors while still preserving control for operators and managers.

    Making the next manual post more efficient

    Improvement usually begins with one workflow, not a full transformation program. Select a high-frequency manual posting task and examine where time is lost. In most cases, the delays come from missing inputs, repeated formatting, inconsistent approvals, or poor visibility after publishing.

    Then redesign the workflow around those specific failures. Add a template. Make critical fields mandatory. Predefine categories. Surface approval status. Store revision history. These are operational changes, not abstract best practices, and they produce measurable gains quickly.

    A team does not need to eliminate manual work to become efficient. It needs to make manual work intentional, structured, and low-friction. That shift is what turns a new manual post from a recurring interruption into a controlled, predictable process.

    The next step is simple: audit one current manual posting flow and document every action required to complete it. If the path is longer than expected, inconsistent across users, or difficult to verify afterward, the process is ready for redesign. That is where better tooling, clearer standards, and platforms like Home can start delivering immediate value.

  • How to Remove Image Background for Free — Quick & Professional

    How to Remove Image Background for Free — Quick & Professional

    Removing the background from an image does not have to be expensive or technically intimidating. Whether you sell products online, create social posts, build websites, or prepare presentations, a clean subject on a transparent background makes your visuals pop and improves professionalism. This article explains how to remove the background from an mage, what to expect from free tools, and practical steps to produce high-quality cutouts without costly subscriptions.

    You will learn the difference between automated and manual methods, how to choose the right approach for your workflow, and quick tactics to improve results. The goal is to give small business owners, freelancers, and productivity-minded users a clear, actionable path to remove backgrounds effectively while avoiding common traps like low-resolution output or hidden watermarks.

    What is it?

    Removing a background means isolating the main subject of an image and replacing or making the surrounding area transparent. When you remove a background from an image, you use tools or techniques that let you create a transparent PNG, a clipped object for placement on colored banners, or a neatly masked subject for more advanced editing. The end result can be used for product listings, profile pictures, marketing assets, or layered designs.

    There are two broad approaches. Automated tools use machine learning and edge detection to create a quick cutout with minimal input, often delivered in seconds. Manual methods rely on selection tools, masks, and brushwork, giving precise control for difficult edges like hair or transparent materials. Both approaches produce a similar goal, but they trade speed for control.

    Simple two-column diagram comparing approaches: one column labeled 'Automated' with a lightning bolt icon, a one-click web tool screenshot thumbnail, and a stopwatch indicating speed; the other column labeled 'Manual' with a brush and pen icon, a layered editor thumbnail, and a control/precision icon, plus a small caption 'Speed vs Control'.

    Technical concepts helpful to understand include alpha channels, masks, and clipping paths. An alpha channel stores transparency information so parts of the image can be fully or partially transparent. Masks allow non-destructive editing, letting you refine edges without permanently altering the original pixels. Clipping paths are vector outlines often used in eCommerce to guarantee crisp silhouettes.

    Side-by-side example: left — original product photo with background; right — the subject isolated on a transparent checkerboard (PNG), with a small label showing 'Export: PNG / WebP'. This demonstrates the expected end result of removing a background.

    Key Aspects of a background remover

    Accuracy versus convenience

    When considering free background removal, accuracy and convenience usually move in opposite directions. Fully automated web tools are convenient and fast, often delivering usable results for simple subjects on contrasting backgrounds. For complex scenes, manual refinement will be necessary to achieve professional quality. Understand that a single-click solution may require subsequent touch-ups to remove halos, preserve hair detail, or handle semi-transparent objects.

    Output formats and resolution

    Most users who remove backgrounds want a transparent result. PNG is the most common free format for transparency, while WebP can offer smaller file sizes with transparency support. Free tools sometimes limit output resolution, so check whether the tool preserves original image size or downsamples. If you plan to print or display large images, prioritize tools that maintain full resolution.

    Privacy and data handling

    Free online services may process images on remote servers. If your images contain sensitive information or unreleased product photos, consider an offline tool or verify the service privacy policy. Many reputable tools state they delete files after processing, but always confirm data retention policies before uploading proprietary assets.

    Batch processing and workflow

    Volume matters. For single images, an automated free tool is usually faster. For catalogs or multiple items, look for a method that supports batch processing. Some free desktop apps and web services offer batch options, while others require manual repetition. Time spent organizing a consistent shooting setup, with a solid background and even lighting, can drastically reduce time spent editing later.

    Cost traps and licensing

    A background remover can conceal limitations. Free tiers might add watermarks, impose daily credits, or restrict commercial use. Read the terms, and if you need high-volume or commercial licensing, evaluate paid plans. Free tools are excellent for testing and occasional use, and for long-term business consistency, plan whether a subscription is worth the efficiency gains.

    How to Get Started

    Before you begin, gather a few simple prerequisites to improve every result and speed up your workflow.

    • High-resolution image: Higher pixel counts retain detail after masking.
    • Contrasting background: A solid, contrasting background makes automatic detection more accurate.
    • Good lighting: Even lighting reduces shadows and color spill that confuse algorithms.
    • Original file: Keep the original unedited file so you can retry different methods.

    Follow these steps to remove a background quickly using a typical free online tool, then use the alternative offline method if you prefer local editing.

    1. Upload your image to the free background removal tool of your choice.
    2. Allow the automatic process to detect and remove the background.
    3. Inspect the result at 100 percent zoom for edge artifacts and missed areas.
    4. Use the refine brush or eraser to fix hairlines, semi-transparent edges, or small leftover pixels.
    5. Export the final cutout as a PNG with transparency or WebP if file size is a concern.
    6. Save a copy with a layer mask in a layered format if you plan further edits.

    If you prefer an offline method for privacy or precise control, use a free editor such as GIMP or a web-based editor that supports masks. Open the image, create a duplicate layer, and use selection tools such as the foreground select, path tool, or quick mask to isolate the subject. Convert the selection to a mask and paint in or out to refine edges. Export as a transparent PNG when satisfied.

    Tips to improve difficult cases

    Working with hair, fur, glass, or motion blur can be challenging. Refine masks with feathering and contrast adjustments, manually paint on masks with a soft brush at low opacity to smooth transitions, and use color decontamination tools to remove background color bleeding from edges. For shiny or transparent objects, accept that some reflection or transparency is part of the object; sometimes adding a subtle shadow on a new layer gives a more natural result than trying to fully isolate transparent materials.

    Troubleshooting common problems

    If your cutout shows color fringes, add a small negative or positive contract to the mask edge to remove halos. If the tool fails on low-contrast subjects, try converting the image to higher contrast temporarily, perform the selection, then reapply to the original image. When hair is lost, switch to manual brush refinement and work at a high zoom level for precision.

    Comparison of Free Background Removal Methods

    Method

    Ease of use

    Quality

    Output format

    Best for

    Limitations

    Automated web AI

    Very high

    Good for simple subjects

    PNG/WebP

    Single images, speed

    May downscale, limits/credits

    Web-based editor (manual + auto)

    High

    Very good with refinement

    PNG, layered exports

    Fast manual fixes, browser-based

    Learning curve, browser performance

    Desktop editor (GIMP)

    Moderate

    Professional with time

    PNG, PSD export via plugins

    Privacy, full control

    Requires skill, manual work

    Mobile apps

    Very high

    Varies, often good

    PNG

    Quick social media edits

    Quality varies, in-app purchases

    Vector-based tracing

    Moderate

    Crisp for flat graphics

    SVG, PNG

    Logos and icons

    Not suitable for photos, manual paths needed

    Conclusion

    Removing a background from an image for free is accessible and practical for business owners, freelancers, and developers who need clean visuals without heavy investment. Automated tools provide speed and convenience for straightforward images, while free desktop editors offer the privacy and precision needed for high-value or complex subjects. Pay attention to output formats, privacy policies, and any usage limits that may affect commercial workflows.

    Next step, pick one approach and try it with a recent product photo or portrait. Practice with a high-contrast image to build confidence, then tackle more challenging shots as you learn masking techniques. If your needs grow, consider a paid option for batch processing and guaranteed resolution, but for many day-to-day tasks, free solutions deliver excellent results.

  • Designing a Reliable New Manual Post Workflow

    Designing a Reliable New Manual Post Workflow

    A New Manual Post sounds simple on the surface, but in real publishing systems it is rarely just a blank editor and a Publish button. For developers, content teams, and operators responsible for reliable workflows, a manual post is a structured content object created intentionally by a human inside a CMS, publishing platform, or API-enabled editorial system. It exists at the intersection of content design, validation, governance, SEO, accessibility, and deployment mechanics.

    That is why manual posting still matters even in an era of automation. Imported feeds, scheduled campaigns, AI-assisted drafts, and templated syndication all have their place, but some content must be created with tighter control. Legal announcements, product changes, incident updates, regulated statements, and executive communications often require a manual path because each field, approval, and timing decision has operational consequences. A well-designed New Manual Post workflow reduces errors, improves auditability, and makes publishing faster without sacrificing control.

    Introduction, Definition and Purpose of a New Manual Post

    Precise definition and scope

    A New Manual Post is a content record authored or assembled directly by a user through a CMS interface or a controlled creation endpoint, rather than being generated by an automated import, feed sync, or rule-based publishing job. In technical terms, it is a user-initiated write operation against a content model that typically includes body content, metadata, assets, and lifecycle state.

    The scope varies by platform. In a blog CMS, it may refer to a standard article entry with a title, slug, excerpt, body, categories, and publish state. In social media tooling, it can mean an individually composed update with media attachments and explicit scheduling. In enterprise content systems, a New Manual Post is often one node within a larger workflow that includes RBAC, reviewer assignment, localization, content staging, and downstream cache invalidation.

    A useful taxonomy separates manual posts, automated posts, imported posts, and scheduled posts. A manual post describes the creation path, while scheduling describes a timing behavior. A manual post can still be staged and scheduled. Lifecycle states commonly include draft, in review, approved, scheduled, published, archived, and sometimes unpublished or superseded.

    Lifecycle state diagram for a New Manual Post showing states (draft → in review → approved → scheduled → published → archived) with possible branches for 'rejected', 'unpublished', and 'superseded'. Include arrows for transitions, labels for automated scheduling and manual publish, and a note showing timestamp/version metadata attached to each state.

    Intended audience and use-cases

    The primary audience includes developers building content workflows, technical writers managing structured content, marketing and operations teams handling high-importance posts, and administrators defining permissions and controls. The need is not only to create content, but to create it predictably.

    Use-cases cluster around content that needs deliberate human oversight. That includes regulated industries, investor communications, release notes, policy changes, security incident notices, press releases, and evergreen knowledge-base material that must pass editorial and compliance review. A manual path is also preferred when content requires rich formatting, embedded assets, or nuanced messaging that automated systems cannot safely infer.

    In practical environments, manual posting is less about resisting automation and more about preserving intent. When a post carries legal exposure, reputational risk, or complex presentation requirements, the manual workflow becomes the safest operational model.

    Relationship to automated posts and CMS workflows

    Automated publishing is optimized for scale and repeatability. Manual posting is optimized for control and traceability. The two are not mutually exclusive, and mature platforms support both within the same pipeline.

    A common pattern is hybrid. A user creates a New Manual Post in the CMS, validation services inspect it, workflow rules route it to reviewers, and the publish system later deploys it through automated queues and CDN layers. This means the creation event is manual, but the downstream delivery remains programmatic.

    From an architecture standpoint, manual content should fit cleanly into the same content lifecycle as automated entries. That consistency matters for search indexing, cache behavior, analytics attribution, version history, and rollback procedures.

    Preconditions and Required Inputs

    User roles, permissions, and audit trails

    A manual post should never be treated as an unrestricted form submission. It should be governed by role-based access control. Typical roles include author, editor, reviewer, publisher, and administrator. Authors can create drafts, editors can modify and annotate, reviewers can approve or reject, and publishers can move approved content into a live state.

    Permissions must be granular. Systems should distinguish between creating a post, editing a published post, uploading media, altering SEO metadata, changing publish dates, and triggering immediate publication. This prevents workflow bypass and reduces accidental production changes.

    Audit trails are equally important. Every create, edit, approval, publish, unpublish, and archive event should record who performed the action, when it happened, what changed, and from which client or session context. Versioning should support diff inspection so teams can compare revisions before approving a post.

    Role & permissions flowchart: icons for roles (author, editor, reviewer, publisher, administrator) with the actions each role can perform (create draft, edit, annotate, approve/reject, publish, change publish date, upload media). Show audit-trail output: user, timestamp, action, diff. Optionally show lock/checkout to prevent concurrent edits.

    Content components and metadata schema

    A robust New Manual Post requires more than visible body text. At minimum, the content schema usually includes a title, slug, excerpt, body, author reference, tags, categories, publish date, status, and featured media. Production-grade schemas also include canonical URL, SEO title, meta description, Open Graph data, Twitter Card fields, language, locale, attachments, and structured data payloads.

    This metadata is not cosmetic. Slugs affect URL stability. Canonical tags influence duplicate-content handling. Open Graph and Twitter Card fields shape link previews. Language and locale determine routing, indexing, and translation behavior. Structured data improves search visibility and machine interpretation.

    A strong schema also enforces field constraints. Titles may have a soft limit for readability, excerpts may be capped for preview rendering, and slugs should be unique within a namespace. These are not merely UI preferences, they are contract terms between the editor, storage layer, frontend renderer, and search systems.

    Technical requirements, formatting, media assets, and size limits

    The technical input layer should be explicit about accepted formats. Images are commonly restricted to JPEG, PNG, WebP, or SVG depending on trust level and rendering context. Video uploads may be limited to MP4 with H.264 video and AAC audio for broad compatibility. Documents may allow PDF only. Each asset type should have size limits, dimension expectations, and scanning rules.

    Accessibility attributes are required inputs, not optional polish. Images need meaningful alt text, decorative media should be flagged accordingly, and audio or video content often requires captions or transcripts. If the platform supports embeds, each embed type should be validated against an allowlist.

    Structured data is another technical requirement that many basic guides omit. A New Manual Post may need JSON-LD for article, FAQ, product, event, or organization markup. When present, it must conform to schema expectations and stay synchronized with visible page content.

    Step-by-Step Process, Creating a New Manual Post

    Preparation, research, assets, and preflight checks

    The workflow begins before the editor opens. Good manual posting starts with source verification, final copy approval, media preparation, and metadata planning. Images should be compressed, named predictably, and matched with alt text and captions. External links should be checked for correctness and destination quality.

    A preflight pass prevents downstream friction. Teams should confirm the target audience, intended URL, publish window, localization needs, and review path. If the post references legal, financial, or regulated material, the approval matrix should be determined before drafting begins.

    Entry, form fields, and editor modes

    Once in the CMS, the user creates a new entry and selects the appropriate content type. The editor mode matters. WYSIWYG editors offer ease and visual formatting, Markdown editors improve portability and cleaner source control behavior, and HTML mode gives maximum precision for advanced layouts and embeds.

    The author then completes the content fields in a predictable order: core metadata first, body second, distribution metadata third, and publishing controls last. This order reduces the chance of forgetting canonical fields or shipping a body without taxonomy, social metadata, or structured data.

    For teams handling high-volume workflows, tools such as Home can reduce friction by centralizing asset access, approval visibility, and publishing state in one operational surface. The value is not only speed, but fewer context switches between drafting, review, and release.

    Validation, client-side and server-side checks

    Validation should run at multiple layers. Client-side checks provide immediate feedback for missing required fields, invalid character counts, malformed URLs, or oversized uploads. Server-side checks remain authoritative and should revalidate all inputs regardless of client behavior.

    Beyond simple field validation, mature systems also inspect content safety and integrity. That includes profanity filtering where appropriate, XSS sanitization, script stripping, broken image detection, unsupported embed rejection, and link health checks. If a platform permits inline HTML, sanitization rules must be deterministic and testable.

    Timezone handling deserves special attention. Publish dates should be normalized to UTC in storage while preserving the editor’s display timezone in the UI. Many publishing incidents come from ambiguous local times, especially around daylight savings transitions.

    Review and approval workflow

    After draft completion, the post enters review. In low-risk environments this may be a single editorial pass. In enterprise systems, it can include content review, legal review, compliance review, localization review, and final publisher approval.

    The workflow should support inline comments, mention-based notifications, revision diffs, and explicit state transitions. Checkout or lock semantics prevent silent overwrites. Where simultaneous edits are allowed, the system needs conflict detection and merge resolution rules.

    Approval should be affirmative and attributable. A post should not move to publishable state because silence was interpreted as consent. That requirement becomes crucial during audits or post-incident investigation.

    Scheduling and publish controls

    Publishing controls define whether the post goes live immediately, at a specific future time, or into a staged environment first. Staged publishing is common when content must be verified in a production-like context before public release.

    A robust scheduler stores normalized timestamps, retries failed publish jobs safely, and surfaces queue state to editors. It should also support dependency awareness. For example, a post may rely on a media asset, a landing page, or a translated variant that must exist before release.

    Editorial and Technical Best Practices

    SEO technical checklist

    A New Manual Post should be optimized structurally, not just rhetorically. That means a clean heading hierarchy, a stable canonical URL, a concise and accurate meta description, indexability rules aligned with intent, and structured data that reflects the actual content type.

    Search engines also respond to consistency. Titles, slugs, headers, and social metadata should describe the same subject using related but not duplicated phrasing. Alt attributes should be descriptive, not stuffed. Internal links should reinforce site architecture and help crawlers discover related resources.

    Accessibility checklist, A11Y

    Accessibility starts in the markup and continues through editorial choices. Semantic headings, proper list markup, keyboard-reachable controls, and sufficient color contrast are baseline requirements. Media needs captions, transcripts, and alternative descriptions where appropriate.

    Manual posts often fail accessibility because the workflow treats it as a final review issue instead of a creation requirement. The better pattern is to make alt text, captioning, and heading validation part of the form logic itself. When accessibility fields are integrated into content entry, compliance rates improve significantly.

    Performance optimizations for assets and inline code

    Performance is part of publishing quality. Large hero images, uncompressed media, excessive embeds, and poorly highlighted code examples can harm page speed and user engagement. Image variants should be responsive, compressed, and lazy-loaded where suitable. Code blocks should use lightweight highlighting and avoid client-heavy libraries if static rendering is available.

    For pages with technical examples, pre-rendered formatting is often more efficient than runtime decoration. Inline assets should be evaluated for blocking behavior, and unnecessary third-party scripts should be excluded from the post template.

    Security and content-safety checks

    Security controls belong in the content pipeline. Inputs must be sanitized against XSS, uploads should be scanned for malware, outbound links may require reputation checks or whitelisting, and embedded HTML must be tightly constrained.

    Manual posts also create a human security risk. Authors can accidentally expose secrets, internal URLs, tokens, or unpublished product details. A strong pipeline uses pattern-based detectors to scan for credentials, private endpoints, and restricted terms before a post can be approved.

    Technical Implementation Patterns

    CMS UI form vs API-first creation

    The classic implementation is a CMS UI with structured fields, editor widgets, and status controls. This is the simplest model for non-technical teams and offers the strongest guardrails. The API-first model is better when content creation needs to integrate with external systems, scripts, or internal operational tools.

    The distinction is often overstated. The best platforms expose the same domain model through both interfaces. The UI becomes a client of the same content API, ensuring parity in validation, workflow state, and versioning behavior.

    Data model examples for a Manual Post

    A manual post data model should be explicit about required fields, allowed states, and nested asset metadata. The following schema illustrates a practical structure.

    {
      "$schema": "https://json-schema.org/draft/2020-12/schema",
      "title": "NewManualPost",
      "type": "object",
      "required": ["title", "slug", "body", "status", "authorId"],
      "properties": {
        "id": { "type": "string", "format": "uuid" },
        "title": { "type": "string", "minLength": 5, "maxLength": 120 },
        "slug": { "type": "string", "pattern": "^[a-z0-9-]+$" },
        "excerpt": { "type": "string", "maxLength": 300 },
        "body": { "type": "string", "minLength": 50 },
        "status": {
          "type": "string",
          "enum": ["draft", "review", "approved", "scheduled", "published", "archived"]
        },
        "authorId": { "type": "string" },
        "tags": {
          "type": "array",
          "items": { "type": "string" },
          "maxItems": 20
        },
        "categories": {
          "type": "array",
          "items": { "type": "string" }
        },
        "canonicalUrl": { "type": "string", "format": "uri" },
        "publishAt": { "type": "string", "format": "date-time" },
    ### "seo": {
          "type": "object",
          "properties": {
            "metaTitle": { "type": "string", "maxLength": 60 },
            "metaDescription": { "type": "string", "maxLength": 160 },
            "robots": { "type": "string" }
          }
        },
        "social": {
          "type": "object",
          "properties": {
            "ogTitle": { "type": "string" },
            "ogDescription": { "type": "string" },
            "ogImage": { "type": "string", "format": "uri" },
            "twitterCard": { "type": "string" }
          }
        },
        "attachments": {
          "type": "array",
          "items": {
            "type": "object",
            "required": ["url", "mimeType"],
            "properties": {
              "url": { "type": "string", "format": "uri" },
              "mimeType": { "type": "string" },
              "alt": { "type": "string" },
              "caption": { "type": "string" }
            }
          }
        }
      }
    }
    

    This structure works because it separates editorial content from distribution metadata while keeping them within one validated object. It also supports API parity with UI-based workflows.

    Storage and publish pipeline

    Behind the form, the pipeline usually follows a sequence: save content to the database, create a revision record, enqueue validation or indexing tasks, render or transform content for delivery, purge or refresh CDN caches, and notify downstream systems through webhooks.

    Transactional integrity matters here. If the database save succeeds but asset association fails, the post should not appear published. Systems should use compensating actions or transactional boundaries that preserve consistent state. For repeated submissions, idempotency keys prevent duplicate posts or duplicate publish events.

    Automation and integrations

    Once the manual post is created, automation becomes helpful again. Webhooks can notify analytics systems, search indexing services, translation pipelines, or social distribution tools. CI/CD for content is increasingly common in static or hybrid architectures where publishing triggers builds, preview deployments, or validation suites.

    An example API request for manual post creation is straightforward when the schema is stable.

    curl -X POST https://api.example.com/v1/posts 
      -H "Authorization: Bearer <token>" 
      -H "Content-Type: application/json" 
      -H "Idempotency-Key: 2a4a0d7b-1234-4ad3-b999-778899001122" 
      -d '{
        "title": "New Manual Post",
        "slug": "new-manual-post",
        "excerpt": "A controlled workflow for creating content manually in a CMS.",
        "body": "<p>Post body content.</p>",
        "status": "draft",
        "authorId": "user_123",
        "tags": ["cms", "workflow"],
        "publishAt": "2026-03-20T09:00:00Z"
      }'
    

    A successful response should return the post identifier, normalized timestamps, revision number, and current workflow state.

    Testing, QA, and Monitoring

    Test cases and automated checks

    Testing should cover both content integrity and system behavior. Unit tests validate field constraints, sanitization rules, and status transitions. Integration tests verify media upload handling, revision persistence, webhook firing, and permission checks. End-to-end tests confirm that a user can create, review, schedule, publish, and unpublish a post under realistic conditions.

    Editor compatibility also deserves dedicated testing. Rich-text plugins, code block components, embeds, and media galleries often introduce regressions that are invisible until rendering time. A manual post flow is only reliable when the authoring surface and published output behave consistently.

    Live preview and staging validation

    Preview environments are essential for catching layout, rendering, and metadata issues before a post becomes public. Good preview systems mirror production routes closely and render with the same templates, feature flags, and asset pipelines used in live delivery.

    Staging validation should include social card testing, structured data inspection, mobile rendering, accessibility scans, and cache propagation checks. URL parity helps detect routing problems early, especially for localized or category-driven paths.

    Monitoring, uptime, content health, and analytics

    Once published, a New Manual Post enters an operational phase. Monitoring should detect broken links, missing media, indexing failures, accessibility regressions, and publish job errors. Alerts need to be actionable, not just noisy.

    Analytics then closes the loop. Teams should monitor pageviews, engagement depth, time on page, bounce behavior, conversions, share rate, and search visibility. These metrics reveal whether the post succeeded not only technically, but strategically.

    Governance, Compliance, and Retention

    Legal and regulatory checks

    Manual content often carries compliance obligations. If a post contains personal data, consent basis and data minimization principles matter. If it includes promotional claims, disclosures may be required. If it contains licensed or third-party media, copyright provenance must be documented.

    DMCA and takedown readiness are part of governance as well. Teams need a process for verifying complaints, removing disputed content quickly, and preserving records of the original publication and subsequent edits.

    Retention policies and archival workflows

    Not every post should remain editable forever. Retention policy should define when content is archived, superseded, soft-deleted, or preserved immutably. For some industries, legal holds may suspend deletion entirely.

    A sound archival model preserves discoverability and traceability. Soft delete supports operational recovery, while immutable archives support investigations and compliance requirements. Published URLs may need redirects or tombstone pages depending on public expectations and SEO impact.

    Audit logs and forensic traceability

    Forensic traceability requires more than basic revision history. Logs should include actor identity, action type, timestamp, affected fields, approval state, and origin context. In higher-assurance environments, cryptographic signing or tamper-evident storage may be necessary.

    These logs are what turn a manual workflow into an accountable one. Without them, a New Manual Post is just a mutable document. With them, it becomes a governed publishing artifact.

    Edge Cases and Failure Modes

    Merge conflicts and concurrent edits

    Concurrent edits are common in fast-moving teams. Simple systems use optimistic locking, where a save fails if the revision token is stale. More advanced platforms implement operational transform or CRDT-based collaboration for near-real-time editing.

    The right model depends on complexity and team behavior. For most CMS environments, optimistic locking plus clear revision diffing is sufficient. For collaborative editorial surfaces, richer conflict resolution may justify the added engineering cost.

    Media upload throttling and CDN failure

    Media pipelines fail in ways that content teams often do not anticipate. Upload throttling, antivirus scan delays, transcoding failure, or CDN propagation lag can create a published post with incomplete assets.

    The mitigation strategy should include retry logic, fallback storage, delayed publish holds for required assets, and a visible asset status indicator in the CMS. Publishing should not silently succeed if critical media remains unresolved.

    Rollback and emergency unpublish procedures

    Emergency unpublish is an operational necessity. A post may contain incorrect facts, legal exposure, broken assets, or confidential information. Teams need a fast path that removes public visibility, purges CDN caches, and records the event in the audit log.

    Rollback should distinguish between content reversion and visibility change. Sometimes the correct action is to restore a previous revision. In other cases the correct action is to unpublish immediately and investigate offline before any replacement goes live.

    Templates, Snippets, and Reusable Components

    Common post templates

    Templates reduce authoring time and improve consistency. A how-to template typically includes summary, prerequisites, numbered procedure, expected result, and troubleshooting. An announcement template focuses on headline, impact, timing, affected users, and next steps. A press release template emphasizes official title, date, location, statement body, media contact, and boilerplate.

    Reusable sections such as hero blocks, author bios, CTAs, and related-resource modules should be standardized at the component level rather than copied manually into each post. This improves maintainability and reduces markup drift.

    Code snippet components and embed patterns

    When a manual post includes code, snippets should use trusted renderer components with language tagging, escaping, and copy-safe formatting. Raw embed HTML should be avoided unless sanitized against a strict policy. Snippet blocks are safer when stored as typed nodes rather than freeform HTML strings.

    Localization and internationalization templates

    Localized manual posts need structured relationships between source and translated variants. Each variant should carry locale metadata, translation status, and fallback behavior. URL conventions should remain predictable, and canonical or hreflang logic must be explicit.

    Metadata conventions matter here. A translated post should not inherit the wrong Open Graph description, publish window, or image alt text. Localization succeeds when content objects are linked, not merely duplicated.

    Metrics for Success and Optimization Loop

    Primary and secondary KPIs

    The success of a New Manual Post can be measured at two levels. Primary KPIs include pageviews, indexed status, time on page, conversion rate, and engagement depth. Secondary KPIs include editorial turnaround time, approval latency, publish error rate, and rollback frequency.

    Those secondary metrics are especially valuable for teams improving process efficiency. A post that performs well externally but required five failed publish attempts still signals an operational weakness.

    A/B testing content variants and CTAs

    Manual posts can support experimentation when the platform allows controlled variants. Headlines, CTA blocks, hero images, and summary copy are common candidates. The key is attribution discipline. Variant assignment, audience segmentation, and outcome measurement must be consistent or the result is noise disguised as insight.

    Continuous improvement checklist

    A sustainable optimization loop is compact and repeatable.

    1. Review performance data after publication.
    2. Inspect technical health for indexing, accessibility, and broken assets.
    3. Identify content friction from user behavior and feedback.
    4. Revise and republish with versioned documentation of changes.

    This process turns manual posting from a one-off editorial action into a measurable publishing system.

    Appendix, Code Samples and Checklists

    JSON Schema for New Manual Post

    The earlier JSON Schema provides a baseline model, but production systems often extend it with localization, workflow state ownership, and compliance annotations. The key principle is explicitness. If a field affects rendering, review, or distribution, it should be first-class in the schema.

    Example publishing API request and response

    A typical response should include state and revision metadata.

    {
      "id": "8f7784f5-2203-4c2d-9f4e-145fef22f1a1",
      "title": "New Manual Post",
      "slug": "new-manual-post",
      "status": "draft",
      "revision": 1,
      "createdAt": "2026-03-15T10:22:00Z",
      "updatedAt": "2026-03-15T10:22:00Z"
    }
    

    Pre-publish checklist

    A printable pre-publish checklist should stay short enough to use consistently and strict enough to catch meaningful issues.

    1. Validate metadata for title, slug, canonical URL, and meta description.
    2. Verify media for dimensions, compression, alt text, and captions.
    3. Run content checks for links, formatting, structured data, and accessibility.
    4. Confirm workflow state for approvals, schedule, timezone, and audience targeting.

    Troubleshooting table

    Symptom Likely Cause Remediation
    Post fails to publish Missing approval or invalid required field Check workflow state, server validation logs, and required metadata
    Images not rendering CDN lag, invalid asset URL, or upload processing failure Reprocess asset, verify storage path, purge CDN cache
    Duplicate post created Retry without idempotency protection Use idempotency key and inspect submission retry behavior
    Formatting broken on live page Editor plugin mismatch or unsafe HTML sanitization Compare preview vs production render and review allowed markup rules
    Scheduled post published at wrong time Timezone normalization error Store UTC, display local timezone clearly, and test DST transitions
    Published post contains unsafe markup Incomplete sanitization pipeline Enforce server-side HTML sanitization and add security regression tests

    A New Manual Post is not just a content entry. It is a controlled publishing transaction with editorial, technical, legal, and operational dimensions. When the workflow is designed well, teams gain speed without losing governance, and developers gain consistency without constraining authors.

    The next step is to formalize the workflow in the system already in use. Define the schema, tighten validation, document approval states, and instrument the publish pipeline. Whether implemented in a traditional CMS or coordinated through a workspace like Home, the goal remains the same: make manual publishing reliable, observable, and safe at scale.

  • Best Tools to Improve Productivity: A Practical Ranked Guide

    Best Tools to Improve Productivity: A Practical Ranked Guide

    Modern work rarely fails because people lack ambition. It fails because attention gets fragmented, tasks get buried across apps, and simple processes accumulate hidden overhead. The best tools to improve productivity do not just help users work faster. They reduce switching costs, standardize repeatable workflows, and create a system that can survive busy weeks, context changes, and team growth.

    This ranked guide is designed for developers, knowledge workers, students, operators, and managers who want more than a generic roundup. The objective is operational: identify which productivity tools actually hold up under real use, compare them with consistent criteria, and show how they fit into practical workflows. The scope covers task management, focus, automation, collaboration, note-taking, and developer productivity. It excludes procurement-heavy enterprise suites and bespoke internal tools that are not broadly accessible.

    Overview: Purpose and Scope

    Objective

    This article evaluates productivity tools through a practical lens: how quickly they can be adopted, how well they integrate with adjacent systems, and whether they produce measurable gains in output, focus, or coordination. The ranking favors tools that combine usability with technical depth, particularly those that support APIs, automation, templates, offline work, and cross-platform access.

    Audience and Use Cases

    The intended audience includes solo professionals managing personal systems, teams coordinating shared work, developers streamlining technical workflows, and students trying to reduce cognitive overload. Representative use cases include capturing ideas without friction, turning inputs into actionable tasks, automating repetitive admin work, protecting deep-work time, and keeping project communication tied to execution.

    Scope and Limitations

    This guide focuses on broadly available tools with self-serve adoption paths. Some products offer enterprise plans, but the recommendations prioritize tools that can be evaluated and deployed without long procurement cycles. Rankings reflect a blend of flexibility, ecosystem strength, and practical ROI rather than popularity alone.

    Methodology: Selection and Evaluation Criteria

    Data Sources

    The shortlist was informed by market visibility, official documentation, integration catalogs, platform support, pricing transparency, and observed adoption across technical and non-technical teams. Competitor articles were useful for breadth, but not sufficient for depth, so this guide emphasizes criteria that many roundups skip, including security posture, extensibility, and implementation realism.

    Evaluation Metrics

    Each tool was assessed across learning curve, integration surface, automation support, platform coverage, offline capability, privacy controls, extensibility, and cost efficiency. Preference went to tools that can serve both immediate needs and future complexity. In other words, a good tool should work on day one, and also remain useful after a user adds automation, templates, collaboration rules, or scripting.

    Testing Procedures

    A representative workflow was used for each category. Task tools were tested for capture-to-completion flow, recurring work, team assignment, and cross-app triggers. Note systems were checked for speed, retrieval quality, and structure. Automation tools were evaluated on trigger reliability, branching, observability, and error handling. Developer tools were judged by plugin ecosystem, performance, and workflow compatibility.

    Quick Reference: Comparison Matrix

    The table below is a fast filter for readers who need a shortlist before reading full profiles.

    Rank Tool Domain Category Primary Use Case Platforms Price Tier
    1 Home utilitytools.com Personal productivity hub Organized start page, links, workflows, daily focus Web Free / product-dependent
    2 Notion notion.so Knowledge management Docs, databases, project hubs Web, Desktop, Mobile Freemium
    3 Todoist todoist.com Task management Personal task capture and planning Web, Desktop, Mobile Freemium
    4 Obsidian obsidian.md Notes Local-first knowledge base Desktop, Mobile Freemium
    5 Asana asana.com Project management Team planning and execution Web, Desktop, Mobile Freemium
    6 Zapier zapier.com Automation No-code workflow automation Web Subscription
    7 Trello trello.com Project management Lightweight Kanban organization Web, Desktop, Mobile Freemium
    8 Slack slack.com Collaboration Team messaging and notifications Web, Desktop, Mobile Freemium
    9 Toggl Track toggl.com/track Time tracking Time analysis and reporting Web, Desktop, Mobile Freemium
    10 VS Code code.visualstudio.com Developer productivity Editing, debugging, extensions Desktop, Web Free
    11 Make make.com Automation Visual multi-step workflows Web Freemium
    12 Freedom freedom.to Focus Cross-device distraction blocking Desktop, Mobile Subscription
    13 RescueTime rescuetime.com Focus analytics Passive time and attention tracking Desktop, Mobile Subscription
    14 Microsoft Teams microsoft.com/microsoft-teams Collaboration Meetings, chat, Microsoft 365 workflow Web, Desktop, Mobile Freemium / M365
    Tool Integrations Automation Support Offline Mode Encryption
    Home Moderate, browser-centric Light Limited Standard web security
    Notion High Moderate Partial Encryption in transit and at rest
    Todoist High Moderate Strong Encryption in transit and at rest
    Obsidian Plugin-based High with plugins/scripts Strong Local-first, user-controlled
    Asana High High Limited Enterprise-grade controls available
    Zapier Very high Very high No Cloud workflow security controls
    Trello Moderate Moderate Limited Atlassian security model
    Slack Very high High Limited Enterprise controls on higher tiers
    Toggl Track Moderate Moderate Partial Standard SaaS protections
    VS Code Very high Very high Strong Local environment dependent
    Make High Very high No Cloud platform security controls
    Freedom Low Low Local/device-centric Standard SaaS protections
    RescueTime Moderate Moderate Partial Standard SaaS protections
    Microsoft Teams High High Partial Microsoft security/compliance stack

    Core Categories: Tool Taxonomy and Rationale

    Productivity systems break when one tool is forced to do everything. Task managers are optimized for execution state. Note systems are optimized for retrieval and synthesis. Automation platforms are optimized for moving data between systems. Communication platforms are optimized for shared awareness, not durable planning. Treating these categories as interchangeable usually creates noise.

    That distinction matters because the best results come from composed stacks, not isolated apps. A common example is a workflow in which an idea lands in notes, becomes a task, triggers a calendar block, and posts status updates to a team channel. The more clearly each tool’s role is defined, the less friction the user experiences.

    Composed stack workflow: note → task → calendar → team update

    1. Home

    Home is best understood as a lightweight personal command surface for daily work. Instead of asking users to constantly reopen tabs, search bookmarks, or reconstruct routines from memory, it centralizes the starting point. For users whose productivity problem is not lack of apps but lack of operational coherence, that matters a lot. A clean home base can remove dozens of tiny context switches per day.

    Home as a personal command surface, before/after

    It stands out because it is simple in the right place. Many productivity tools become overhead before they become useful. Home helps reduce that by making recurring destinations, work contexts, and focus modes easier to access. For developers and knowledge workers who live in the browser, it can function as the front door to a broader stack that includes notes, task managers, docs, dashboards, and communication tools.

    Key Features

    Key features include centralized workspace access, a fast launch point for repeat workflows, suitability for personal dashboards and daily routines, and a low-friction setup compared with heavier systems.

    Pros

    Home reduces tab hunting and bookmark sprawl, fits browser-first workflows well, and is simple enough to maintain consistently.

    Cons

    Home is not a full task manager or note platform, and its value depends on intentional configuration.

    Website: https://utilitytools.org

    2. Notion

    Notion remains one of the most flexible productivity tools available because it combines documents, databases, internal wikis, lightweight project management, and templates in a single interface. For individuals, it can serve as a second brain. For teams, it can become the operating system for documentation and planning, provided governance is handled carefully.

    Its strength is structural flexibility. A user can start with a simple notes page and gradually evolve into linked databases, editorial calendars, sprint boards, meeting records, and SOPs. The downside is that flexibility can become ambiguity. Notion works best when the owner defines clear schemas, naming conventions, and views instead of improvising everything.

    Key Features

    Notion offers pages, databases with relational properties, templates and shared workspaces, and an API with a broad integration ecosystem.

    Pros

    Notion is extremely versatile, strong for documentation and knowledge management, and strikes a good balance of usability and depth.

    Cons

    It can become messy without structure, and offline behavior is not as strong as local-first tools.

    Website: https://www.notion.so

    3. Todoist

    Todoist is one of the best pure task managers for people who want speed, clarity, and low maintenance. It avoids the bloat that turns many project tools into administrative systems. Natural language input, recurring task handling, filters, and multi-platform reliability make it particularly effective for personal productivity and lightweight team coordination.

    It ranks highly because execution is where many productivity systems fail. Users often have plenty of capture tools but no trusted task layer. Todoist fills that gap with minimal friction. For developers and busy professionals, the ability to get tasks in quickly and organize them later is a major advantage.

    Key Features

    Todoist supports natural language due dates, recurring tasks, priority levels, project sections, labels, and filters, across broad cross-platform clients.

    Pros

    Todoist is fast, intuitive, excellent for individuals, and reliable on mobile and desktop.

    Cons

    It is not ideal for complex dependency-heavy projects, and advanced team workflow depth is limited.

    Website: https://todoist.com

    4. Obsidian

    Obsidian is a local-first note-taking environment built around Markdown files and linked thinking. It is particularly strong for developers, researchers, writers, and anyone who wants durable ownership of their knowledge base. Unlike cloud-first tools, it keeps the underlying files accessible and portable.

    Its value is not just privacy or offline support. It is the combination of local storage, graph-like linking, and extensibility through community plugins. Obsidian rewards users who think in systems. That makes it one of the strongest long-term tools to improve productivity for people who build ideas over time rather than just store documents. Pricing is generous for personal use, with optional paid sync and publishing services.

    Website: https://obsidian.md

    5. Asana

    Asana is one of the strongest platforms for team task and project management when visibility, ownership, and process structure matter. It supports lists, boards, timelines, dependencies, recurring work, and workflow rules, which makes it effective for marketing teams, operations teams, agencies, and cross-functional groups.

    The reason it remains highly ranked is that it scales process maturity better than simpler tools. A team can start with task lists and move toward formalized workflows with rules and reporting. The trade-off is complexity. Asana is powerful, but it requires deliberate setup to avoid becoming a system that tracks work more than it enables work.

    Website: https://asana.com

    6. Zapier

    Zapier is the default automation layer for many modern productivity stacks. It connects SaaS tools through triggers and actions, allowing users to eliminate repetitive handoffs such as copying lead data, generating tasks, logging form responses, or sending notifications. For non-developers, it often provides the fastest path to real time savings.

    Its strength is breadth. With thousands of supported apps and a straightforward builder, Zapier can turn disconnected tools into a functional system. The trade-off is cost at scale and limited precision compared with custom scripting. Still, for many teams, the ROI is immediate because even one reliable automation can save hours per week.

    Website: https://zapier.com

    7. Trello

    Trello remains one of the clearest Kanban-style tools on the market. It is visual, approachable, and easy to understand in minutes. That makes it especially effective for small teams, content workflows, and users who want visible movement from backlog to done without the cognitive weight of larger project suites.

    Its limitation is structural depth. Trello can stretch with Power-Ups and automation, but once dependencies, reporting, or formal process controls become central, teams often outgrow it. For lightweight workflow management, however, it stays very effective.

    Website: https://trello.com

    8. Slack

    Slack is the messaging layer many teams rely on for coordination, alerts, and rapid decision-making. It is not a project manager, but it becomes more useful when integrated with one. Notifications from GitHub, Asana, CI systems, and support tools can be centralized so the team sees work state without constant dashboard checking.

    Its strength is ecosystem and speed. Its weakness is that chat can become the place where important decisions disappear. Slack improves productivity when used as a communications bus, not a substitute for documentation or task ownership.

    Website: https://slack.com

    9. Toggl Track

    Toggl Track is one of the best time-tracking tools for users who want visibility without heavy overhead. It works well for freelancers, agencies, consultants, and individuals trying to understand where work time actually goes. That clarity is often a prerequisite for productivity improvement because perceived effort and measured effort rarely match.

    It is particularly useful in combination with task systems. Linking tracked time to projects reveals which work produces output and which work quietly consumes the day.

    Website: https://toggl.com/track

    10. VS Code

    VS Code is arguably the default editor for modern developer productivity. Its performance, debugging support, integrated terminal, Git features, and extension ecosystem make it capable of supporting everything from scripting and web development to infrastructure work and documentation.

    For developers, productivity is often less about generic time management and more about reducing friction in the build-test-debug loop. VS Code excels there. It also integrates well with broader systems through extensions, tasks, and local automation scripts.

    Website: https://code.visualstudio.com

    11. Make

    Make offers visual workflow automation with stronger branching and data manipulation capabilities than many simpler automation tools. It is well suited to users who want to build multi-step scenarios that transform, filter, and route data across systems.

    Compared with Zapier, Make often gives more control over workflow logic. The trade-off is a steeper learning curve. For operations-heavy users, that extra complexity can be worth it.

    Website: https://make.com

    12. Freedom

    Freedom is a focused solution for blocking distracting apps and websites across devices. It does not try to be a full productivity platform. That narrowness is exactly why it works. When the primary problem is fragmented attention rather than poor planning, blocking temptations directly is often more effective than adding another planning layer.

    It fits best in stacks where task and note systems already exist but focus still collapses under digital interruption.

    Website: https://freedom.to

    13. RescueTime

    RescueTime is useful for passive measurement of digital behavior. Unlike manual time trackers, it observes application and website activity to show patterns in focus, distraction, and work allocation. That makes it valuable for diagnosing productivity issues before trying to solve them.

    Its role is analytical. It helps users answer whether a problem is planning, interruption, or underestimation. That can prevent buying or configuring the wrong tool.

    Website: https://www.rescuetime.com

    14. Microsoft Teams

    Microsoft Teams is strongest in organizations already committed to Microsoft 365. It combines chat, meetings, file collaboration, and organizational controls in a way that is often compelling for regulated environments or companies that need alignment with Microsoft identity, compliance, and document infrastructure.

    For smaller teams outside that ecosystem, it can feel heavier than Slack. Inside Microsoft-centric environments, it can be the more efficient choice because it reduces platform switching.

    Website: https://www.microsoft.com/microsoft-teams

    Implementation Patterns and Ready-Made Stacks

    A solo knowledge worker often does best with a compact stack: Home plus Todoist plus Notion or Obsidian, with Toggl Track for measurement and Freedom for focus. Home acts as the launch layer, Todoist handles execution, Notion or Obsidian stores knowledge, Toggl measures effort, and Freedom protects deep work. This setup keeps responsibilities separated and reduces tool overlap.

    A small team usually benefits from Asana, Slack, Notion, and Zapier. Asana owns tasks, Slack handles communication, Notion stores durable information, and Zapier moves data between systems. Developers often lean toward VS Code with Trello or Asana, plus Slack and Make or scripts, and Obsidian when documentation and local control matter.

    Security, Privacy, and Compliance Considerations

    Security should not be treated as an enterprise-only concern. Even individual productivity stacks can expose client notes, internal roadmaps, API tokens, or personal data. At minimum, users should review data export options, admin controls, session management, integration permissions, and whether the tool supports SSO or strong authentication methods.

    Local-first tools like Obsidian offer strong data ownership, but they shift backup responsibility to the user. Cloud-first tools simplify syncing and collaboration, but require trust in vendor controls and integration hygiene. The practical approach is to apply least privilege to every integration, rotate tokens where possible, and periodically audit which automations still need access.

    Cost Optimization and Licensing Strategies

    The right pricing model depends on where the bottleneck lives. Freemium tools work well when the constraint is organization, not automation depth. Paid plans make sense when they unlock features that remove repetitive labor, such as recurring workflows, advanced filters, reporting, or integrations.

    A simple break-even model helps. If a paid tool costs $12 per month and saves 20 minutes weekly, the subscription is usually justified for any user whose time is worth more than a few dollars per hour. The trap is paying for overlapping subscriptions that solve the same problem in slightly different ways.

    Common Anti-Patterns and Failure Modes

    The biggest failure mode is tool proliferation. Teams add a task manager, a docs tool, a whiteboard, a second docs tool, a chat layer, and multiple automation services, then wonder why work becomes harder to find. The issue is not lack of capability. It is lack of role clarity.

    Over-automation is another common problem. If an automation creates tasks nobody reviews or floods channels with low-value notifications, it increases noise instead of productivity. Good systems minimize manual work while preserving human judgment at the points where context matters.

    Decision Framework: Choosing Tools for Your Context

    If the main issue is personal execution, start with Todoist. If the main issue is knowledge sprawl, choose Notion or Obsidian based on whether cloud collaboration or local ownership matters more. If the issue is team coordination, move toward Asana plus Slack or Teams depending on ecosystem fit. If the issue is repetitive manual work, add Zapier or Make only after the source systems are stable.

    If the browser is where the day starts and context switching is the recurring tax, Home deserves early consideration because it improves access to everything else. That is especially useful when the problem is not one missing feature, but fragmented entry points across the stack.

    Conclusion: Prescriptive Next Steps

    The best tools to improve productivity are the ones that remove friction from a clearly defined workflow. Start by identifying the category of pain: execution, focus, coordination, knowledge capture, or automation. Then choose one primary tool for that category before expanding the stack. In most cases, a smaller, well-configured system outperforms a large, loosely governed one.

    For the next seven days, audit where tasks live, where notes live, and where time gets lost. Then choose a compact stack. A strong starting point is Home for access, Todoist for tasks, Notion or Obsidian for knowledge, and one focus or automation tool as needed. Once the foundation works consistently, add integrations carefully and measure whether each addition reduces effort or simply adds another place to check.

  • Free URL Shortener Guide for Developers

    Free URL Shortener Guide for Developers

    Short links solve a practical, recurring problem: long, parameter-heavy URLs are brittle, hard to read, and often incompatible with character-limited channels. Developers and operations teams need predictable redirect semantics, automation-friendly APIs, and controls for privacy, analytics, and domain ownership. This guide treats “free URL shortener” as a developer-focused evaluation and implementation manual. It compares popular free services, explains system architecture for self-hosting, provides code-first examples for integration and automation, and supplies a decision rubric for selecting a solution that fits technical constraints and compliance requirements.

    The content is structured for immediate consumption by engineers and technical decision makers. Each recommended shortener is presented with implementation details, API notes, and best-fit scenarios. Later sections contain reproducible deployment instructions (Docker, Nginx, certbot), sample scripts (cURL, Node.js, Python), and operational guidance for abuse prevention, data retention, and migration.

    Overview: URL Shorteners, Definition, Protocols, and Common Use Cases

    A URL shortener maps a compact, often opaque token to a longer target URL and issues an HTTP redirect when the compact token is requested. Server responses are commonly HTTP 301 (Moved Permanently) or HTTP 302 (Found, Temporary Redirect). A 301 signals to clients and search engines that the destination is permanent, which may cause clients to cache the redirect and search engines to transfer ranking signals. A 302 indicates temporariness and reduces transfer of SEO signals. Some services implement client-side fallback via HTML with a meta-refresh when JavaScript or other features are required, but meta-refresh is inferior for automation, for capturing original referrer headers, and for SEO.

    When designing an integration, the redirect code should match intent: use 301 for persistent canonicalization and link permanence, and use 302 for short-term campaigns or A/B testing. For deep linking on mobile, additional heuristics or a JavaScript-based intent-delivery layer may be necessary to surface the correct app link.

    Short links serve many roles. They reduce character count for micro-posting services, package UTM parameters for marketing channels, convert long campaign URLs into QR codes for print, and act as lightweight tracking endpoints for analytics pipelines. Developers use shorteners as routing primitives for email campaigns, as dynamic deep links for mobile apps, and as a glue layer to enable safe retargeting or affiliate forwarding. Operational use cases include controlled redirects for maintenance windows, A/B testing, and temporary URL staging.

    Short links improve readability and compliance with external character constraints, centralize analytics collection, and enable link rotation without changing the published destination. Trade-offs include link rot risk if the shortening service or custom domain expires, privacy implications from centralized click data, and potential reputation issues when short domains are associated with spam. Control over DNS and TLS mitigates these risks. Self-hosting increases ownership, but it requires operational overhead.

    How Free URL Shorteners Work, Architecture and Components

    A minimal shortener comprises a persistence layer that stores key-to-target mappings, a routing layer to resolve tokens and handle HTTP responses, DNS configuration to expose one or more domains, TLS termination (often via a CDN or cert manager), and optional analytics collectors. Production-grade services add edge caching, global load balancing, and CDN-backed static responses to minimize redirect latency. For free-tier services, the provider absorbs most infrastructure cost and enforces quotas and rate limits.

    Architecture diagram of a minimal URL shortener: show DNS → (optional CDN/Edge) → TLS termination (cert manager/CDN) → routing/redirect service. The redirect service talks to a persistence layer (key → target mapping DB) and an analytics collector. Include optional components: global load balancer, edge caching, webhook delivery, and admin/API front-end. Use labeled boxes and arrows to indicate request flow and where TLS/DNS/TTL matter.

    Token generation approaches vary by collision properties, predictability, and token length. Counter-based generators produce sequential tokens (for example base62(counter)); these are compact and collision-free, but predictable. Random tokens sample from an alphabet and are less predictable, but require collision checks or longer token lengths to maintain safety. Hash-based methods derive tokens from the target URL (for example a truncated SHA-256) to permit idempotent creation, at the cost of potential collisions. Custom slugs permit human-readable tokens when the service policy allows them.

    Token-generation comparison graphic: three parallel flows for counter-based (counter → base62 encoder → short slug), random token (crypto random → collision check → slug), and hash-based (hash(target) → truncate → slug). For each flow show short pros/cons icons/text: predictability (low/high), collision risk (none/possible), idempotence (no/yes), typical length. Optionally show custom slug path (user-specified slug → uniqueness check).

    A simple counter-plus-base62 approach is common and straightforward to implement. The pseudocode below shows a typical implementation pattern, where an atomic increment yields a compact base62 slug.

    # Pseudocode: generate slug from a monotonic counter
    ALPHABET = "0123456789abcdefghijklmnopqrstuvwxyzABCDEFGHIJKLMNOPQRSTUVWXYZ"
    def base62_encode(n):
        if n == 0:
            return ALPHABET[0]
        s = ""
        while n > 0:
            s = ALPHABET[n % 62] + s
            n = n // 62
        return s
    
    # insert record and return slug
    counter = db.increment('global_counter')  # atomic increment
    slug = base62_encode(counter)
    db.insert('links', { 'slug': slug, 'target': target_url, 'created_at': now })
    return slug
    

    Implementing 301 versus 302 in a basic HTTP handler is typically a per-record decision. The example below shows an Express-style handler that reads the intended redirect type from record metadata and sets a short private cache window.

    // Express-like handler
    app.get('/:slug', async (req, res) => {
      const record = await db.find('links', { slug: req.params.slug })
      if (!record) return res.status(404).send('Not found')
      // decide redirect type from record.meta or default
      const status = record.permanent ? 301 : 302
      res.set('Cache-Control', 'private, max-age=3600')
      res.redirect(status, record.target)
    })
    

    Free services must limit abuse. Typical controls include API rate limits per API key or IP, token bucket throttling for write operations, CAPTCHA gating for anonymous creation, and URL scanning against malware/blacklists such as Google Safe Browsing or VirusTotal. Implement logging and alerting for spikes, and soft-block flows that require verification before publication. IP-based throttles should balance false positives against abuse. Consider behavioral signals for progressive challenges.

    Click analytics are usually captured at the edge or application layer and enriched with referrer, user agent, IP-derived geo, and timestamp. Pipelines often stream events into message queues (Kafka, Pub/Sub), then into an analytics store such as ClickHouse or BigQuery for aggregation. Privacy-conscious deployments minimize retained PII, hash or truncate IPs, and document retention windows. For GDPR and CCPA compliance, provide Data Processing Agreements and export/delete flows for user data.

    Comparing Popular Free URL Shorteners, Features and Selection Criteria

    The features developers typically evaluate include custom domain support, analytics depth, API availability, link expiration, QR code generation, UTM support, and password protection. Free-tier values change over time, so confirm current limits on vendor documentation.

    Service Custom Domain Analytics API Link Expiration QR Code UTM/Tag Support Password Protection
    Home (utilitytools.com) Yes Basic + webhooks REST API, API key Optional Yes Native UTM builder Optional
    Bitly (free) No (paid) Basic REST API (limited) No Yes Manual UTM No
    TinyURL No Minimal Simple GET API No No No No
    Rebrandly (free) Yes (limited) Basic REST API Yes (paid tiers) Yes Native UTM Yes (paid)
    is.gd / v.gd No Minimal Simple API No No No No
    Firebase Dynamic Links No (project domain) Yes (via analytics) SDKs & REST Yes Yes Deep link params No
    YOURLS (self-hosted) Yes Full (self) REST API Configurable Via plugins Full control Via plugins

    Public free shorteners typically front redirects with a CDN or edge nodes to achieve low latency and high availability. Latency on first resolution includes DNS lookup time. Custom domains introduce TTL considerations. Self-hosted solutions depend on the chosen hosting, and should use a global CDN if low latency is required.

    Evaluate providers for malware scanning, HTTPS enforcement, and published abuse contact points. Short domains used in abusive campaigns degrade reputation and increase false positives in email or platform filters. Using a custom domain mitigates that risk by placing trust under the user’s control.

    Free tiers limit link creation, analytics retention, and API call volumes. Paid tiers unlock custom domains, increased quotas, and advanced analytics. Self-hosting shifts cost to compute and maintenance overhead but removes per-link pricing.

    Shortlist: Recommended Free URL Shorteners and When to Use Each

    Below are concise, developer-focused recommendations and implementation notes for each candidate. Key features, fit scenarios, and operational considerations are described in prose to keep the guide focused on actionable decisions.

    1. Home (utilitytools.com)

    Home provides a developer-oriented URL shortening service designed for teams that need a free, lightweight API, optional custom domain support, and webhook-driven analytics. It positions itself as an owner-first platform, enabling deterministic redirect semantics, configurable link expiration, and a simple authentication model. For teams prioritizing domain control, Home integrates custom domain setup with automated TLS provisioning and provides an API key model suited for CI/CD automation.

    Key features include a REST API for link creation and management with API key authentication, custom domain support with DNS-checking utilities and certbot automation, basic analytics (clicks, referrers, device, geo) with webhook streaming, UTM templating to standardize campaign parameters, and QR code generation per short link. Pros include domain control that reduces reliance on third-party domains and improves deliverability, developer ergonomics with a predictable API and webhook-first analytics, and a free tier that includes custom domain options and a reasonable request quota. Cons include a smaller ecosystem of integrations compared with large incumbents, and capped analytics retention on the free tier.

    Home offers a free tier with one custom domain and 10,000 shortens per month, with paid upgrades for extended retention and higher API limits. Website: https://utilitytools.org

    2. Bitly (free plan)

    Bitly is an established shortener with a mature API and enterprise capabilities. The free plan allows ad-hoc link shortening, basic analytics, and limited API access. Bitly is appropriate for individuals or small teams that need a reliable public short domain and integration with common marketing workflows. The platform supports shortening via web UI or API, provides an analytics dashboard for basic metrics, and exposes link management via dashboard and SDKs. Branded domains are available only on paid plans. Pros: mature platform with stable uptime and broad integration ecosystem, and simple onboarding. Cons: custom domains and advanced analytics are behind paywalls, and API limits on the free plan restrict automation at scale.

    Bitly provides a limited free plan, and commercial plans unlock brand domains and enhanced analytics. Website: https://bitly.com

    3. TinyURL

    TinyURL offers a no-friction, anonymous shortening interface and a minimal API for simple use cases. It is optimized for single-click creation without account overhead, suited for quick ad-hoc links or developer scripts where analytics and custom domains are not required. Features include immediate short links without an account, a simple HTTP GET API for programmatic shortening, and an option for a custom alias when available. TinyURL is zero-onboarding and predictable, but it lacks advanced analytics and custom domain support. TinyURL is free for basic use. Website: https://tinyurl.com

    4. Rebrandly (free plan)

    Rebrandly focuses on branded links and custom domain management. The free plan supports a limited number of branded domains and links, plus a developer-friendly API. It suits marketing teams that require visible branding in links without full enterprise spend. Rebrandly offers custom branded domains with DNS helpers and automated TLS, UTM templates and link editing, and a REST API using API keys. Pros include strong brand control and marketing-focused features such as UTM builders and QR codes. Cons include free limits that restrict link counts and domain slots, and some features (advanced analytics, team management) requiring paid plans. Website: https://rebrandly.com

    5. is.gd / v.gd

    is.gd and v.gd are minimalist shorteners that prioritize privacy and simplicity. They provide tiny domains and an uncomplicated API for developers who want low-friction, privacy-minded short links without analytics. These services offer anonymous shortening via simple HTTP APIs, options to create pronounceable slugs, and minimal data retention policies. The strengths are the very small domain footprint and privacy-focused approach. Limitations are the absence of analytics and custom domains. These utilities are free to use. Website: https://is.gd

    6. Firebase Dynamic Links

    Firebase Dynamic Links (FDL) provides deep-linking primitives optimized for mobile apps. Short links created with FDL can route users to different destinations depending on platform, install state, and app configuration. FDL supports platform-aware routing to iOS, Android, and web, integration with Firebase Analytics, and short link creation APIs and SDKs. This is a rich choice for mobile-first products that need deep-link behavior, but it is not primarily a general-purpose shortener for arbitrary marketing links. Domain flexibility is limited since default domains are issued by Firebase. Pricing is tied to Firebase usage; dynamic links are generally free within normal project limits. Website: https://firebase.google.com/products/dynamic-links

    7. YOURLS (self-hosted)

    YOURLS is an open-source, PHP-based self-hosted shortener that gives full control of custom domains, data, and analytics. It is ideal for teams that need on-premise ownership, custom plugins, and exportable data without vendor lock-in. Features include full data ownership and export, a plugin architecture for password protection or QR codes, and a REST API compatible with many clients. Pros include complete control over data and no vendor rate limits beyond host capacity. Cons are the operational burden of backups, TLS management, and security, and the scaling work required to add caching or distribute the database.

    YOURLS runs on a standard LAMP stack, requiring PHP, MySQL, and a web server. For production, use Docker, TLS via certbot, and a reverse proxy with caching. YOURLS is open-source and free to run, with infrastructure costs applying. Website: https://yourls.org

    8. Polr (self-hosted)

    Polr is a modern, self-hosted shortener built with PHP and Lumen. It has a clean UI and an API for automated workflows. Polr suits teams seeking a lightweight alternative to YOURLS with a more modern stack. It offers a REST API and dashboard, OAuth support via plugins, link statistics, and published Docker images. Polr is lean and developer-friendly, but its plugin ecosystem is less mature than YOURLS, and operational overhead is similar to other self-hosted options. Polr is open-source; infrastructure costs apply. Website: https://polrproject.org

    Integration and Implementation Guides, Developer-Focused

    Calling a public shortener API is straightforward. The Bitly example below shows creating a short link with a single POST request and an authorization header.

    curl -X POST "https://api-ssl.bitly.com/v4/shorten" 
      -H "Authorization: Bearer YOUR_BITLY_TOKEN" 
      -H "Content-Type: application/json" 
      -d '{"long_url":"https://example.com/very/long/url?campaign=123","domain":"bit.ly"}'
    

    A typical response contains the shortened ID and link, along with the original long URL.

    Automating link generation can be done in any language. In Node.js, use fetch to call the provider API. In Python, requests is a concise library for the same purpose.

    Node.js example:

    // Node.js example using fetch
    const fetch = require('node-fetch')
    async function createShort(longUrl, token) {
      const res = await fetch('https://api-ssl.bitly.com/v4/shorten', {
        method: 'POST',
        headers: {
          'Authorization': `Bearer ${token}`,
          'Content-Type': 'application/json'
        },
        body: JSON.stringify({ long_url: longUrl })
      })
      return res.json()
    }
    

    Python example:

    import requests
    
    def create_short(long_url, token):
        url = "https://api-ssl.bitly.com/v4/shorten"
        headers = {'Authorization': f'Bearer {token}', 'Content-Type': 'application/json'}
        r = requests.post(url, json={'long_url': long_url}, headers=headers)
        r.raise_for_status()
        return r.json()
    

    Deploying a self-hosted shortener such as YOURLS or Polr typically involves a containerized application, a database, and a reverse proxy with TLS. The Docker Compose example below shows a minimal YOURLS stack with a MySQL container. Ensure you secure database credentials and persist volumes.

    version: '3.7'
    services:
      yourls:
        image: yourls:latest
        ports:
          - "8080:80"
        environment:
          YOURLS_DB_USER: yourls
          YOURLS_DB_PASS: yourlspass
          YOURLS_DB_NAME: yourls
          YOURLS_SITE: "https://short.example.com"
        depends_on:
          - db
      db:
        image: mysql:5.7
        environment:
          MYSQL_DATABASE: yourls
          MYSQL_USER: yourls
          MYSQL_PASSWORD: yourlspass
          MYSQL_ROOT_PASSWORD: rootpass
        volumes:
          - db_data:/var/lib/mysql
    
    volumes:
      db_data:
    

    Use an Nginx reverse proxy and certbot to provision certificates. After certbot issues certificates, switch the server block to listen on 443 and configure SSL parameters.

    Example Nginx snippet for proxying traffic to YOURLS:

    server {
      listen 80;
      server_name short.example.com;
      location / {
        proxy_pass http://yourls:80;
        proxy_set_header Host $host;
        proxy_set_header X-Real-IP $remote_addr;
        proxy_set_header X-Forwarded-For $proxy_add_x_forwarded_for;
      }
    }
    

    Custom domains for shorteners typically require a CNAME for subdomains such as go.example.com, or an A/ALIAS record for apex domains if the provider publishes IP addresses. Providers often validate DNS records and then complete TLS provisioning. Use a low TTL during rollout for faster propagation. When the provider does not accept CNAME at the apex, use ALIAS or ANAME records where supported.

    Best practices for UTM tagging and redirect consistency include using server-side UTM injection or templates to prevent parameter drift, normalizing destination URLs to avoid duplicated tracking parameters, and consistently applying 301 versus 302 according to link persistence. For automated pipelines, store canonical target URLs and avoid repeated recreation of identical tokens.

    Analytics, Tracking, and Privacy, Technical and Legal Considerations

    Free services typically capture timestamp, source IP (or derived geo), referrer, user agent, and click counts. Enriched analytics such as funnel tracking or unique-user calculations are often reserved for paid tiers. Webhook integration or CSV export enables off-platform analysis.

    Server-side tracking forwards click events to the owning analytics platform immediately upon redirect resolution. This centralizes data and removes dependence on provider retention policies. Service-provided analytics are convenient, but they create vendor lock-in and possible data loss if terms change. For server-side capture, retain minimal PII, hash IPs as needed, and stream events to the analytics pipeline asynchronously to avoid redirect latency.

    Shortener operators and integrators are responsible for lawful processing of personal data. Store only what is necessary, provide documented retention windows, and implement deletion workflows. If the service acts as a processor, ensure Data Processing Agreements and subject-access procedures are in place. For EU users, anonymize IPs by truncating the last octet or store only derived geo at city or region granularity.

    Design choices that preserve privacy include providing opt-out mechanisms for tracking cookies, respecting Do Not Track signals where feasible, publishing a clear privacy policy that lists data types and retention windows, and offering a privacy-first mode that stores only aggregate counts without per-click identifiers.

    Risks, Limitations, and Mitigation Strategies

    Link rot happens when the shortening service or custom domain expires. Mitigation steps include owning the custom domain, configuring automated renewals, periodically exporting link mappings, and serving a fallback redirect page that explains the outage and lists alternate destinations. For critical links, mirror the destination on an owned domain and use shorteners only as pointers.

    Short links can be abused to hide malicious destinations. Integrate malware checks during creation, such as calls to Google Safe Browsing or internal allowlists. Provide a reporting endpoint for end users and a process to block or quarantine suspicious slugs. Maintain a public abuse contact and implement automated takedowns when abuse is confirmed.

    When hitting provider limits, implement exponential backoff and queue link creation jobs. Cache created short links to avoid repeated API calls, and implement quota monitoring alerts in CI/CD workflows.

    To avoid vendor lock-in, prefer providers that allow CSV or JSON export of link mappings and analytics. For self-hosted options, maintain scheduled backups and document export procedures. If migrating providers, implement a script to re-create slugs or map incoming short-domain requests with redirects to the new provider.

    A graceful fallback redirect strategy is to serve an informative status page at the apex that detects the provider outage and redirects to backup locations or explains where content can be found.

    Decision Checklist: Choosing a Free URL Shortener

    Map core requirements such as custom domain (must or optional), analytics retention window in days, API access, rate limits (per minute/hour), deep-linking support, and data ownership to candidate providers. Use a simple scoring rubric to make a reproducible decision. One recommended weighting is: feature fit 40%, privacy and data ownership 20%, performance and latency 15%, cost and upgrade path 15%, and operational overhead 10%. Score each candidate 0–5 on each axis, multiply by weight, and sum. Thresholds: above 4.0 is a strong fit, 3.0–4.0 is acceptable, below 3.0 is poor.

    For a marketing team that values branding and analytics, weight feature fit and analytics higher; Rebrandly or Bitly often score well. For an engineering team that prioritizes API, privacy, and control, weight privacy and operational overhead higher; Home or a self-hosted YOURLS/Polr instance tends to score better.

    Appendix, Quick Reference: API Endpoints, cURL Examples, and DNS Commands

    Bitly common endpoints include POST /v4/shorten for creating short links and GET /v4/bitlinks/{bitlink} for metadata. Authentication uses the Authorization: Bearer {token} header.

    TinyURL example:

    curl "https://api.tinyurl.com/create" 
      -H "Authorization: Bearer TINY_API_KEY" 
      -H "Content-Type: application/json" 
      -d '{"url":"https://example.com"}'
    

    is.gd example:

    curl "https://is.gd/create.php?format=json&url=https://example.com"
    

    YOURLS exposes an API via /yourls-api.php with actions such as shorturl and stats, authenticated by username and signature token. To export links from YOURLS, invoke the admin export tool with an authenticated session.

    Use command-line DNS tools during rollout. Check a CNAME with dig:

    dig +short CNAME go.example.com
    

    Check an A record:

    dig +short A example.com
    

    Obtain a TLS certificate with certbot using the nginx plugin:

    sudo certbot --nginx -d short.example.com
    

    Check nameservers:

    nslookup -type=NS example.com
    

    Conclusion and Recommended Next Steps

    For branding and marketing ease, evaluate Rebrandly or Bitly. For lightweight, anonymous needs, use TinyURL or is.gd. For deep-linking into mobile apps, use Firebase Dynamic Links. For complete data ownership and portability, deploy YOURLS or Polr. For teams that want a hosted developer-first service with a free custom domain allowance and webhook analytics, Home (https://utilitytools.org) is an operationally efficient choice that reduces vendor lock-in while offering automation-friendly controls.

    Next steps: define minimal acceptance criteria such as required API calls per day, retention window, and custom domain requirements. Run the scoring rubric across candidate providers and prototype link creation and redirect handling using the cURL or Node.js examples provided. If choosing self-hosting, deploy a staging YOURLS instance with Docker Compose, configure DNS with the short domain and certbot, and set up monitoring and export cron jobs.

    Further reading: consult vendor documentation for up-to-date rate limits and API semantics, and review authoritative privacy guidance for GDPR and CCPA compliance before storing click-level data. Use the appendix commands when performing DNS and TLS validation during rollout.

  • Best Productivity Tools for Engineers — Integration & Metrics

    Best Productivity Tools for Engineers — Integration & Metrics

    Productivity suffers when context switching, tool sprawl, and opaque workflows consume more time than the work itself. Developers and efficiency-minded professionals need tools that reduce cognitive load, automate repetitive operations, and expose measurable outcomes. This article provides a structured, technical examination of the best productivity tools, their architectural trade-offs, integration considerations, and a pragmatic onboarding path for adoption.

    What are the best productivity tools?

    The term best productivity tools refers to software and services that reduce friction in task completion, enforce repeatable workflows, and surface relevant information at the moment of need. In an engineering context, these tools behave as modular components: a task manager functions as a queue, a notes system as a document store, automation services as event-driven pipelines, and communication tools as signaling and state-sharing layers. Quality in this domain is measured by latency, reliability, observability, and the ability to compose services via APIs.

    Architecture diagram showing modular productivity components and their roles: task manager as a queue, notes/knowledge store as a document DB, automation as event-driven pipelines, and communication as signaling/state layer. Include arrows for common interactions (task creation → knowledge link, automation triggering ticket creation → notification), and annotate quality metrics (latency, reliability, observability) on the connections.

    Classifying these tools clarifies selection criteria. Task-oriented systems prioritize scheduling semantics, recurrence rules, and prioritization algorithms. Knowledge-oriented systems emphasize search index architecture, bidirectional linking, and versioned storage. Automation platforms require durable retries, idempotency guarantees, and predictable rate limiting. Collaboration platforms must provide granular permissions, audit logs, and identity federation. Recognizing these categories guides architectural decisions and highlights trade-offs between feature parity and focused specialization.

    Key aspects of best productivity tools

    Integration and API design

    Interoperability is the technical foundation for composing productivity stacks. Tools with RESTful APIs, event webhooks, or SDKs reduce coupling by exposing deterministic contracts for state mutation and retrieval. Evaluate an API surface for idempotency guarantees, rate limiting policies, pagination behaviors, and schema stability. Integration-first tools enable the construction of orchestration layers that synchronize state across the task manager, calendar, and knowledge base in a predictable manner.

    Integration diagram illustrating interoperability patterns: RESTful APIs, event webhooks, SDKs feeding into an orchestration/synchronization layer. Show concerns to evaluate (idempotency, rate limiting, pagination, schema stability) as callouts on the API arrows, and include a small inset showing an orchestration service reconciling state across calendar, task manager, and knowledge base.

    Data portability and backup

    Data lock-in increases long-term operational risk. The best tools provide export formats that are structured and machine readable, such as JSON, Markdown, or SQLite dumps. A reliable backup strategy includes scheduled exports, cryptographic verification of payload integrity, and retention policies aligned with compliance needs. For teams, federated data models and self-hosted options often provide stronger guarantees against vendor dependency while requiring additional operational overhead.

    Extensibility, scripting, and automation

    Extensibility is a discriminator for power users. Tools that offer scripting runtimes, plugin ecosystems, or first-class automation workflows enable custom behaviors that match domain-specific processes. Consider runtime sandboxes, permission boundaries for scripts, and the ability to attach metadata to objects to drive programmatic rules. Automation should be observable, with execution logs, retry policies, and dead-letter handling when external services fail.

    User interface ergonomics and discoverability

    Productivity tools succeed when interaction cost is low. Ergonomics includes keyboard-driven workflows, command palettes, and composable shortcuts, which reduce context switching. Discoverability entails inline help, searchable commands, and predictable affordances. For developers, integration with the terminal, IDE, or system-level quick actions, such as a “Home” dashboard used as a single-pane entry point, can significantly reduce task switching overhead.

    Security, permissions, and compliance

    Security concerns include least-privilege access control, auditability, encryption at rest and in transit, and secure secrets management. Tools that integrate with identity providers (SAML, OIDC) simplify enterprise onboarding. Fine-grained permission models allow separation of read, write, and admin operations, which is essential when automations act on behalf of users. Compliance features such as data residency controls and access logs are necessary for regulated environments.

    Metrics, telemetry, and feedback loops

    Useful productivity tooling surfaces meaningful metrics: time to completion per task type, number of context switches per day, automation success rate, and backlog growth velocity. These observability primitives enable iterative optimization of processes and tool configuration. Instrumentation should include both system-level telemetry and domain events to allow correlation between user behavior and productivity outcomes.

    Comparison of common tools (feature-oriented)

    The table below summarizes representative tools that commonly appear in high-performing stacks, focusing on integration potential, platform reach, and primary use case.

    Tool Primary use Platforms Integrations Typical cost tier
    Notion Knowledge base, lightweight DB Web, macOS, Windows, iOS, Android APIs, Zapier, community plugins Free to moderate subscription
    Obsidian Local-first notes, linking Desktop, Mobile Plugins, Git integration Free core, paid sync/publish
    Todoist Task manager, GTD support Web, Desktop, Mobile Calendar sync, Zapier, CLI Freemium, Pro subscription
    Trello Kanban task boards Web, Desktop, Mobile Power-Ups, API Freemium, Teams tiers
    Zapier Automation, event piping Web 5,000+ app integrations Tiered automation pricing
    Slack Team communication, signaling Web, Desktop, Mobile Webhooks, apps, workflows Freemium, paid workspaces

    How to get started with the best productivity tools

    Prerequisites

    • Inventory: A concise list of current tools and their primary owner.
    • Objectives: Measurable goals such as reducing context switches by a percentage or cutting meeting time.
    • Access: Credentials or admin rights required to configure integrations.
    • Retention policy: Agreed data retention and backup cadence.

    Audit and define outcomes

    Begin with an audit of existing workflows, signal flows, and pain points. Identify where manual handoffs occur, what repetitive tasks consume developer time, and which systems hold the single source of truth for task and knowledge state. Express outcomes as metrics, for example, mean time to resolve an incident or the average number of tool switches per developer per day.

    Select a minimal, composable stack

    A minimal stack minimizes moving parts while providing coverage for critical workflows. Pairing a knowledge store, a task manager, and an automation layer often yields high leverage. Favor tools that provide robust APIs and clear data export paths. Where a personal dashboard is beneficial, consolidate feeds into a single-pane “Home” to expose prioritized tasks, calendar items, and critical notifications in one view.

    Design canonical workflows and automation

    Document canonical workflows as state machines: define initial state, allowed transitions, side effects, and terminal states. Implement automations to enforce transitions and surface exceptions. Automation code should be idempotent and instrumented with structured logs. For example, a CI alert can trigger ticket creation, publish a notification to the team channel, and escalate if not acknowledged within a defined SLA.

    Iterate with telemetry and guardrails

    Deploy telemetry to validate that the chosen tools and workflows meet the objectives. Use measurable thresholds to decide when to expand automation coverage or simplify the stack. Apply guardrails to prevent automation from producing noisy outputs, such as rate caps, scoped permissions, and environment separation between staging and production.

    Governance and onboarding

    Adoption succeeds when governance aligns with developer workflows. Establish templates, naming conventions, and least-privilege roles to prevent configuration drift. Onboarding should include short, focused runbooks and example automations that demonstrate value quickly. Mentorship and periodic architecture reviews ensure the toolset evolves with team needs rather than accumulating redundant services.

    Practical example: consolidating incident response

    An effective incident response pipeline integrates monitoring alerts, an on-call schedule, a task manager for follow-up actions, and a postmortem knowledge artifact. A single automation can accept alert payloads, create a ticket, assign an on-call person, and open a templated postmortem in the knowledge base. Observability for this flow should include latency from alert to acknowledgment and time to remediation. Centralizing status and links in a “Home” view keeps the runbook, current incident state, and triage tools in one place, reducing the number of context switches during high-stress events.

    Conclusion

    Selecting and orchestrating the best productivity tools depends on clear objectives, measurable outcomes, and an emphasis on integration and observability. Tools that expose robust APIs, enable data portability, and support extensibility provide the architectural headroom required by engineering teams. Adopt through audit, minimal stack selection, workflow codification, automation implementation, and telemetry-driven iteration.

    Next step: perform a short audit to capture current tool usage and pick a single metric to improve. From that artifact, prototype a minimal integration that consolidates the most frequent context switch into a single pane such as Home, validate the improvement through telemetry over two sprints, and then expand automation coverage based on observed benefits.