JNTZN

Tag: audio conversion

  • How to Convert MP3 Files to AIFF — Fast, Lossless Guide

    How to Convert MP3 Files to AIFF — Fast, Lossless Guide

    If you need to convert an MP3 to an AIFF, you are probably not chasing better sound by magic. You are trying to solve a workflow problem. Maybe your editor prefers AIFF, your mastering chain expects uncompressed audio, or an older studio tool refuses to play nicely with MP3 files.

    That is where this guide helps. Converting an MP3 to an AIFF file is easy on Windows, macOS, and Linux, and you can do it with free tools in just a few minutes.

    The important part is understanding what this conversion does, what it does not do, and which settings make sense for your actual use case.

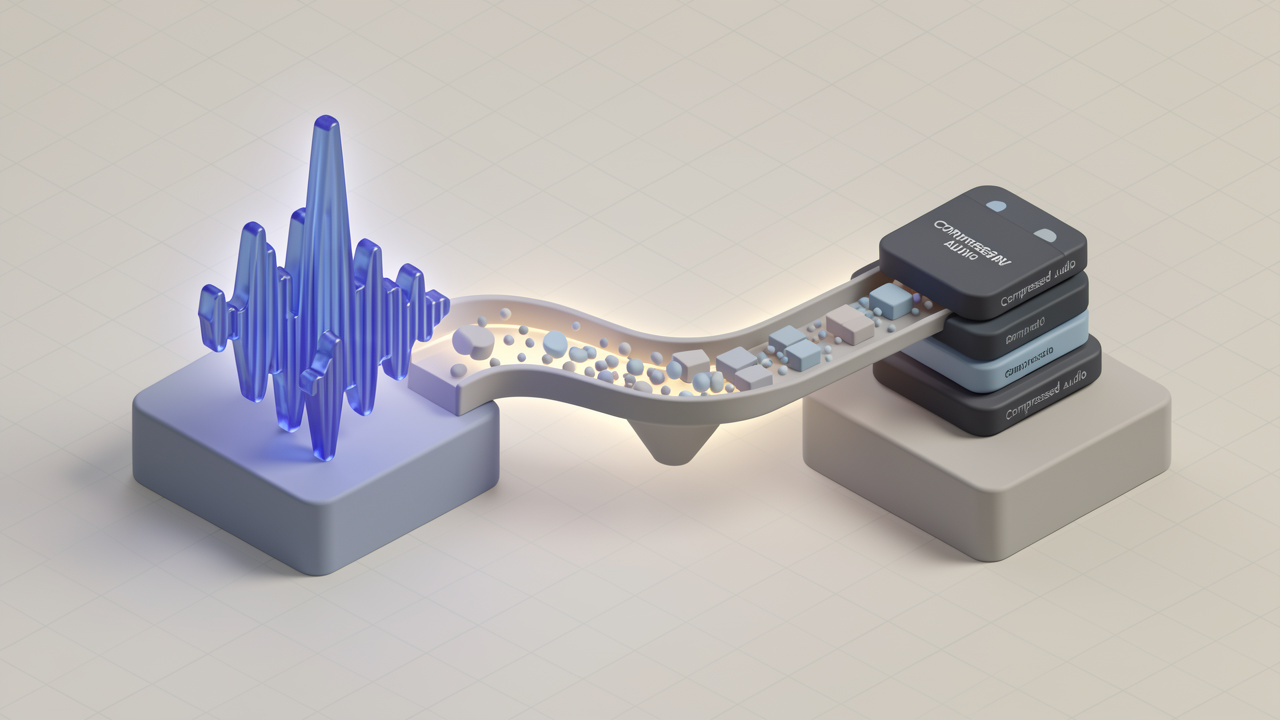
    A quick reality check matters here. Turning an MP3 into AIFF does not restore lost detail. MP3 is a lossy format, which means some audio data was discarded when the file was originally compressed. AIFF can preserve what remains without adding new loss, but it cannot rebuild what is already gone. Still, for editing, compatibility, and production workflows, converting MP3 files to AIFF can be the right move.

    What Is MP3 and What Is AIFF?

    MP3: a quick overview

    MP3 is one of the most widely used audio formats ever created. Its main advantage is file size, and it uses lossy compression, which reduces the amount of audio data by removing sounds that are considered less noticeable to human hearing.

    That compression is what made MP3 perfect for portable players, downloads, email attachments, and streaming-era convenience. A three-minute song in MP3 format might only take a few megabytes, while the same audio in an uncompressed format can be many times larger.

    The tradeoff is quality. At high bitrates, an MP3 can sound very good, even transparent for casual listening, but it is still a compressed format, and once the data has been removed, it is gone.

    AIFF: a quick overview

    AIFF, short for Audio Interchange File Format, is an audio container developed by Apple. It typically stores uncompressed PCM audio, similar in quality and structure to WAV. Because it is uncompressed, AIFF preserves the audio exactly as stored, without additional quality loss during conversion or editing.

    AIFF is common in music production, audio editing, mastering, broadcast workflows, and legacy Mac-based environments. Many professional audio tools support it well, especially in Apple-centric studios.

    A useful way to think about AIFF is this: MP3 is optimized for convenience, while AIFF is optimized for fidelity and workflow stability.
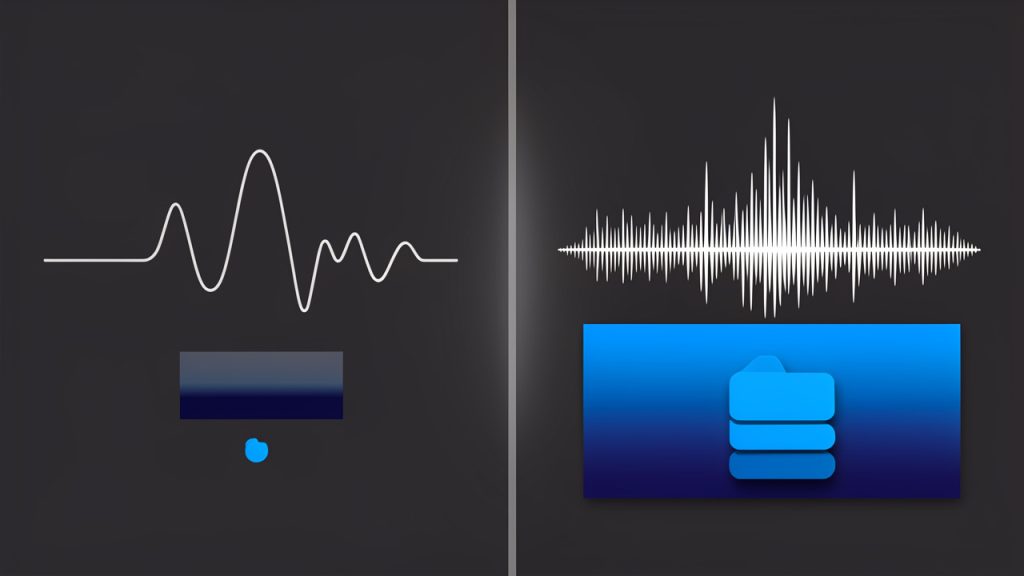
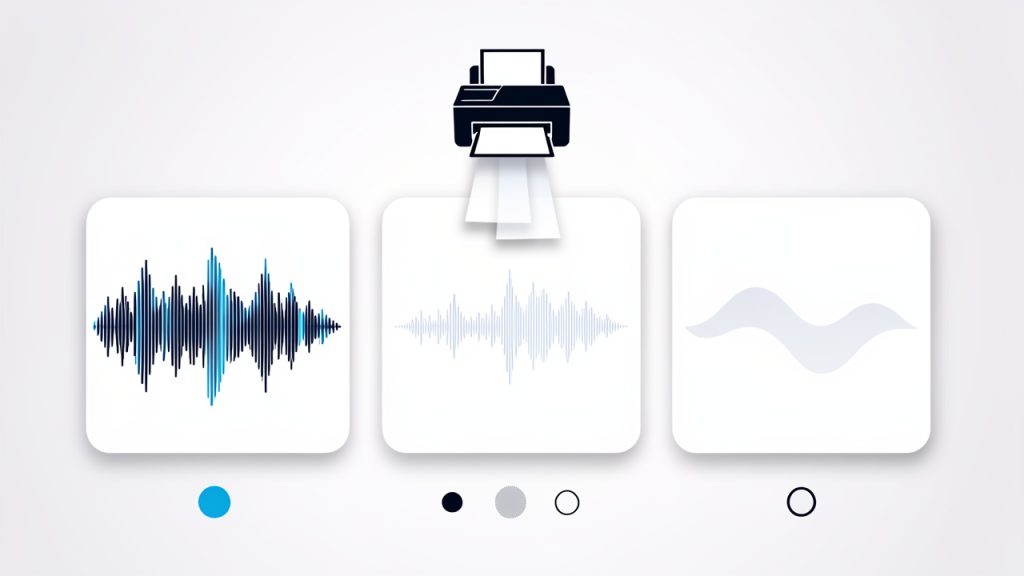
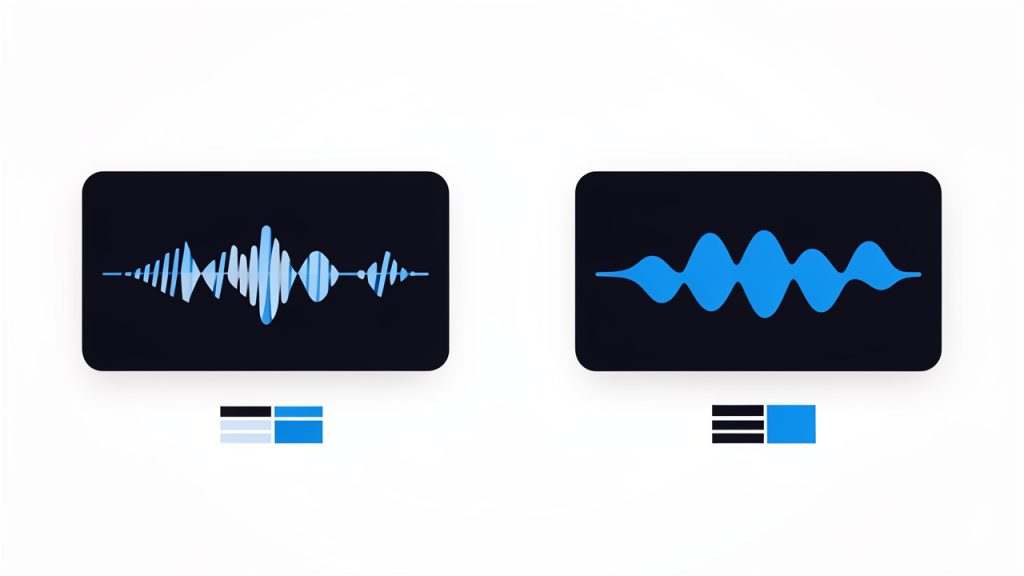
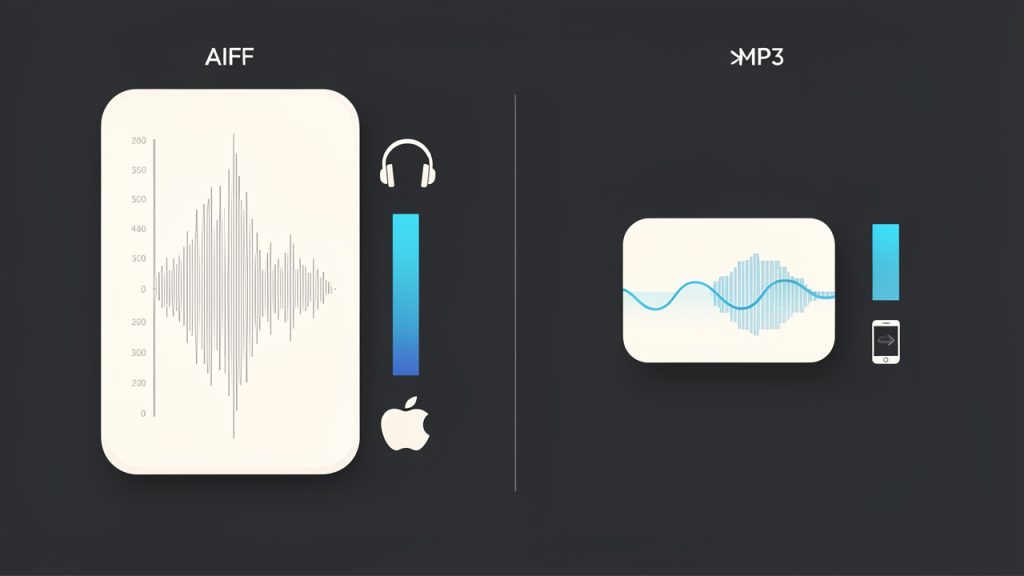
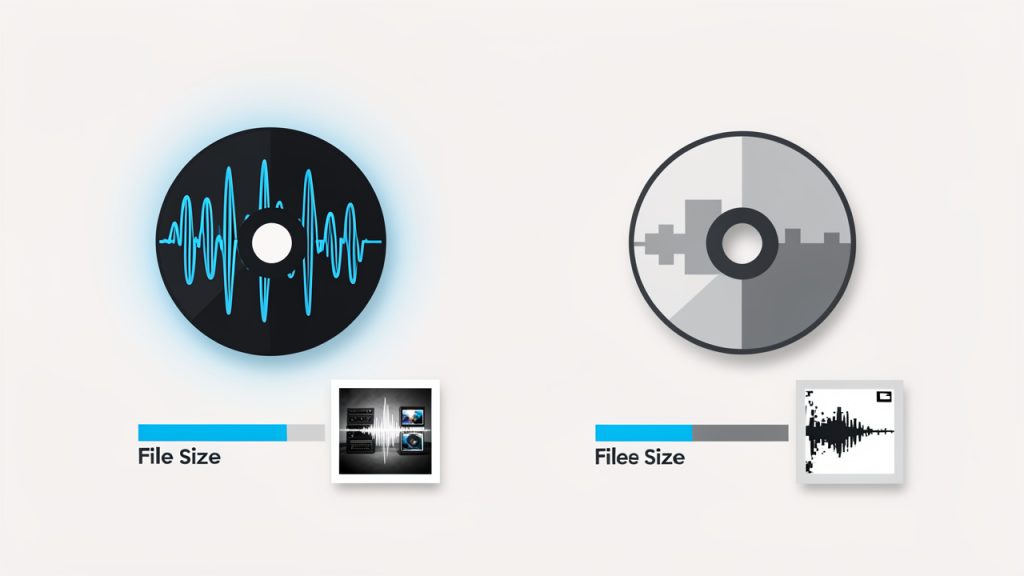
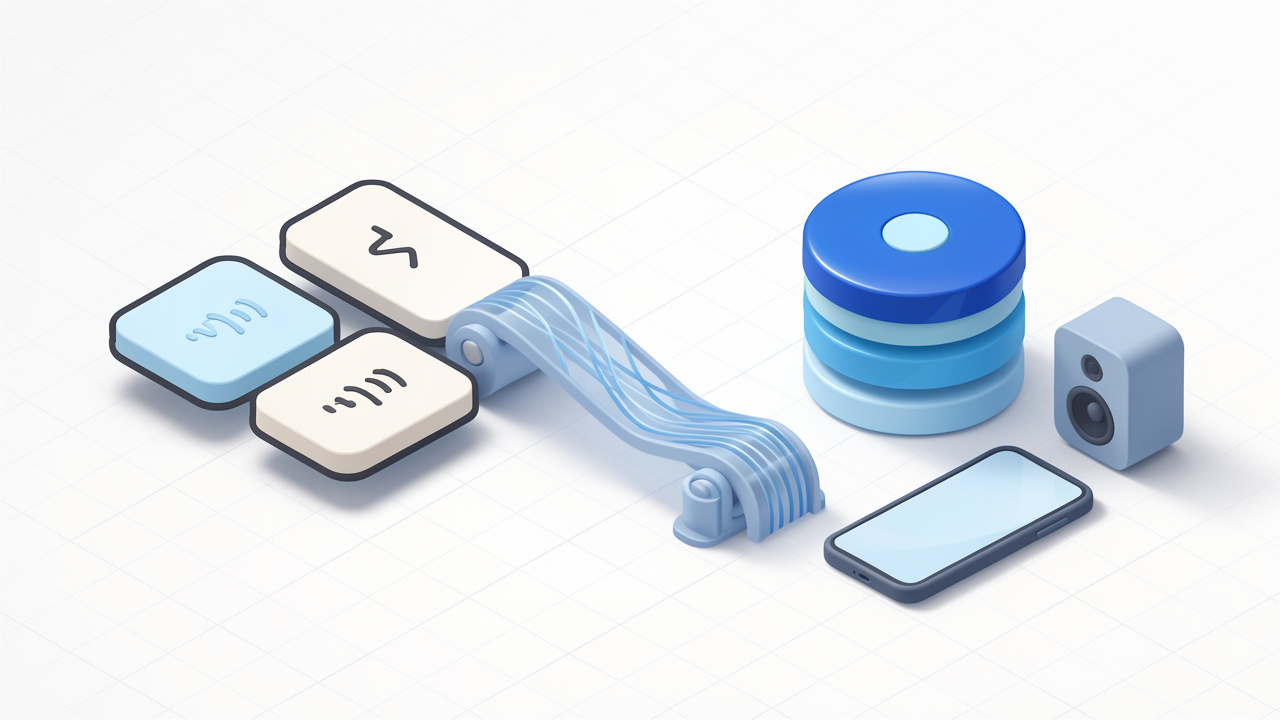
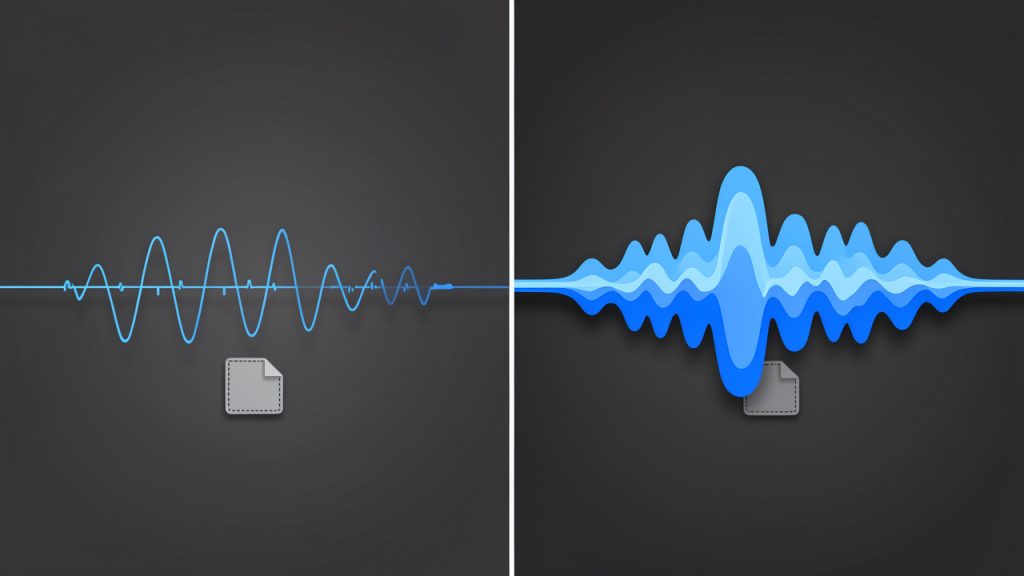
    Split-screen illustration comparing MP3 vs AIFF: left side labeled “MP3 (lossy)” shows a waveform and spectrogram with attenuated high-frequency content and visible compression artifacts, plus a small file-size icon; right side labeled “AIFF (uncompressed)” shows a fuller waveform and dense spectrogram with preserved detail and a large file-size icon. A short caption reads: “MP3 strips data to save space — AIFF preserves what remains.”

    Key differences: quality, size, metadata, and compatibility

    The biggest difference between MP3 and AIFF is lossy versus uncompressed audio. MP3 sacrifices some information to save space. AIFF keeps the waveform intact as PCM data, which makes it better for processing and repeated editing.

    File size is the next major difference. AIFF files are much larger. If storage space matters, that increase can be significant. If you are working in a DAW, preparing for CD authoring, or handing files to professional gear, the size increase is often worth it.

    Metadata handling also differs. MP3 commonly uses ID3 tags for artist, title, album, artwork, and track information. AIFF can store metadata too, but it often uses chunks rather than the exact same tagging structure. Some converters copy tags cleanly, some only copy part of them, and some ignore artwork unless you re-add it manually.

    When and Why You Should Convert MP3 to AIFF

    Useful cases for converting

    There are several valid reasons to convert MP3 files to AIFF, even though the conversion does not improve original fidelity. One of the most common is audio editing. Many editors and DAWs handle uncompressed audio more smoothly, especially when applying effects, trimming, crossfading, or exporting multiple versions.

    Another good reason is professional workflow compatibility. Some studio tools, samplers, older hardware units, and archival systems prefer or require AIFF or WAV. If you are sending files to a collaborator, a post-production engineer, or a CD authoring system, AIFF can be the more reliable handoff format.

    It can also make sense for archival copies of already-delivered MP3 assets when you need a stable, uncompressed working version for repeated processing. You are not improving the source, but you are preventing further quality loss from repeated lossy exports.

    The limitation that many guides gloss over

    This is the part many people misunderstand. Converting MP3 to AIFF does not make the sound better. It only changes the container and storage method.

    If an MP3 was encoded at 128 kbps and lost high-frequency detail, switching it to AIFF keeps that 128 kbps-derived sound exactly as it is, only in a larger, uncompressed form. This is not the same thing as creating a true lossless master.

    The same logic applies to upsampling. Changing a 44.1 kHz MP3 to 96 kHz AIFF does not create more sonic detail. It only increases the sample count mathematically. Sometimes higher rates are required by a workflow, but they do not recover lost information.
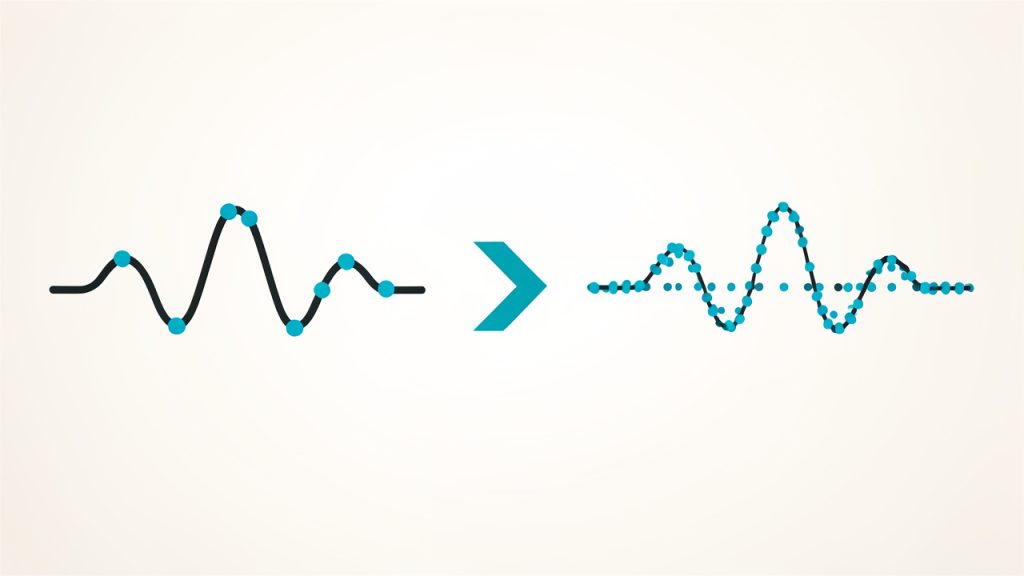
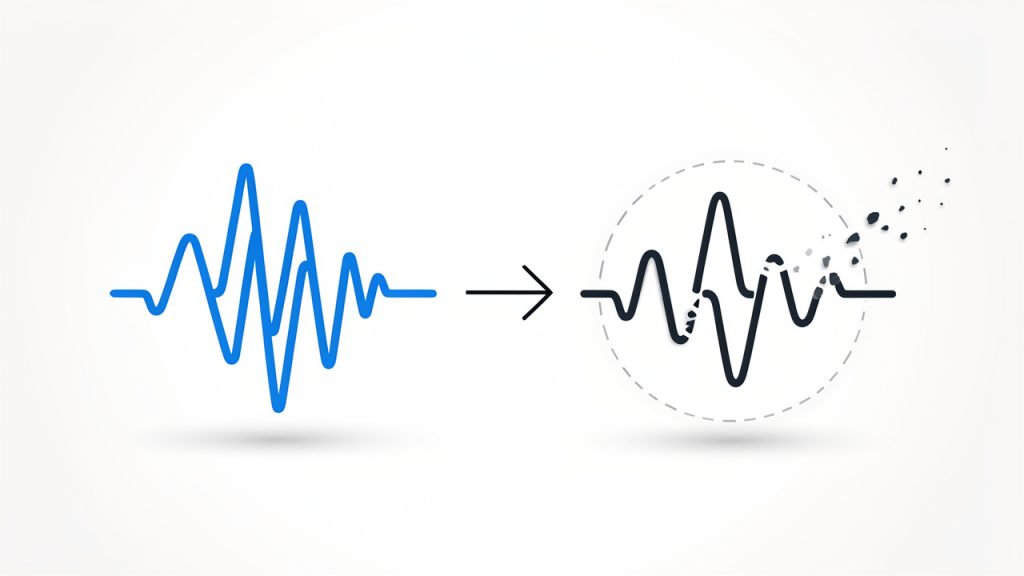
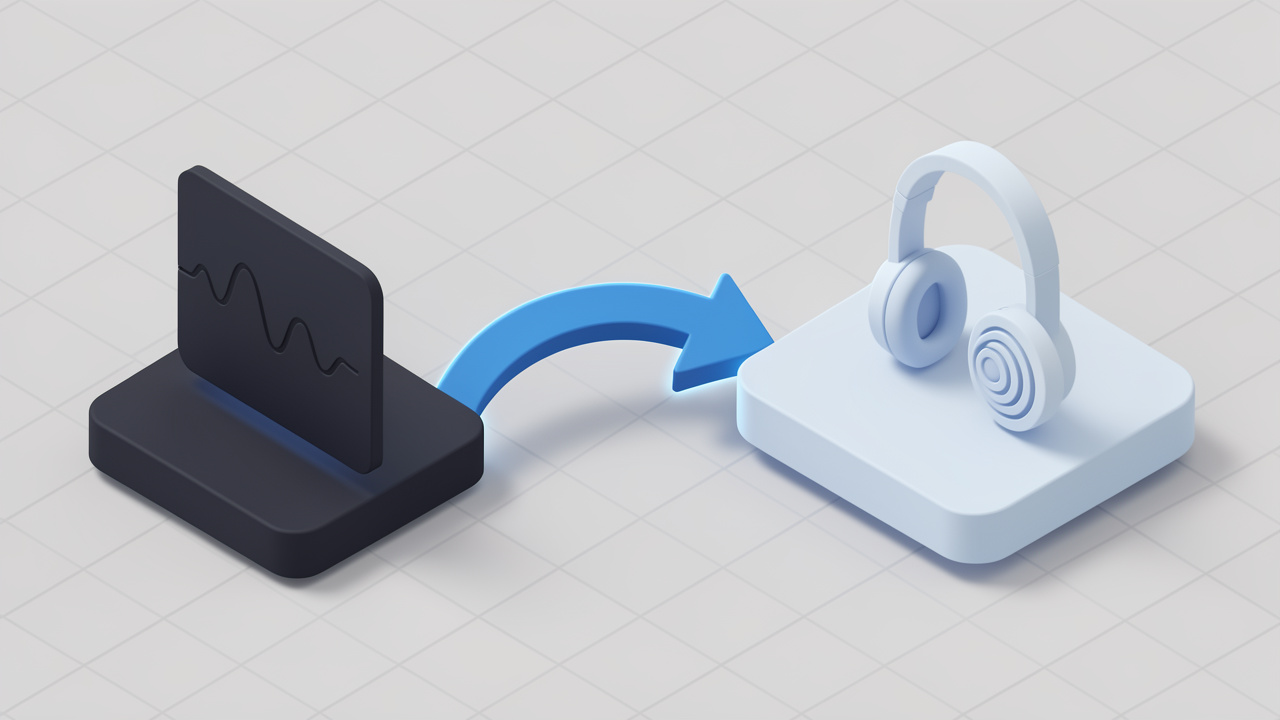
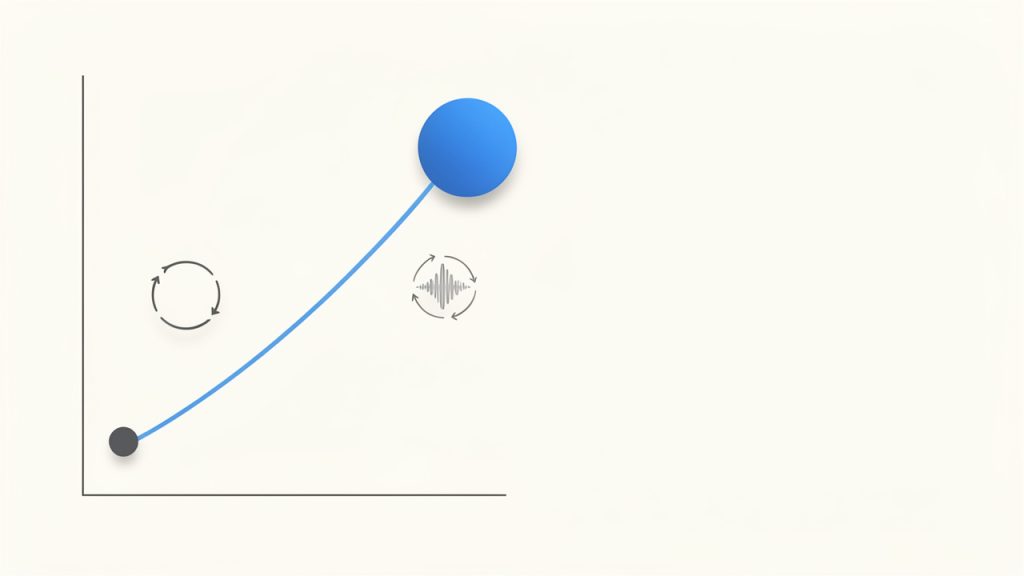
    Visual explaining that conversion doesn’t restore lost data: a small diagram showing an original MP3 waveform sampled at 44.1 kHz with missing/highly smoothed detail, and an arrow to an AIFF waveform at 96 kHz that shows interpolated samples but not new information; includes a label: “Upsampling adds samples, not detail.”

    When not to convert

    If your goal is streaming, mobile listening, or saving space, converting MP3 to AIFF usually makes little sense. The files get larger, transfer slower, and offer no audible improvement for casual playback.

    For everyday listening, keeping the original MP3 is often smarter. AIFF is best used when you need editing headroom, format compatibility, or a professional delivery standard.

    Best Ways to Convert MP3 to AIFF

    There is no single best tool for every user. The right method depends on whether you value speed, editing features, batch conversion, privacy, or metadata control.

    Desktop apps are usually the best starting point. They are faster, more reliable with large files, and safer for private audio. Tools like VLC, Audacity, Apple Music, and dedicated converters can handle one-off jobs well.

    Online converters are convenient when you need a fast result without installing software, but they come with tradeoffs, especially file-size limits, slower uploads, and privacy concerns. If the audio is sensitive, copyrighted, or client-related, uploading it to a third-party service may not be appropriate.

    Command-line tools like FFmpeg are ideal for power users. They are fast, flexible, scriptable, and excellent for batch jobs. If you regularly convert folders full of files, FFmpeg is often the most efficient route.

    Step-by-Step: Convert MP3 to AIFF on Windows (Using Free Tools)

    Method A, using VLC Media Player

    VLC is free, widely trusted, and easy for quick conversions. Download it from the official VideoLAN site to avoid bundled installers.

    1. Open VLC Media Player.
    2. Go to Media > Convert / Save.
    3. Click Add and choose your MP3 file.
    4. Click Convert / Save.
    5. In Profile, choose an audio profile that outputs AIFF, or create a custom profile if needed.
    6. Set the destination filename with the .aiff extension.
    7. Start the conversion.

    VLC is excellent for speed, but metadata handling can be inconsistent. If song info matters, check the exported file afterward in a tag editor or media library.

    For settings, use 44.1 kHz for CD-related audio and most music files, or 48 kHz if the destination is video production. Keep channels in stereo unless you specifically need mono.

    Method B, using Audacity

    Audacity is free and better when you want editing control before export. It is also a more comfortable option if you want to inspect waveforms, trim silence, or normalize levels.

    1. Install Audacity from the official Audacity site.
    2. Open the program and drag your MP3 file into the window.
    3. If needed, edit or inspect the track.
    4. Go to File > Export > Export Audio.
    5. Choose AIFF Files as the export format.
    6. Pick the destination folder and filename.
    7. Set sample rate and channel options if needed.
    8. Add or confirm metadata in the export dialog.
    9. Click Export.

    Audacity is a strong choice when metadata and manual quality control matter. It also makes it easier to hear whether your MP3 source has artifacts before you commit it to a larger AIFF workflow.

    Method C, using FFmpeg

    FFmpeg is the most flexible free solution on Windows, especially for repeated conversions. Install it from the official FFmpeg source or trusted package managers, then make sure the executable is available in your system path.

    A basic single-file conversion looks like this:

    ffmpeg -i input.mp3 output.aiff
    

    If you want explicit control over sample rate, channels, and metadata mapping, use:

    ffmpeg -i input.mp3 -ar 44100 -ac 2 -sample_fmt s16 -map_metadata 0 output.aiff
    

    This keeps the workflow predictable. -ar 44100 sets the sample rate, -ac 2 sets stereo, -sample_fmt s16 sets 16-bit PCM style output, and -map_metadata 0 copies source metadata where possible.

    If FFmpeg throws errors, the usual causes are bad file paths, permission issues, or an incorrect install. On Windows, quoting paths with spaces is essential.

    Step-by-Step: Convert MP3 to AIFF on macOS (Using Native Tools and Free Apps)

    Method A, using Apple Music or iTunes

    On macOS, Apple Music is one of the easiest built-in methods. On older systems, the equivalent process may still be under iTunes.

    First, configure the import settings. Open Music, then go to Settings or Preferences, find Files, and open Import Settings. Choose AIFF Encoder. This tells the app what format to create during conversion.

    Then:

    1. Add the MP3 file to your library if it is not already there.
    2. Select the track.
    3. Use File > Convert > Create AIFF Version, or right-click if your version offers that shortcut.
    4. Wait for the new AIFF file to appear in the library.
    5. Reveal it in Finder if you need the actual file location.

    This method is simple and preserves library organization well. It is especially useful for users already working inside the Apple ecosystem.

    Method B, using Audacity or VLC

    Audacity and VLC on macOS work much like they do on Windows. Audacity gives you better visibility into export settings and metadata entry. VLC is faster for quick conversions.

    If you care about artwork, track titles, and album data, Audacity usually gives you more explicit control. If you just need an AIFF file quickly, VLC is often enough.

    Method C, using FFmpeg with Homebrew

    For batch conversion on macOS, FFmpeg is hard to beat. The easiest installation path is Homebrew.

    Install Homebrew if you do not already use it, then install FFmpeg with:

    brew install ffmpeg
    

    Once installed, convert a file with:

    ffmpeg -i input.mp3 -ar 44100 -ac 2 -sample_fmt s16 -map_metadata 0 output.aiff
    

    For a whole folder, a simple shell loop works well:

    for f in *.mp3; do ffmpeg -i "$f" -ar 44100 -ac 2 -sample_fmt s16 -map_metadata 0 "${f%.mp3}.aiff"; done
    

    That command converts every MP3 in the current folder to AIFF while preserving names and attempting to copy metadata.

    Step-by-Step: Convert MP3 to AIFF on Linux (GUI and CLI)

    Method A, using SoundConverter

    Linux users who prefer a graphical interface can use SoundConverter or similar desktop tools. It is lightweight and straightforward for bulk jobs.

    On many distributions, you can install it from the package manager. After launch, add your MP3 files or drag in a folder, choose AIFF as the output format if supported by the installed backend, select your destination, and run the conversion.

    This route is convenient, but exact format support may vary depending on codecs and backend packages installed on your system.

    Method B, using FFmpeg

    On Linux, FFmpeg is usually the most dependable approach. Install it with your distribution’s package manager, then use:

    ffmpeg -i input.mp3 output.aiff
    

    For more control:

    ffmpeg -i input.mp3 -ar 48000 -ac 2 -sample_fmt s16 -map_metadata 0 output.aiff
    

    Linux users often run into path and permission quirks, especially when converting files in protected directories. If a command fails, confirm you have write access to the destination folder.

    Tips for scripting batch jobs

    A practical batch command for the current directory is:

    for f in *.mp3; do ffmpeg -i "$f" -ar 44100 -ac 2 -sample_fmt s16 -map_metadata 0 "${f%.mp3}.aiff"; done
    

    If your folder tree is deeper, you may want a find-based workflow. The key is to test on a few files first before processing hundreds of tracks.

    Top Online Converters: Quick Comparison and Privacy Considerations

    Online converters are useful when you need a one-time conversion and do not want to install software. The best known services usually support drag-and-drop uploads, simple format selection, and quick downloads. Common examples include CloudConvert, Convertio, FreeConvert, and Zamzar.

    What matters most is not the prettiest interface. It is whether the service uses HTTPS, states how long files are retained, allows control over output settings, and handles metadata properly. Some online tools silently re-encode with defaults you did not choose, which can create unexpected sample rates or strip tags.

    If you are converting sensitive recordings, unreleased music, client audio, or large folders, online tools are usually the wrong choice. Local conversion is faster, more private, and more predictable.

    Recommended Tools: Features, Pros, Cons, and Use Cases

    Choosing the right tool is easier when you match it to your workflow rather than just the format.

    FFmpeg runs on Windows, macOS, and Linux and is best for batch conversion, automation, and precise settings. It is fast, scriptable, and powerful, but the command line can intimidate beginners.

    Audacity is cross-platform and ideal when you need editing plus conversion. It provides excellent control and visual editing, but it is slower for large batch jobs.

    Apple Music or iTunes works well in Apple-centric environments for simple library conversion. It is built in and integrates with your library, but it offers limited advanced control.

    VLC is good for quick one-off conversions across platforms. It is free and familiar, but metadata handling can be inconsistent.

    Online converters are useful in a pinch, but privacy, upload time, and file limits are disadvantages.

    For most users, 44.1 kHz, stereo, 16-bit is a safe default. If the destination is video production, 48 kHz is often the better fit. If you plan more intensive editing inside a modern DAW, you might prefer 24-bit AIFF, but remember that raising bit depth on an MP3 source does not add lost detail. It mainly gives your processing chain more room for subsequent work.

    Common Conversion Settings Explained

    Sample rate

    The sample rate determines how many times per second the waveform is measured. 44.1 kHz is standard for music and CDs. 48 kHz is standard in video and many broadcast workflows.

    Higher rates like 88.2 or 96 kHz have their place in recording and production, but they do not magically improve an MP3 source. If the original file came from a standard compressed music file, staying at 44.1 or 48 kHz is usually the practical choice.

    Bit depth

    16-bit is standard for CD-quality delivery. 24-bit is common in production because it provides more headroom for processing and level adjustments.

    When converting from MP3, increasing bit depth does not recover detail. It can still be useful if the AIFF file will go through further EQ, dynamics processing, or mixing, because the working environment may benefit from the added processing margin.

    Channels

    Most MP3 music files are stereo, and they should generally stay that way. Converting stereo to mono should only happen when the destination explicitly requires it, such as voice-only material or bandwidth-limited production systems.

    Normalization and dithering

    Normalization adjusts loudness, usually to bring the peak level to a target. It can be helpful if the source is unusually quiet, but it also changes the file, so it should be intentional.

    Dithering matters when reducing bit depth, especially in professional workflows. If you are exporting to 16-bit after processing in a higher internal precision environment, dithering can help reduce quantization artifacts. If you are simply converting without meaningful editing, it is less critical.

    Metadata and Tags: Preserving Song Info When Converting

    MP3 files usually carry metadata in ID3 tags. AIFF stores metadata in different ways, often through chunks inside the file container. Because of this mismatch, metadata transfer is not always perfect.

    FFmpeg can copy metadata with -map_metadata 0, and Apple Music often keeps library info well when converting inside its own ecosystem. Audacity lets you manually confirm or edit tags during export, which is useful when accuracy matters more than automation.

    If metadata is missing after conversion, use a dedicated tag editor such as Kid3 or Mp3tag. For music libraries, this extra step can save a lot of cleanup time later. Artwork is especially worth checking, since it is one of the first things many converters drop.

    Audio Quality Myths and Realities

    The biggest myth in conversion is that AIFF sounds better simply because it is bigger. It does not. The conversion only prevents additional loss during later stages. It does not reverse the original lossy compression.

    You may still hear differences after conversion in a production environment, but not because AIFF repaired the source. More often, it is because your editing software handles uncompressed files more predictably, avoids repeated MP3 decoding, or reduces compatibility issues in the workflow.

    The best practice is simple. Start with the highest-quality source available, avoid multiple lossy transcodes, and use AIFF or another lossless format once you enter the editing or mastering stage.

    Troubleshooting: Common Problems and Fixes

    Conversion failures usually come down to a few recurring causes. The first is permissions. If the destination folder is read-only or protected, the converter may fail silently or throw a generic error. The second is path formatting, especially on Windows when filenames contain spaces. The third is a broken or unofficial install.

    If metadata disappears, the issue is usually not the audio itself but the converter’s handling of tags. Try FFmpeg with metadata mapping, or export with Audacity and re-enter tags manually. If album artwork is missing, a dedicated tag editor is often the fastest fix.

    Online converters can fail on large files because of browser timeouts or upload caps. In that case, switch to a desktop tool. If an exported AIFF will not play correctly, check the sample rate and channel settings. Some older hardware is picky about unexpected combinations.

    Practical Examples and FFmpeg Command Cheatsheet

    If you want a reliable way to convert MP3 to AIFF with full control, FFmpeg is the most useful tool to learn.

    A basic conversion:

    ffmpeg -i input.mp3 output.aiff
    

    A safer production-style conversion with explicit settings:

    ffmpeg -i input.mp3 -ar 44100 -ac 2 -sample_fmt s16 -map_metadata 0 output.aiff
    

    For 48 kHz output:

    ffmpeg -i input.mp3 -ar 48000 -ac 2 -sample_fmt s16 -map_metadata 0 output.aiff
    

    For batch conversion in the current folder on macOS or Linux:

    for f in *.mp3; do ffmpeg -i "$f" -ar 44100 -ac 2 -sample_fmt s16 -map_metadata 0 "${f%.mp3}.aiff"; done
    

    For Windows PowerShell, a simple loop is:

    Get-ChildItem *.mp3 | ForEach-Object { ffmpeg -i $_.FullName -ar 44100 -ac 2 -sample_fmt s16 -map_metadata 0 ($_.BaseName + ".aiff") }
    

    If you want loudness adjustment or normalization, do it carefully and only when needed. That step changes the audio content, so it is not part of a pure format conversion.

    Legal and Ethical Considerations

    Converting your own files for editing, backup, or device compatibility is usually straightforward. Sharing or distributing converted files that you do not have rights to is a different matter. Copyright still applies, regardless of the format.

    Privacy matters too. If you use an online converter, you are uploading audio to someone else’s servers. That may be harmless for a public podcast intro and unacceptable for confidential interviews, client recordings, or unreleased music.

    Responsible archival means keeping track of what the source was, what settings you used, and whether the result is a working copy or a final deliverable.

    Summary: Best Practice Recommendations

    If you need an easy way to handle an MP3-to-AIFF workflow, the smartest choice depends on what you are actually doing with the file afterward. For quick one-off conversions, VLC or Apple Music can be enough. For editing and metadata control, Audacity is the better choice. For batch conversion, automation, and precise settings, FFmpeg is the clear winner.

    A few defaults work well for most people. Use 44.1 kHz, 16-bit, stereo for general music and CD-related tasks. Use 48 kHz when the file is headed into video production. Expect much larger files, and do not expect better fidelity than the original MP3 already contained.

    Your next step is simple. Pick the method that matches your workflow, convert one test file first, verify playback and metadata, then process the rest with confidence.

    Appendix: Resources and Download Links

    Use official sources whenever possible. That reduces the risk of bundled adware, outdated builds, and broken codecs.

    The most trustworthy places to get started are the official sites for FFmpeg, Audacity, VLC Media Player, and Apple Music or iTunes support documentation. For tag editing, Kid3 and Mp3tag are both reputable options.

    If you want to learn more, look for vendor documentation and established audio engineering references covering PCM audio, AIFF and WAV containers, sample rate standards, bit depth, dithering, and mastering workflows. Those resources will help you make better decisions long after a simple conversion job is done.
  • How to Convert MP3 Files to M4A: Easy Methods and Tips

    How to Convert MP3 Files to M4A: Easy Methods and Tips

    If you need a quick way to convert an MP3 to M4A, the good news is that you have several solid options. The better news is that the right option depends less on the file format itself and more on what you care about most: convenience, privacy, batch conversion, Apple compatibility, or preserving tags and album art.

    A lot of people assume converting audio will magically improve sound quality. It will not. In most cases, changing an MP3 into an M4A means re-encoding one lossy file into another lossy format, which can actually reduce quality if you choose poor settings. Still, there are good reasons to do it. M4A files, especially those using AAC, often deliver similar perceived quality at a smaller size and tend to work especially well across the Apple ecosystem.

    This guide explains what MP3 and M4A actually are, when conversion makes sense, how the process works, and which tools are worth using. You will also get step-by-step instructions, FFmpeg examples, metadata tips, and a practical comparison table so you can choose the best method for your workflow.

    What Is MP3 and What Is M4A? Key Differences Explained

    MP3 became the default digital audio format for a reason. It made music files small enough to store, transfer, and stream back when bandwidth and disk space were far more limited than they are today. It still works almost everywhere, from older car stereos to Windows PCs, Android phones, budget music players, and web apps.

    M4A is different. It is usually a container format that holds audio encoded with AAC. In practice, when people talk about M4A, they usually mean AAC audio stored in an M4A file. This format is especially common in Apple devices and apps, including iPhone, iPad, iTunes, the Music app on macOS, and parts of the broader Apple media ecosystem.

    A simple labeled diagram comparing MP3 and M4A: left side shows an 'MP3 file' with an MP3 codec block and a list of broad compatibility icons (older car stereo, Android, web); right side shows an 'M4A file' as a container box with an AAC codec block inside and Apple ecosystem icons (iPhone, iTunes, Music app). Add a small caption: 'MP3 = codec; M4A = container (commonly AAC) — AAC is generally more efficient.'

    The technical difference matters. MP3 and AAC are both lossy codecs, but AAC is generally more efficient. That means an M4A file encoded with AAC can often sound as good as, or better than, an MP3 at the same bitrate. In some cases, it can also be smaller for the same perceived quality. That is why people often move from MP3 to M4A when optimizing libraries for mobile use.

    Compatibility is broad for both formats, but not identical. MP3 is still the safest universal format. M4A works well on iPhone, iTunes, macOS, many Android apps, modern Windows players, VLC, and most current media software. If your main goal is Apple device sync, better metadata handling, or more efficient AAC compression, converting can make sense.

    When Should You Convert MP3 to M4A?

    There are a few practical reasons to convert. If you organize your music in Apple Music, iTunes, Finder, or an iPhone-focused workflow, M4A often feels more natural. If you are trying to reduce file size while keeping decent listening quality, AAC in an M4A container can also be a smart choice. Podcasts and spoken-word content can especially benefit from efficient AAC settings.

    That said, you should not convert simply because you expect better audio. If your source file is already an MP3, converting it to M4A does not restore lost detail. It is a bit like photocopying a photocopy into a different paper size. You might get a more convenient version, but you do not recover the original information.

    If sound quality matters, the best path is to start from a lossless source such as WAV, FLAC, or ALAC, then create your M4A from that original. If you downloaded an MP3 and just want it to play, sometimes the best move is to leave it alone. If a service offers the same track in AAC or M4A natively, downloading that version is better than converting the MP3 yourself.

    How Conversion Works: What Actually Happens When You Convert Audio

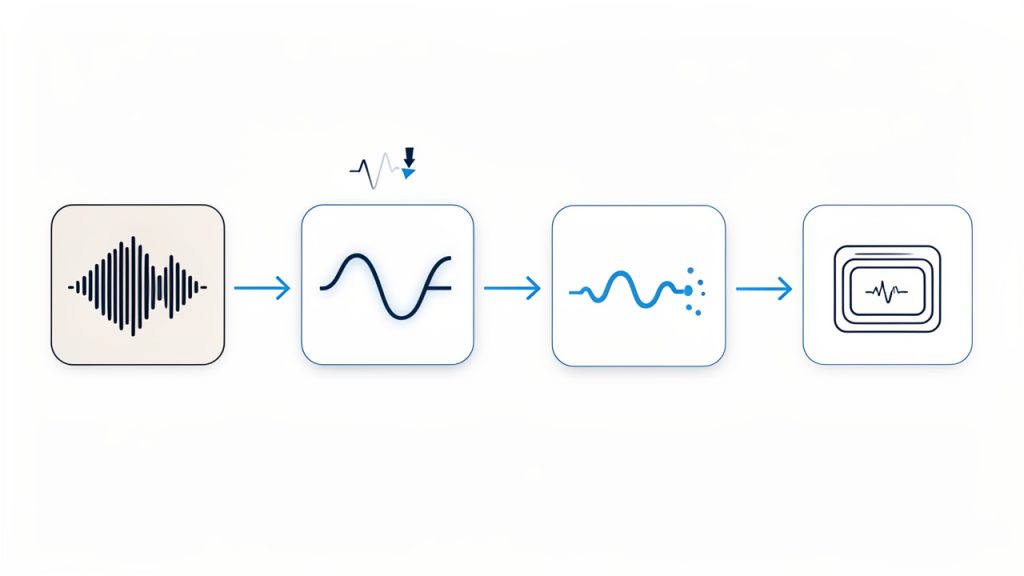
    In most MP3-to-M4A workflows, the audio is re-encoded. That means the MP3 is decoded back into audio data, then encoded again as AAC inside an M4A container. This is not the same as simply changing a filename extension or repackaging the stream. Because MP3 and AAC are different codecs, a true conversion almost always requires this extra compression step.

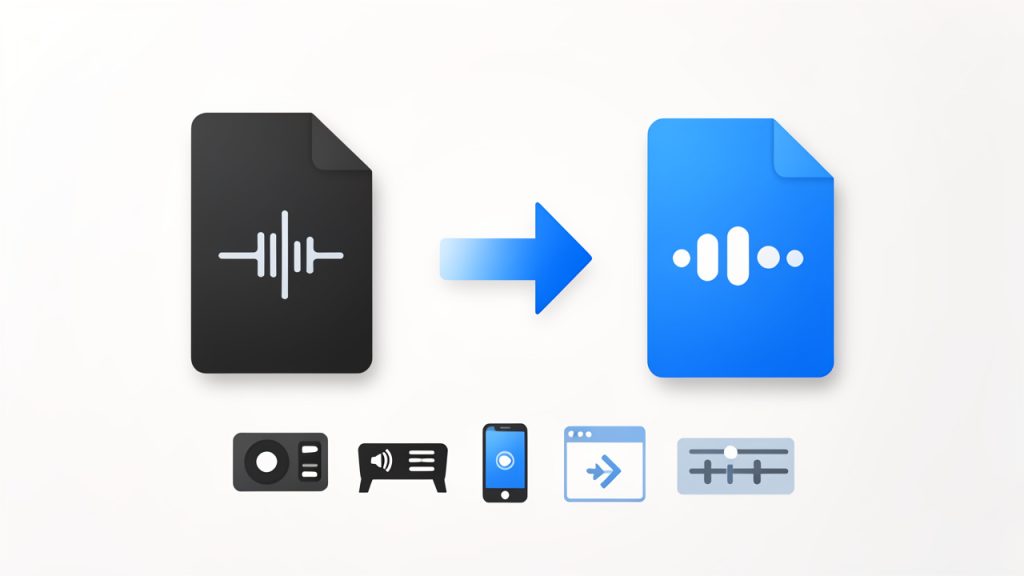
    A step-by-step conversion flow diagram: MP3 (compressed) -> decode to PCM (raw audio) -> encode to AAC -> wrap in M4A container. Include side notes: 'Re-encoding can reduce quality', 'Sample rate usually unchanged', and an icon showing metadata mapping (ID3 -> MP4 tags) with a warning about album art/custom fields.

    Bitrate plays a major role. For music, AAC-LC at 192 to 256 kbps is a sensible range for most users. For podcasts or voice recordings, lower settings may still sound perfectly fine. Sample rate usually stays the same as the source unless you deliberately change it. In most cases, there is no need to force a different sample rate.

    Metadata is another overlooked issue. MP3 files typically use ID3 tags, while M4A files use MP4-style metadata tags. Good converters can map fields such as title, artist, album, track number, and genre automatically, but album art and some custom fields may not always carry over cleanly. That is why the best tools either preserve metadata directly or make retagging easy afterward.

    Top Methods to Convert MP3 to M4A

    Below are the most useful tools and services for converting MP3 to M4A, ranked by flexibility, ease of use, and real-world practicality.

    1. FFmpeg

    FFmpeg is the most powerful option on this list. It is a free, open-source command-line tool that can convert audio with precise control over codec, bitrate, metadata, and batch workflows. If you want repeatable results, automation, or professional-level flexibility, FFmpeg is hard to beat.

    FFmpeg supports AAC encoding into M4A, batch conversion through scripts or terminal commands, metadata copying with -map_metadata 0, and cross-platform support for Windows, macOS, and Linux. It offers fine control over bitrate, sample rate, and encoder options. Because it runs offline, it is better for privacy and automation than web tools.

    FFmpeg is free and open-source, extremely flexible, excellent for bulk conversion, and works offline. Its downsides are the command-line interface, which may intimidate beginners, and the fact that some advanced AAC encoders may not be included in every build.

    A simple high-quality conversion command looks like this:

    ffmpeg -i input.mp3 -c:a aac -b:a 256k -map_metadata 0 output.m4a
    

    This tells FFmpeg to take input.mp3, encode it as AAC at 256 kbps, copy metadata from the source, and save the result as output.m4a.

    For quality-based encoding with an FFmpeg build that includes libfdk_aac, you can use:

    ffmpeg -i input.mp3 -c:a libfdk_aac -vbr 3 -map_metadata 0 output.m4a
    

    For batch conversion on macOS or Linux:

    for f in *.mp3; do ffmpeg -i "$f" -c:a aac -b:a 256k -map_metadata 0 "${f%.mp3}.m4a"; done
    

    For batch conversion in Windows PowerShell:

    Get-ChildItem *.mp3 | ForEach-Object { ffmpeg -i $_.FullName -c:a aac -b:a 256k -map_metadata 0 "$($_.BaseName).m4a" }
    

    Website: https://ffmpeg.org

    2. VLC Media Player

    VLC is best known as a video player, but it also works as a capable media converter. For users who want a free desktop app with a graphical interface, VLC is one of the easiest ways to convert MP3 files to M4A without installing a specialized audio program.

    VLC includes a built-in converter, processes files offline, and runs on Windows, macOS, and Linux. It is convenient if you already have VLC installed and it is safer than many random online converters for private files. The interface is not optimized for batch audio workflows, metadata handling can be inconsistent, and it exposes fewer transparent settings than FFmpeg.

    To use VLC, open Media > Convert/Save, add your MP3 file, choose Convert, select an AAC or M4A-compatible profile, set the destination filename with the .m4a extension, then start the conversion. If the default profile is vague, create a custom profile with AAC audio and verify the container format.

    Website: https://www.videolan.org

    3. Apple Music app / iTunes

    If you are an Apple user, this is often the smoothest method. On older Windows systems and older macOS versions, iTunes can convert MP3 files to AAC. On modern Macs, the Music app handles similar library-based workflows. This route is ideal if your files are already organized in an Apple library and you want tight integration with iPhone or iPad syncing.

    Apple’s tools are built for Apple workflows, offer library-based conversion, and generally manage metadata and artwork well. They are very convenient for Mac and iPhone users, require no command-line knowledge, and produce files that are highly compatible with Apple devices. The trade-off is less flexibility than FFmpeg and fewer options for advanced batch automation.

    To convert, go to the import settings in iTunes or the Music app, choose AAC Encoder, set your preferred quality, then select the MP3 file in your library and create an AAC version. The converted file will typically appear alongside the original.

    Website: https://www.apple.com

    4. CloudConvert

    CloudConvert is one of the better online options for converting MP3 to M4A when you do not want to install software. It supports many file types, has a cleaner interface than most web converters, and usually provides clearer conversion settings than bare-bones alternatives.

    CloudConvert offers web-based conversion with custom output settings and works across devices without local installation. It is very convenient and beginner friendly, but uploading audio to a third-party server is not ideal for sensitive recordings, private voice notes, unreleased media, or licensed content with restrictions. For occasional non-sensitive files, it is a solid choice.

    If you use CloudConvert, upload the MP3, select M4A as the output format, check audio settings if available, choose AAC at a sensible bitrate such as 192 or 256 kbps, then download the converted file.

    Website: https://cloudconvert.com

    5. Zamzar

    Zamzar has been around for years and remains one of the most recognizable online conversion services. Its strength is simplicity: upload a file, choose the target format, and wait for the conversion. For users who want minimal friction and do not need advanced settings, Zamzar is often enough.

    Zamzar is very easy to use from almost any browser, but it provides limited control over advanced audio settings and is not ideal for sensitive files. It may be slower for large uploads and is best for public-domain clips or disposable test files.

    Website: https://www.zamzar.com

    6. Online-Convert

    Online-Convert is another web-based service that often gives users more direct control over conversion settings than ultra-simple competitors. That makes it a better pick if you want some configurability without using FFmpeg or desktop software.

    Online-Convert is convenient from the browser and offers more settings than some competitors. Privacy concerns still apply, the interface can feel utilitarian, and free usage may be limited, but it works well for quick experiments and basic bitrate adjustments.

    Website: https://audio.online-convert.com

    7. The Audio Converter (iPhone/iPad)

    For iOS users, The Audio Converter is one of the more straightforward apps for converting files directly on a phone or tablet. It is useful when you receive audio by email, Files, or cloud storage and need a quick format change without moving to a desktop.

    The main benefit is mobility, and it is handy for a few files on the go. For larger libraries, mobile conversion can feel clunky.

    Website: https://www.floattechapps.com

    8. Android converters

    On Android, several apps can convert MP3 to M4A locally. The exact best choice can change over time, so choose an app with solid reviews, recent updates, and clear permission requirements. Good Android converters are handy for quick mobile edits or field recordings, but be cautious: mobile store apps vary widely in quality and some include ads or ask for suspicious permissions.

    Website: https://play.google.com

    Recommended Tools and Where They Shine

    Choosing the best converter is easier when you map it to your actual use case rather than chasing a generic “best tool” label.

    Tool Best For Platform Privacy Ease of Use Batch Support
    FFmpeg Power users, developers, archivists Windows, macOS, Linux Excellent, offline Moderate to low for beginners Excellent
    VLC Media Player Casual desktop users Windows, macOS, Linux Excellent, offline Good Basic
    Apple Music / iTunes Apple-centric libraries macOS, Windows Excellent, offline Very good Moderate
    CloudConvert Quick one-off web conversions Browser Moderate to low Excellent Limited
    Zamzar Simple online use Browser Moderate to low Excellent Limited
    Mobile apps Phone-only workflows iOS, Android Varies by app Good Low

    If you want the best free desktop option, use FFmpeg if you are comfortable with commands and VLC if you prefer buttons. If you live in the Apple ecosystem, Music app or iTunes is the most seamless route. If you only need one quick conversion and the file is not sensitive, CloudConvert is usually the strongest online pick.

    Step-by-Step: Convert MP3 to M4A Using FFmpeg

    Installing FFmpeg is straightforward. On Windows, download a trusted build from the official FFmpeg site or a reputable package source. On macOS, many users install it through Homebrew. On Linux, it is usually available through the distribution’s package manager.

    Once installed, start with a simple command:

    ffmpeg -i input.mp3 -c:a aac -b:a 256k -map_metadata 0 output.m4a
    

    Here is what the flags mean. -i input.mp3 sets the source file. -c:a aac selects the AAC audio encoder. -b:a 256k sets audio bitrate to 256 kbps. -map_metadata 0 copies metadata from the first input. output.m4a defines the destination file and container.

    If your build supports libfdk_aac, many users consider it a high-quality AAC encoder:

    ffmpeg -i input.mp3 -c:a libfdk_aac -vbr 3 -map_metadata 0 output.m4a
    

    For voice content or smaller files, you can reduce bitrate:

    ffmpeg -i input.mp3 -c:a aac -b:a 128k -map_metadata 0 output.m4a
    

    If album art does not transfer automatically, you may need a more explicit mapping workflow, especially when the source contains embedded cover art in a form FFmpeg interprets separately.

    How to Keep Metadata and Album Art When Converting

    Metadata transfer is where many converters fall short. MP3 files commonly use ID3 tags, while M4A relies on a different metadata structure. Basic tags like artist, album, and title often copy over without trouble, but embedded artwork can be inconsistent.

    FFmpeg’s -map_metadata 0 helps preserve tags, but after conversion, it is worth checking the result in a dedicated tag editor such as Mp3tag or Kid3. These tools are especially useful if fields appear blank, track numbering breaks, or cover art disappears.

    If metadata matters a lot to you, the Apple Music app and iTunes often do a better job in Apple-centric workflows. For manual cleanup on Windows, Mp3tag is one of the easiest options. On cross-platform setups, Kid3 is a solid choice.

    Quality Tips and Best Practices

    The most important rule is simple, do not expect quality gains from lossy-to-lossy conversion. If your MP3 is already compressed, your best goal is to avoid making it noticeably worse. For music, AAC-LC at 192 to 256 kbps is a safe recommendation. For podcasts and voice, 96 to 128 kbps can be enough, depending on the source.

    AAC-LC is the standard choice for most music. HE-AAC can be efficient at very low bitrates, but it is not the best default for general music libraries. If you care about future-proofing, keep your original MP3 and, when possible, archive from a lossless master like FLAC or WAV so future conversions do not compound quality loss.

    Safety, Privacy, and Legal Considerations

    Online converters are convenient, but they introduce real privacy risk. If the file contains private interviews, internal business recordings, client assets, or unreleased material, keep the conversion offline. Use FFmpeg, VLC, or an Apple desktop tool instead.

    Legality matters too. Converting audio you own for personal use may be acceptable in some contexts, but converting protected streaming content or bypassing platform restrictions can violate terms of service or copyright law. Always check the rules that apply in your region and with the service you are using.

    Malware is another concern, especially with obscure “free converter” apps. Download software from official websites, avoid bundled installers, and verify app reviews and permissions before installing on desktop or mobile.

    Troubleshooting Common Problems

    If the converted file will not play, the issue is often the codec or container combination. Make sure you encoded to AAC and saved with the .m4a extension. Simply renaming a file is not conversion.

    If metadata is missing, rerun the conversion with metadata mapping or open the file in Mp3tag or Kid3 to inspect fields manually. If track names become generic or artwork disappears, the source tags may not have mapped cleanly into the M4A structure.

    If quality sounds worse than expected, check whether you converted a low-bitrate MP3 into an even lower-bitrate AAC. That usually compounds artifacts. Try a higher target bitrate, but remember that higher bitrate cannot restore detail already lost in the original MP3.

    If file sizes are too large, your bitrate may be unnecessarily high. For everyday listening, stepping down from 256 kbps to 192 kbps AAC often offers a better balance between size and perceived quality.

    Frequently Asked Questions (FAQ)

    Does converting an MP3 to M4A improve quality?

    No. Converting an existing MP3 to M4A does not improve the original audio quality. It may help with compatibility, library management, or file size efficiency, but it cannot restore lost detail.

    Can I convert without losing metadata?

    Often, yes. Tools like FFmpeg, iTunes, Music app, and some desktop converters can preserve metadata. Album art and custom fields may still need manual checking.

    Is M4A better than MP3 for all devices?

    No. M4A is excellent for Apple devices and many modern apps, but MP3 remains the most universally compatible format across older hardware and software.

    Which is smaller, MP3 or M4A?

    At similar perceived quality, M4A with AAC is often smaller than MP3. The exact result depends on the encoder and bitrate you choose.

    Conclusion and Recommended Next Steps

    If you want the simplest answer, here it is. Use FFmpeg for control and batch jobs, VLC for an easy free desktop workflow, Apple Music or iTunes if you live in the Apple ecosystem, and CloudConvert only for non-sensitive one-off files.

    For the best results, keep your original file, use AAC-LC, aim for 192 to 256 kbps for music, and verify metadata after conversion. If quality really matters, start from a lossless source instead of an MP3.

    A practical next step is to create a small test set with one song, one podcast, and one file with album art. Convert them with your preferred tool, compare file size, playback, and metadata, then apply the same settings to the rest of your library. That simple test will save you far more time than redoing hundreds of files later.

  • How to Convert WMA Files to MP3 Quickly

    How to Convert WMA Files to MP3 Quickly

    Converting a WMA file to MP3 sounds simple until you actually need to do it fast. Maybe a client sent audio in the wrong format. Maybe an old voice recording will not play on your phone. Or maybe you are organizing a library of training files, podcasts, or archived interviews and keep running into compatibility issues.

    That is where the need to convert WMA into MP3 becomes practical, not technical. MP3 remains one of the most widely supported audio formats across phones, browsers, editing tools, cloud platforms, and everyday media players. If you want fewer playback problems and easier file sharing, turning WMA audio into MP3 is often the quickest fix.

    What is converting WMA to MP3?

    At its core, converting WMA to MP3 means changing an audio file from Windows Media Audio (WMA) format into MP3, a more universally accepted format. Both use lossy compression, but they were designed with different ecosystems in mind. WMA was developed by Microsoft and was once common in Windows-based software and older digital music libraries. MP3, by contrast, became the default standard for portable audio because it works almost everywhere.

    For most users, the format itself matters less than the outcome. You want your audio to open, play smoothly, upload easily, and work across devices without extra apps or compatibility warnings. That is why MP3 still dominates for everyday use. Whether you are handling business recordings, webinar exports, customer support clips, or personal audio files, MP3 is usually the safer destination format.

    People search for ways to convert WMA into MP3 because they want a quick, free, and reliable conversion method. They are not usually looking for a deep lesson in audio engineering. They want a file that simply works. That said, understanding a few basics helps you avoid quality loss, bloated files, or failed conversions.

    Why WMA still shows up

    WMA is not obsolete, but it is less convenient than it used to be. Many older desktops, CD rips, archived media collections, and legacy business systems still produce or store audio in WMA format. If you have inherited files from an older workflow, there is a good chance WMA is part of the mix.

    This matters for small teams and freelancers because legacy files tend to surface at inconvenient moments. A training department may need old audio modules republished. A virtual assistant may be asked to upload recordings into a modern content platform. A developer may need compatible assets for an app or browser-based tool. In each case, converting from WMA into MP3 removes friction.

    Why MP3 remains the default choice

    MP3 is popular for one simple reason, compatibility. It plays nicely with websites, smartphones, editing tools, email attachments, cloud storage systems, and social platforms. If your goal is broad usability, MP3 is often the right final format.

    It also offers a practical balance between file size and sound quality. For spoken-word audio, such as interviews, lectures, voice notes, and webinars, MP3 usually provides more than enough quality without creating oversized files. That balance is especially useful when you are sharing files with clients or uploading them through limited dashboards.

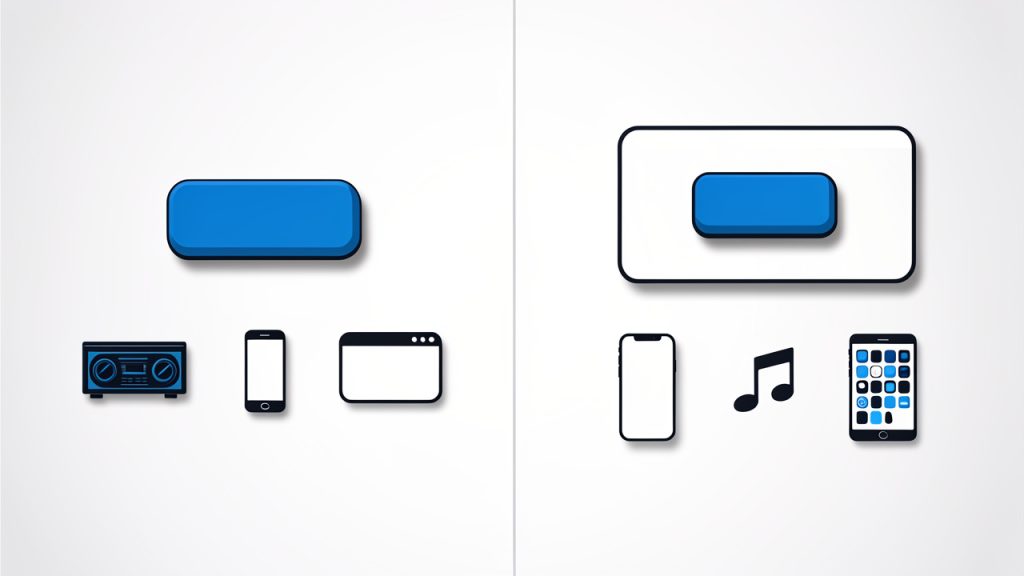
    Compatibility comparison illustration: where each format works best.

    Key aspects of converting WMA into MP3

    Converting audio is not just about changing the extension. A good conversion preserves the listening experience while making the file easier to use. To do that well, you need to think about quality, file size, compatibility, and workflow.

    Audio quality and compression

    Both WMA and MP3 use compression, which means they reduce file size by removing some audio data. When you convert a compressed file into another compressed format, there is usually some degree of quality trade-off. In plain language, each conversion can shave off a little detail.

    For most business and everyday use cases, this is not a major problem. If you are converting a spoken recording, meeting audio, or standard music file for normal listening, the difference may be negligible. But if the source file is already low quality, or if you convert it multiple times, the loss can become noticeable. That is why it is smart to convert from the original WMA file once and keep a backup of that source.

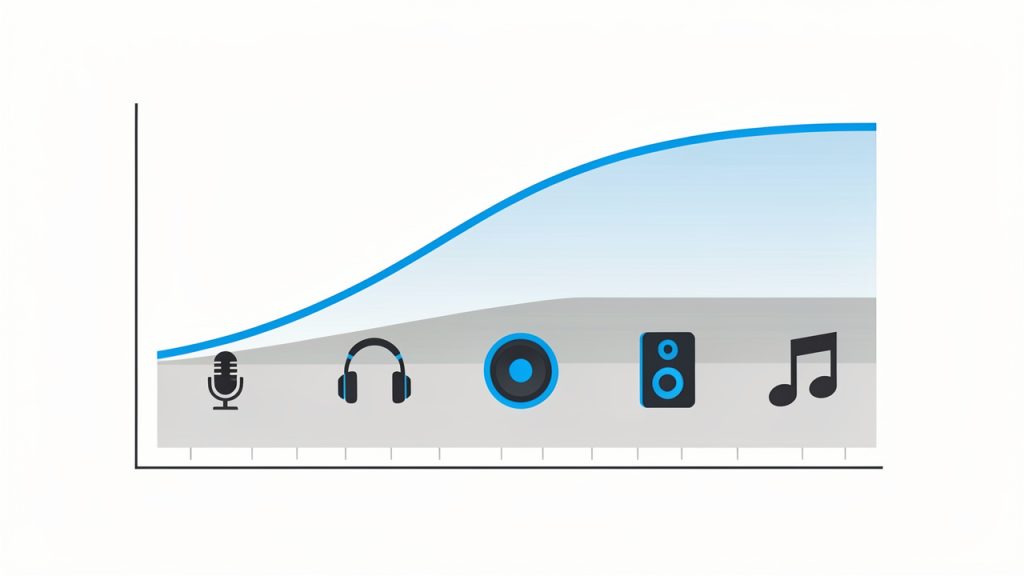
    Bitrate plays a major role here. A higher MP3 bitrate generally means better audio quality and a larger file. A lower bitrate creates smaller files but can introduce artifacts or dullness. For voice-heavy content, moderate settings often work well. For music, you may prefer a higher bitrate to retain more depth and clarity.

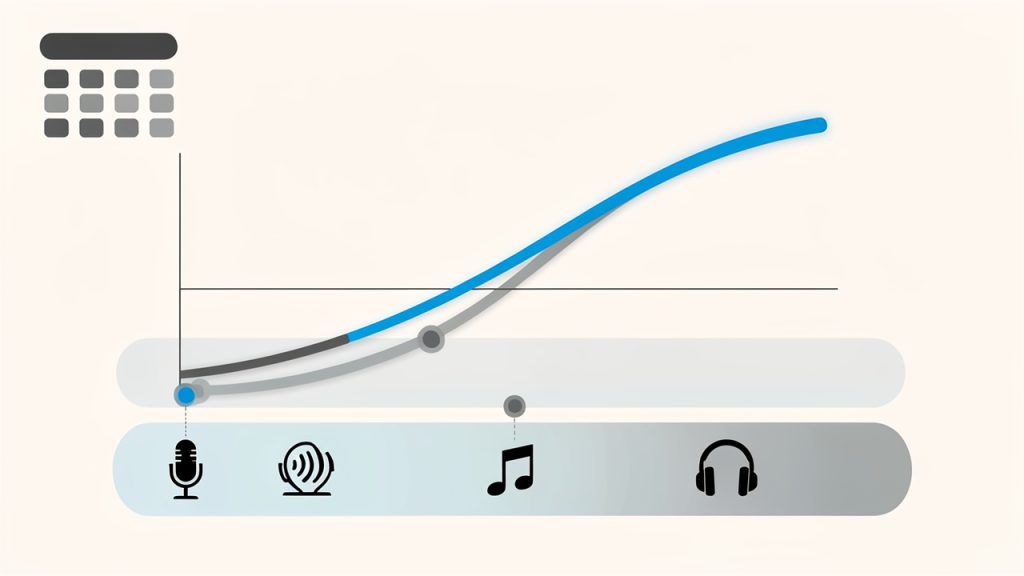
    Bitrate vs quality vs file size graphic: shows audio quality vs file size with markers for low, moderate, and high bitrates and a note about repeated conversions lowering quality.

    File size and storage efficiency

    One reason users search for ways to convert WMA files into MP3 is file sharing. Modern workflows rely on uploads, email attachments, cloud syncing, and mobile downloads. If a file is awkwardly formatted or too large, it slows everything down.

    MP3 gives you more control over size because many converters let you choose output settings. That can be useful if you are preparing files for a website, online course, client portal, or internal knowledge base. Smaller files upload faster and stream more smoothly, which improves the experience for your audience.

    The trade-off is straightforward. Smaller files are convenient, but compressing too aggressively can hurt quality. The ideal setting depends on how the audio will be used. A customer-facing podcast deserves more care than a simple internal memo recording.

    Device and platform compatibility

    Compatibility is the strongest case for converting WMA audio into MP3. WMA may still work in certain desktop environments, but support is less consistent on mobile devices, browser tools, and non-Windows platforms. If you need a format that behaves predictably across ecosystems, MP3 is the practical answer.

    This is especially relevant for freelancers and small businesses that use a patchwork of tools. You might record on one device, edit on another, upload through a browser, and share with clients using entirely different systems. MP3 reduces the chance that someone on the other end will reply with, “I cannot open this file.”

    Speed, simplicity, and online tools

    Most users do not want to install heavy software just to convert a few files. That is why online converters are popular. They are fast, accessible, and often free for basic use. You upload the WMA file, choose MP3 as the output, and download the converted version.

    That convenience comes with a few considerations. If the audio contains sensitive client information, internal meetings, or private interviews, you should pay attention to privacy policies and file retention rules. Convenience is valuable, but trust matters more when the content is confidential.

    For non-sensitive files, online conversion is often the easiest route. It is especially useful for occasional tasks, quick turnarounds, and lightweight workflows where installing desktop software would be overkill.

    A simple format comparison

    Format Full Name Best For Compatibility Typical Benefit Typical Limitation
    WMA Windows Media Audio Older Windows-based libraries and legacy systems Moderate Efficient in some Microsoft environments Less universal support
    MP3 MPEG Audio Layer III General playback, sharing, web use, mobile devices Very high Broad compatibility and flexible file sizes Possible quality loss at low bitrates

    How to get started converting WMA files into MP3

    If you need to convert a file today, the process is usually straightforward. The key is choosing the right method for your situation. A one-off personal file may call for an online converter, while frequent batch work may be better handled with installed software.

    Choose the right conversion method

    Start by thinking about volume and sensitivity. If you only have one or two audio files and they are not confidential, an online tool is often enough. It is quick, requires no setup, and works from almost any device. If you regularly convert recordings, or you need better control over output settings, dedicated desktop software may be more efficient.

    Browser-based tools are ideal for convenience. Desktop apps are better when you need batch conversion, offline access, or stronger privacy. The best tool is the one that fits your workflow without creating extra steps.

    Use sensible output settings

    When converting a WMA file to MP3, avoid choosing settings blindly. Think about where the audio is going next. If it is for speech, online learning, virtual meetings, or internal documentation, you can often use a moderate bitrate and get a clean result with manageable file size.

    If the file contains music, layered sound, or anything intended for polished public listening, choose higher quality settings. You do not need to over-optimize, but you do want to avoid making the file sound thin or distorted. It is often worth testing one sample conversion before processing a whole batch.

    Follow a basic conversion workflow

    For most tools, the process looks like this:

    1. Upload or import the WMA file.
    2. Select MP3 as the output format.
    3. Choose quality settings, if available.
    4. Start the conversion.
    5. Download and test the MP3 file on the device or platform where it will be used.

    The last step matters more than people think. A file that converts successfully is not always a file that performs well in the real world. Test playback, confirm the duration is correct, and make sure the audio sounds as expected before you send it to a client or publish it online.

    Organize files for repeated use

    If conversion is part of your regular workflow, a little organization saves time. Keep your original WMA files in a clearly labeled archive folder. Store the converted MP3 files separately. Add naming conventions that identify the version, date, or intended use.

    This is especially helpful for agencies, consultants, and content teams. Audio assets pile up quickly, and confusion grows when files have similar names but different formats. A simple folder structure can prevent duplicate work and make future updates easier.

    Common problems and how to avoid them

    One common mistake is converting a file several times. Every repeated conversion can degrade quality, so it is better to convert once from the original source and keep that original safely stored. Another issue is choosing output settings that are too low, which can make voice recordings sound muffled or metallic.

    Playback issues can also happen if the file extension changes but the actual format does not. A proper conversion tool re-encodes the file correctly. Simply renaming the extension from .wma to .mp3 does not work. If a converted file seems broken, try a different converter or re-export with more standard settings.

    Conclusion

    Converting WMA audio into MP3 is ultimately about making audio easier to use. MP3 wins because it is widely supported, easy to share, and flexible enough for everything from voice notes to customer-facing content. If you are dealing with older files or inconsistent playback, conversion is often the fastest way to remove friction from your workflow.

    Your next step is simple. Pick one file, convert it to MP3, and test it on the device or platform where it needs to work. If the result sounds right and plays everywhere you need it, you have a repeatable process you can use again and again.

    For a quick refresher on converting a WMA file to MP3, see this short guide on common WMA file to MP3 conversion steps.

  • MP3 to WAV: When to Convert and How It Affects Quality

    MP3 to WAV: When to Convert and How It Affects Quality

    Converting MP3 to WAV sounds simple, but it often becomes confusing the moment audio quality, file size, compatibility, and editing needs enter the picture. Many people assume one format is just as good as the other, or that conversion somehow “restores” lost sound data. It does not. A little clarity saves time, storage, and frustration.

    If you are a small business owner preparing podcast clips, a freelancer editing voice recordings, a developer handling media assets, or someone trying to make an audio file work in the right app, understanding MP3 to WAV conversion matters. The right choice depends on what you need the file to do next, not just on what sounds familiar.

    What is MP3 to WAV?

    At its core, MP3 to WAV means converting an audio file from the MP3 format into the WAV format. MP3 is a compressed audio format designed to reduce file size. WAV is typically an uncompressed audio format that preserves more raw audio data and is widely used in editing, production, and professional workflows.

    Side-by-side visual comparing MP3 vs WAV: left panel shows a simplified, 'thinner' waveform with parts faded or missing and a small file-size icon labeled MP3 (lossy/compressed); right panel shows a fuller, detailed waveform and a large file-size icon labeled WAV (uncompressed).

    The key difference is not just the file extension, it is how the audio is stored. An MP3 removes parts of the sound data to make the file much smaller. This is called lossy compression. A WAV file, by contrast, usually stores audio in a much less compressed or uncompressed form, which makes it larger and easier for editing software, recording systems, and some hardware devices to process accurately.

    This leads to an important point that many users miss. Converting an MP3 into WAV does not improve the original audio quality. If the MP3 already lost data during compression, that missing information does not magically come back when you save it as WAV. What conversion does do is make the file more suitable for certain tasks, especially where compatibility and editing stability matter.

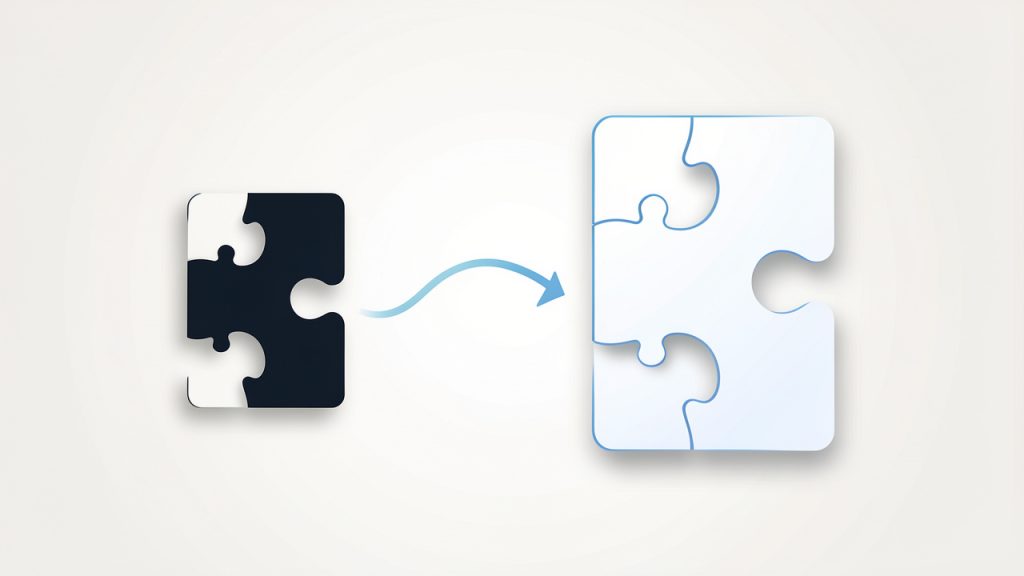
    A metaphorical illustration showing an MP3 file with pieces removed (like missing puzzle pieces) being converted into a larger WAV file where the missing pieces remain absent — emphasizing that conversion does not restore lost audio data.

    A simple way to think about it is this. MP3 is like a highly compressed image sent over messaging apps to save space, WAV is more like the original working file used in design software. Turning the compressed image back into a larger file does not recreate the missing detail, but it may make it easier to use in a professional workflow.

    Key Aspects of MP3 to WAV

    Why people convert MP3 to WAV

    The most common reason for converting MP3 to WAV is workflow compatibility. Audio editors, video production tools, DAWs, transcription systems, and some broadcasting platforms often handle WAV files more predictably than MP3s. WAV files are simpler for software to decode because they usually do not rely on the same compression logic as MP3.

    Another major reason is editing performance. When you edit audio repeatedly, cut sections, apply effects, normalize volume, or mix tracks, working with WAV can reduce the chance of introducing additional compression artifacts. Editors often prefer WAV because it gives them a more stable source format, even if the original audio began as MP3.

    There is also the issue of device and platform requirements. Some systems, including legacy hardware, professional recording devices, call systems, and speech processing tools, specifically request WAV uploads. In those cases, the conversion is not about quality improvement, it is about meeting a technical requirement.

    MP3 vs WAV at a glance

    Feature MP3 WAV
    Compression type Lossy Usually uncompressed
    File size Small Large
    Audio quality Reduced to save space Higher retention of source audio
    Best use case Streaming, sharing, storage Editing, production, archiving workflows
    Compatibility in editors Good, but sometimes less ideal Excellent
    Can conversion restore lost quality? No No

    This comparison highlights the practical trade-off. MP3 is efficient, WAV is flexible. One is built for convenience, the other for production.

    Audio quality misconceptions

    One of the biggest misconceptions around MP3 to WAV is the belief that WAV automatically means “better sound.” That is only true if the source audio was already high quality. If your original file is a 128 kbps MP3, converting it to WAV simply creates a much larger file that contains the same compressed audio quality.

    That does not mean the conversion is pointless, it means the benefit is functional, not magical. For example, if you need to import voice audio into editing software, sync it with video, or deliver it to a platform that rejects MP3 uploads, WAV becomes useful even though it does not improve the sound itself.

    A second misconception is that all WAV files are identical. In reality, WAV files can vary by sample rate, bit depth, and encoding settings. A 44.1 kHz, 16-bit WAV may be perfectly fine for music delivery, while 48 kHz, 24-bit is more common in video and production environments. Understanding those settings matters when precision is important.

    File size and storage implications

    Storage is where the difference becomes obvious fast. An MP3 might be only a few megabytes, while the same audio as WAV can be ten times larger or more. For a solo creator working on a few clips, that may not matter. For a business processing hundreds of recordings, it matters a lot.

    Larger files take longer to upload, download, sync, and archive. If you convert everything by default without a reason, your storage bill and project clutter can grow unnecessarily. That is why MP3 to WAV should be intentional. Use WAV where editing, system compatibility, or delivery standards require it. Keep MP3 where portability and smaller files are the priority.

    For teams and freelancers, this decision affects project management too. WAV files are better as working files, MP3 files are often better as sharing files. Knowing when to use each can keep both quality expectations and storage demands under control.

    How to Get Started with MP3 to WAV

    Start with your actual goal

    Before converting any file, ask a practical question: Why do I need WAV? If the answer is “to improve quality,” you may not get the result you expect. If the answer is “my editor, client, software tool, or system requires WAV,” then the conversion makes sense.

    This small mindset shift prevents wasted time. A lot of users convert files simply because WAV sounds more professional. Sometimes it is the right move. Sometimes it just creates larger files with no real benefit. The best workflow starts with the next step in your process, not the format name alone.

    For example, if you are sending a podcast episode draft to a client for approval, MP3 is often enough. If you are importing spoken word tracks into audio editing software for cleanup and mastering, WAV is usually the better choice.

    Choose the right conversion settings

    When converting MP3 to WAV, pay attention to the export settings if the tool allows it. The most common options include sample rate and bit depth. These settings do not restore lost quality from the MP3, but they can affect compatibility with downstream tools.

    For general use, 44.1 kHz, 16-bit WAV is a safe standard. For video production or professional post-production, 48 kHz is often preferred. If you are delivering files to a client or platform, use their required settings rather than guessing.

    If your conversion tool offers “high quality” presets, be careful not to confuse that label with source recovery. A high-quality WAV export from a low-bitrate MP3 is still limited by the original MP3. The conversion can preserve what remains, but it cannot recreate what was removed during compression.

    Use an online tool carefully

    Online converters are popular because they are fast and convenient. For many users, especially those handling a few files at a time, an online MP3 to WAV tool is the easiest option. You upload the MP3, choose WAV, convert, and download.

    That convenience comes with considerations. If your audio contains private interviews, client calls, unreleased media, legal recordings, or sensitive business material, be cautious. Not every free tool clearly explains how long files are stored or whether uploads are deleted after processing. For public or low-risk files, online conversion is usually fine. For confidential work, a trusted desktop app may be the safer route.

    If you do use a browser-based tool, look for clear file limits, transparent privacy policies, and support for the output settings you need. Ease of use matters, but so does control.

    A simple conversion workflow

    1. Upload your MP3 file to a trusted converter or open it in a desktop audio tool.
    2. Select WAV as the output format and review any settings like sample rate or bit depth.
    3. Convert and download the file, then test it in the app, editor, or system where you plan to use it.

    That is enough for basic needs. What matters more is checking the output file in the real destination environment. A conversion is only successful if the new WAV file works where you need it.

    Check the result before moving on

    After converting, play the WAV file and verify a few basics. Make sure the audio starts and ends correctly, volume levels are consistent, and the file opens in your target software. If the file is for client work or production, confirm that the sample rate matches project requirements.

    This verification step is often skipped, especially when converting in bulk. That can create avoidable problems later, such as sync issues in video timelines or rejected uploads on third-party systems. A quick check now can save a rework cycle later.

    If you handle audio regularly, it is smart to create a repeatable mini-workflow. Use the same settings, naming conventions, and storage folders each time. That level of consistency helps freelancers, teams, and small businesses stay organized as media files pile up.

    Conclusion

    MP3 to WAV conversion is less about making audio sound better and more about making it usable in the right context. MP3 is great for compact storage and easy sharing, WAV is better for editing, production, and systems that require a less compressed format. The conversion has value, but only when it supports your actual workflow.

    The next step is simple. Look at how you plan to use the file after conversion. If you need cleaner compatibility, easier editing, or a format accepted by professional tools, convert your MP3 to WAV with the right settings and verify the output. If not, keeping the file as MP3 may be the smarter and more efficient choice.