JNTZN

Tag: image-conversion

  • How to Convert PNG Files to PDF Quickly

    How to Convert PNG Files to PDF Quickly

    Turning a PNG into a PDF sounds like a tiny task until you need to do it quickly, keep the image quality sharp, and make sure the file is easy to share. That is where many people hit friction. A screenshot, scanned receipt, signed form, design mockup, or product image may look fine as a standalone image, but once it needs to be emailed, printed, archived, or combined with other pages, PDF is usually the format people expect.

    For small business owners, freelancers, developers, and productivity-focused users, converting PNG files into PDFs is less about file types and more about workflow. You want something simple, reliable, and preferably free. You also want to avoid bloated software, confusing settings, and quality loss. The good news is that converting a PNG file into a PDF is usually straightforward once you understand what changes, what stays the same, and what options matter.

    What is converting a PNG into a PDF?

    At its core, converting a PNG into a PDF means taking an image file and packaging it into a document format.

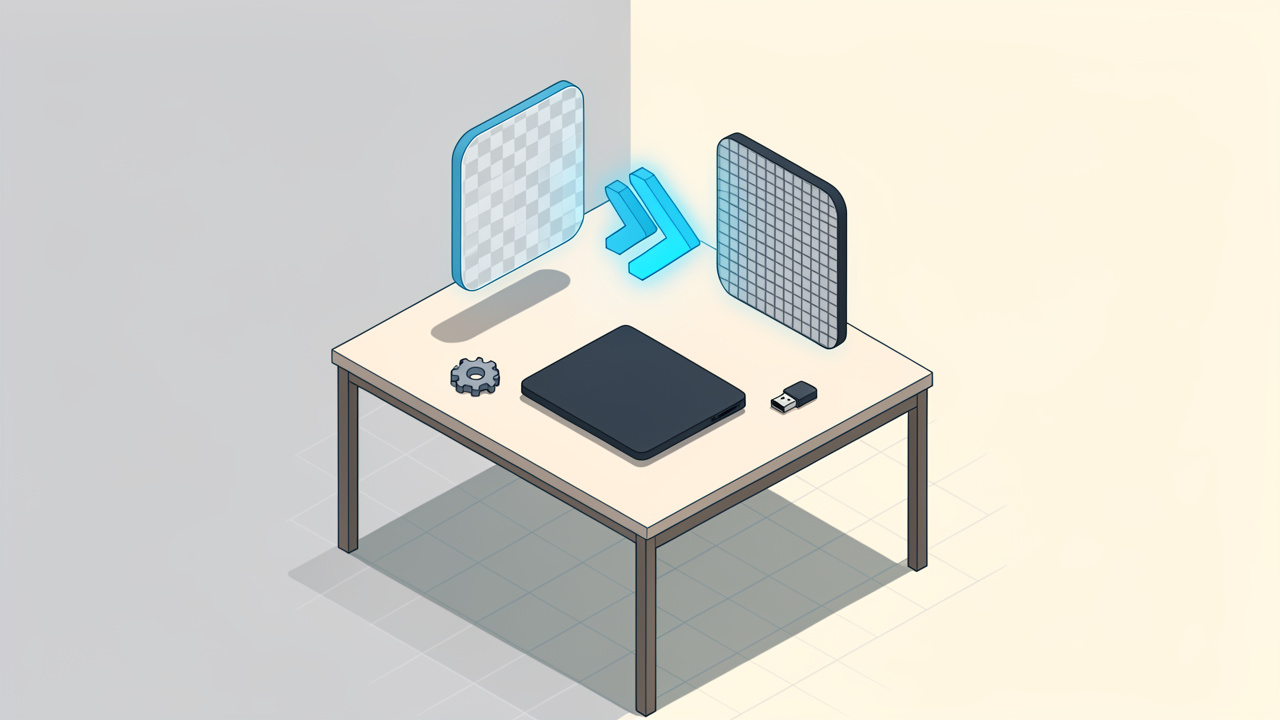
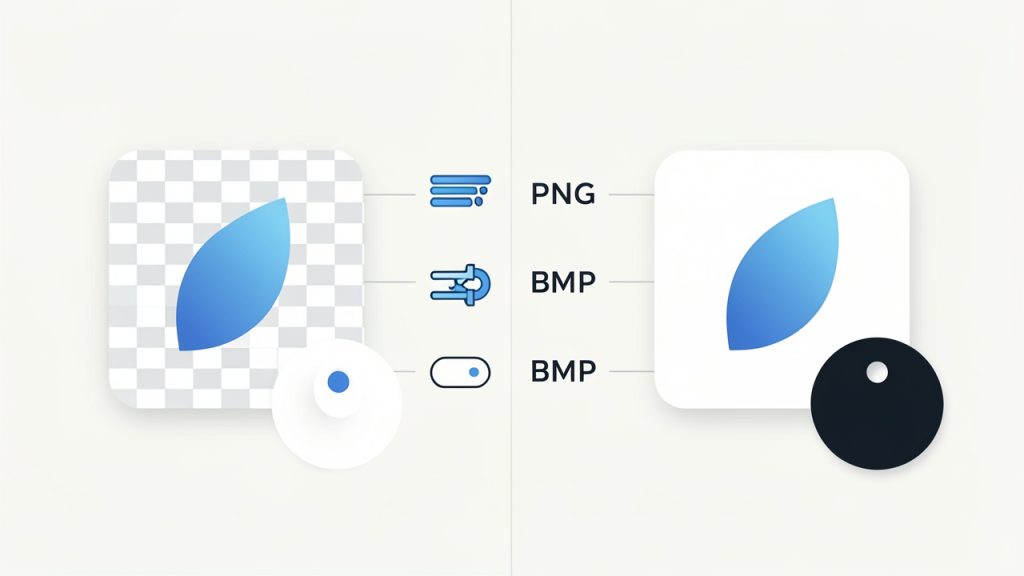
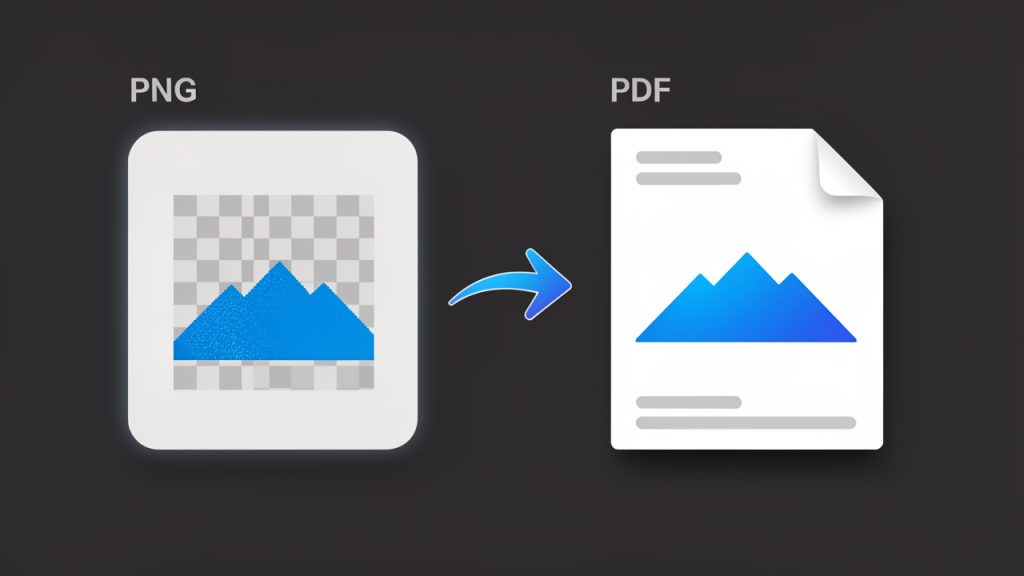
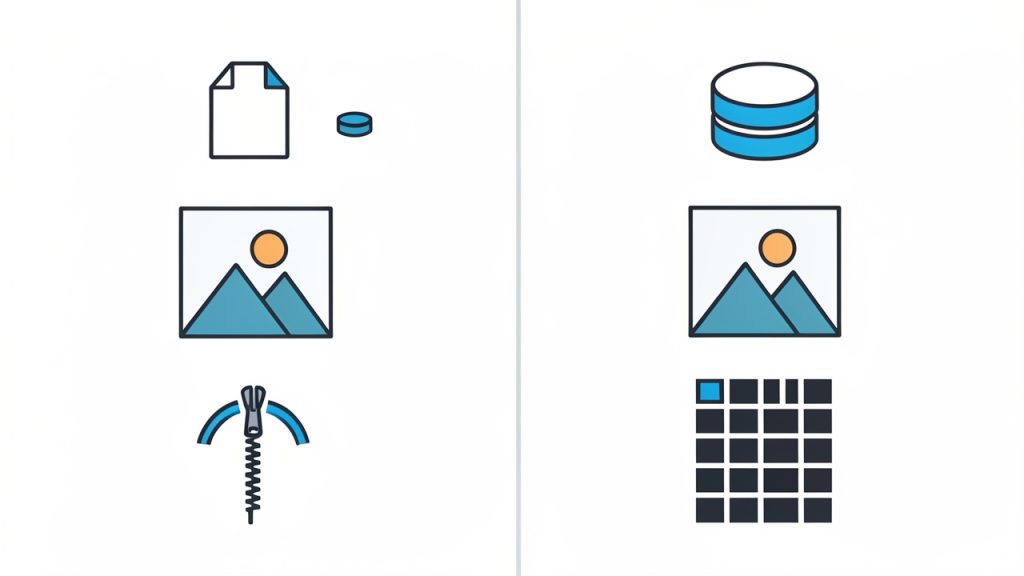
    Side-by-side comparison showing a PNG image (thumbnail of a logo/screenshot with a checkerboard transparency background) on the left and a PDF document page (same image centered on a page with header/footer metadata) on the right, with an arrow labeled “Convert” between them. Visual cues: ‘PNG (lossless image)’ and ‘PDF (document wrapper)’ labels, small icons for file types, and a subtle note showing that layout and compatibility are added by the PDF.

    A PNG file is designed for images, especially graphics that need sharp edges, transparency, or lossless quality. PNG is a lossless image format. A PDF, on the other hand, is designed for sharing and presenting content in a consistent layout across devices and platforms.

    This distinction matters more than it first appears. A PNG is excellent when you need an image to remain crisp, such as a logo, screenshot, chart, or digital illustration. A PDF becomes more useful when that same image needs to be treated like a document. If you are sending an invoice attachment, submitting paperwork, compiling scans, or preparing visual assets for review, a PDF gives the file more structure and broader compatibility.

    The phrase people search for, often written as “PNG to PDF”, usually refers to either a one-time conversion or an ongoing need in daily work. Sometimes it is as simple as converting a single image into a one-page PDF. In other cases, it means combining multiple PNG files into one organized PDF document with the right page order, page size, and orientation.

    Why PDF is often the better final format

    PDF has become the standard for formal file exchange because it preserves layout and is widely supported. Whether your recipient opens it on a laptop, tablet, phone, or office printer, the content is far more likely to appear exactly as intended. That predictability is a major reason people convert image files into PDFs instead of sending raw images.

    There is also a psychological aspect to file format choice. A PDF feels complete. It looks more official, more stable, and easier to archive. When a client receives a PDF instead of a loose image file, the presentation often feels more polished. For businesses and freelancers, that small difference can support a more professional impression.

    When people commonly convert PNG files into PDFs

    The most common use cases are practical and repetitive. Someone scans paperwork as images and needs to combine the pages into a single PDF. A freelancer exports mockups or slides as PNG files and wants to send them as a clean presentation document. A developer captures UI screenshots for bug reports or product documentation and converts them into a shareable file that can be reviewed or stored more easily.

    In each case, the image itself is still important, but the document wrapper is what makes the file easier to move through a workflow. That is why PNG-to-PDF conversion has become such a common utility task across industries.

    Key aspects of converting PNG files into PDFs

    A good conversion is not just about changing the extension. It is about preserving what matters while making the file more useful. To do that well, it helps to understand image quality, file size, layout behavior, and compatibility.

    Image quality and resolution

    One of the first concerns people have is whether converting a PNG into a PDF will reduce quality. In many cases, the answer is no, at least not automatically. If the conversion tool embeds the PNG cleanly into the PDF, the image can remain visually identical.

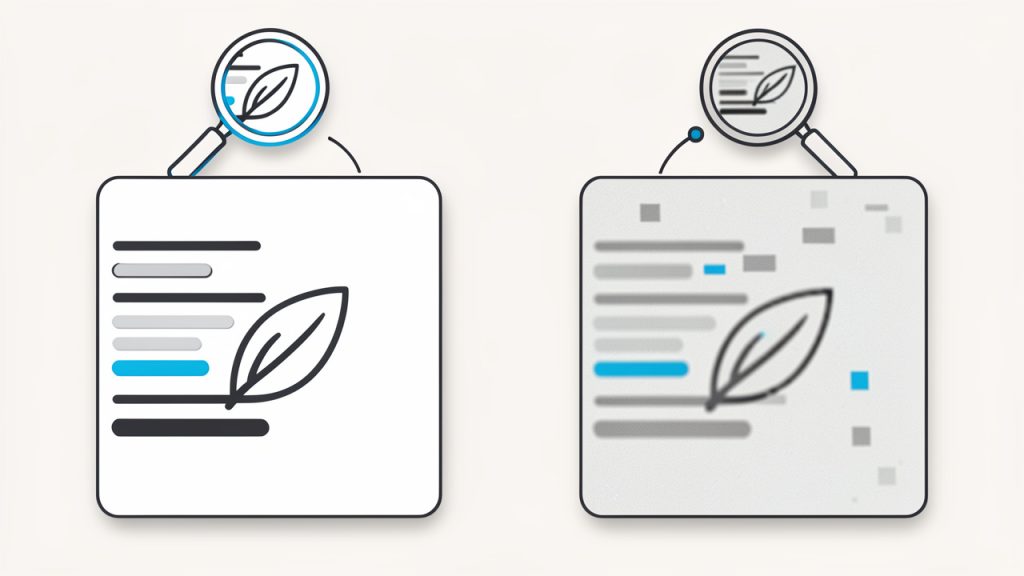
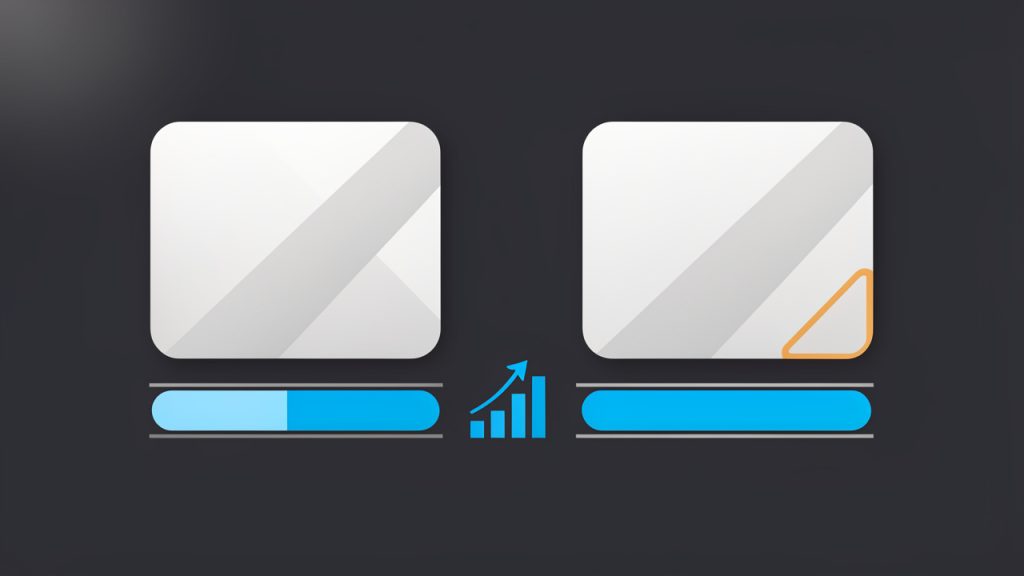
    A two-panel comparison illustrating image quality effects: left panel shows the original sharp PNG (close-up of small text and line art, labeled ‘Source PNG — lossless’), right panel shows the same image after aggressive conversion/compression (blurred edges, artifacts, labeled ‘Compressed/optimized PDF — lower quality’). Include callouts for ‘resolution unchanged’ and ‘compression can soften text’.

    That said, some tools optimize or compress files during export, and that can reduce quality if the settings are aggressive or hidden. If your PNG contains small text, interface elements, or line art, even slight compression can make the result look softer. This is especially noticeable when printing. If visual precision matters, check whether the tool allows you to control compression or output quality.

    Resolution is another factor that affects the final result. A low-resolution PNG converted into a PDF does not become sharper just because it is now in document format. The PDF can preserve the image, but it cannot invent detail that was never there. If the source PNG is blurry or pixelated, the PDF will usually reflect that same limitation.

    File size trade-offs

    A PDF is not always smaller than a PNG. In fact, depending on how the conversion is handled, the file can become larger. This surprises users who expect PDF to act like a compression shortcut. In reality, the PDF may wrap the image with additional document data, metadata, or page information, increasing the overall size.

    For business workflows, file size matters when you are emailing attachments, uploading documents to portals, or storing large numbers of files in the cloud. If you are converting multiple high-resolution PNGs into one PDF, the final document can grow quickly. In those cases, use a tool that balances compression with readability rather than simply maximizing quality at all costs.

    The right choice depends on your goal. If you need a polished print-ready document, a larger size may be acceptable. If you only need a file that can be reviewed on screen and sent quickly, a lighter PDF is often better.

    Single image vs. multi-page PDF

    Not every conversion works the same way. A single PNG can become a one-page PDF with minimal effort. A batch of PNGs is more complex because page order, page breaks, orientation, and page sizing all come into play.

    This is where a good converter becomes more than a format changer. It becomes a document assembly tool. If you are combining receipts, portfolio pages, contracts, forms, or screenshots, you want to be able to control sequence and page formatting. A well-structured PDF is much easier to navigate than a folder full of disconnected image files.

    Transparency, margins, and page layout

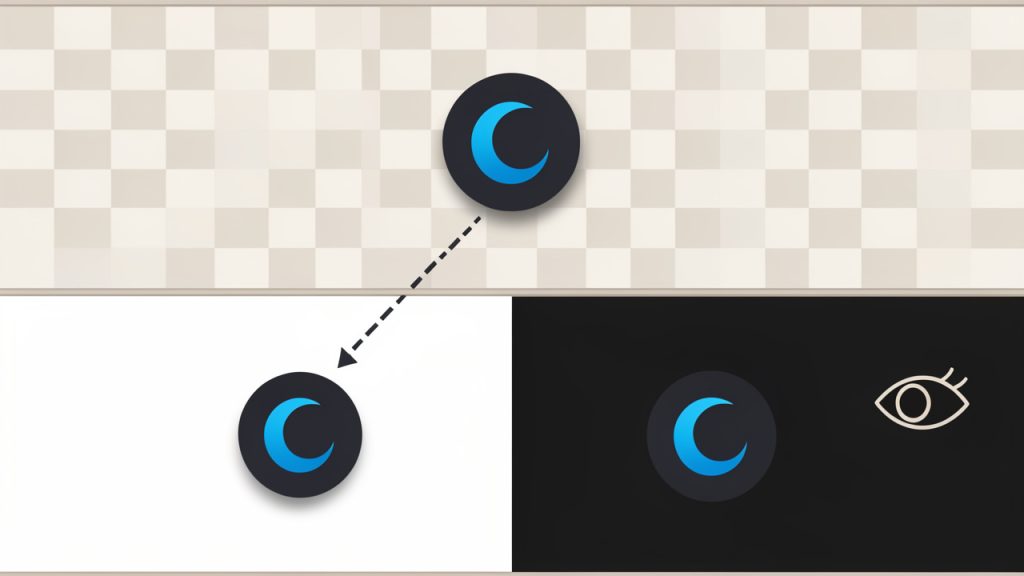
    PNG files support transparency, which is one of the format’s strengths. But PDF pages need a defined background and page area. Depending on the converter, transparent parts of the PNG may appear white, flattened, or placed against a default background when exported to PDF.

    Margins can also affect presentation. Some tools stretch the image to fit the page. Others center it and leave whitespace around the edges. Neither is inherently wrong, but the result may look very different from what you expected. This matters for scanned documents, digital art, and branding materials, where alignment and spacing contribute to readability and visual polish.

    Security and privacy considerations

    This is one of the most overlooked aspects of online conversion. If you are using a web-based tool to turn PNG files into PDFs, you are uploading your content to a server somewhere. For everyday files, that may be acceptable. For contracts, IDs, invoices, medical records, or client work, it deserves more thought.

    A privacy-conscious workflow means checking whether files are deleted automatically, whether uploads are encrypted, and whether the service has a clear retention policy. For sensitive material, a local desktop or device-based conversion method may be the safer option. Convenience is valuable, but so is control.

    Common methods compared

    Method Best For Pros Trade-Offs
    Online converter Quick one-off tasks Fast, accessible, no installation Privacy concerns, upload limits, variable quality
    Built-in print to PDF Basic local conversion Free, available on many devices, simple Limited control over page layout and batching
    Desktop software Frequent or sensitive conversions Better quality control, offline use, more settings May require installation or payment
    Mobile app On-the-go work Convenient for scans and quick sharing Smaller screen, fewer advanced options

    How to get started converting PNG files into PDFs

    For most people, the best starting point is the simplest one. Use the method already available to you, then move to a more specialized tool only if your workflow demands it. The right approach depends on whether you care most about speed, quality, privacy, or document organization.

    Start with your actual use case

    Before converting anything, ask one simple question: What is this PDF for? That answer shapes almost every decision that follows. If the file is for internal reference, speed may matter most. If it is for a client or official submission, presentation and compatibility become more important. If it contains confidential information, local processing should move higher on your list.

    This small moment of clarity prevents a lot of unnecessary trial and error. People often choose a tool first and only later realize it compresses too much, adds watermarks, limits file count, or handles page formatting poorly. Starting with the use case keeps the process efficient.

    A simple conversion workflow

    If you are new to converting PNG files into PDFs, the workflow is usually straightforward:

    1. Choose your PNG file or files.
    2. Select a trusted conversion method, either online or on your device.
    3. Check page order, orientation, and size if using multiple images.
    4. Export the PDF and review it carefully before sharing or printing.

    Even this basic process benefits from a final review. Open the PDF on a second device if possible. Make sure text is readable, page crops look correct, and image edges are not cut off. A quick check can save an awkward resend later.

    Organizing multiple PNGs into one PDF

    When converting multiple PNG files, the main challenge is not technical. It is organizational. If the images are named inconsistently or uploaded in the wrong order, the PDF can become confusing immediately. Renaming files before conversion is often worth the extra minute.

    For example, if you are combining pages from a scanned contract, names like page-1, page-2, and page-3 will reduce errors. If you are assembling design samples or report images, logical naming helps the converter maintain sequence. It also makes future edits easier if you need to rebuild the PDF later.

    Choosing the right page size and orientation

    This is a detail many users ignore until the final file looks odd. A portrait PNG placed on a landscape PDF page can create too much blank space. A wide screenshot forced into a standard letter-size page may appear too small to read comfortably. The best tools let you match the image dimensions to the page or scale the page to fit the image.

    If the PDF is meant for printing, choose standard paper sizes such as A4 or Letter. If it is only for digital viewing, a tighter image-to-page fit can make the document look cleaner and more modern. The point is not to chase perfection. It is to choose settings that serve the way the file will actually be used.

    Avoiding common problems

    Most conversion issues fall into a few predictable categories. The image looks blurry because the source file was too small or the tool compressed it. The pages are out of order because files were not arranged before export. The PDF is too large because high-resolution images were bundled without optimization. The margins look awkward because the converter applied default page settings that did not match the image shape.

    These are not complex problems, but they are frustrating when you are in a hurry. A little preparation goes a long way. Keep source images organized, know whether the file is for print or screen, and test one sample conversion before processing a larger batch.

    Online tool or local tool?

    For free, easy-to-use workflows, online tools are often the first choice. They work in the browser, require no setup, and handle basic conversions quickly. This is ideal when you are on a shared machine, switching devices, or just trying to finish a small task with minimal effort.

    Local tools make more sense when privacy, repeat usage, or output consistency matters. If you regularly convert invoices, reports, forms, or client assets, a desktop or built-in operating system solution may feel more dependable over time. It removes upload delays, avoids internet dependency, and gives you more control over where your files go.

    The best choice is not universal. It is situational. A productivity-minded user often benefits from having both options available and using each where it fits best.

    Conclusion

    Converting a PNG into a PDF is a simple task on the surface, but the best results come from understanding what the conversion is really doing. You are not improving the original image just by changing formats. You are making that image easier to share, organize, print, archive, and present. Once you see it that way, the right settings and tools become much easier to choose.

    If you need to get started today, begin with a small test file and focus on three things: image clarity, page layout, and file size. If those look right, your process is probably solid. From there, you can build a faster workflow for receipts, forms, screenshots, portfolios, or any other images you need to turn into a polished PDF document.

  • How to Convert JPG Images to AVIF for Faster Websites

    How to Convert JPG Images to AVIF for Faster Websites

    If your website feels slower than it should, your image format might be the hidden culprit. Large JPG files are still everywhere, but they are not always the most efficient choice for modern websites, apps, and digital workflows.

    Converting JPG images to AVIF can dramatically reduce file size while preserving visual quality. That matters whether you run an online store, publish blog content, build web apps, or simply want faster-loading pages and leaner media files. For small business owners, freelancers, developers, and productivity-focused users, this is one of those simple upgrades that can pay off immediately.

    What Is JPG to AVIF?

    At its core, converting a JPG file into AVIF means changing a traditional image into a newer, more efficient format. JPG, or JPEG, has been the standard for years because it is widely supported and easy to use. AVIF is a newer format designed to deliver better compression, often with noticeably smaller file sizes at similar or better visual quality.

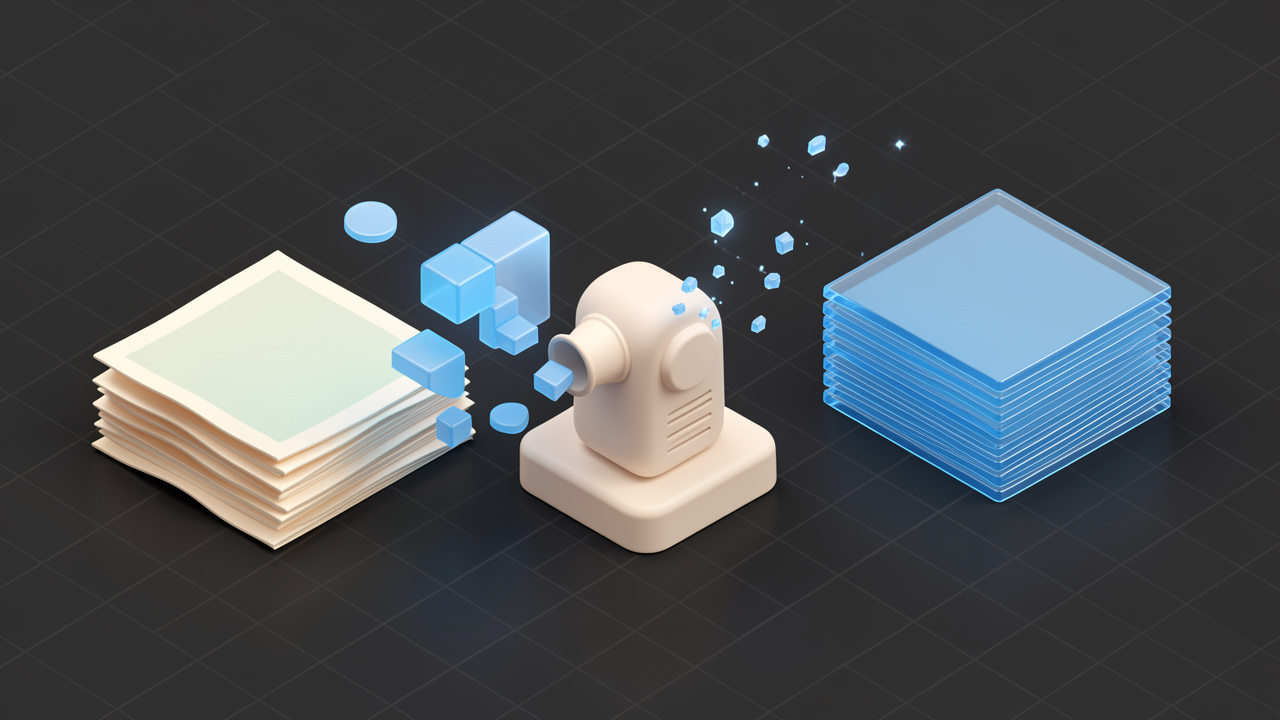
    Think of it like packing a suitcase more intelligently. A JPG gets the job done, but AVIF often fits the same contents into less space. That smaller footprint can reduce bandwidth usage, improve page speed, and make image-heavy websites feel much more responsive.

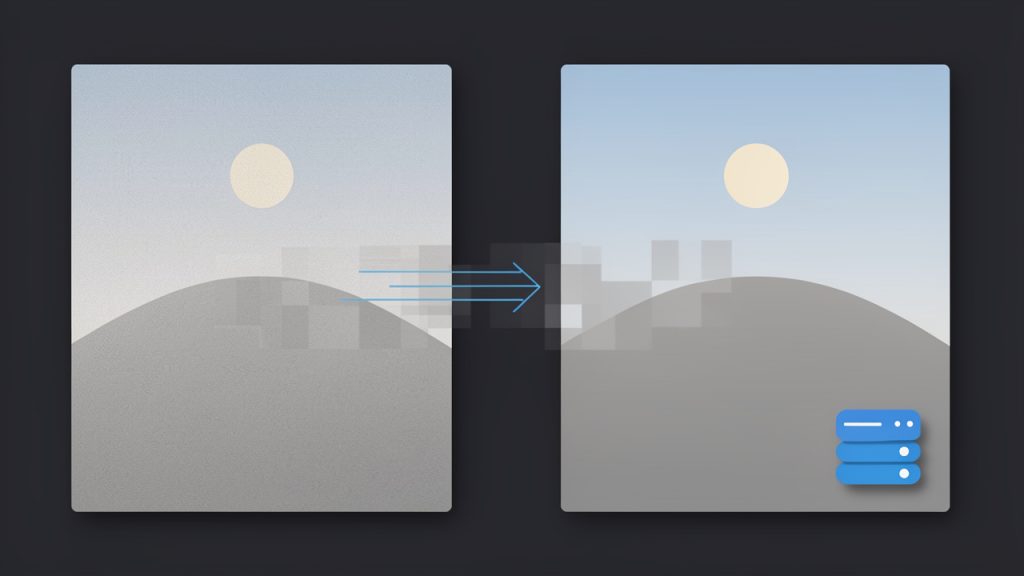
    Visual suitcase packing analogy: JPG bulky and overflowing, AVIF neatly packed, caption: Same content, less space

    AVIF stands for AV1 Image File Format. It is based on the AV1 video codec, which is known for efficient compression. In practical terms, that means AVIF can store rich image detail while keeping file sizes low. It also supports modern features such as transparency and high dynamic range, which gives it an edge in certain use cases.

    For many users, the reason to convert from JPG to AVIF is straightforward: faster delivery with less compromise. If you are managing web assets, sending image files online, or optimizing a site for SEO and performance, that matters.

    Key Aspects of JPG to AVIF

    Why people convert JPG images to AVIF

    The biggest reason is file size reduction. Smaller image files can improve load times, especially on mobile networks and slower connections. That directly affects user experience. It can also affect conversions, bounce rate, and search visibility, because speed is now part of how people judge a site and how search engines evaluate it.

    There is also a storage benefit. If you manage hundreds or thousands of images, even modest compression gains can translate into significant savings. That is helpful for e-commerce catalogs, portfolio sites, marketing teams, content publishers, and SaaS platforms that serve media at scale.

    Another important factor is quality retention. AVIF often performs better than JPG at lower file sizes, particularly in images with gradients, subtle color shifts, or detailed textures. The exact results depend on the source image and compression settings, but in many cases AVIF gives you a better balance between appearance and weight.

    JPG vs AVIF at a glance

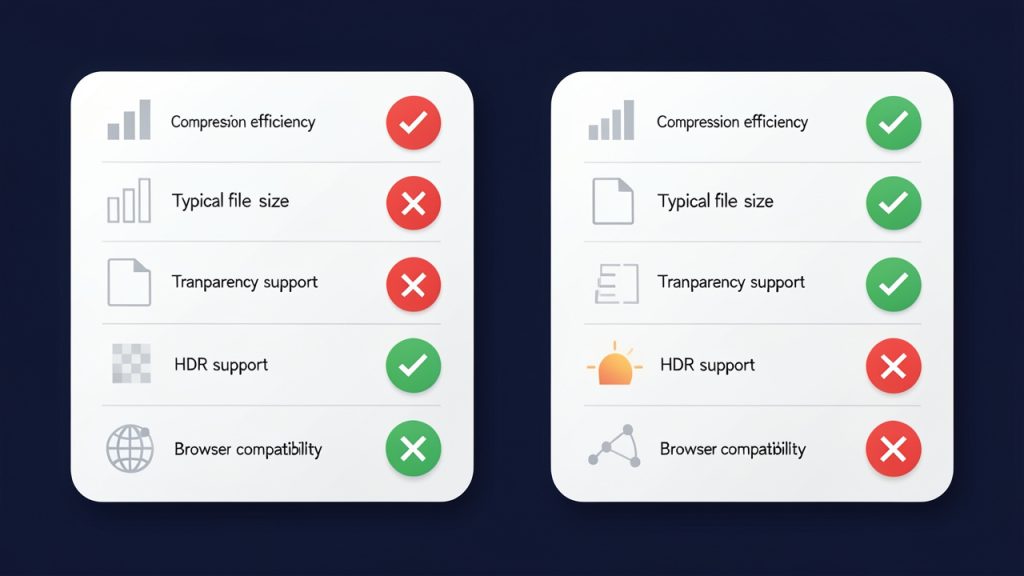
    Feature-comparison infographic: JPG vs AVIF across compression efficiency, file size, transparency, HDR, and browser compatibility

    Feature JPG AVIF
    Compression efficiency Good Excellent
    File size Typically larger Typically smaller
    Image quality at low size Acceptable to good Often better
    Transparency support No Yes
    HDR support Limited Yes
    Browser compatibility Very broad Broad, but not universal in older environments
    Best use case Legacy compatibility Modern web optimization

    JPG remains useful because it works almost everywhere. AVIF is more future-focused. If maximum compatibility is your top priority, JPG still has a role. If performance and modern optimization matter more, AVIF is often the stronger option.

    The quality trade-off you should understand

    No image conversion is magic. When you convert a JPG into AVIF, the AVIF file can only work with the data already present in the JPG. If the original JPG was heavily compressed or visually degraded, converting it will not restore missing detail.

    That is why source quality matters. A high-quality JPG usually converts more successfully than a low-quality one. AVIF can preserve what is there very efficiently, but it cannot invent lost information. For the best results, start with the cleanest source image you have.

    You should also be aware that aggressive AVIF compression can go too far. While the format is powerful, very small file targets can still introduce artifacts, soften detail, or alter texture. The goal is not to create the smallest file possible. The goal is to create the smallest file that still looks right for the viewer.

    Where AVIF works best

    AVIF is especially effective for websites, landing pages, digital product interfaces, blog images, and online stores. In these environments, every kilobyte counts. Faster pages can improve engagement and help visitors stay focused instead of waiting for visuals to load.

    It is also useful in workflows where you serve multiple image sizes and want efficient delivery across desktop and mobile devices. Developers often prefer AVIF because it supports modern performance strategies without forcing a visible quality drop.

    That said, AVIF may not be ideal for every scenario. Some older software tools, legacy systems, and outdated browsers may not handle it well. If your audience includes users on older platforms, you may need a fallback format such as JPG or WebP.

    How to Get Started With JPG to AVIF

    Choose the right conversion method

    Most people start with an online JPG-to-AVIF converter. This is the easiest route because it requires no installation and usually works in a browser. You upload the JPG, select quality settings if available, convert the file, and download the result.

    This option is ideal for casual use, quick tasks, or small batches. It is especially attractive for freelancers and small businesses that want speed and simplicity without learning new software.

    If you handle images regularly, desktop software or automated workflows may be more efficient. Developers and teams working with large media libraries often prefer batch tools or build-process integration. That makes it easier to optimize images consistently without manual repetition.

    What to look for in a good converter

    Not all converters are equal. A useful tool should preserve visual quality, offer clear settings, and process files quickly. It should also be transparent about privacy, especially if you are uploading client assets, product photography, or branded media.

    A strong converter typically offers these essentials:

    1. Quality control, so you can balance appearance and file size
    2. Batch conversion, if you work with multiple images
    3. Secure handling, especially for business or client files
    4. Fast processing, so optimization does not become a bottleneck

    If a tool gives no control over output quality, the result can feel unpredictable. For serious use, that is a limitation worth avoiding.

    A simple workflow that works

    The easiest way to approach converting JPG files into AVIF is to test a few representative images first. Do not convert your entire library blindly. Pick one product photo, one banner, one blog image, and one detailed visual. Compare the AVIF outputs side by side with the originals.

    Pay attention to text clarity, edge sharpness, gradients, skin tones, and fine textures. Some images compress beautifully. Others need gentler settings. A short testing phase can save you from rolling out assets that are technically smaller but visually weaker.

    Once you find the right quality range, apply it consistently. This turns image optimization from a guessing game into a repeatable process. For businesses and creators, that kind of consistency matters just as much as raw compression.

    Best practices for websites and online content

    If you are using AVIF on a website, keep compatibility in mind. Many modern browsers support it, but a fallback strategy is still wise. That is especially true if your site serves a wide audience across devices and regions.

    You should also avoid uploading oversized source images just because AVIF compresses well. Compression is only one part of performance. Proper dimensions, responsive image delivery, and sensible quality settings still matter.

    Scenario Better choice Why
    Legacy system or universal compatibility needed JPG Safest support across older tools and browsers
    Modern website focused on speed AVIF Strong compression and lower bandwidth use
    Images need transparency AVIF Supports alpha transparency
    Quick social sharing with minimal workflow changes JPG Easier support across platforms
    Large content library with performance goals AVIF Better long-term optimization potential

    Common mistakes to avoid

    One common mistake is assuming every image should be converted automatically. Some visuals benefit greatly from AVIF, while others may show little improvement or require careful tuning. It is better to evaluate by use case than to treat all files the same.

    Another mistake is ignoring visual review. File size is measurable, but quality is contextual. An image that looks fine in a thumbnail may fall apart in a hero banner or full-width product view. Always check the image where it will actually be used.

    People also forget about workflow compatibility. If your CMS, design software, email platform, or client handoff process does not support AVIF smoothly, the best technical format may still create practical friction. Efficiency is not just about compression. It is also about how easily your team can use the result.

    Conclusion

    Converting JPG images to AVIF is one of the smartest low-effort upgrades for modern digital performance. It can reduce file size, improve loading speed, and help you serve cleaner, lighter media across websites and online platforms. For small businesses, freelancers, developers, and productivity-minded users, that makes AVIF well worth considering.

    The best next step is simple: take a few of your most-used JPG files and convert them to AVIF as a test. Compare file size, loading behavior, and visual quality in real use. Once you see what works for your images and audience, you can build a faster, more efficient workflow around it.

  • How to Convert JPG to SVG for Sharp Logos and Icons

    How to Convert JPG to SVG for Sharp Logos and Icons

    A blurry logo can make even a polished brand look amateur in seconds. If you have ever tried to enlarge a JPG for a website header, a storefront sign, or a client presentation, you have probably run into the same problem, the image gets soft, jagged, and unusable fast.

    That is where converting a JPG to an SVG becomes so valuable. For small business owners, freelancers, developers, and anyone working with digital assets, understanding this conversion can save time, reduce design friction, and improve visual quality across print and screen.

    The catch is simple. A JPG and an SVG are not just different file extensions, they are built in completely different ways. That means converting a JPG image into SVG format is sometimes straightforward, sometimes messy, and often misunderstood. Once you know what actually happens during the process, it becomes much easier to choose the right tool, the right image, and the right expectations.

    What Is Converting a JPG into an SVG?

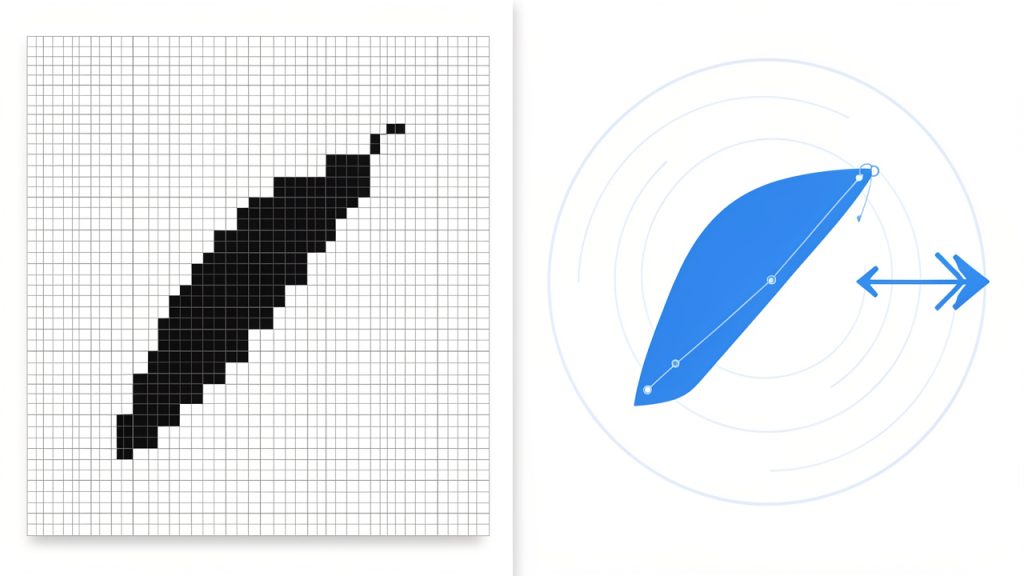
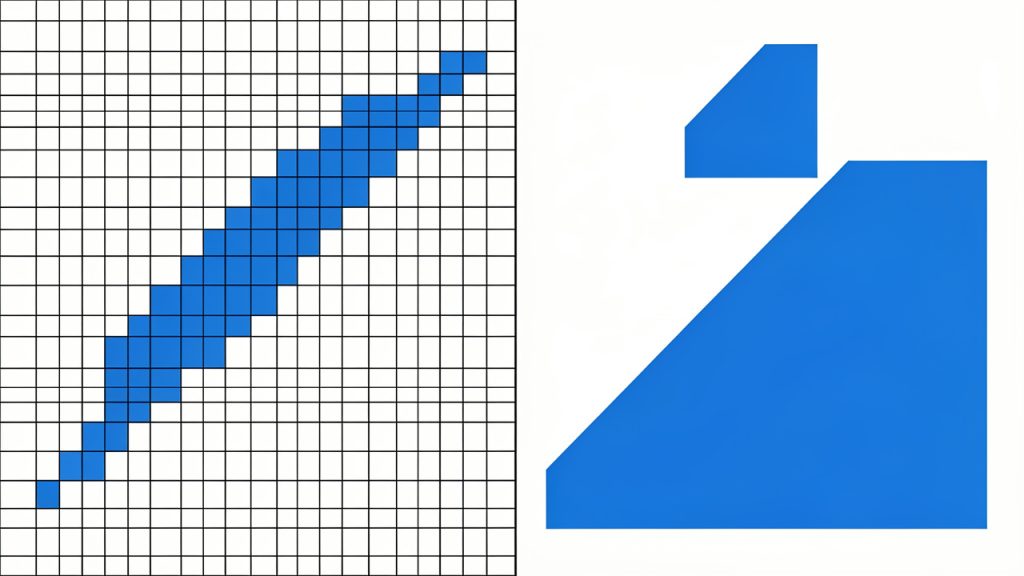
    A JPG is a raster image format. It stores pictures as a grid of colored pixels, which makes it ideal for photographs and detailed images with gradients, shadows, and subtle textures. The downside is that raster images lose quality when scaled up. Every enlargement stretches those pixels further.

    An SVG, or Scalable Vector Graphics file, works differently. Instead of storing a fixed grid of pixels, it uses mathematical paths, curves, and shapes to describe the image. Because of that, SVG files can scale to almost any size without losing sharpness. A logo on a business card and the same logo on a billboard can remain crisp when stored as an SVG.

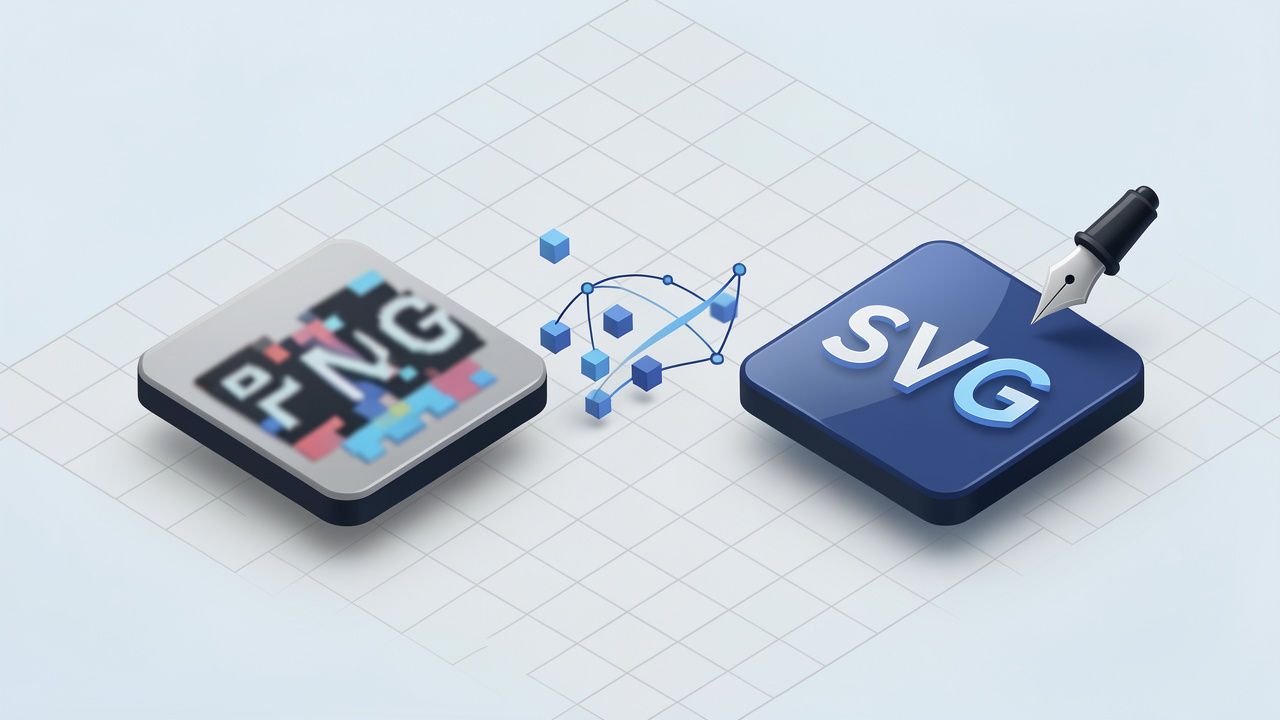
    Side-by-side comparison showing a JPG (zoomed-in pixel grid with jagged edges when enlarged) next to an SVG (same artwork rendered with smooth vector paths at multiple sizes). The SVG side should show crisp scaling from small to billboard size, while the JPG side shows pixelation when enlarged.

    When people search for a way to convert a JPG to an SVG, they are usually trying to solve one of three problems. They want a logo that scales cleanly, an icon that looks sharp on modern screens, or artwork that can be edited more easily in design software. In all three cases, the goal is not just conversion for its own sake. The real goal is flexibility, quality, and reuse.

    That said, converting a JPG into an SVG is not magic. The software does not restore lost quality from a compressed photo. It interprets the image and attempts to turn visible edges, colors, and shapes into vector paths. This is why a simple black-and-white icon converts beautifully, while a complex photo of a person or landscape often becomes bloated, inaccurate, or visually strange.

    Key Aspects of Converting JPG Images to SVG

    Raster and vector are fundamentally different

    The biggest misunderstanding about converting a JPG image into SVG format is the assumption that every image will improve just by changing file type. It will not. File format conversion does not automatically upgrade the design itself.

    A low-resolution JPG logo might become an SVG file, but if the original image is noisy, pixelated, or poorly cropped, the vector result may simply trace those flaws. Think of it like tracing a wrinkled sketch with a pen. You may create clean lines, but you are still starting from imperfect source material.

    This is why the best candidates for conversion are images with clear edges, limited colors, strong contrast, and simple shapes. Logos, symbols, badges, signatures, and line art usually perform well. Product photos, portraits, and detailed scenic images usually do not.

    Automatic conversion vs. manual redrawing

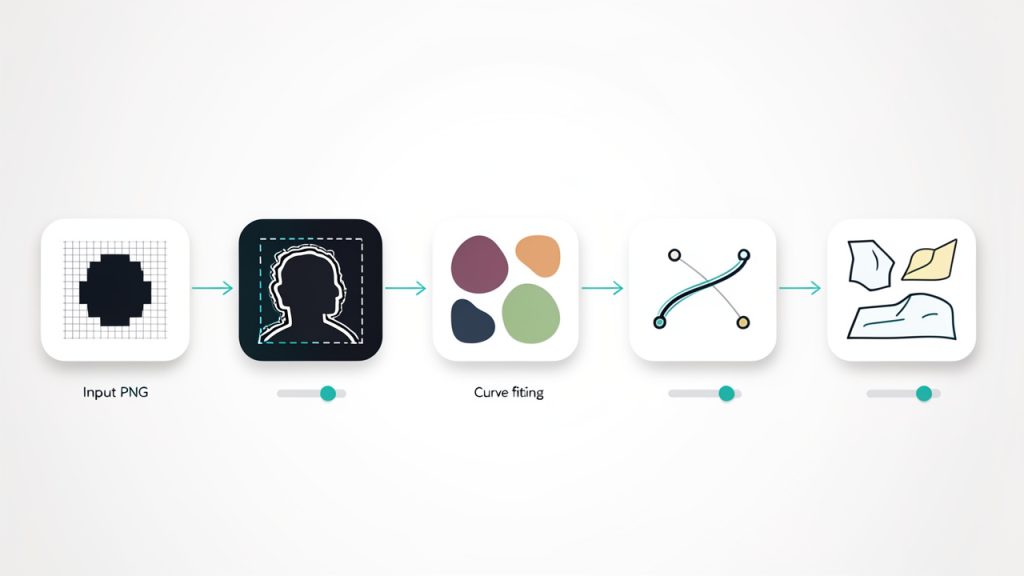
    Most online tools that convert JPG files to SVG use auto-tracing. They analyze the image, identify boundaries between color areas, and convert those boundaries into vector paths. This is fast, convenient, and often good enough for simple use cases.

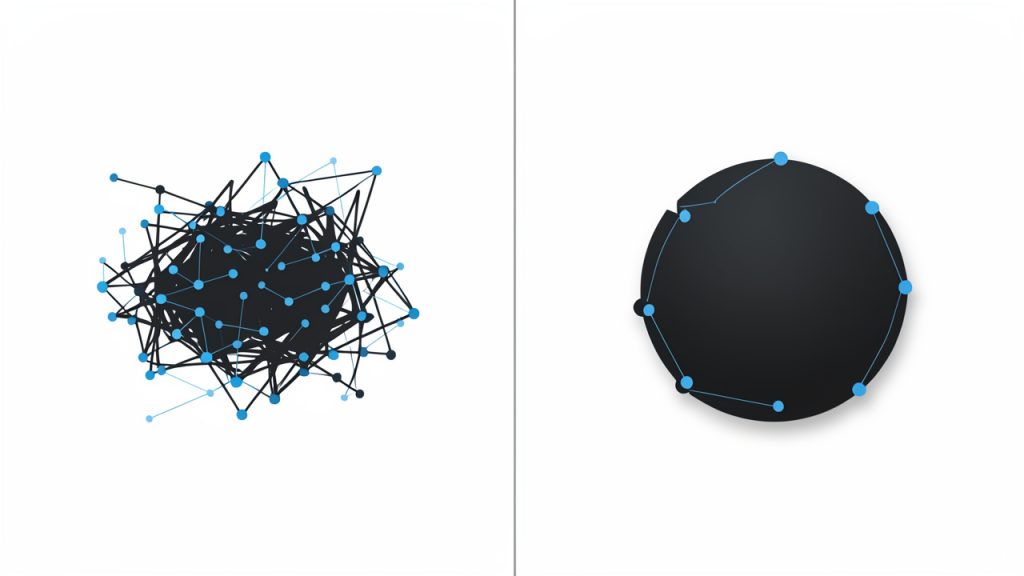
    Two-panel illustration of auto-tracing versus manual redrawing: left panel shows an auto-traced result with many rough anchor points, stray artifacts, and cluttered paths; right panel shows a clean, manually redrawn vector with simplified, smooth shapes and tidy anchor points.

    However, automatic conversion has limits. It may create too many anchor points, rough edges, layered shapes, or odd artifacts around text and corners. If you need a polished brand asset, especially for commercial use, you may need to clean the SVG afterward in a design editor or recreate the artwork manually.

    Manual redrawing takes more time, but it gives better control. For example, if you have a logo that must look perfect on packaging, signage, and mobile screens, redrawing the mark as true vector artwork often produces a cleaner result than relying entirely on auto-conversion.

    Image complexity changes the outcome

    The more detailed the original JPG, the harder the conversion. A simple coffee shop logo with one icon and a wordmark might trace neatly. A photograph of a coffee cup on a wooden table with steam, shadows, and reflections will not convert into a practical SVG in the same way.

    This matters because many users expect SVG to be a universal better format. It is better for certain types of visuals, especially graphics that need to scale. It is not inherently better for every image. For many photographs, keeping the image as JPG, PNG, or WebP is the smarter choice.

    A useful way to think about it is this, SVG is best for designed graphics, not captured reality. If the image is built from intentional shapes, SVG makes sense. If the image depends on photographic detail, raster formats usually remain the right fit.

    File size is not always smaller

    Another common assumption is that an SVG will always be lighter than a JPG. Sometimes it is. Sometimes it is much larger.

    A simple vector icon can be tiny and efficient. But an SVG created from a detailed JPG can include thousands of paths and become cumbersome. That can slow down editing, complicate rendering, and create unnecessary overhead for web use.

    For developers and site owners, this matters. A clean SVG logo in a navigation bar is excellent. A messy auto-traced SVG with excessive vector data is not. If performance matters, the output file should be checked, simplified, and tested rather than accepted at face value.

    Text, transparency, and background cleanup matter

    Many JPG files include backgrounds, shadows, and flattened text. That creates friction during conversion. A logo saved as a JPG may have a white background baked in, which the converter interprets as part of the image. The result is often an SVG with an unwanted rectangle or extra paths around the edges.

    Text can also become problematic. Instead of remaining editable text, it may be converted into shapes, and sometimes inaccurate ones. If typography matters, it is often better to recreate the text with the original font rather than rely on an automatic trace.

    This is why source image preparation matters so much. Before converting, it often helps to crop tightly, remove the background, increase contrast, and simplify the image. A cleaner JPG usually leads to a cleaner SVG.

    How to Get Started With Converting JPG Files to SVG

    Start with the right image

    The quality of the final SVG begins with the quality of the original image. If possible, choose the cleanest version available. A high-resolution logo with strong contrast will trace far better than a blurry screenshot copied from social media.

    If you only have a poor JPG, do some preparation first. Remove unnecessary background space. Straighten the image if it is tilted. Increase contrast if the edges are faint. If the design uses only one or two colors, simplify it before conversion. These small steps can dramatically improve the result.

    For business users, this is especially important when dealing with old branding files. Many companies discover that their “logo file” is just a low-quality JPG buried in an email thread from years ago. In that case, conversion can help as a starting point, but the best long-term fix may be to rebuild the logo properly in vector format.

    Choose a tool based on your goal

    Not every converter is built for the same outcome. Some online tools prioritize speed and convenience. Others offer more control over threshold, color count, smoothing, and path simplification. Design software may go further by allowing you to edit, clean, and optimize the vector after tracing.

    If your goal is quick reuse for a website icon or mockup, an easy online converter may be enough. If your goal is print-ready brand artwork, you will likely want a tool that gives you more control over the tracing process and the ability to refine the output.

    The best approach depends on how exact the result needs to be. For casual use, convenience often wins. For professional assets, control usually matters more than speed.

    Follow a simple conversion process

    You do not need a complicated workflow to get started. In most cases, the process looks like this:

    1. Upload the JPG to a converter or vector design tool.
    2. Adjust tracing settings such as detail, contrast, or color count.
    3. Preview the result and look for rough edges, missing shapes, or unwanted background areas.
    4. Export the SVG and open it in an editor if cleanup is needed.

    That sounds simple, but the preview stage is where smart decisions happen. If the traced image looks cluttered or inaccurate, exporting immediately usually leads to more frustration later. It is better to pause, simplify the source image, or reduce trace complexity before moving on.

    Check the SVG before using it everywhere

    Once the file is exported, test it in the environments that matter. Open it in a browser. Place it in a design tool. Resize it large and small. If it is for a website, see how it renders on light and dark backgrounds. If it is for print, inspect the edges and curves closely.

    This testing step often reveals issues that are easy to miss at first glance. Thin strokes may disappear at small sizes. Background remnants may show up only on colored layouts. Overly complex paths may make editing painful later. Catching those issues early prevents repeat work.

    A practical mindset helps here. The purpose of converting a JPG into an SVG is not merely to produce a new file type. It is to create an asset that is more useful than the original. If the new file is harder to use, the conversion has not really succeeded.

    Comparing JPG and SVG for real-world use

    The difference between these formats becomes clearer when you compare how they behave in everyday projects.

    Format Best For Scaling Editability Typical Weakness
    JPG Photos, complex images, web images with many colors Loses quality when enlarged Limited, pixel-based edits Blurry edges at larger sizes
    SVG Logos, icons, illustrations, simple graphics Scales cleanly at any size Highly editable in vector tools Poor fit for detailed photos

    For a freelancer designing social media graphics, JPG may still be ideal for photographic banners and content images. But for logos, buttons, icons, and brand marks, SVG usually offers better flexibility.

    For developers, SVG is especially useful in modern interfaces because it looks crisp on high-density screens. That makes it a strong choice for UI icons, product illustrations, and scalable brand elements. Still, the key is using SVG where it belongs, not forcing every image into vector form.

    Common mistakes to avoid

    Many conversion problems come from unrealistic expectations rather than bad tools. One of the most common mistakes is trying to vectorize a complex photograph and expecting a clean, minimal SVG. The software can only interpret what it sees, and detailed photos create a flood of shapes and paths.

    Another frequent issue is using a poor source image. Tiny screenshots, compressed files, and images with noisy backgrounds make tracing far less accurate. If the original is weak, the final result usually reflects that weakness.

    There is also a tendency to skip cleanup. Users often convert the file, see that it technically opens as SVG, and assume the job is done. But for professional use, especially in branding or product design, cleanup is often where the real quality work happens.

    When converting a JPG into an SVG makes sense

    A JPG-to-SVG workflow is worth using when the image is simple, the shape matters more than photographic detail, and scalability is important. That applies to logos, badges, stamps, icons, diagrams, and line drawings. In these cases, vector output can be significantly more useful than the original raster file.

    It also makes sense when you need a more editable version of an existing graphic. Even if the first conversion is imperfect, it can provide a workable base for refining the artwork instead of redrawing everything from scratch.

    On the other hand, if your original image is a photo or heavily textured artwork, conversion may not be the right answer. You may be better off improving the raster image itself, exporting in a better raster format, or using a hybrid workflow that combines vector and bitmap assets.

    Conclusion

    Converting a JPG into an SVG can be a smart move, but only when you understand what the process is actually doing. You are not simply changing file extensions. You are translating a pixel-based image into vector shapes, and that translation works best with simple, clean graphics.

    If you want the best result, start with a strong source image, choose the right tool for your needs, and review the output carefully before using it in production. For logos, icons, and branded graphics, SVG can bring sharpness, scalability, and long-term flexibility that a JPG simply cannot match.

    Your next step is practical. Take one image you use often, preferably a logo or icon, and test a conversion with a clean source file. Compare the result at different sizes, on different backgrounds, and in the tools you already use. That quick experiment will tell you more than any definition ever could.

  • How to Convert a JPG into a Professional ICO File

    How to Convert a JPG into a Professional ICO File

    A simple image file can quietly make your brand look polished, or make it look unfinished. If you have ever uploaded a logo, favicon, or app icon and realized the platform wants an ICO file instead of a JPG, you are not alone. This is one of those small technical tasks that seems trivial until it blocks a website launch, desktop shortcut, or software packaging workflow.

    Converting a JPG to an ICO file is usually easy, but doing it well takes a little more care than most people expect. The right dimensions, transparency, sharpness, and file quality all affect how your icon appears in browser tabs, Windows folders, shortcuts, and app interfaces. A rushed conversion can leave you with blurry edges, awkward backgrounds, or an icon that looks fine in one place and terrible in another.

    What Is Converting a JPG to an ICO File?

    A conversion from a JPEG image into an ICO file turns a photograph-style image into the icon format commonly used by Windows and often associated with website favicons and application icons. While a JPG is designed for photographs and general image sharing, an ICO file is built specifically to display small icons clearly across different sizes.

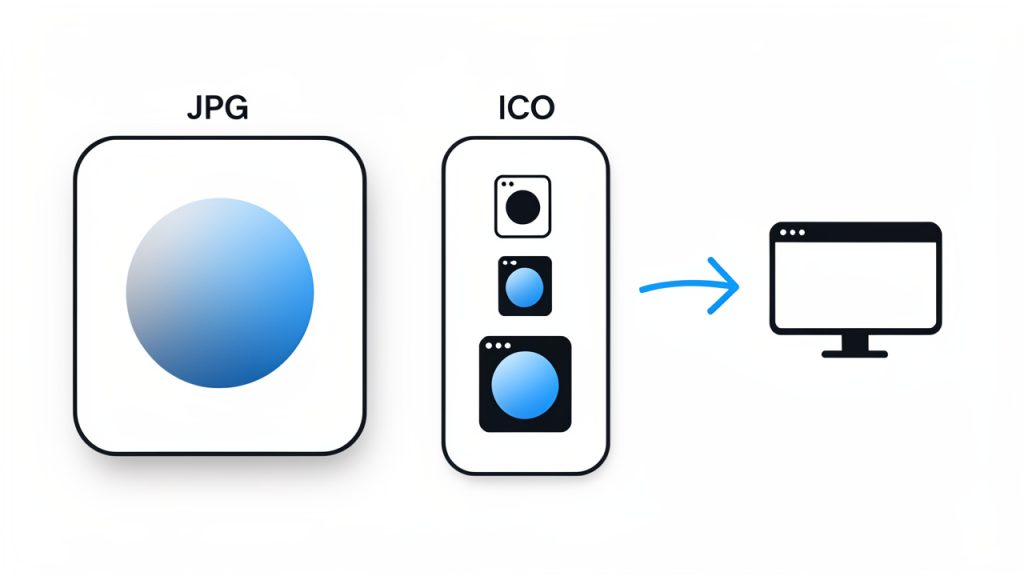
    An ICO file can contain multiple image sizes in one file, which allows the operating system or browser to choose the most appropriate version depending on where the icon is displayed. That is why a proper icon can still look crisp at 16×16 pixels and remain usable at 32×32 or 64×64.

    Side-by-side diagram showing a single JPG image on one side and an ICO file on the other containing multiple embedded icons at different pixel sizes (16x16, 32x32, 48x48, 64x64). Label the ICO variants and show an arrow indicating the OS/browser choosing the appropriate size.

    This difference matters more than it seems. A JPG usually contains a single flat image, often compressed in a way that sacrifices some fine detail. An ICO file, in contrast, is optimized for clarity at small dimensions. If the source image is too detailed, too rectangular, or lacks contrast, the final icon may be technically correct but visually weak.

    For small business owners and freelancers, this often comes up when setting up a favicon for a website, creating a branded desktop shortcut, or preparing assets for a Windows application. For developers, it may be part of the packaging process for software, browser extensions, or desktop tools. In all of these cases, the goal is the same: create a small, recognizable image that still works when scaled down dramatically.

    Key aspects of converting JPG images to ICO files

    File format differences matter

    A JPG is excellent for photos because it keeps file sizes low while preserving acceptable visual quality. The trade-off is that JPEG compression can introduce artifacts, especially around text, logos, and hard edges. Those imperfections become much more visible when the image is reduced to icon size.

    An ICO file serves a different purpose. It is designed for clarity at small dimensions, not for photographic realism. In practice, clean lines, strong contrast, and simple shapes perform far better than busy graphics. If your source image is a detailed banner or a full-color photograph, converting it directly into an icon may technically work, but the result often looks muddy and unreadable.

    Size and scalability are critical

    Most icons are viewed at very small sizes. A logo that looks sharp on a website header at 500 pixels wide may become impossible to recognize at 16×16. That is why resizing is not just a mechanical step, it is a design decision.

    A good icon usually starts with a simple, centered subject. If your JPG includes extra background space, long text, or multiple visual elements, the icon will likely lose impact. Cropping and simplifying the image before conversion often makes a bigger difference than the conversion tool itself.

    Comparison of two icons at tiny size (16x16): one produced from a detailed photo/logo that looks muddy and unreadable, and one from a simplified monogram/symbol that remains clear and recognizable. Include captions like 'Too detailed → unreadable' and 'Simple → recognisable'.

    The most common icon sizes include 16×16, 32×32, 48×48, and 64×64 pixels. Some tools let you generate several sizes in a single ICO file, which is usually the best option. This allows systems to choose the size they need rather than scaling one version up or down.

    If you are creating a favicon, your smallest size matters a lot. Fine details vanish quickly. Test whether the icon still looks recognizable at 16×16 before finalizing it. If it does not, the design likely needs to be simplified rather than merely resized.

    Transparency can be a hidden issue

    One of the biggest limitations of a JPG source file is that JPEG does not support transparency. If your original image has a white or colored background, that background will usually stay visible after conversion unless you edit the image first.

    This becomes especially noticeable when the icon is displayed against dark mode interfaces, colored browser themes, or custom desktop backgrounds. A white box around a logo can make an otherwise professional brand asset look unfinished. If transparency matters, it may be better to first edit the image in a format like PNG, remove the background, and then create the ICO file from that cleaner source.

    For users who only have a JPG available, this does not mean the project is doomed. It simply means expectations need to be realistic. Some icons work perfectly well with a solid background, especially if they are designed intentionally as square badges. Others need a transparent edge to blend naturally into their environment.

    Quality depends on the source image

    The phrase garbage in, garbage out applies here. A low-resolution JPG will not magically become a sharp icon because it has been converted to ICO. If the original image is blurry, heavily compressed, or poorly cropped, the final result will reflect those flaws.

    The best source images are usually high-resolution, square or near-square, and visually simple. Logos, initials, symbols, and bold marks convert well. Detailed flyers, photos of people, and full website screenshots do not. Think of an icon like a road sign. It needs to be understandable instantly, even from a distance, or in this case, at a tiny scale.

    Use case shapes the right output

    Not every icon is for the same environment. A favicon for a website has different practical needs than a Windows application icon. A browser tab icon needs to be recognizable at a glance and often appears at very small dimensions. A desktop application icon may appear in shortcuts, file explorers, taskbars, and installation files, sometimes at several sizes.

    For that reason, a smart JPG-to-ICO workflow considers where the icon will actually be used. If the file is for a website, prioritize simplicity and contrast. If it is for a software product, consider multiple sizes and how the icon will appear on both light and dark backgrounds.

    How to get started converting a JPG to an ICO file

    Start with the right image

    Before you use any converter, look at the JPG critically. Ask whether the image is truly suited to icon use. If it includes small text, busy textures, or multiple focal points, simplify it first. Often the best approach is to isolate the brand mark, monogram, or symbol rather than using the full logo lockup.

    If possible, crop the image into a square. Most icons display best in square proportions, and many conversion tools will otherwise force the image into a square area in ways that create awkward spacing or distortion. Centering the important visual element before conversion gives you much more predictable results.

    Choose an appropriate size

    Generate icon sizes that match common usage, such as 16×16, 32×32, 48×48, and 64×64. If your tool allows multiple embedded sizes in one ICO file, use that feature so systems can pick the best resolution.

    If you are creating a favicon, your smallest size matters a lot. Fine details vanish quickly, so simplify the design until it remains readable at 16×16.

    Use a reliable conversion tool

    Many online tools can convert a JPG to an ICO file in seconds. That convenience is useful, especially for freelancers or small teams who do not want to install extra software for a one-time task. Still, not all converters produce equally clean results. Some compress aggressively, some offer limited size options, and some do not preserve image quality as well as expected.

    When evaluating a tool, focus on whether it lets you control icon dimensions, generate multiple sizes, and preview the result. If the task is business-critical, such as preparing a branded favicon for a live website or packaging a software release, it is worth testing more than one tool and comparing outputs side by side.

    Follow a simple workflow

    For most users, the process is straightforward. Select a clean JPG image that is high-resolution and square if possible. Crop or simplify the image so the core visual remains clear at small sizes. Upload it to a converter that supports ICO output and size selection. Download and test the file in the environment where it will actually appear.

    Testing in context is often skipped, and it should not be. An icon that looks fine in a preview may appear too small, too soft, or too cluttered once placed in a browser tab or Windows shortcut. Real-world testing is part of the conversion process.

    Check the result in context

    A favicon should be tested in a browser tab, bookmark bar, and mobile browser if relevant. A desktop icon should be viewed on different background colors and at different scaling settings. Developers should also verify that the file is accepted by the build system, installer, or framework they are using.

    This context-based testing separates a merely converted file from a usable one. It is the difference between checking a box and creating an asset that actually supports brand recognition and usability.

    Common mistakes to avoid

    Here are predictable problems and better alternatives:

    • Using a detailed photo: Icon becomes blurry and unreadable, use a simple symbol, logo mark, or initial instead.
    • Starting with a low-resolution JPG: Final ICO looks soft or pixelated, use the highest-quality source available.
    • Ignoring background color: White or awkward box appears around icon, edit the background first or use a cleaner source image.
    • Using only one size: Icon scales poorly in different contexts, create an ICO with multiple size variants.

    Conclusion

    Converting a JPG to an ICO file is simple on the surface, but quality depends on more than just uploading and downloading. The source image, its clarity at small sizes, the presence or absence of transparency, and the intended use all shape whether the final icon looks professional or improvised.

    If you need an icon for a website, app, shortcut, or branded digital asset, start with the cleanest possible image and think like a designer, not just a file converter. A strong icon is small, clear, and instantly recognizable. Your next step is straightforward: choose your best source image, create the ICO file, and test it where your audience will actually see it.

  • How to Convert JPG Images to BMP Without Losing Quality

    How to Convert JPG Images to BMP Without Losing Quality

    Converting a JPG to a BMP sounds simple, until image quality shifts, file sizes explode, or a once-sharp graphic suddenly becomes awkward to use in another program. If you have ever needed an image format for printing, legacy software, design work, or a device that refuses to accept JPG files, you have already run into this exact problem.

    The good news is that turning a JPG image into BMP format is usually quick and straightforward. The more important question is when it makes sense, what changes during conversion, and how to do it without losing control over quality, size, or compatibility. For small business owners, freelancers, developers, and anyone using online tools to stay productive, understanding the difference can save time and prevent frustrating rework.

    What is converting a JPG image to a BMP?

    A conversion from JPG to BMP is the process of taking an image stored in JPG (or JPEG) format and saving it as a BMP bitmap file. Both formats store pictures, but they do it in very different ways. JPG is designed for efficient compression, which makes it ideal for web use, email attachments, and digital photos.

    A JPG (or JPEG), an open description, is linked here for reference: https://en.wikipedia.org/wiki/JPEG. A BMP bitmap file is linked here: https://en.wikipedia.org/wiki/BMP_file_format.

    That difference matters in real-world use. A JPG is usually much smaller, which is why it loads quickly and travels easily between apps and devices. A BMP is often much larger, but it can be easier for certain software to read, especially older Windows-based applications, image-processing tools, embedded systems, or workflows where compression artifacts are a problem.

    When people search for a way to convert a JPG image to a BMP, they are often trying to solve a practical compatibility issue. Maybe a printer utility only accepts BMP files. Maybe a game asset pipeline needs bitmap images. Maybe a legacy application cannot correctly process JPEG compression. In each case, the conversion itself is easy, but choosing the right settings is where good results come from.

    Why these formats exist side by side

    JPG became dominant because it offers an excellent balance between visual quality and small file size. For photographs and general-purpose sharing, it works extremely well. The trade-off is that JPG uses lossy compression, which means some image information is discarded each time the file is compressed. See more about lossy compression here: https://en.wikipedia.org/wiki/Lossy_compression.

    BMP takes a different approach. It is one of the oldest and simplest raster image formats, widely associated with Microsoft Windows. Because it often stores image data more directly, it can preserve the exact pixel layout without the compression behavior you get from JPG. That simplicity can be useful, even if it comes at the cost of much larger files.

    A good way to think about it is this, JPG is built for efficiency, while BMP is built for straightforward storage and compatibility. Neither is universally better. The right choice depends on what you need the file to do next.

    JPG vs BMP comparison diagram, Efficiency vs straightforward storage

    Caption: Efficiency (JPG) vs straightforward storage and compatibility (BMP).

    Key aspects of converting a JPG image to a BMP

    Before you convert a JPG file to BMP, it helps to understand what actually changes. The file extension changes, of course, but the deeper effects involve quality, compression, file size, transparency, and use case. These are the factors that determine whether the conversion is useful or just unnecessary extra weight.

    File size usually increases significantly

    The first surprise for most users is how much larger a BMP file can become. A compact JPG image that is only a few hundred kilobytes might become several megabytes after conversion. This is not a mistake. It is a consequence of BMP’s less compressed structure.

    File size increase example: identical image, JPG small vs BMP large

    A compact JPG image that is only a few hundred kilobytes might become several megabytes after conversion. For businesses and freelancers, this matters when images need to be stored in bulk, uploaded to cloud systems, or shared with clients. A single conversion may be harmless, but converting an entire folder of JPG photos into BMP can quickly consume storage space and slow down workflows. If your goal is simply to change the file format for broad compatibility, BMP may be fine. If your goal is efficiency, it usually is not the best destination format.

    Converting does not restore lost JPG detail

    This is one of the most important points to understand. If a JPG image has already been compressed, converting it to BMP does not magically recover detail that was lost earlier. The BMP will store the image as it exists now, including any JPG artifacts such as blockiness, smoothing, or edge degradation.

    That means a JPG-to-BMP conversion is best understood as a format change, not a quality upgrade. The resulting BMP can prevent further lossy compression if you continue editing, but it cannot recreate information that was already discarded when the JPG was made.

    Imagine photocopying a document and then placing the copy in a premium folder. The folder may protect the copy from further damage, but it does not make the copied text sharper than it was to begin with. The same logic applies here.

    BMP can improve software compatibility

    Despite its age, BMP still matters in specific environments. Some desktop tools, industrial systems, documentation workflows, custom apps, and older Windows utilities work more reliably with bitmap images than with compressed formats like JPG. In these situations, converting a JPG image to a BMP is not about visual improvement. It is about predictable file handling.

    Developers and technical users see this often. If a parser, import tool, or image library has limited format support, BMP can be the simplest bridge. The file may be larger, but it can be easier to process because the structure is less complex than modern compressed formats.

    For non-technical users, the same principle applies in a simpler way. If a piece of software says “unsupported image format” when you upload a JPG, a BMP version may solve the problem immediately.

    Image dimensions stay the same, but storage changes

    When you convert a JPG to BMP, the pixel dimensions usually remain unchanged unless you explicitly resize the image. A 1200 x 800 image will still be 1200 x 800 after conversion. What changes is the way those pixels are stored.

    This distinction is useful because many people confuse file size with image dimensions. A BMP may be dramatically larger in megabytes, yet look exactly the same on screen because the width and height are identical. The larger size reflects storage method, not necessarily a bigger visual image.

    Color handling matters in some workflows

    Most simple conversions preserve colors well enough for everyday use, but not every tool handles color profiles in exactly the same way. If your work depends on visual consistency, such as product photography, print preparation, UI design, or branded graphics, it is smart to inspect the converted BMP before using it in production.

    Even small color shifts can matter when an image appears in marketing materials or customer-facing assets. A quick quality check after conversion can prevent mismatched visuals later.

    JPG vs BMP at a glance

    Feature JPG BMP
    Compression Lossy, highly compressed Usually uncompressed or lightly compressed
    File Size Small Large
    Best Use Photos, web, sharing Compatibility, editing workflows, legacy software
    Image Quality Over Re-saves Can degrade with repeated compression More stable once saved
    Software Support Very broad Broad, especially in Windows and older systems
    Transparency Support Limited in standard JPG Typically limited in basic BMP workflows

    How to get started converting a JPG image to a BMP

    If you need to convert a JPG image into BMP format, the actual process is usually fast. The smarter part is choosing the right method for your workflow. online tools are ideal for quick, occasional tasks. Built-in desktop tools work well for offline use. Batch-capable apps are better if you handle many files at once.

    Choose the right conversion method

    For most users, an online JPG-to-BMP converter is the fastest option. You upload the JPG file, let the tool process it, then download the BMP result. This works well for occasional conversions, especially when you do not want to install software.

    If your images contain sensitive client material, internal documents, or unreleased creative assets, a local method may be better. Basic image editors on Windows and macOS often let you open a JPG and use “Save As” or “Export” to create a BMP file. This keeps the image on your device and reduces privacy concerns.

    Developers and power users may prefer desktop tools with batch processing. When handling dozens or hundreds of files, automation matters more than convenience. In those cases, BMP is usually chosen because a downstream system specifically requires it.

    A simple way to convert

    The actual steps are usually short and familiar.

    1. Select your JPG file from your device or cloud storage.
    2. Choose BMP as the output format in the converter or editor.
    3. Convert and download the new bitmap file.
    4. Open the BMP to confirm the image looks correct and works in your target software.

    These steps look simple because they are. What separates a good result from a frustrating one is the review afterward. Always open the converted file before sending it to a client, uploading it to a platform, or passing it into a production workflow.

    What to check after conversion

    After converting a JPG to BMP, verify that the image dimensions are correct, the colors look normal, and the file opens in the software that required the BMP format in the first place. A conversion is only successful if it solves the next step of your workflow.

    It is also wise to check file size. If the BMP is too large for your intended use, that is not necessarily a problem with the converter. It may simply mean BMP is the wrong final format unless a specific system requires it. If the image is only being shared or displayed online, keeping it in JPG or switching to PNG may be more practical.

    When an online tool makes sense

    An online converter is especially useful when speed matters more than advanced settings. If you are preparing a one-off image for a vendor portal, a hardware utility, or a software import screen, the browser-based route is hard to beat. It removes friction and makes the task accessible to non-technical users.

    That said, not all online tools are equal. A reliable tool should be easy to use, clear about supported formats, and quick to process standard file sizes. It should not force unnecessary account creation for simple conversions, and it should make downloads immediate and predictable.

    Common mistakes to avoid

    A few small mistakes cause most conversion problems. Users often assume BMP will improve image quality, when in fact it only preserves the current state of the JPG. Others forget how much the file size will grow and then struggle to upload or store the result. Another common issue is converting first and checking compatibility second, instead of testing the final BMP in the software that actually needs it.

    The best approach is simple, convert with purpose. Know why you need BMP, confirm that BMP is truly required, and inspect the file once it is created. That discipline keeps image workflows clean and efficient.

    Best use cases for BMP conversion

    Scenario Is BMP a Good Choice? Why
    Uploading product photos to a website Usually no JPG is smaller and better for web delivery
    Using images in older Windows software Often yes BMP may offer better compatibility
    Editing after avoiding further JPG compression Sometimes yes BMP can preserve the current image state
    Emailing files to clients Usually no BMP files are often too large
    Importing into a specialized device or app Yes, if required Some systems explicitly expect bitmap files

    Conclusion

    Converting a JPG image to a BMP is not complicated, but it is more than a basic file swap. It changes how the image is stored, usually increases file size, and can improve compatibility with software or systems that prefer bitmap files. What it does not do is restore detail lost to JPEG compression.

    If you need a quick result, an online tool is often the easiest starting point. If privacy, batch processing, or software-specific requirements matter more, a local workflow may be the better fit. The next step is simple, take one JPG file, convert it to a BMP, open the result in your target application, and confirm that it solves the problem you actually need to solve.

    Links referenced in this article:

  • Convert SVG to PNG Online — Fast, Accurate Exports

    Convert SVG to PNG Online — Fast, Accurate Exports

    You do not need design software to turn an SVG into a PNG anymore. If you have a logo, icon, illustration, or web graphic in SVG format and need a quick raster version for email, social media, presentations, or product listings, using an online converter is often the fastest path.

    That matters because SVG and PNG serve different jobs. SVG files are ideal for scalable graphics, while PNG files are better when you need broad compatibility, fixed dimensions, or transparent backgrounds in apps that do not handle vector formats well. If you want to convert SVG to PNG online, the good news is that the process is usually simple, fast, and accessible from any browser.

    Side-by-side comparison showing the same logo as an SVG (left) and a PNG (right). The SVG side remains perfectly sharp when zoomed or enlarged; the PNG side becomes visibly pixelated when scaled up. Include small zoom-in callouts to emphasize sharp vs pixelated edges.

    What is Convert svg to png online?

    To convert SVG to PNG online means using a browser-based tool to transform a vector graphic file into a pixel-based image, without installing desktop software. You upload an SVG, choose settings such as size or quality if needed, and download a PNG version in seconds.

    This is especially useful for small business owners and freelancers who work across different platforms. A brand logo may exist as an SVG for clean scaling on a website, but marketplaces, document editors, ad platforms, or messaging tools often require PNG uploads instead. An online converter bridges that gap quickly.

    The difference between the two formats is worth understanding. Scalable Vector Graphics, or SVG, is built from mathematical paths and shapes. It stays sharp at virtually any size. Portable Network Graphics, or PNG, is a raster image made of pixels. It cannot scale infinitely without losing clarity, but it is widely supported and excellent for screenshots, interface assets, and graphics that need transparency.

    In practical terms, converting from SVG to PNG is like taking a blueprint and turning it into a finished photograph at a chosen size. The original vector remains flexible, but the PNG becomes a fixed output that is easier to share in many everyday workflows.

    Key Aspects of Convert svg to png online

    Why people convert SVG to PNG

    Most users are not converting formats for technical reasons alone. They are solving a compatibility problem. If a client wants a logo for PowerPoint, if an ecommerce platform rejects SVG uploads, or if a social media scheduler only accepts PNG, then conversion becomes a necessary step.

    There is also a convenience factor. PNG files are predictable. They display the same way in most apps, can preserve transparent backgrounds, and are simple to insert into documents, slide decks, and design tools. For many users, that reliability matters more than keeping a file in vector format.

    Quality depends on output size

    One of the biggest misunderstandings around SVG conversion is assuming every PNG output will look perfect automatically. The quality of the PNG depends heavily on the export dimensions you choose. Since SVG is vector-based, it can render sharply at many sizes. But once exported to PNG, the image is locked into a specific pixel width and height.

    That means a logo converted at 300 pixels wide may look fine on a website but blurry on a printed handout or a high-resolution display. Choosing the right dimensions from the start is critical. If the image will appear in multiple places, it is often smart to export several PNG sizes rather than rely on one file for every use case.

    A three-panel example of the same graphic exported at different PNG widths (e.g., 150px, 300px, 900px). Show the small export appearing crisp for small use, the mid-size as appropriate for web, and the too-small/upsampled image looking blurry. Label each panel with its pixel dimensions and a short note about appropriate use.

    Transparency and background settings matter

    One major reason PNG remains popular is its support for transparent backgrounds. This is important for logos, icons, and layered graphics that need to sit cleanly on white, dark, or colored surfaces.

    When using an online SVG to PNG converter, check whether the tool preserves transparency by default. Some tools may flatten the image onto a white background, which can create problems later. If you are preparing assets for branding or UI work, transparency is not a small detail, it is often the difference between a polished result and one that looks improvised.

    Fonts, styling, and rendering can affect results

    Not every SVG behaves the same way in every converter. Some SVG files rely on embedded styles, linked fonts, masks, filters, or advanced effects. If the online tool does not fully support those elements, the PNG output may look slightly different from the original.

    This is common with exported artwork from design tools or custom web graphics. Text may shift if the converter cannot access the intended font. Effects such as shadows or clipping masks may render inconsistently. For simple icons and logos, this is rarely a major issue. For complex illustrations, it is worth testing output before final delivery.

    Privacy and file handling should not be ignored

    Convenience is important, but so is file security. When you convert SVG to PNG online, your file usually passes through a web service. If the SVG contains unpublished branding, client assets, product designs, or proprietary illustrations, you should pay attention to how that service handles uploads and deletions.

    For everyday public graphics, online conversion is generally low-friction and efficient. For sensitive commercial files, it is smarter to use a trusted service with clear privacy practices or switch to an offline workflow if needed. This is especially relevant for agencies, developers, and businesses managing confidential design assets.

    Online tools versus desktop apps

    An online converter is often the best option when speed and simplicity matter. You do not need to install software, update plugins, or learn a full design suite just to create a PNG. That makes browser-based tools attractive for non-designers and busy teams.

    Desktop software still has advantages when you need precise color management, batch processing, complex artboard handling, or complete control over export settings. The right choice depends on your workflow. For one-off tasks and lightweight production work, online conversion is usually enough. For repeat-heavy or highly controlled design pipelines, dedicated software may be worth it.

    Common use cases at a glance

    Use Case Why Convert SVG to PNG Best Practice
    Website asset fallback Some systems or email builders do not support SVG well Export at exact display size and 2x size
    Logo sharing Clients often need easy-to-use files Preserve transparency and create multiple sizes
    Ecommerce listings Platforms may require PNG or raster uploads Use clean edges and a consistent background
    Social media graphics PNG is widely accepted and predictable Match platform dimensions before export
    Presentations and documents Office tools handle PNG more reliably Use high enough resolution to avoid blur

    What makes a good online converter

    A good SVG to PNG online tool should do more than complete the conversion. It should preserve sharpness, retain transparency, render the design accurately, and make the process quick enough that it does not interrupt your work. That balance of quality and speed is what separates a useful tool from one you only use once.

    Look for a converter that supports custom dimensions, clean downloads, and straightforward file handling. If you regularly prepare assets for multiple outputs, the ability to scale exports without distortion is particularly valuable. Some tools also support drag-and-drop uploads, batch conversion, or cloud imports, which can save time in a professional workflow.

    The importance of sizing for real-world use

    Size is not just a technical setting, it is a business decision. A freelancer sending a client logo pack needs different PNG sizes than a developer exporting web UI icons. A small ecommerce seller may need a product badge sized for listings, while a marketing team may need a larger transparent graphic for paid ads.

    This is why the best approach is to think backward from where the image will appear. If the PNG is going on a website header, choose dimensions that match that area. If it may appear on high-density displays, prepare a larger version as well. Starting with use case instead of guesswork reduces rework later.

    Batch conversion and workflow efficiency

    For users managing many files, the real question is not whether conversion works, but whether it scales. If you have dozens of icons, product labels, or branded illustrations, converting files one by one can become tedious quickly.

    Some online tools address this with batch processing, allowing multiple SVG files to be converted at once. This is especially useful for developers preparing asset libraries or small teams standardizing image formats across platforms. Even a modest time saving per file adds up when repeated over a month of work.

    Browser convenience for non-designers

    One reason online converters have become so common is that they remove the learning curve. You do not need to know Illustrator, Figma, Inkscape, or image export settings in depth. In most cases, a browser and a file are enough.

    That accessibility opens the door for people who are not part of a formal design team. A virtual assistant updating product images, a founder preparing a pitch deck, or a freelance writer inserting a logo into a media kit can all handle the task without relying on specialist software. That kind of independence is valuable in fast-moving businesses.

    How to Get Started with Convert svg to png online

    Getting started is straightforward, but a few smart decisions upfront will improve your results. Before uploading anything, know where the PNG will be used. A website icon, slide graphic, and printable logo all require different export sizes. If you choose dimensions after conversion, you may end up stretching the file and reducing quality.

    It also helps to inspect the SVG itself. If the file contains unusual fonts, filters, or layered effects, test the output carefully. Simple graphics usually convert without issue, while more complex artwork may need a second pass or a different converter for the cleanest result.

    A practical starting workflow looks like this:

    1. Choose the SVG file you want to convert.
    2. Upload it to an online SVG to PNG converter in your browser.
    3. Set output size and transparency options if the tool allows it.
    4. Download the PNG and inspect it at the size you plan to use.
    5. Export additional sizes if the image will appear across multiple platforms.

    Once the PNG is downloaded, do not stop at a quick glance. Open it in the actual context where it will be used. A file that looks crisp in a download preview may appear too small in a presentation or slightly soft on a retina screen. Checking the final environment saves time and avoids avoidable revisions.

    If you work with brand assets regularly, create a small naming system for outputs. For example, keeping variants like logo-500px, logo-1000px, and logo-transparent helps prevent confusion later. This is a simple habit, but it makes asset management much easier as your file library grows.

    Common mistakes to avoid

    A frequent mistake is converting at too low a resolution. Because the SVG source is scalable, users sometimes assume they can create a tiny PNG now and enlarge it later. That is where quality breaks down. Once exported as PNG, the image is fixed in pixels.

    Another issue is ignoring background handling. If you need a transparent logo but export it with a white background, that problem may not become obvious until the file is placed on a dark website banner or colored flyer. A small export oversight can create an unprofessional result.

    There is also the temptation to use the first available tool without checking output accuracy. For basic files, that may be fine. For client-facing visuals, always verify alignment, color, and text rendering. A conversion should be invisible to the end user. If they can tell something changed, the output needs another look.

    Who benefits most from online SVG to PNG conversion

    Small business owners benefit because they often need quick, compatible graphics without hiring a designer for every minor task. Freelancers benefit because they can deliver assets in the format clients actually use, not just the format they were created in.

    Developers gain a fast way to prepare image fallbacks, app assets, or marketing visuals for environments that do not support vector graphics consistently. Productivity-focused users benefit from removing unnecessary software steps. When a browser can do the job in under a minute, the workflow becomes lighter and more efficient.

    Conclusion

    To convert SVG to PNG online is to solve a practical format problem with speed and flexibility. It allows you to take clean, scalable vector graphics and turn them into widely supported image files for documents, websites, ecommerce platforms, presentations, and social media. The process is simple, but the best results come from paying attention to size, transparency, rendering accuracy, and privacy.

    If you need a fast next step, start with one SVG file and export it in the exact dimensions required for its destination. Check the result in real use, then save additional sizes if needed. That small bit of care turns a quick conversion into a polished, professional asset you can use with confidence.

  • How to Convert PNG to JPG Online — Fast, Secure & High-Quality

    How to Convert PNG to JPG Online — Fast, Secure & High-Quality

    A bloated PNG can quietly slow down your website, break an email attachment limit, or frustrate a client who just wants a simple photo upload. If you need to convert PNG to JPG online, the good news is that it usually takes less than a minute. The catch is that not every converter handles quality, transparency, privacy, and compression the same way.

    That matters more than most people realize. A PNG with a transparent background can turn into a white box. A colorful product image can shift slightly if the color profile is mishandled. And if you upload sensitive graphics to the wrong tool, convenience can come at a privacy cost. The best approach is not just finding a converter, but choosing the right one for your use case.

    This guide explains when PNG-to-JPG conversion makes sense, how online tools work, what settings to choose, and which free tools are worth using. It also covers the less obvious details, like metadata, sRGB color consistency, progressive JPGs, and how to avoid common quality problems.

    Why convert PNG to JPG? When and why it matters

    PNG and JPG solve different problems. PNG is lossless, which means it preserves image data more faithfully and supports transparency. That makes it ideal for logos, interface elements, screenshots, and images you may want to edit again later. JPG is lossy, which means it compresses image data to create a much smaller file, often with little visible difference at sensible settings.

    For many real-world tasks, that smaller size is the whole point. A large PNG photo might be several megabytes, while a JPG version at good web quality could be dramatically smaller. That reduction improves page speed, speeds up uploads, and makes file sharing easier. For a blog, ecommerce gallery, listing photo, or portfolio image, JPG is often the more practical format.

    PNG vs JPG: the real trade-off

    The simplest way to think about it is this, PNG prioritizes fidelity and flexibility, while JPG prioritizes efficiency. If your image is a photograph, especially one without transparency, JPG usually makes more sense for online use. If it is a logo with crisp edges or an asset layered into a design workflow, PNG may still be the better choice.

    The major compromise is that JPG does not support transparency. Any transparent area in a PNG must be flattened onto a solid background, typically white, black, or a custom color. JPG also introduces compression artifacts if quality is set too low, which can show up as blur, haloing, or blocky gradients.

    Common reasons to convert

    Small business owners and freelancers often convert PNG to JPG online for practical reasons. Product photos on a store need to load faster. Images for a CMS may need a more common web-friendly format. Email systems may reject large attachments. Social platforms and marketplaces may also handle JPG more predictably than PNG.

    Developers and productivity-focused users often convert in batches to streamline asset preparation. If you are optimizing screenshots for a documentation site, compressing article images for better Core Web Vitals, or preparing image uploads for clients, JPG is often the fastest path to a lighter workflow.

    When you should not convert

    There are cases where converting is the wrong move. If you need transparent backgrounds, keep the file as PNG or switch to a modern format that supports alpha transparency. If the image is part of an editing pipeline, repeated JPG saves can degrade quality over time.

    You should also avoid converting archival master files just to save space. Keep the original PNG if it matters. A good rule is simple, publish a JPG if you need speed, but preserve the source PNG if you may need to edit, reuse, or repurpose the file later.

    How online PNG-to-JPG conversion works

    At a basic level, an online converter takes the source PNG, removes or flattens any transparency, applies JPG compression, and gives you a downloadable output file. What differs from tool to tool is where the conversion happens, what settings you can control, and what happens to your file during and after the process.

    Some tools run the conversion on their servers after you upload the image. Others, especially privacy-focused browser apps, do the work locally in your browser. That distinction affects both speed and trust.

    Client-side vs server-side conversion

    A server-side converter uploads the image to a remote system, processes it there, and then provides the JPG for download. This is often convenient and can support more formats, automation, and larger workflows. It is common in tools like CloudConvert, Convertio, and Zamzar.

    A client-side converter performs the work directly in your browser. The main advantage is privacy, because the file may never need to leave your device. This is why tools like Squoosh stand out. For sensitive images, browser-based conversion is often the smarter option, assuming the tool truly processes locally.

    Color profiles, metadata, and quality settings

    Not all converters treat image data the same way. Many tools let you choose a quality setting, usually as a slider or percentage. For most web images, 75 to 85 quality is a strong starting point. Lower than that can create noticeable artifacts. Higher than that may preserve detail but reduce the file-size benefit.

    Metadata is another overlooked detail. Your PNG or converted JPG may contain information such as timestamps, authoring details, or embedded color profile data. Some tools strip metadata automatically, which helps reduce file size and protect privacy. Others preserve it. Neither behavior is universally better, so it is worth checking if that matters for your project.

    Handling transparency correctly

    When you convert a transparent PNG to JPG, the transparent pixels must be replaced with something. Most tools either flatten them to white by default or let you choose a custom background color. If the converter does this poorly, you may see jagged edges or dark halos around formerly transparent regions.

    Transparency flattening before/after: left PNG with checkerboard background, right flattened background — white (alpha removed)

    This is especially noticeable with logos, icons, and cutout product images. If you know the image will sit on a white web page, a white background is usually the cleanest choice. If it will appear on a colored layout, choose a matching background to avoid ugly edge artifacts.

    Step-by-step: Convert PNG to JPG online

    The workflow is usually simple, but small setting choices can have a big effect on the result. If you want a fast, dependable process, use this general method.

    Step 1, choose a trusted tool

    Start with a converter that has a solid reputation, a clear privacy policy, and enough controls for your needs. If the image is sensitive, lean toward a client-side tool. If you need batch conversion, cloud storage imports, or advanced settings, a server-based service may be more convenient.

    Step 2, upload the PNG

    Drag-and-drop upload UI with dashed drop zone labeled “Drop PNG files here” and a PNG thumbnail being dragged in

    Most tools support drag-and-drop, which is the fastest option. You can also browse for files manually or import from cloud services in some cases. If you are converting multiple images, check whether the tool supports batch upload before you begin.

    Step 3, choose output options

    If the tool offers settings, set the output format to JPG, then choose your quality level. For web images, a quality setting around 75 to 85 usually gives the best balance between clarity and size. If the PNG has transparency, select an appropriate background color.

    Some converters also let you resize before export. This is useful because a smaller image dimension often cuts file size more than compression alone. If your website only displays an image at 1200 pixels wide, exporting a 4000-pixel JPG is wasted weight.

    Step 4, convert and download

    Once the settings are in place, run the conversion and download the file. On some tools this happens instantly. On others, especially server-based services, there may be a brief processing step. If batch files are involved, you may receive a ZIP archive.

    Step 5, verify quality and metadata

    Open the new JPG and inspect it before publishing. Look for soft detail, color shifts, edge artifacts, or an unexpected background color where transparency used to be. If the file still feels too large, try resizing first, then adjusting compression slightly.

    Also check whether metadata was preserved or removed if privacy or workflow compatibility matters. This step is easy to skip, but it is the difference between a quick conversion and a polished one.

    Screenshot of convertio.co

    1. Convertio

    Convertio is one of the most recognizable names for people who need to convert PNG to JPG online quickly. Its main appeal is convenience. The interface is clean, drag-and-drop works well, and the service supports a huge range of file types beyond images, which makes it especially useful for freelancers and small business owners who want one tool for occasional format changes across different media. Convertio supports cloud imports, basic batch workflows, and a familiar conversion flow that does not overwhelm non-technical users.

    Convertio is very beginner-friendly, quick to set up for one-off conversions, and convenient for cloud import/export. The trade-offs are that processing happens on their servers, which may not suit sensitive files, advanced image controls are not as deep as specialist tools, and free usage limits can be restrictive for heavy users.

    Website: https://convertio.co

    Screenshot of cloudconvert.com

    2. CloudConvert

    CloudConvert is a strong option for users who want more control and a professional feel. It supports image conversion well and caters to users who care about workflow reliability, API access, and configurable settings. If you are a developer, power user, or agency handling recurring conversions, CloudConvert often feels more robust than lightweight web converters. It provides a high-quality engine, advanced settings for supported formats, and API access for automation and integration, which makes it especially useful when you need consistency across batches or must integrate conversion into a larger workflow.

    CloudConvert is reliable for professional use, supports good format coverage and workflow flexibility, and works well for teams and developers. Its downsides are server-side uploads, a less casual feel than ultra-simple converters, and limited free credits for frequent users.

    Website: https://cloudconvert.com/

    Screenshot of zamzar.com

    3. Zamzar

    Zamzar is a long-standing, no-frills choice for straightforward online file conversion. If you want to upload a PNG, choose JPG, and download the result without worrying about many settings, Zamzar does the job. It supports a broad range of file types and is simple to use, making it a good fit for occasional users and business users who need low-friction conversions.

    Zamzar offers a straightforward conversion flow and broad file support, but its optimization controls are limited, processing is server-side, and it may feel basic to users who want detailed compression tuning.

    Website: https://www.zamzar.com/

    Screenshot of squoosh.app

    4. Squoosh

    Squoosh is the standout choice if privacy and image optimization matter more than generic file conversion convenience. Built as a browser-based image app, much of the processing can happen client-side, directly on your device. For users who do not want to upload sensitive visuals to a remote server, that is a major advantage. Squoosh also provides visual before-and-after comparisons and fine-grained optimization controls, letting you see the effect of compression before exporting and make smarter decisions about file size.

    Squoosh is excellent for privacy-conscious users and for fine tuning quality, and it is ideal for web optimization workflows. Its limitations are that it is less general-purpose than multi-format converters, can feel more technical for beginners, and is not primarily designed for batch handling.

    Website: https://squoosh.app/

    Screenshot of online-convert.com

    5. Online-Convert.com

    Online-Convert.com sits in a practical middle ground. It offers more settings than the simplest converters while remaining accessible to non-experts. If you want to tweak output behavior, adjust image-related parameters, or work with a range of file types from one platform, it is a solid pick.

    Online-Convert.com is more configurable than many casual tools and strikes a good balance between ease and control. The trade-offs are server-side conversion, a busier interface than minimalist competitors, and free limits that may apply depending on usage.

    Website: https://www.online-convert.com/

    Quick comparison of the best PNG to JPG online tools

    ToolBest forPrivacy modelBatch supportQuality controlsEase of use
    ConvertioFast everyday conversionsServer-sideYesBasic to moderateVery easy
    CloudConvertProfessional and repeat workflowsServer-sideYesModerate to strongEasy
    ZamzarOccasional simple useServer-sideLimited to moderateBasicVery easy
    SquooshPrivacy and optimizationClient-sideLimitedStrongModerate
    Online-Convert.comFlexible utility useServer-sideYesModerateEasy

    Best practices and tips to preserve quality and reduce size

    The best JPG is not always the smallest one. Over-compress an image and it looks cheap, keep it too large and your page speed suffers. The sweet spot for most photographic web images is quality 70 to 85, especially after resizing to appropriate display dimensions.

    If you are working with screenshots, graphics with text, or UI elements, be cautious. JPG can blur edges and introduce artifacting around letters or sharp lines. In many of those cases, PNG may still be the better choice. Conversion is most effective when the source is photo-like rather than graphic-heavy.

    Resize before you obsess over quality

    A lot of oversized images remain too large because users only change compression. Dimension matters more than people think. Reducing an image from 4000 pixels wide to 1600 pixels wide can slash file size while keeping the image perfectly usable on most websites. Cropping also helps. If part of the image does not contribute to the message, remove it before exporting. Less visual information often means a lighter file and a stronger composition at the same time.

    Use progressive JPG and sRGB when possible

    A progressive JPG loads in layers, which can make pages feel faster to users, even if the total file size is similar to a baseline JPG. Not every converter exposes this option, but it is worth using for web publishing when available. For color consistency, sRGB is the safest choice for the web. If your tool or editor lets you convert or embed an sRGB profile, do it to reduce the chances of washed-out or oversaturated images on different screens and browsers.

    Strip metadata when privacy or speed matters

    Metadata can include location, timestamps, device information, and editing details. If you are publishing to the web or sending files externally, removing unnecessary metadata can slightly reduce size and improve privacy. If you are a photographer or need EXIF data for workflow reasons, keep it. Otherwise, stripping it is usually the smarter default for public-facing images.

    Privacy, security, and legal considerations

    Uploading files to an online converter is not a neutral act. Once the file leaves your device, you are trusting the service to process it responsibly, delete it promptly, and not reuse it in ways you did not intend. That is fine for generic stock-style visuals, but not always for client assets, internal documents, or unreleased product imagery.

    If the image contains confidential information, copyrighted material under restricted use, or customer data, think twice before using a server-side tool. A browser-based converter like Squoosh, or a local desktop app, is often safer.

    What to check before uploading

    Look for a clear privacy policy, retention timeline, and deletion policy. Check whether files are auto-deleted after a short period and whether the provider states how uploads are handled. If that information is hard to find, that alone is a warning sign.

    Also consider the legal side. If you are converting client work, licensed visuals, or partner assets, make sure your use of a third-party conversion service does not conflict with contract terms or platform restrictions.

    Troubleshooting: Common conversion problems and fixes

    Even the best online tool can produce a disappointing result if the settings or source image are not right. Most issues fall into a handful of predictable categories, and they are usually fixable.

    Blurry output or banding artifacts

    If the JPG looks soft or shows ugly transitions in skies, shadows, or gradients, the quality setting is probably too low. Raise the compression quality slightly and try again. If the source image is extremely detailed, resize it first rather than forcing ultra-heavy compression. Banding is especially common in areas with subtle tonal shifts. Some tools simply handle those cases better than others, so switching converters can help too.

    Color shifts or dull-looking images

    If the image looks less vibrant after conversion, the problem is often the color profile. Exporting or converting to sRGB usually helps. If the tool does not expose profile controls, try a different converter or use a desktop editor for that file. Also compare the file in a proper image viewer rather than relying only on browser thumbnails, which can sometimes mislead.

    Output file is still too large

    If the JPG remains bigger than expected, check the image dimensions first. A large-resolution file at moderate compression can still be huge. Resize to the actual needed display size, then export again at around 75 to 85 quality. If the image contains large flat-color areas, text, or interface elements, JPG may simply be inefficient for that kind of content. In that case, PNG or another modern format may perform better.

    Transparency turned into the wrong background

    This happens when a transparent PNG is flattened automatically, often to white or black. If the result looks wrong, choose a specific background color during export if the tool allows it. Matching the destination page background usually produces the cleanest edges.

    Alternatives: Desktop and command-line options

    Online tools are convenient, but they are not always the best choice. If you handle sensitive files, large batches, or recurring asset work, local software is often faster and safer in the long run.

    On macOS, Preview can export many images to JPG easily. On Windows, Paint or Photos can handle basic conversions. Free tools like GIMP and IrfanView offer more control and are better for repeat use.

    For developers and power users, ImageMagick is one of the most efficient options available, excellent for batch conversion, scripting, and automation. Here are a few practical examples:

    magick input.png -background white -flatten -quality 85 output.jpg
    

    This command converts a PNG to JPG, fills transparent areas with white, and uses a quality setting of 85.

    magick input.png -resize 1600x -background white -flatten -quality 80 output.jpg
    

    This version resizes the image to 1600 pixels wide before converting, which is often a better way to reduce file size.

    magick *.png -background white -flatten -quality 82 *.jpg
    

    For batch workflows, commands like this can save enormous time, though exact shell behavior may vary by system. If you handle dozens or hundreds of files regularly, automation quickly becomes more efficient than any online interface.

    Quick FAQ

    Will converting PNG to JPG reduce quality permanently?

    Yes, potentially. JPG is a lossy format, so some image data is discarded during compression. At good settings the loss may be hard to notice, but it is still there. Keep the original PNG if you may need it later.

    Can I convert a transparent PNG to JPG and keep transparency?

    No, JPG does not support transparency. The transparent area must be replaced with a solid background color.

    What is the best JPG quality setting for web use?

    For most photos, 75 to 85 is the practical sweet spot. Start there, then adjust based on image detail and file-size goals.

    Are online converters safe?

    Some are reasonably safe for routine files, but not all are equal. For sensitive images, use a client-side tool or local software. Always review privacy and deletion policies before uploading.

    Recommended workflows by use case

    If you just need to convert one ordinary image fast, a simple service like Convertio or Zamzar is usually enough. If you need more reliability or batch-friendly workflows, CloudConvert or Online-Convert.com makes more sense. If privacy matters, Squoosh is the strongest web-based choice because it is geared toward local, browser-side processing.

    If you routinely prepare images for websites, the best workflow is often this: start with the original file, resize to the actual needed dimensions, convert to JPG at around 80 quality, use sRGB for consistent color, and remove metadata unless you explicitly need it. Then preview the final file before publishing.

    A final check goes a long way. Confirm the background looks correct, inspect the image at full size, verify the file size is reasonable, and keep the source PNG stored safely. That way you get the speed benefits of JPG without losing control of quality, privacy, or future editing flexibility.

  • How to Convert Base64 to Image Files (Quick Guide)

    How to Convert Base64 to Image Files (Quick Guide)

    A Base64 image string looks harmless until you need to turn it into a real file, display it in a browser, or debug why it refuses to render. That is where most people get stuck. You might have a string from an API, an HTML email, a database export, or a frontend app, and all you really want is a usable image.

    The good news is that Base64 to image conversion is simple once you know what format you are holding, how to clean it, and which tool fits your workflow. Whether you are a developer saving files on a server, a freelancer testing API responses, or a small business owner using an online tool for a one-off job, the same rules apply.

    This guide explains what Base64 does, why images are encoded this way, how to convert Base64 to image files in multiple languages, and how to avoid the common mistakes that waste time. It also covers the parts many tutorials skip, including image type detection, security checks, performance tradeoffs, and troubleshooting.

    What is Base64 and why it’s used for images

    What Base64 encoding does

    Base64 is a way to represent binary data, such as an image, using plain text characters. Computers store images as raw bytes, but many systems are designed to safely move text. Base64 acts like a translator, converting binary content into a text-friendly form made from letters, numbers, +, /, and sometimes = for padding.

    That text is not an image by itself. It is an encoded version of the image data. To turn Base64 to image, you decode the string back into the original bytes and then save or display those bytes as a PNG, JPEG, GIF, WebP, or another image format.

    A useful mental model is this: Base64 is like packing a product into a shipping box that fits the transport system better. The box adds bulk, but it helps the item travel through channels that prefer text.

    Visual metaphor showing raw image bytes being 'packed' into a Base64 text string and then unpacked back into bytes — include a simple conveyor: bytes (binary) -> Base64 characters (A–Z, a–z, 0–9, +, /, =) boxed for transport -> decoded bytes (image file).

    Why images are embedded as Base64

    Images are often embedded as Base64 because it makes transfer and embedding easier in certain contexts. One of the most common examples is a data URI, which looks like data:image/png;base64,.... This lets a browser render an image directly from a string, without requesting a separate file URL.

    That is useful for inline images in HTML or CSS, especially for very small assets like icons, placeholders, or tiny logos. Email templates also use embedded images in some cases, because external image loading may be blocked or delayed by the email client. Some APIs return Base64 image data because it can be bundled into a JSON response without needing separate file storage or signed URLs.

    There is convenience here, but it comes with tradeoffs. Base64 makes it easy to move image data around, but it is not always the most efficient format for storage or delivery.

    Diagram of a data URI embedded in HTML: show a browser window rendering an <img> whose src is a long data:image/png;base64,... string — include a highlighted snippet of the data URI and an arrow to the rendered inline image (no separate network request).

    Pros and cons of using Base64 for images

    The biggest downside is size. Base64 adds roughly 33% overhead compared with the original binary file. A 300 KB image can become around 400 KB or more once encoded. That affects bandwidth, API payload size, page weight, and memory use.

    Caching is another important factor. If an image is embedded directly into HTML or CSS as a data URI, the browser cannot cache it separately from that file. If the page changes, the image may be downloaded again as part of the document. By contrast, an external image file can be cached independently and reused across multiple pages.

    The upside is fewer HTTP requests for tiny assets, simpler packaging in APIs, and easier portability in systems that only handle text. For small icons or one-off embedded images, Base64 can be practical. For large photos, product galleries, or repeated assets, external files are usually better.

    How to convert Base64 string to an image, quick examples

    Online converters and when to use them

    If you just need a quick result and you are not handling sensitive data, an online Base64 to image converter is the fastest option. You paste the string, the tool decodes it, and you preview or download the image.

    This works well for debugging API responses, checking if a string is valid, or converting a one-time asset. It is less suitable for private customer files, internal documents, or anything security-sensitive. In those cases, local conversion is safer.

    A reliable tool should let you preview the decoded image, identify the file type, and alert you if the Base64 is malformed.

    Convert Base64 to image using JavaScript in the browser

    In the browser, the easiest case is when you already have a full data URI. You can assign it directly to an image element.

    <img id="preview" alt="Preview" />
    <script>
      const base64 = "data:image/png;base64,iVBORw0KGgoAAAANSUhEUgAA...";
      document.getElementById("preview").src = base64;
    </script>
    

    If you want to turn a raw Base64 string into a downloadable file, first strip any prefix, decode it, and build a Blob.

    const input = "data:image/png;base64,iVBORw0KGgoAAAANSUhEUgAA...";
    const match = input.match(/^data:(image/[a-zA-Z0-9.+-]+);base64,(.+)$/);
    const mimeType = match ? match[1] : "image/png";
    const base64Data = match ? match[2] : input;
    const byteCharacters = atob(base64Data);
    const byteNumbers = new Array(byteCharacters.length);
    for (let i = 0; i < byteCharacters.length; i++) {
      byteNumbers[i] = byteCharacters.charCodeAt(i);
    }
    const byteArray = new Uint8Array(byteNumbers);
    const blob = new Blob([byteArray], { type: mimeType });
    const url = URL.createObjectURL(blob);
    const a = document.createElement("a");
    a.href = url;
    a.download = "image.png";
    a.click();
    URL.revokeObjectURL(url);
    

    This approach is useful for frontend tools and browser-based image previews. For very large payloads, though, it can use a lot of memory because the whole string is decoded in one go.

    Convert Base64 to image using Node.js

    Node.js makes this straightforward with Buffer. If the string includes a data URI prefix, remove it first.

    const fs = require("fs");
    const input = "data:image/png;base64,iVBORw0KGgoAAAANSUhEUgAA...";
    const base64Data = input.replace(/^data:image/[a-zA-Z0-9.+-]+;base64,/, "");
    const buffer = Buffer.from(base64Data, "base64");
    fs.writeFileSync("output.png", buffer);
    console.log("Image saved as output.png");
    

    If you do not know the file type in advance, detect it before choosing the extension. That is especially important in production systems that receive images from users or third-party APIs.

    Convert Base64 to image using Python

    Python’s built-in base64 module handles decoding cleanly.

    import base64
    import re
    input_data = "data:image/png;base64,iVBORw0KGgoAAAANSUhEUgAA..."
    base64_data = re.sub(r"^data:image/[a-zA-Z0-9.+-]+;base64,", "", input_data)
    image_bytes = base64.b64decode(base64_data)
    with open("output.png", "wb") as f:
        f.write(image_bytes)
    print("Image saved as output.png")
    

    For stricter validation, use base64.b64decode(base64_data, validate=True) so invalid characters trigger an error instead of being silently ignored.

    Convert Base64 to image using PHP

    PHP includes base64_decode(), which is enough for most cases.

    <?php
    $input = "data:image/png;base64,iVBORw0KGgoAAAANSUhEUgAA...";
    $base64 = preg_replace('/^data:image/[a-zA-Z0-9.+-]+;base64,/', '', $input);
    $data = base64_decode($base64, true);
    if ($data === false) {
        die("Invalid Base64 data");
    }
    file_put_contents("output.png", $data);
    echo "Image saved as output.png";
    ?>
    

    The second argument to base64_decode enables strict mode, which helps catch malformed input early.

    Convert Base64 to image using command-line tools

    On Linux or macOS, command-line decoding is fast and practical for debugging.

    echo 'iVBORw0KGgoAAAANSUhEUgAA...' | base64 -d > output.png
    

    If your system uses a different flag:

    echo 'iVBORw0KGgoAAAANSUhEUgAA...' | base64 --decode > output.png
    

    If the data is hex-encoded after another processing step, xxd can help, but for standard Base64 to image conversion, base64 -d is the usual tool.

    Handling common Base64 variants and pitfalls

    Recognizing and stripping the data URI prefix

    A lot of conversion failures happen because the input is not just Base64. It includes a prefix like data:image/jpeg;base64,. That header is useful because it tells you the MIME type, but most decoders need only the content after the comma.

    The safe pattern is to detect whether the string starts with data: and split on the first comma. Everything after that is the actual Base64 payload. If you forget this step, your decoder may error out or produce a corrupt file.

    URL-safe Base64 vs standard Base64

    Not all Base64 strings use the same alphabet. URL-safe Base64 replaces + with - and / with _. This variant appears in web tokens, query strings, and some APIs because it avoids characters that can cause issues in URLs.

    If you try to decode URL-safe Base64 with a standard decoder, it may fail unless you first normalize those characters back to the standard form. Many libraries support URL-safe decoding explicitly, but it is worth checking documentation instead of assuming all Base64 is identical.

    Padding characters and when they matter

    The = character at the end of a Base64 string is padding. It helps ensure the encoded length fits Base64’s block structure. Some systems omit padding, especially in URL-safe variants.

    Missing padding does not always break decoding, but some decoders require it. A simple fix is to add = characters until the string length is divisible by 4. If the payload still fails after that, the issue is probably not padding alone.

    Invalid characters and error handling

    Whitespace, line breaks, transport errors, or accidental copy-paste changes can break a Base64 string. The result might be an exception, a corrupt image, or an output file that exists but will not open.

    Good practice is to validate before decoding and wrap the decode step in error handling. In Python, use strict validation. In PHP, use strict mode. In JavaScript and Node.js, check the input format and fail gracefully if the decoded bytes do not match an expected image signature.

    Large payloads and memory considerations

    A very large Base64 string can stress memory because the text version is already bigger than the binary file, and decoding often creates additional copies in memory. That is one reason browser-based conversion can freeze tabs when the payload is large.

    On servers, avoid full-buffer decoding for very large files when possible. Stream the input, decode in chunks, and write directly to disk or object storage. This matters in image-heavy apps, upload services, and automation pipelines.

    Detecting image type from Base64

    Using the data URI MIME type if present

    If your Base64 string begins with something like data:image/webp;base64, you already have the simplest clue about the image type. In many workflows, that is enough to choose the file extension and set the correct Content-Type.

    Still, do not trust it blindly. A malicious or buggy source can label a payload as PNG when it is actually something else. For anything security-sensitive, compare the declared MIME type with the actual decoded bytes.

    Magic bytes approach

    Most image formats have recognizable magic bytes at the beginning of the file. After decoding a small portion of the Base64 string, you can inspect the first few bytes and identify the type.

    Here are common signatures:

    FormatMagic bytes (hex)Notes
    PNG89 50 4E 47Starts with .PNG signature
    JPEGFF D8 FFCommon for .jpg and .jpeg
    GIF47 49 46ASCII GIF
    WebP52 49 46 46 + 57 45 42 50RIFF container with WEBP marker

    This technique is more reliable than trusting a filename or a MIME prefix alone. It is a smart check when saving user uploads or processing third-party API content.

    Libraries and tools to detect format automatically

    If you do this often, use a library. In Node.js, file-type can inspect buffers and detect the format. In Python, python-magic and Pillow are common choices. In PHP, finfo, GD, or Imagick can help verify the actual file type and whether the image can be opened safely.

    Automation is especially useful when the Base64 string has no prefix and the extension is unknown.

    Security considerations

    Malicious payloads hidden in Base64

    Base64 does not make content safe. It only changes the representation. A harmful file can still be encoded as Base64 and passed through APIs, forms, or databases.

    That includes malformed files, oversized payloads, polyglot files that pretend to be images, and hidden content techniques such as steganography. If your system accepts Base64 image uploads, treat them like any untrusted file upload.

    Validating image content before displaying or saving

    The best defense is to decode the data, verify the actual image format, and then open it with a trusted image library. In many cases, the safest pattern is to re-encode the image into a known-good format like PNG or JPEG using a library such as Pillow, GD, or Imagick.

    That strips unexpected metadata, normalizes structure, and reduces the risk of passing through malformed or disguised content. It also lets you enforce size limits, dimensions, and file type restrictions.

    Rate limiting and resource exhaustion attacks

    Because Base64 strings are text, they are easy to send in huge quantities. Attackers can abuse this to consume CPU, memory, disk space, or bandwidth. Even legitimate users can unintentionally trigger issues by uploading extremely large inline images.

    Set strict maximum payload sizes, limit decode time where possible, and rate-limit endpoints that accept Base64 image data. Reject requests before decode if the string length already exceeds your policy threshold.

    Serving decoded images safely

    If you save and serve decoded images, send the correct Content-Type header and avoid content sniffing issues. If you render Base64 data directly into a page, review your Content-Security-Policy rules to ensure data: URLs are allowed only where appropriate.

    If image data is user-generated, sanitize any related metadata and do not mix untrusted strings directly into HTML without context-aware escaping. The risk is not just the image bytes, but also how surrounding content is handled.

    Performance best practices and alternatives

    When to use Base64 vs external image files

    A practical rule of thumb is simple. Use Base64 for tiny assets where reducing requests matters more than efficient caching. Use external files for anything medium or large, especially photos, product images, user uploads, and repeated UI assets.

    For example, a 1 KB icon embedded inline may be fine. A 200 KB product image embedded in JSON is usually a bad trade.

    Impact on page speed and caching

    Base64 can reduce the number of requests, but it increases document size. That matters on slower networks and mobile devices. If images are embedded in HTML, CSS, or JavaScript bundles, the browser must download that entire file before it can reuse the image.

    An external image file can be cached separately, lazy-loaded, served from a CDN, and reused across pages. That often leads to better real-world performance than inlining everything.

    Techniques to reduce size

    If you must move images as Base64, optimize the underlying image first. Compress it, resize it, and choose a modern format. Converting large PNGs or JPEGs to WebP or AVIF can reduce the file dramatically before any Base64 encoding happens.

    Server-side compression can help surrounding payloads, but remember that Base64 itself is still overhead. The best savings usually come from image optimization, not from trying to make the encoded text smaller.

    CDNs and data URI tradeoffs

    A CDN shines when images are separate files. It can cache near the user, apply optimized delivery, and reduce load on your origin server. Data URIs bypass those benefits because the image is tied to the parent file.

    If your workflow needs compact inline graphics, consider inline SVG for simple vector icons or traditional sprite strategies for tightly controlled assets. These options can be more efficient than Base64 for certain UI elements.

    Advanced scenarios and tools

    Embedding images in emails

    Email is one of the classic places where Base64 images appear, but client support is inconsistent. Some clients block images, some strip certain constructs, and large email bodies can hurt deliverability.

    For tiny logos or icons, inline embedding can work. For larger images, linked hosted files are often more manageable. Keep total email size low and test across major clients before relying on embedded images heavily.

    Storing Base64 images in databases

    Storing Base64 directly in a database is convenient, but usually inefficient. You pay the 33% size overhead, increase row size, and make backups heavier. Queries can also become slower and more memory-intensive.

    A better pattern is to store the image as binary in object storage or a file system, then save only metadata and a URL or key in the database. If you must accept Base64 at the API layer, decode it immediately and store the binary result instead of the original encoded string.

    Streaming decode for very large images

    For very large inputs, streaming is the right architecture. In Node.js, you can process incoming data with streams rather than buffering the entire payload. In Python, chunked processing or upload handlers can reduce memory pressure.

    This matters less for occasional small files and much more for batch systems, media pipelines, or services accepting user-generated content at scale.

    Automated conversion pipelines and tooling

    If your workflow repeatedly handles Base64 images, build a pipeline. Decode, detect type, validate dimensions, re-encode into a standard format, optimize, and store.

    Useful tools include Node packages like file-type and native Buffer, Python libraries such as Pillow and python-magic, and PHP image libraries like GD or Imagick. Command-line tools can also fit into scripts and CI pipelines for quick checks.

    Step-by-step troubleshooting checklist

    If your Base64 to image conversion fails, check these in order:

    1. Confirm the prefix: If the string starts with data:image/...;base64,, strip everything before the comma before decoding.
    2. Verify the variant: If it contains - and _, it may be URL-safe Base64 and needs normalization.
    3. Fix padding: If the length is not divisible by 4, add = until it is.
    4. Inspect the bytes: After decoding, check the first bytes for PNG, JPEG, GIF, or WebP signatures.
    5. Validate the MIME type: Make sure declared type and actual content match.
    6. Check memory limits: Large strings can crash browser tabs or exhaust server memory. Use streaming for big files.
    7. Review CSP rules: If a browser will not display an inline data URI, your Content-Security-Policy may block data: sources.

    A simple command-line check can help quickly:

    echo 'YOUR_BASE64_STRING' | base64 -d > test_image.bin
    file test_image.bin
    

    If file reports a valid image format, your Base64 is probably fine and the issue is elsewhere, such as MIME type or frontend rendering.

    Examples and common use-cases

    Inline avatars in single-page apps

    A single-page app might embed tiny default avatars as Base64 to avoid extra requests during initial render. That can be acceptable for a few very small placeholders.

    But once users upload real profile photos, external file storage becomes better. The photos can be resized, cached independently, and delivered through a CDN instead of bloating API responses.

    Small icon sprites embedded in emails

    An email template with a few tiny monochrome icons may use embedded image data to reduce dependence on remote loading. This can make branding more consistent in some clients.

    Still, the total message size matters. What works for a 500-byte icon becomes a problem when a marketing email embeds multiple large images directly in the HTML.

    APIs that return Base64 images vs returning URLs

    Some internal APIs return Base64 because it simplifies a single JSON response. That is fine for signatures, QR codes, or generated thumbnails. For larger assets, returning a URL is usually better because it keeps API responses smaller and lets the client fetch only what it needs.

    This is one of the most common design decisions teams revisit as an app grows. What feels simple early on can become expensive later.

    Converting legacy Base64 storage to modern workflows

    A legacy system might store customer images as Base64 text in a database. Migrating that setup usually means decoding each record, detecting the real type, re-encoding where needed, storing the file in object storage, and replacing the text field with a reference.

    Teams often see immediate benefits: smaller databases, faster backups, easier CDN delivery, and simpler frontend rendering.

    Resources, libraries and online tools

    Recommended libraries by language

    The following tools are widely used and practical:

    LanguageLibraries / ToolsBest use
    Node.jsBuffer, file-typeDecode Base64, detect image type
    Pythonbase64, Pillow, python-magicDecode, validate, re-encode
    PHPbase64_decode, GD, Imagick, finfoDecode and verify image content
    CLIbase64, file, xxdQuick validation and debugging

    Online Base64 to image converters and validators

    For one-off jobs, online tools can save time. The best ones offer preview, MIME detection, and validation. Use them for non-sensitive content only, or self-host an internal version if privacy matters.

    If you work with client data, financial documents, or user uploads, local or server-side conversion is the safer choice.

    Further reading and official docs

    Official language documentation is the best source for edge cases and strict decoding behavior. For production systems, also review your image library docs, storage platform guidance, and security recommendations for file uploads and content validation.

    Conclusion and quick reference

    Base64 to image conversion is easy once you separate the actual payload from any data URI prefix, decode it with the right tool, and verify the resulting bytes. The biggest mistakes usually come from trusting the MIME type blindly, ignoring URL-safe variants, or using Base64 where normal image files would perform better.

    Your next step depends on your use case. For a quick one-off, use an online converter. For app development, decode locally in JavaScript, Node.js, Python, or PHP. For production systems, add validation, file type detection, size limits, and a storage strategy that avoids unnecessary Base64 bloat.

    Cheat sheet: common commands and snippets

    TaskSnippet
    Browser preview<img src="data:image/png;base64,..." />
    Node.js save filefs.writeFileSync("output.png", Buffer.from(base64Data, "base64"))
    Python save fileopen("output.png", "wb").write(base64.b64decode(base64_data))
    PHP save filefile_put_contents("output.png", base64_decode($base64, true))
    Linux decode`echo ‘BASE64’
    Strip data URI prefixRemove data:image/...;base64, before decoding
    Fix missing paddingAdd = until length is divisible by 4
    Detect PNG bytes89 50 4E 47
    Detect JPEG bytesFF D8 FF
    Detect GIF bytes47 49 46

    If you are building a workflow around Base64 images, the smartest move is simple: decode early, validate carefully, optimize the real image, and store files in a format built for delivery.

  • JPG to PNG: When to Convert, Tools, and Best Practices

    JPG to PNG: When to Convert, Tools, and Best Practices

    A quick JPG to PNG conversion can solve the right problem, or create a bigger one. That is why so many people end up with bloated files, disappointing image quality, or a transparent background that still looks rough around the edges.

    If you are a small business owner updating product images, a freelancer sending client assets, or a developer preparing web graphics, the format you choose matters. This guide explains what JPG to PNG really means, when it helps, when it does not, and how to convert files the right way using built-in tools, desktop software, online converters, and developer-friendly methods.

    What “JPG to PNG” Means and When to Convert

    What is JPG/JPEG?

    JPG, also written as JPEG, is one of the most common image formats in the world. It was designed primarily for photographs and complex images with lots of colors, gradients, and visual detail. Its biggest advantage is small file size, which comes from lossy compression.

    Lossy compression means the file discards some image data to reduce storage space. In many cases, especially at high quality settings, that loss is hard to notice with the naked eye. But once the data is removed, it is gone. Re-saving a JPG over and over can gradually make artifacts, soft edges, and blocky areas more visible.

    JPG also does not support true transparency. If you need a logo with no background, or a cutout product photo that sits cleanly on a webpage, JPG is usually the wrong final format. It can store metadata such as EXIF camera data and color profiles, but its core strength remains efficient photo compression.

    What is PNG?

    PNG stands for Portable Network Graphics. It uses lossless compression, which means image data is preserved rather than thrown away during saving. That makes PNG a strong choice when you want to keep sharp lines, crisp text, interface elements, screenshots, diagrams, and graphics intact.

    PNG also supports transparency, including smooth alpha transparency. This matters for logos, icons, signatures, overlays, and product images that need to blend into different backgrounds without a white box around them.

    In practical terms, PNG is often better for graphics than photos. It can preserve detail very well, but the trade-off is file size. A PNG made from a photograph can be much larger than the original JPG without looking noticeably better.

    Split-screen comparison: JPG vs PNG, lossy vs lossless and transparency support

    Common reasons to convert JPG to PNG

    There are several legitimate reasons to convert JPG to PNG. One common case is editing. If you must continue editing an image multiple times, saving your working file as PNG can help you avoid further lossy degradation that would happen with repeated JPG exports.

    Another reason is design workflow. If you are placing an image into presentations, mockups, apps, or websites and you need transparency or cleaner edges, PNG is often more practical. This is especially true for logos, badges, UI elements, and screenshots.

    It can also make sense for archival of a current state, but with an important caveat. Converting a JPG to PNG preserves the current image without introducing new JPG compression on future saves. However, it does not recover quality already lost in the JPG. Think of it like photocopying a document into a protective sleeve. You preserve what you have now, but you do not magically recreate the original.

    When You Should Not Convert JPG to PNG

    Quality misconceptions

    The biggest myth around JPG to PNG is that conversion improves quality. It does not. If a JPG already has compression artifacts, blur, banding, or noise, saving it as PNG will simply preserve those flaws in a different container.

    This matters because people often convert a low-quality JPG hoping it will become sharper. It will not. A PNG can stop further lossy damage if you continue working with the file, but it cannot reconstruct discarded image information.

    If you still have the original source file, such as a RAW photo, PSD, AI, or an earlier export, use that instead. Starting from the best source is always better than converting a compressed derivative.

    File size considerations

    For photographs, JPG is often preferable because it gives you a strong balance between visual quality and compact size. A high-resolution photo that is 1 MB as a JPG might become 5 MB, 10 MB, or more as a PNG with little visible improvement.

    That increase matters if you store many images, send them by email, upload them to client portals, or publish them online. PNG is efficient for flat-color graphics and transparent assets, but it is rarely the best format for everyday photo delivery.

    A simple rule helps here: if the image is mostly a photo, keep it as JPG unless you have a specific reason to use PNG. If the image is mostly graphics, text, interface elements, or transparency, PNG becomes more attractive.

    File-size tradeoffs: photo vs graphics, JPG vs PNG

    Caption: Photo → usually JPG; Graphics/Transparency → usually PNG.

    Web performance implications

    For websites, unnecessary PNGs can hurt page speed. Larger files increase bandwidth usage and slow loading, especially on mobile connections. If you convert every photo from JPG to PNG, your site may become heavier without any meaningful visual benefit.

    That has real business impact. Slow pages can reduce conversions, increase bounce rate, and weaken SEO performance. Google does not rank a page higher just because an image is PNG. It values user experience, and faster pages usually win.

    For web delivery, modern formats like WebP and AVIF are often better than either JPG or PNG for many use cases. PNG still has a role, especially for transparency and graphics, but it should be chosen intentionally.

    How to Convert JPG to PNG, Step-by-Step Methods

    Using built-in OS tools

    If you want the fastest possible method, your operating system may already be enough.

    On Windows, Paint can convert JPG to PNG in a few clicks:

    1. Open the JPG file in Paint.
    2. Click File.
    3. Choose Save As.
    4. Select PNG picture.
    5. Rename the file and save it.

    On macOS, Preview is just as straightforward:

    1. Open the JPG in Preview.
    2. Click File and then Export.
    3. Choose PNG from the format dropdown.
    4. Select a location and save.

    These built-in tools are convenient for one-off tasks. They are not ideal for advanced color management, transparency editing, or bulk workflows, but they work well when speed matters.

    Using free desktop software

    Desktop tools give you more control, especially if you care about resizing, metadata, transparency, or batch conversion. IrfanView is excellent for Windows users who want a lightweight option. GIMP is a powerful free editor for Windows, macOS, and Linux. Photoshop is still the standard in many design environments.

    In IrfanView, you typically open the JPG, choose Save As, then select PNG. In GIMP, you open the image and use Export As to choose PNG. In Photoshop, you can use Save a Copy or Export As depending on your workflow. These tools also let you prepare the image before conversion, which is often more important than the format switch itself.

    If the file name matters, use clear versioning. Something like product-shot-v2.png is more useful than image-final-new-3.png. For client work, consistent naming saves time and avoids accidental overwrites.

    Using online converters

    Online converters are popular because they are quick and require no installation. Services such as CloudConvert, Convertio, and Online-Convert are widely used for JPG to PNG tasks.

    They are best for occasional conversions when the image is not sensitive. Upload the JPG, choose PNG, wait for processing, then download the result. Most platforms also support drag and drop and can handle a few files at once.

    Before using any online converter, check three things. First, confirm the site uses HTTPS. Second, review the file deletion policy to see how long uploaded files are stored. Third, avoid uploading confidential client documents, IDs, contracts, or private photos unless you fully trust the service and your compliance requirements allow it.

    Converting in bulk

    If you need to convert dozens or hundreds of images, manual methods become painful. Batch workflows are much better.

    Many desktop apps support bulk conversion through a dedicated batch tool. IrfanView has a built-in batch conversion window. Photoshop supports Actions and Image Processor. GIMP can be extended with batch plugins or external tools.

    For developers and power users, command-line tools are faster and more repeatable. ImageMagick is one of the best options. A simple example looks like this:

    magick input.jpg output.png
    

    To convert multiple JPG files in a folder, you can script it with shell tools or platform-specific automation. This is especially helpful for product catalogs, content migrations, or asset pipelines.

    Converting programmatically

    If conversion is part of an app, workflow, or upload pipeline, Python Pillow is a practical choice. It gives you programmatic control over format conversion and post-processing.

    Here is a basic example using Pillow:

    from PIL import Image
    img = Image.open("input.jpg")
    img.save("output.png", "PNG")
    

    If you want to preserve color consistency, inspect the source image mode and profile before saving. In production workflows, it is also smart to validate file type rather than relying only on the file extension.

    For quick automation from the terminal, ImageMagick remains excellent because it is scriptable, cross-platform, and mature. It is especially useful when you need resizing, metadata stripping, or format conversion in one step.

    Best Tools and Services for JPG to PNG Conversion

    Choosing the best JPG to PNG tool depends on what you care about most: speed, privacy, batch support, editing control, or automation. Built-in tools are ideal for occasional use. Online services are convenient when you are on any device and need immediate results. Desktop apps win when you need advanced editing or bulk work. Developer tools are best for repeatable workflows.

    The table below gives a practical comparison.

    Tool Best for Ease of use Batch support Privacy Cost
    Paint / Preview Quick one-off conversion Very easy Limited High, local files Free
    CloudConvert Fast online conversion Easy Moderate Medium, upload required Free tier / paid
    Convertio Browser-based convenience Easy Moderate Medium, upload required Free tier / paid
    Online-Convert Flexible online settings Moderate Moderate Medium, upload required Free tier / paid
    IrfanView Lightweight desktop batch work Easy Strong High, local files Free for personal use
    GIMP Free advanced editing Moderate Moderate High, local files Free
    Photoshop Professional editing workflows Moderate Strong High, local files Paid
    ImageMagick / Pillow Automation and developer workflows Advanced Excellent High, local files Free

    Security, privacy, and batch limits

    If privacy matters, local tools are safer by default because files never leave your machine. That makes Preview, Paint, GIMP, Photoshop, IrfanView, ImageMagick, and Pillow strong choices for business documents, sensitive assets, and client work.

    For online tools, read the fine print. Look for file retention windows, deletion guarantees, maximum file size, daily conversion caps, and whether API access or batch processing is hidden behind a paywall. A free tool can be perfect for occasional use, but frustrating for heavy workflows.

    Optimizing PNGs After Conversion

    Reducing PNG file size

    A converted PNG is not always ready to use. In many cases, it needs optimization. This is where tools like optipng, pngcrush, and pngquant become valuable.

    pngquant is especially useful when you can reduce the image to a limited color palette. That can shrink file size dramatically for logos, icons, illustrations, and UI graphics. optipng and pngcrush focus on lossless optimization, which means they attempt to reduce file size without changing visible quality.

    Here are two practical commands:

    optipng output.png
    
    pngcrush -rem allb -reduce input.png optimized.png
    

    The -rem allb option strips unnecessary metadata chunks, and -reduce tries to use a more efficient PNG structure where possible.

    When to use PNG-8 vs PNG-24/32

    PNG-8 uses a limited color palette, usually up to 256 colors. It is a strong fit for simple graphics, flat illustrations, icons, and logos where the image does not need millions of colors.

    PNG-24 supports far more color detail and is better for richer graphics. PNG-32 usually refers to 24-bit color plus an 8-bit alpha channel for full transparency. That is often what people mean when they want smooth transparent edges.

    For photos, even PNG-24 can become very large. For simple graphics, PNG-8 can offer a much better size-to-quality balance. That is why optimization is not just compression, it is also about choosing the right PNG variant.

    Preserving or removing metadata

    PNG files can carry metadata, although not always in the same way as JPG EXIF. Some workflows preserve embedded color profiles or textual information, while others strip it.

    If you need accurate color reproduction across devices, retaining the ICC profile may be important. If file size matters more and the image is simple web artwork, stripping metadata can save space. This trade-off is small on one file, but significant across hundreds of assets.

    Compressing without notable quality loss

    The best practical tip is to optimize after conversion, not before. First convert the image. Then run a PNG optimizer or export through a tool that supports palette reduction and metadata control.

    If the image is a screenshot or flat graphic, try palette reduction. If it is a logo with transparency, test PNG-8 first. If you see banding or rough edges, move back to PNG-24 or PNG-32. This simple testing cycle often produces much better results than blindly saving everything at maximum settings.

    Handling Transparency and Backgrounds

    How to remove or make background transparent

    Converting JPG to PNG does not automatically create transparency. If your JPG has a white background, converting it to PNG will usually give you a PNG with the same white background. Transparency must be created by editing the image.

    In Photoshop, open the image, unlock the background layer, select the background using the Magic Wand, Quick Selection, or Select Subject, refine the mask, then export as PNG. In GIMP, add an alpha channel first, select the background, delete it, refine edges if needed, and export as PNG.

    Automatic online background removers can help with simple product shots or portraits. They are convenient, but results vary. Hair, soft shadows, and semi-transparent materials often need manual touch-up afterward.

    Edge smoothing and anti-aliasing

    The hardest part of transparency is not removing the background, it is making the edges look natural. Jagged edges, white halos, and rough outlines are common when the original JPG was compressed heavily or placed on a bright background.

    To improve results, feather the selection slightly, refine masks carefully, and zoom in around complex edges. If a light fringe appears, use defringe or edge cleanup tools in your editor. This is especially important for logos, people, and product cutouts displayed on dark backgrounds.

    Common pitfalls when converting photos vs graphics

    Photos are harder than graphics. A screenshot or icon usually has clear boundaries and cleaner color transitions. A real-world photo may have motion blur, hair strands, shadows, reflections, and compression noise that make clean transparency difficult.

    That is why JPG to PNG works best for graphics when transparency is needed. For photos, PNG is not a magic background-removal format. The quality of your masking work matters more than the file extension.

    Performance, Accessibility, and SEO Considerations

    Page speed and modern formats

    For websites, PNG should be used with purpose. If you need sharp graphics with transparency, PNG is a strong option. If you are serving photos, WebP or AVIF will often provide much smaller files at similar visual quality.

    SVG is also better than PNG for many logos and icons because it is resolution-independent and often tiny in size. This means the best web workflow is not always JPG to PNG. Sometimes the better answer is JPG to WebP or rebuilding the asset as SVG.

    Alt text and accessibility

    Changing image format does not change accessibility on its own. What matters is how the image is described and used. If you replace a JPG with a PNG on a website, keep or improve the alt text so screen readers still convey the right meaning.

    Decorative images should have appropriate empty alt attributes. Informative images should describe their purpose clearly. Accessibility is about communication, not file type.

    Responsive images and multiple formats

    Developers should think beyond one output file. A good image strategy often means generating several sizes and formats, then serving the best option depending on the browser and screen size.

    A common pattern is to provide modern formats first, with a fallback:

    <picture>
      <source srcset="image.webp" type="image/webp">
      <source srcset="image.png" type="image/png">
      <img src="image.png" alt="Product logo">
    </picture>
    

    This approach balances compatibility and performance. It also fits well into responsive image workflows where the same visual asset needs to look sharp on different devices.

    Common Problems and Troubleshooting

    Poor quality after conversion

    If the PNG looks bad, the problem usually started with the original JPG. Compression artifacts, blur, and soft edges carry over into the PNG. Re-export from the original source file if possible. If not, mild sharpening or cleanup may help, but do not expect miracles.

    Another common issue is scaling. If you enlarged the image before conversion, it may look worse because you are stretching limited detail. Conversion is not enhancement.

    Huge PNG files

    Very large PNGs usually happen when a photo is saved losslessly without optimization. Check dimensions first. A 4000-pixel image used in a 400-pixel webpage slot is wasting space.

    Then check image type. If it is a photo, use JPG, WebP, or AVIF instead. If it must remain PNG, try palette reduction, metadata stripping, and optimization tools like optipng or pngquant.

    Color profile and ICC issues

    If the converted file looks washed out or overly saturated, a color profile mismatch may be the cause. Some apps preserve embedded profiles, others convert or discard them. This leads to different rendering across browsers, editors, and operating systems.

    A safer workflow is to standardize around sRGB for web graphics. For print or color-critical work, preserve the correct ICC profile and test in the target environment.

    Failed conversions or corrupted files

    If a conversion fails, the file may be damaged, mislabeled, or partially downloaded. Try opening it in another app first. If that works, re-save it and convert again.

    If a command-line tool fails, inspect the actual file format instead of trusting the extension. A file named .jpg might not always be a valid JPEG internally. Using another converter can also help, because some tools are better at handling edge cases than others.

    FAQs, Quick Answers

    • Does converting JPG to PNG improve quality? No. It prevents additional JPG-style compression on future saves, but it does not restore lost detail.
    • Can PNG files be larger than JPG? Yes, often much larger, especially for photographs.
    • Is PNG better for web? Sometimes. It is better for transparency, logos, screenshots, and graphics. It is usually not the best choice for large photos.
    • How do I convert multiple files at once? Use a batch-capable app like IrfanView or Photoshop, or automate with ImageMagick or Pillow.

    Resources and Further Reading

    If you want to go deeper, the best next step is to use official documentation and proven image tools rather than relying on random snippets. ImageMagick is excellent for command-line workflows. Pillow is the standard Python imaging library for many automation tasks. The official PNG specification is useful if you work closely with image pipelines, metadata, or browser rendering.

    A small cheat sheet can save time when you do this often:

    magick input.jpg output.png
    
    optipng output.png
    
    pngquant --quality=65-85 output.png
    

    For most users, the right workflow is simple. Convert JPG to PNG only when you need lossless editing, transparency, or cleaner graphic handling. If the image is a photo for the web, pause first and ask whether JPG, WebP, or AVIF would do the job better.

    Your next step is to test one image with the method that matches your use case. Use Preview or Paint for a quick one-off conversion, GIMP or Photoshop if you need transparency, and ImageMagick or Pillow if you want scalable automation. The best conversion is not just successful, it is appropriate for the way the image will actually be used.